Handheld gaming is portable fun, and now you can enable ROG Ally dock mode for gaming on a big screen like a TV or a monitor by following this method.
Asus ROG Ally is designed to give you the best gaming experience anywhere. By far, it has dominated the spot to become the best handheld gaming console among its competitor. However, if you’re fond of experiencing the processing power of Asus ROG Ally on a bigger screen, here is how you can do it.
To enable the Asus ROG Ally dock mode for connecting it to a TV screen or monitor, plug in the console in the 65W Asu’s charger using the USB Type-C cable. Now connect the TV screen or monitor with the Asus charger using an HDMI cable and configure the external display settings to continue gaming.
To explain things more clearly, we have written a comprehensive guide on how to setup the Asus ROG Ally dock mode for gaming on a TV screen or monitor by following an easy step-by-step method.
Setting Up Asus ROG Ally Dock Mode to TV Screen or Monitor
To play games on a bigger screen, you’ll have to set up the Asus ROG Ally dock mode using the 65-Watt charger and HDMI cable.
The official dock has fewer ports, and here are alternative docking stations options prepared for you.
Step #1: Connect the Console
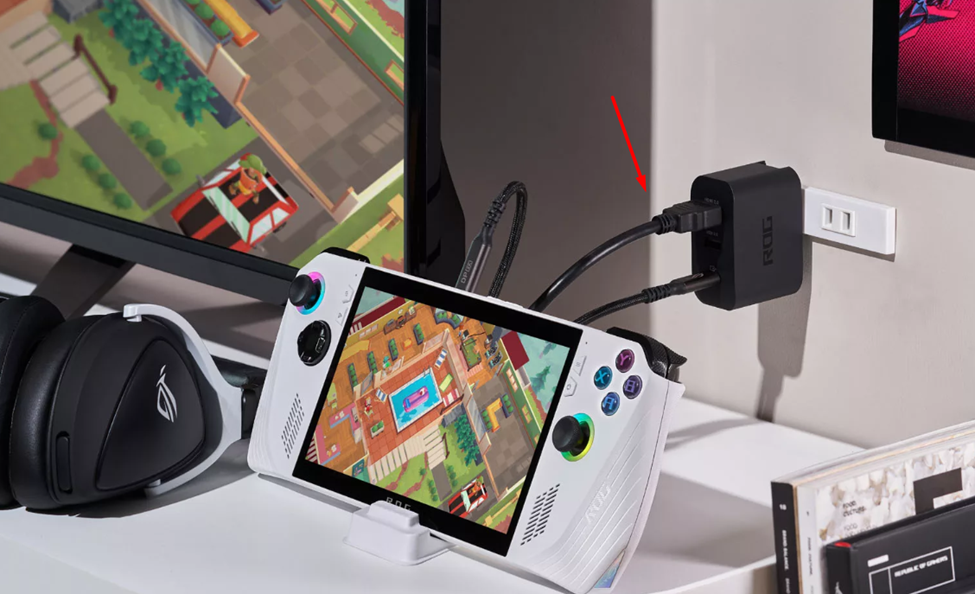
First, connect the Asus ROG Ally to the 65W charger featuring three ports. To connect the console, take the USB Type-C cable and insert one end into the console and the other into the charger. Plug in the charger. You don’t have to perform any configuration for it. Simply connect the cables, and you’re done.
Also Read: How to Fix Asus ROG Ally Audio Issues (Reasons and Fixes)
Step #2: Connect the Display
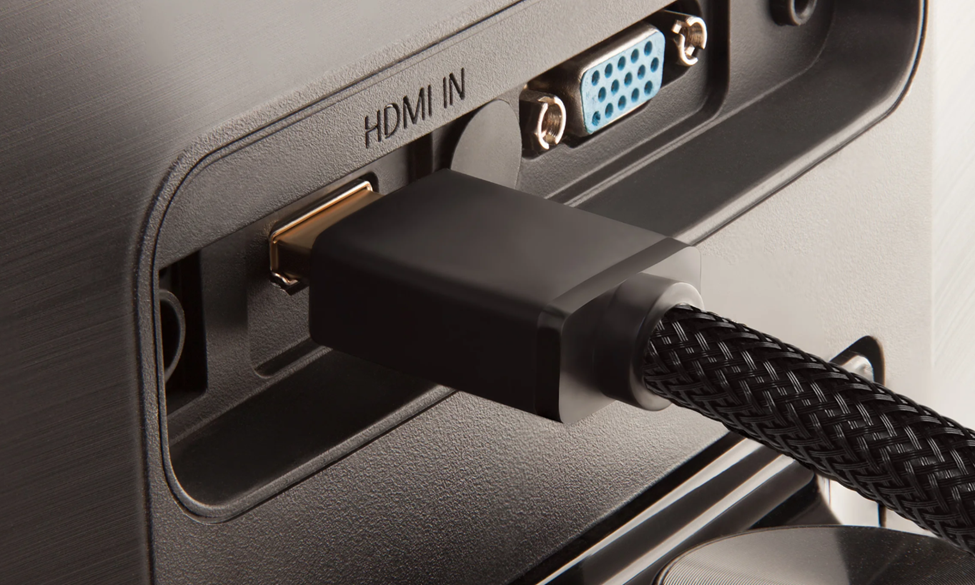
Now you have to connect the display with the charger; you’ll need an HDMI cable. Insert one end of the HDMI cable into the 65W charger and the other end into the Asus ROG Ally console. Switch ON your Monitor. Then plug in the 65W charger to a power outlet and switch on the console and the monitor screen.
Also Read: How to Run Steam Games on Asus ROG Ally Lag-Free!
Step #3: Configure the Display
After connecting all the cables and powering the 65W adapter, you’ll get the Asus ROG Ally to display on your monitor by default. The screen might go black after a few seconds, but the console display will appear on the monitor.
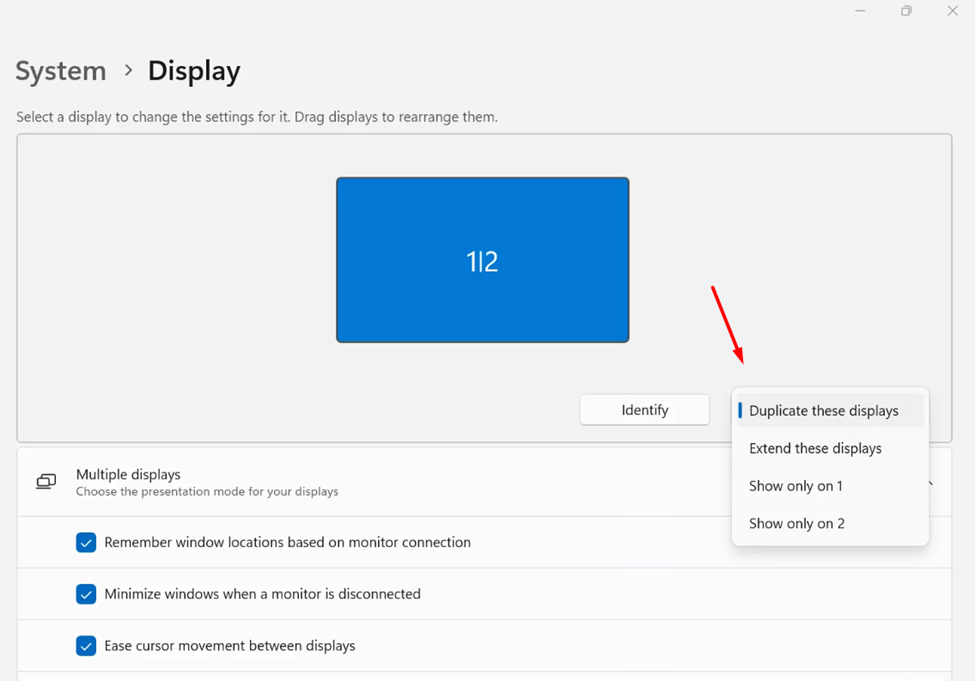
Open the Windows mode using your console and go to Settings > System > Display. Set the resolution to 1080p. You can also duplicate or extend the displays according to your preference.
Also Read: How to Update Asus ROG Ally BIOS
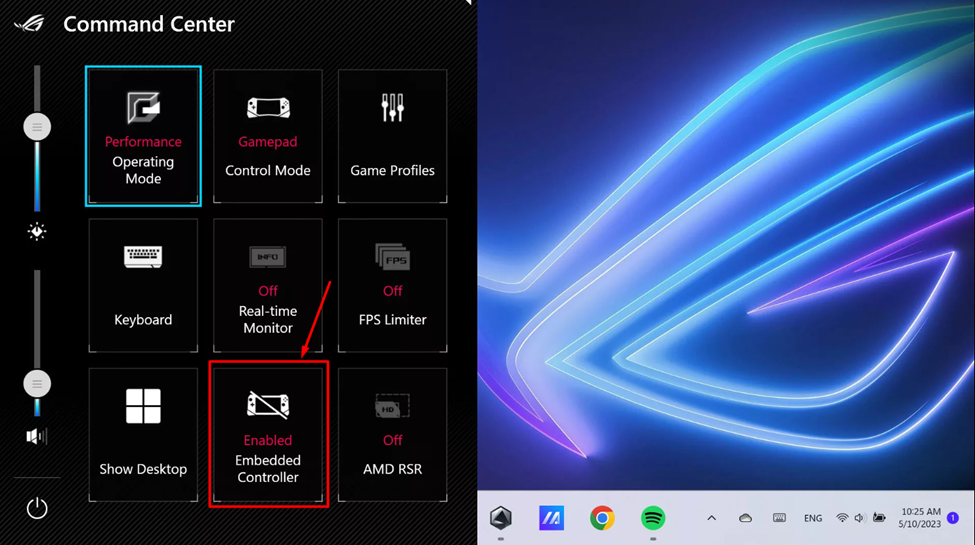
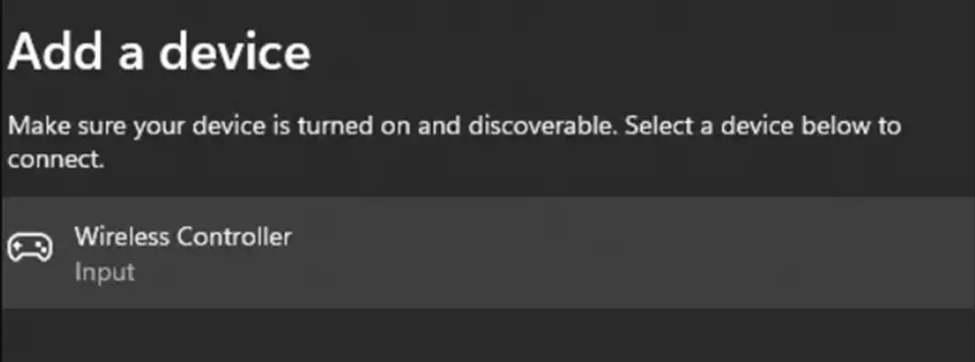
Step #4: Connect Controllers and Disable Gamepad
This step is final, and you can set it according to your preference. Using the Bluetooth feature, you can connect PS5’s DualSense, DualShock, Xbox, or any Bluetooth-enabled controller with Asus ROG Ally. But first, you’ll need to turn off the built-in gamepad of Asus ROG Ally by opening the Command Center and switching OFF the Embedded Controller option.
To connect controllers:
- Open the Windows mode
- Go to Settings > Bluetooth & Devices.
- Enable the Bluetooth and switch ON your controllers to pair them with the console.
- The Asus ROG Ally can connect up to 4 controllers at a time.
Final Words
Playing games on a bigger and better display screen doubles the fun. With the Asus ROG Ally’s Windows compatibility, it is fairly easy to dock ROG Ally with any external display. Moreover, you can also record gameplay on Asus ROG Ally while it’s docked to an external display. Hopefully, our guidelines were helpful enough to guide you well on setting up Asus ROG Ally dock mode to connect it to a TV or a monitor.