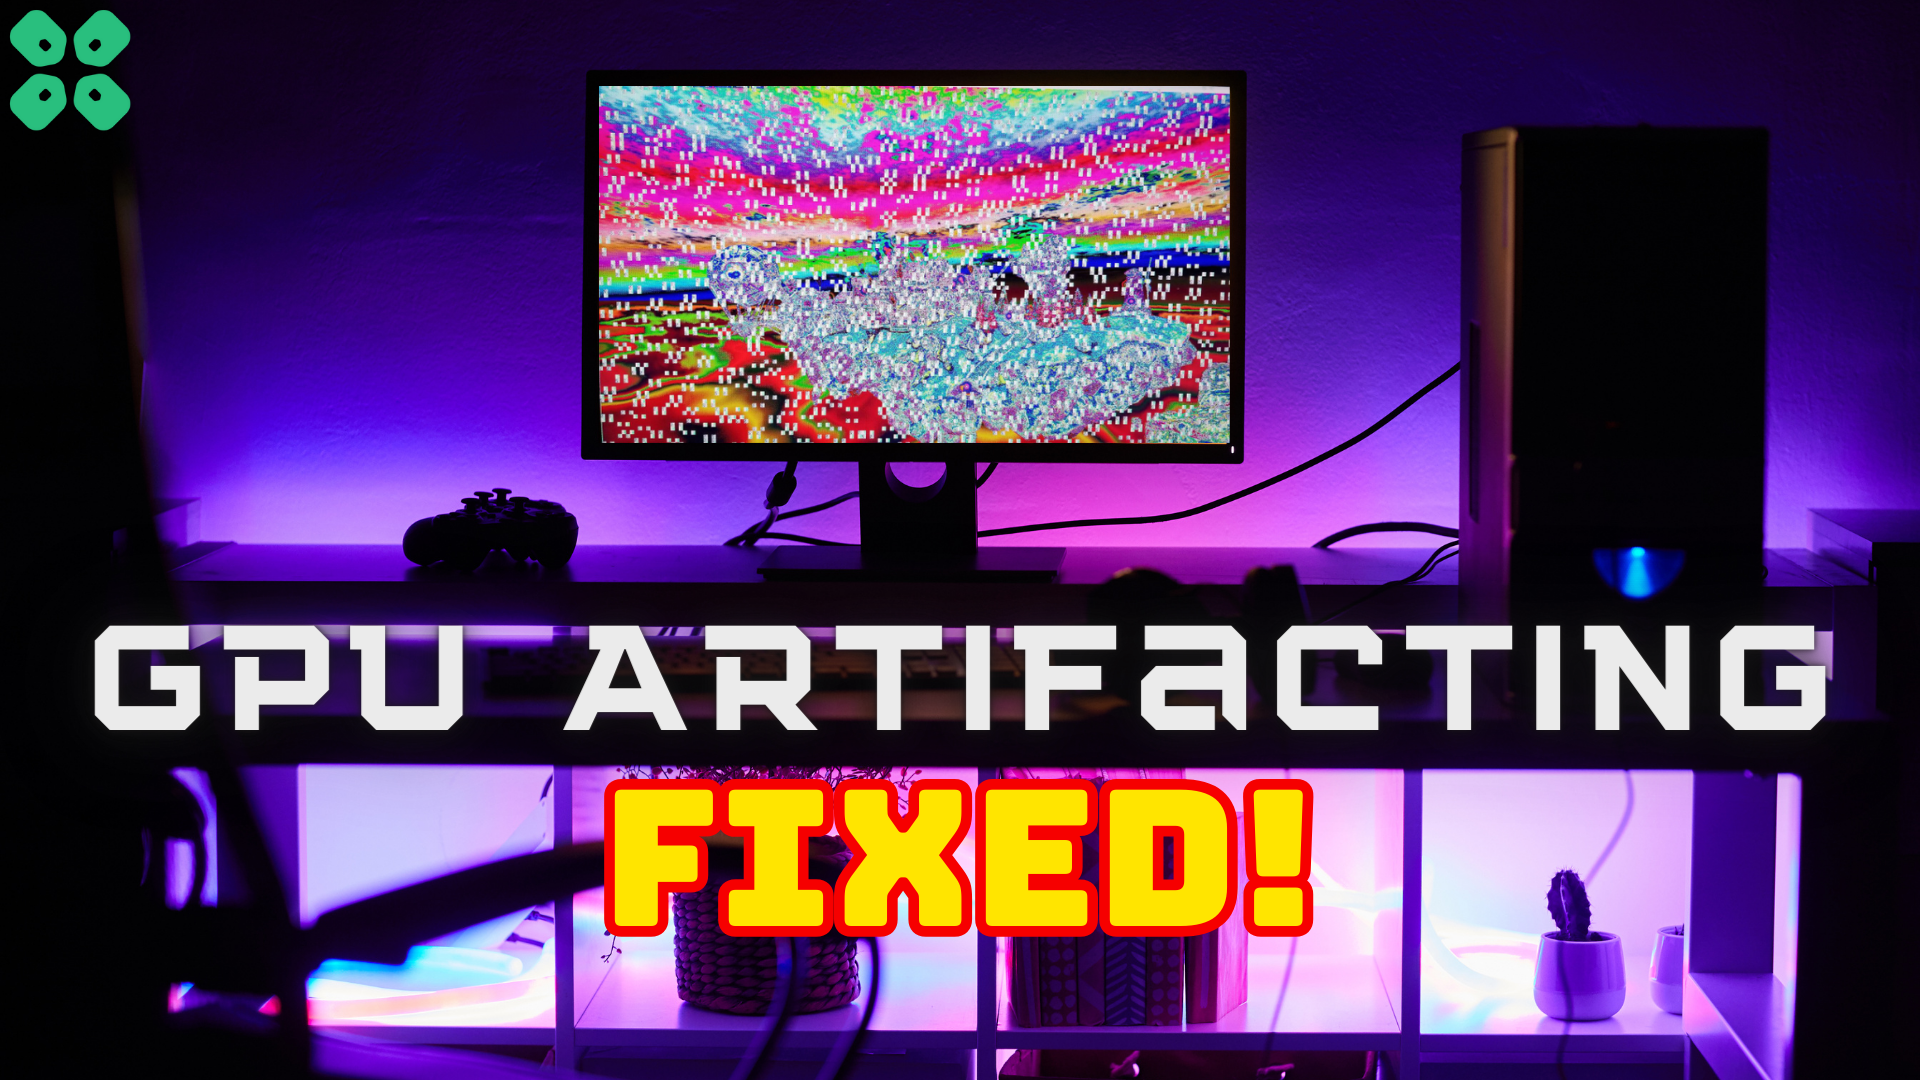
GPU artifacting is one of the worst things that could happen to your graphics card, which results in a pixelated display, bright patches of pixels appearing on the screen, and, in some cases, no signal to the monitor. This issue can even happen to some of the most expensive gaming PCs, no matter which GPU you have. So, how can you fix this issue?
GPU artifacting can occur if your graphics card usage is at 100% while bearing the load of intensive graphics and rendering. To fix the GPU artifacting on your PC, reduce the GPU core clock to the default settings using the MSI afterburner. Also, make sure to update the graphics drivers to fix any bugs or issues with your GPU.
Even if you know how to buy the right graphics card, GPU artifacting is related to the voltage of your graphics card’s core chip. Therefore, we have discovered some tried and tested solutions to fix the GPU artifacting by following tried and tested solutions.
Reasons for GPU Artifacting
Before we jump into finding the solutions, let’s talk about some of the factors that cause GPU artifacting so you can take the right precautions.
- Make sure your GPU is not overclocked to an extreme level.
- Adjust the clock voltage of your GPU to an optimum level.
- Check the power supply adapter and make sure it is adequately attached to your GPU.
- The graphics card’s drivers are outdated.
- GPU is overheating constantly due to intensive processing.
Fixing the GPU Artifacting on Windows PC
Here, we have featured some tried and tested solutions to resolve the GPU artifacting on a Windows PC, which can be applied on any dedicated graphics card.
Fix #1: Underclock your GPU
Underclocking your GPU is the best way to save some power, avoid overheating, and resolve GPU artifacting. You can underclock your GPU using the dedicated software developed by the vendor of your graphics unit, or you can use the MSI afterburner, a universal program for overclocking or underclocking a GPU; here are the steps you need to perform.
- Install the MSI Afterburner on your computer system and run it.
- Adjust the ‘Core Clock’ bar stated in MHz from right to left to underclock the GPU.
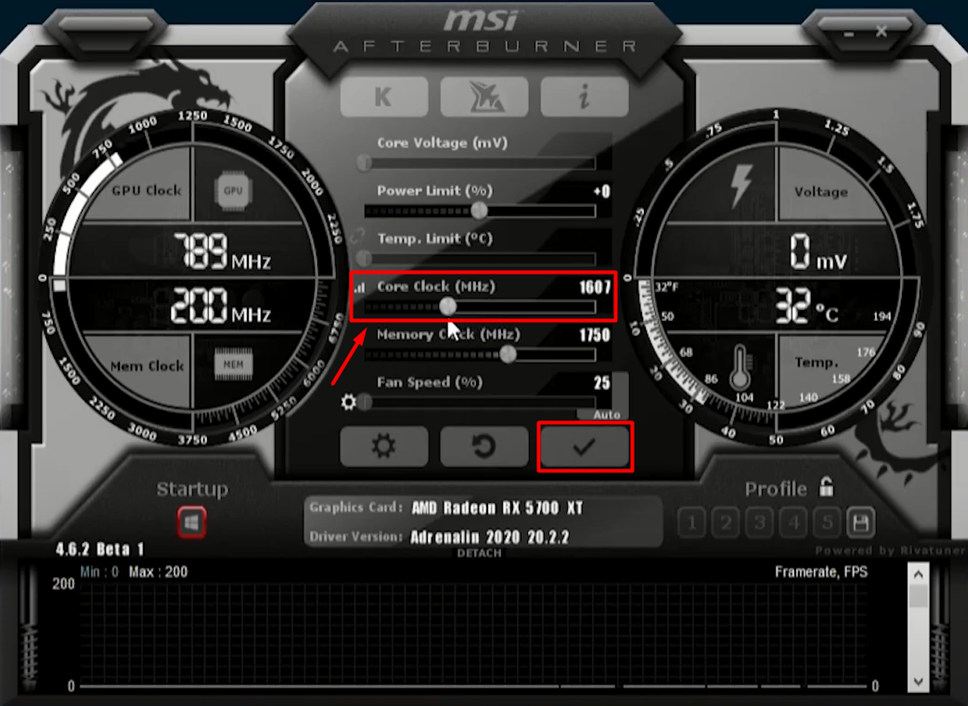
- Once you have set the clock levels, click the checkmark icon (✔) on the interface, and the changes will be applied.
While maintaining the overclocking levels, adjust the voltage and fan speeds to avoid any hardware failure.
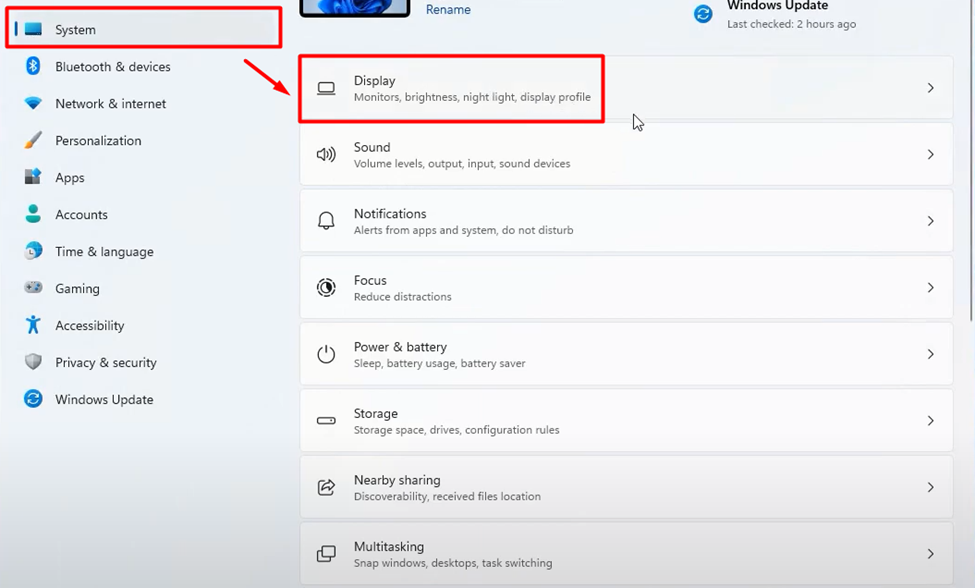
Fix #2: Disable GPU Hardware Acceleration
Many users are unfamiliar with this feature, but GPU hardware acceleration causes more stress on the graphics card by reducing the graphics workload from the CPU. If the GPU hardware acceleration is enabled, all the graphics load from browsers, games, design software, and numerous other programs will be solely handled by the GPU, ultimately increasing its usage even in the idle state. Hence, following these steps, you can disable the GPU hardware acceleration to fix GPU Artifacting.
- Open Windows Settings and go to the ‘Display’ options in the ‘System’ tab.
- Click on Graphics > Change Default Graphics Settings and toggle off the switch under Hardware-accelerated GPU scheduling.
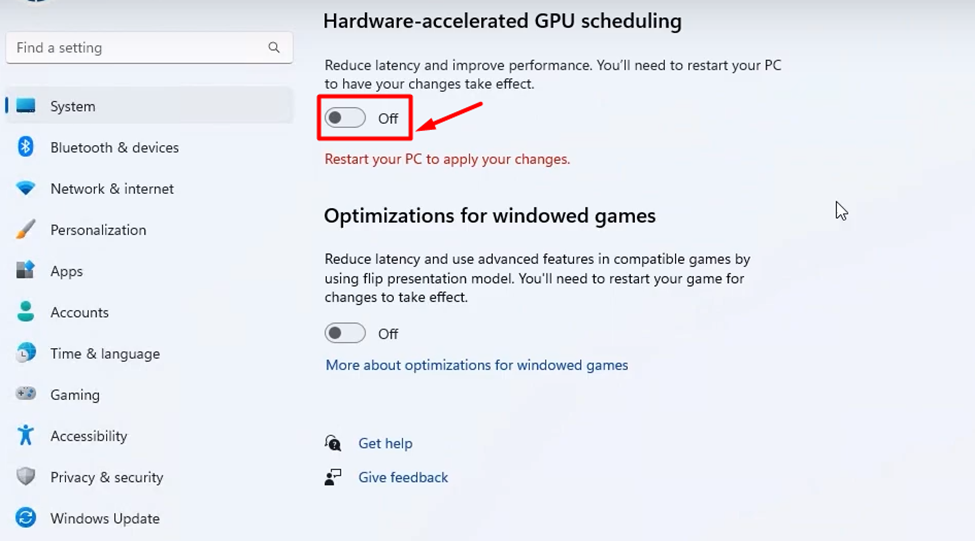
- Restart your computer system to apply the changes, and your GPU usage will significantly reduce.
Fix #3: Reset the Power Supply
If your power supply is not working properly, then it may cause GPU artifacting due to an improper supply of voltage through the PSU connector. Therefore, follow these steps to reset the PSU to fix the GPU artifacting issue.
- Shut down your PC and press the power button for at least 5 seconds to release any charge.
- Now turn the power button on your power supply to ‘0’ from ‘1’, indicating it to turn off.
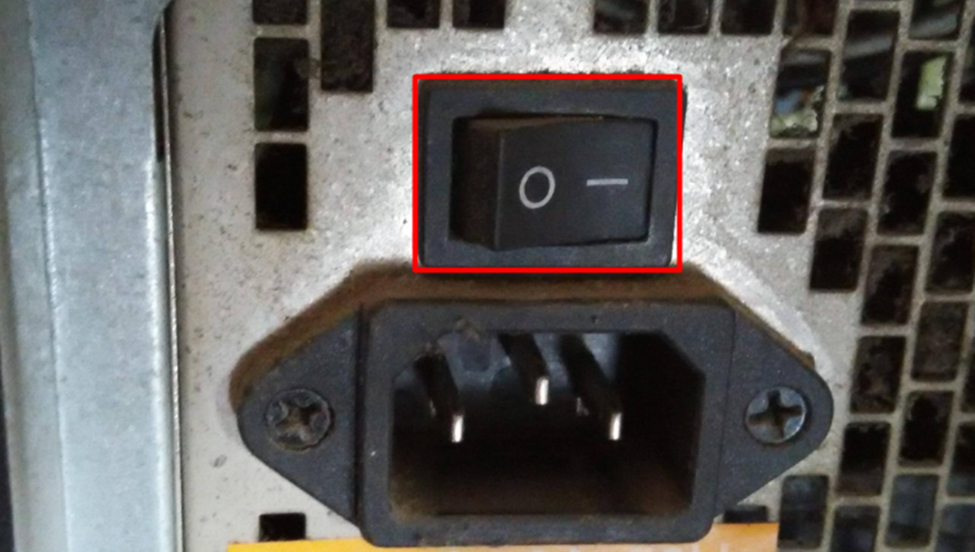
- Remove the power cord from the interface if your power supply has no button.
- Now wait for at least 30 seconds and then turn the power supply button back to ‘1’ from ‘0’ or plug in the power cord.
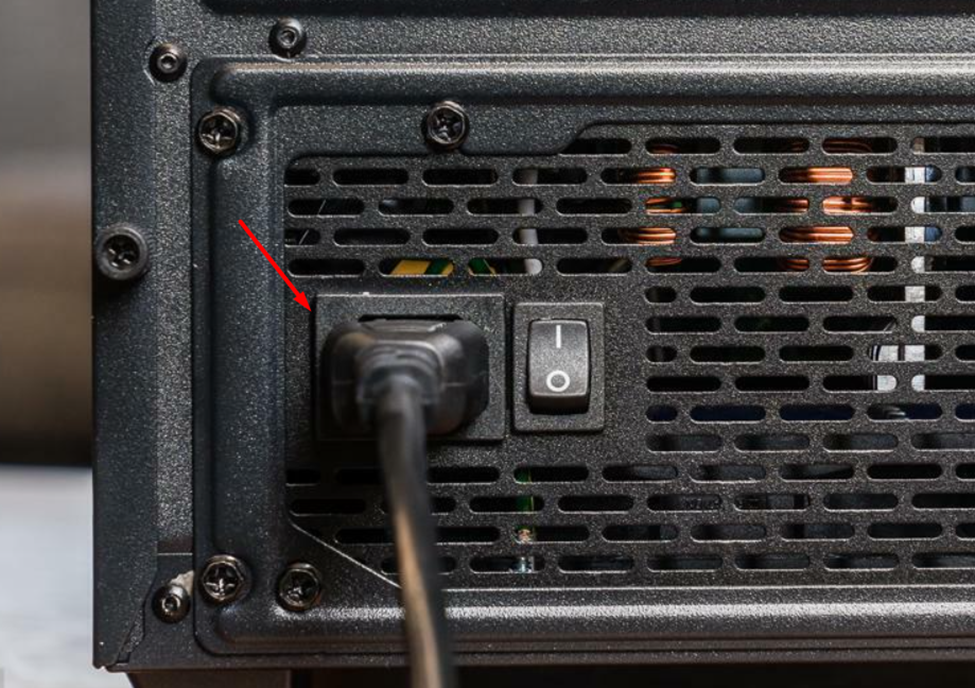
- Switch ON your PC and press the power button to check if it supplies the power to start the PC.
Fix #4: Update Display Drivers
If your display drivers have been outdated, it’s probably one of the main reasons your hardware is malfunctioning to cause GPU artifacting. Therefore, ensure you have installed the latest display drivers for your dedicated GPU by following these steps.
- Go to Start Menu and search for the ‘Device Manager’ in the search bar.
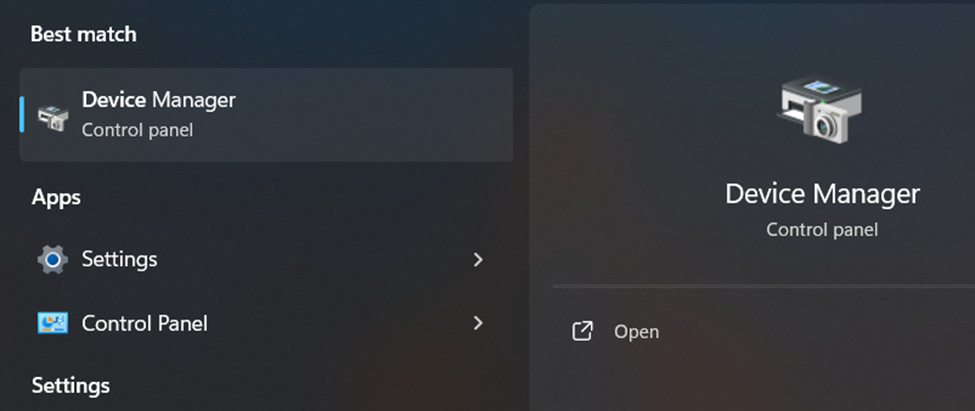
- Enter to open the Device Manager and click on the Display Driver section.
- Right-click on your display adapter, click on it and select the ‘Update Driver’ option.

- Wait until the PC searches for driver updates and lets you install them properly.
After applying driver updates, you may have to restart your Windows PC, which will automatically resolve the GPU artifacting.
Fix #5: Maintain GPU Temperature
If your graphics card is taking a lot of stress, then overheating could be one of the main reasons for GPU artifacting. Therefore, you can use the MSI Afterburner to adjust the GPU fan speed by following these steps.
- First, you have to download and install the MSI Afterburner.
- Launch the MSI Afterburner and save the Default Profile, which is probably indicated as ‘1’.
- Click the ‘Gear’ icon to open the properties.
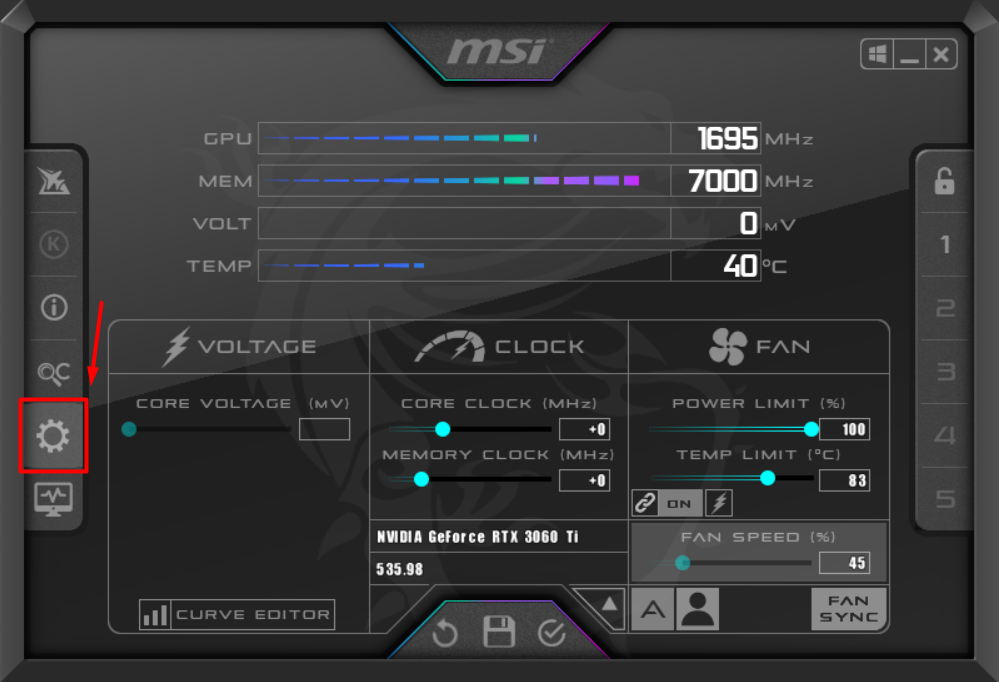
- Select ‘Fan’ from the properties and make sure to check the box that says ‘Enable user defined software automatic fan control‘.
- Now select the drop down menu next to the fan curver, and set it to ‘Custom’.
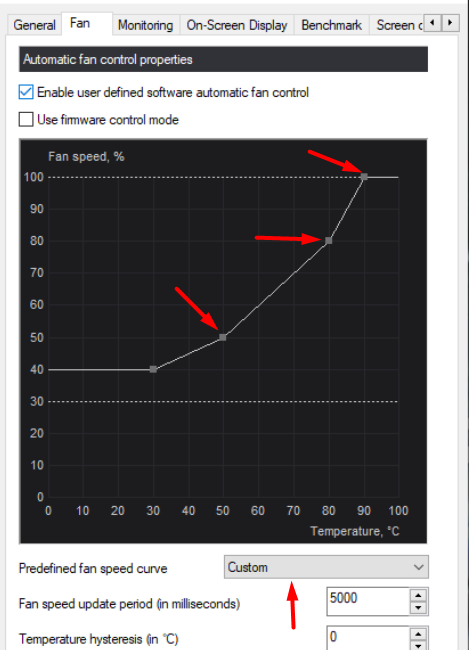
- Adjust the points on the graph to increase the fan speed while corresponding to the temperature points at which the fan speed will increase or decrease.
- Once you have increased the fan speed, click ‘Apply’ and ‘OK’ to save the changes. Make sure to Minimize MSI Afterburner and do not close the software so the changes remain in effective.
Fix #6: Check the Cable Connections
Sometimes, the GPU Artifacting can mainly occur due to a faulty cable connection to the port or the cable itself. Therefore, we recommend you to check the cable connection by using a different cord or a different port to output the display.
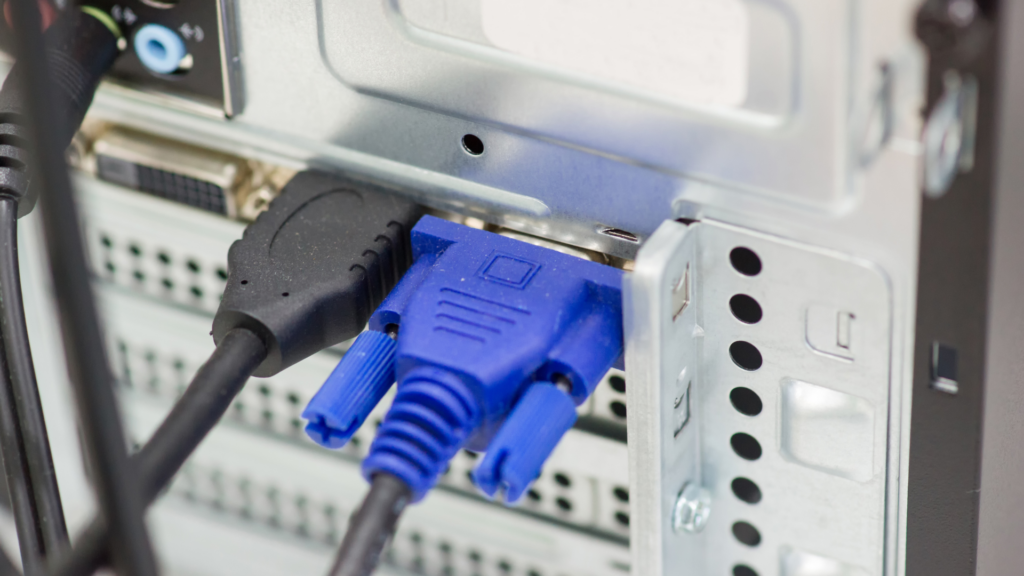
- Connect your HDMI cable to a friend’s computer and see if it works.
- If you have access to multiple HDMI cables, try using two or three different cables to see if the results are different. This will help you determine if the issue is with the cable or something else.
Fix #7: Replace the GPU Core
If none of the above-mentioned fixes have resolved the GPU artifacting issue for you, then the last option is to get the GPU core replacement. A GPU core is the main chip of your graphics card that powers the whole unit, and it may come in a single or multiple cores, depending on the name of the GPU.
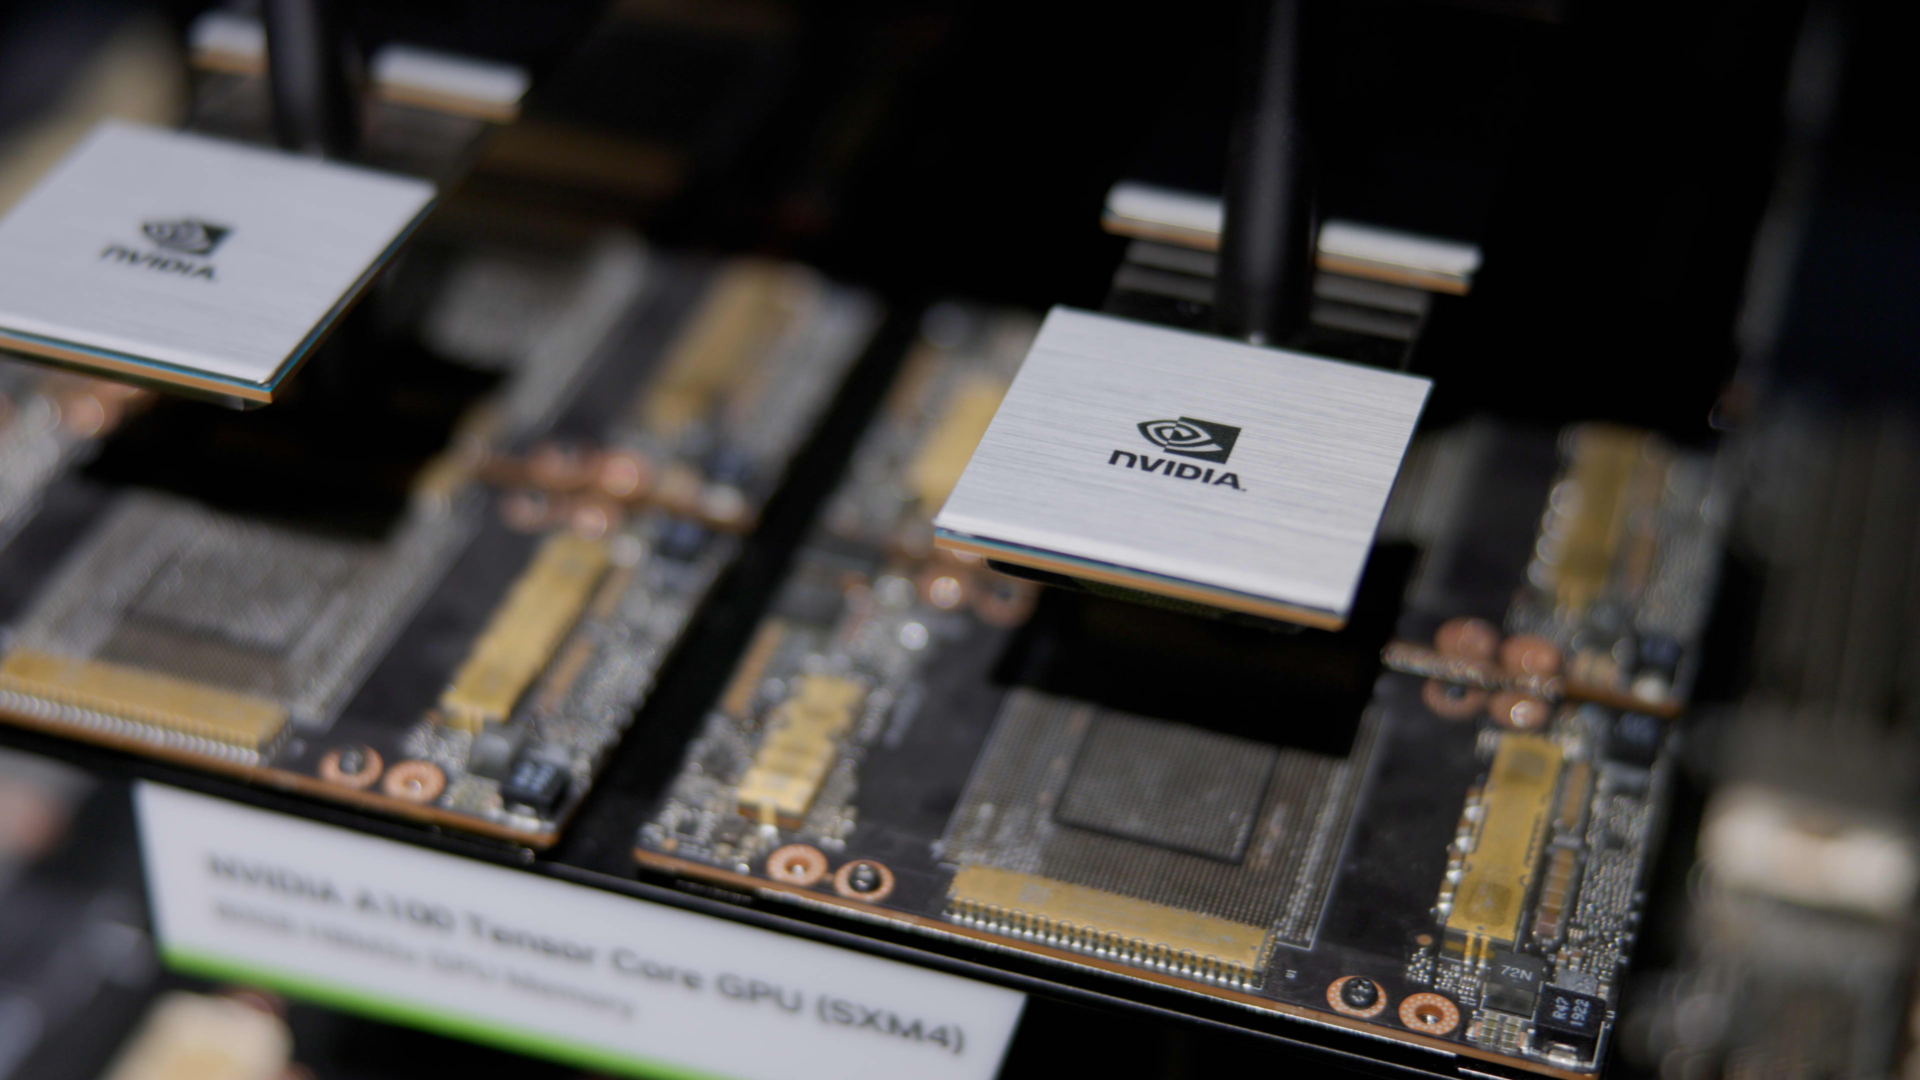
Here is a glimpse of what the GPU core looks like. It is covered by the heat sync of your graphics card, so you may be unable to access it without taking the whole unit apart. Therefore, we recommend getting professional help to replace the GPU core chip with a new one, which will surely resolve the GPU artifacting issue for you once and for all.
Final Words
Bright pixels covering your whole screen like a bad satellite TV connection is something similar to what you’ll see when a GPU is artifacting. For once, you might think that it’s an issue with your gaming monitor or the cable connection. But, in fact, it’s the issue with your graphics card itself. With the methods mentioned in this article, you can surely overcome the problem of GPU artifacting to experience lag-free gaming. Hopefully, this guide was helpful, and if you have any questions, let us know down in the comments.