Isn’t it annoying when your button input is not forwarded properly? Here is a quick solution to resolve Asus ROG Ally Joystick Deadzones.
Handheld gaming has never been more fun, and there is a wide collection of games for Asus ROG Ally. However, the console has become a victim of hardware issues like overheating, battery draining, and now the joystick unresponsiveness. Many users on Reddit have discovered Asus ROG Ally joystick doesn’t work properly after hours of gameplay. Fortunately, you can adjust the responsiveness.
To fix the Asus ROG Ally joystick deadzones, you can modify its settings for each stick in the gamepad mode. If that doesn’t work, you can always attach an external controller like the DualSense, DualShock, or Xbox controller for a better experience.
The new Armoury Crate with Windows 11 support gives you a wide range of options to control the Asus ROG Ally. Therefore, we have written a detailed guide on how to fix Asus ROG Ally joystick deadzones and unresponsiveness by discussing a few easy methods.
Fixing Asus ROG Ally Joystick Deadzones and Unresponsiveness
Here we have mentioned 3 step-by-step methods for fixing Asus ROG Ally joystick deadzones.
Method #1: Configure Gamepad Mode
The first thing you may want to try is calibrating the joysticks according to your gameplay style for each joystick by following these steps.
- Press the button on the lower right side of Asus ROG Ally to access Control mode.
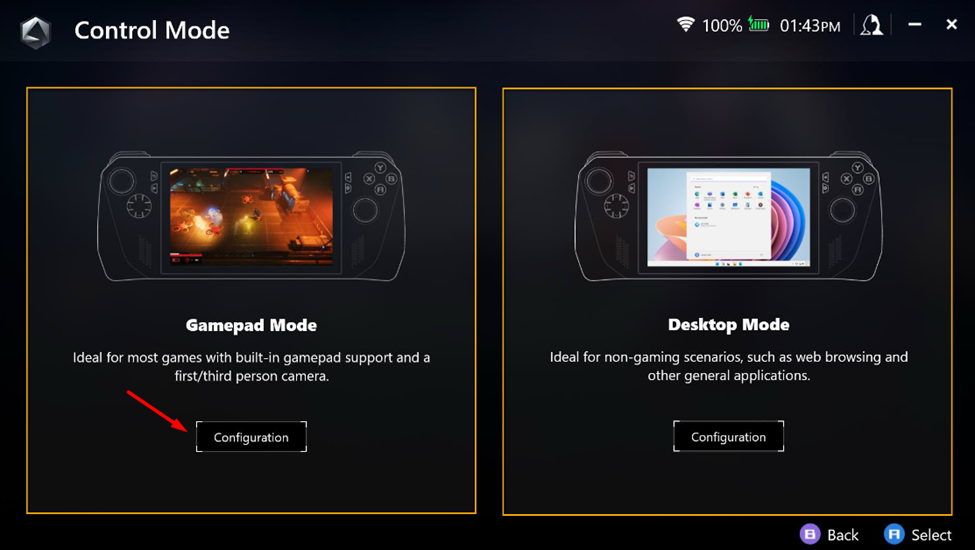
- Tap ‘Configuration’ under the Gamepad Mode.
- Tap on ‘Right Stick’ and adjust the slider under ‘Dead Zone’ and ‘Outer Threshold.’
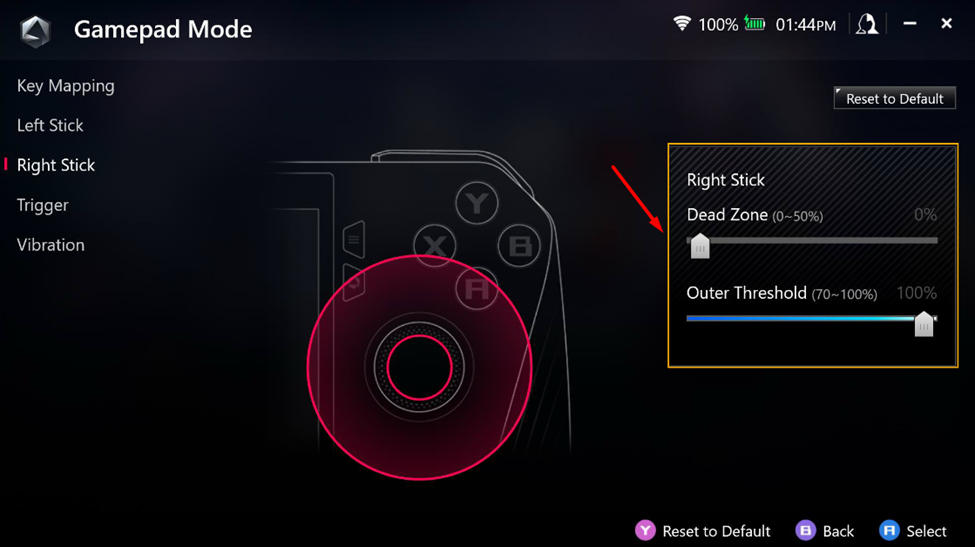
- Perform the same changes to the ‘Left Stick’ Dead Zone.
And that’s about it. You can now play your favorite games to see if the joystick responsiveness and input have improved.
Method #2: Attach External Controller
If your Asus ROG Ally controller is not working, you can connect to another controller by following these steps.
- Open the Windows 11 Desktop mode on Asus ROG Ally and tap the Start Menu button.
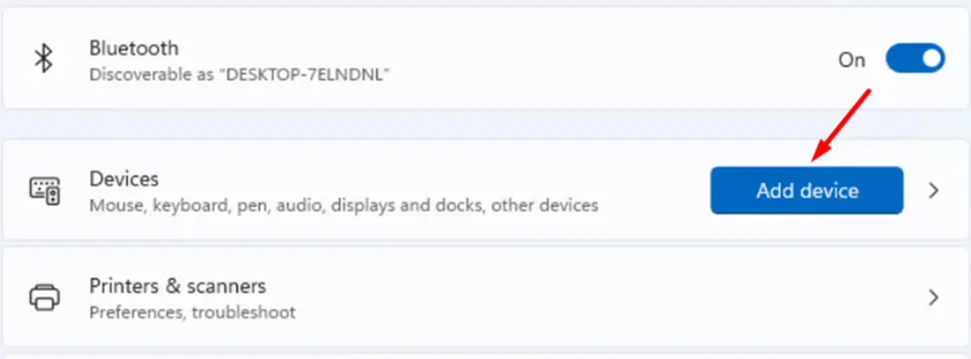
- Type Bluetooth in the search bar and tap ‘Bluetooth & devices.’
- Enable Bluetooth and tap on the ‘Add device’ button.
- Tap on ‘Bluetooth’ from Add a Device Window.
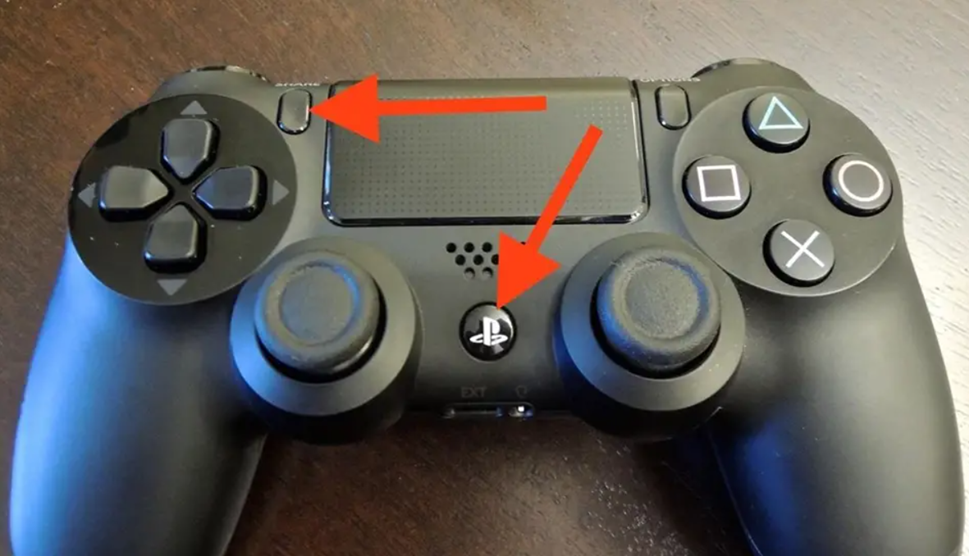
- Press the PlayStation and Share buttons on your PS4 DualShock 4 Controller to put it in pairing mode.
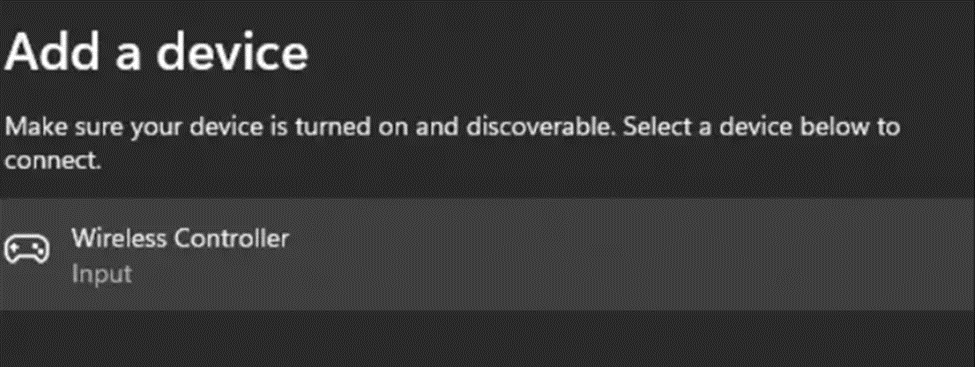
- Check the Add a Device window on the ROG Ally screen to see if it scans the controller.
- Tap on your controller from Add a Device list, and ROG Ally will connect with that controller.
Method #3: Steam Controller Settings
- Open Steam on Asus ROG Ally and go to Settings > Controller > General Controller Settings.
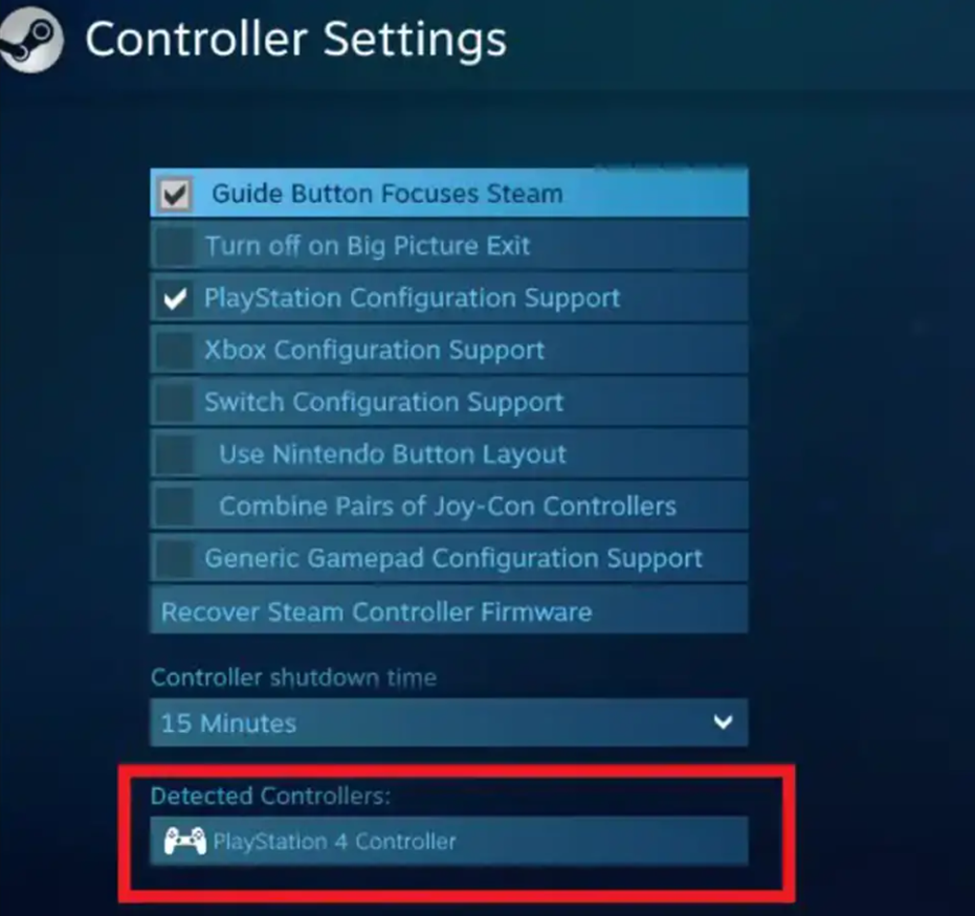
- Select your controller and then choose ‘Calibrate.’
- In the pop-up menu, you can set the dead zones for both the left and right sticks.

- Once you’re done, tap ‘OK’ to save the changes, and you’re all set.
This method is suggested and tested by Reddit community members, so it will only work for externally attached controllers and may be more effective on Steam games.
Final Words
Asus ROG Ally is programmed to deliver quality performance and an ultimate gameplay experience with its customization options. However, the gameplay style for each game, by each gamer, varies on their way of holding the console. Hence the button responsiveness is dependent on it, too, and you can always set the Asus ROG Ally joystick dead zones from the software. Hopefully, you’ll now enjoy a more personalized gaming experience.