Have you recently built a PC, and it won’t boot? Here are some easy fixes based on your PC’s state of boot.
Building a gaming PC in 2023 is a very hectic job, and it only happens by a miracle if your PC boots up without any technical issues or software errors. The worst thing that could happen to a PC builder is that their PC may not boot. Sometimes, you may experience beep sounds or flashing lights, indicating something is wrong with the hardware.
The most probable reason your PC won’t boot after a build is that the power switches are not attached correctly to the Motherboard. Another reason could be that you may not have switched on the Power Supply or that a loosely bounded connection from the PSU can disturb the boot sequence of the PC.
These and many more reasons could lead to this technical defect which can be easily resolved quickly. In this article, we will share simple checks and balances with troubleshooting methods if your PC won’t boot after a build.
Understanding Patterns of a PC that Won’t Turn ON
If your PC doesn’t boot after a build, different types of patterns will indicate depending on its state, as mentioned below.
1. PC Won’t Boot at All (No Lights or Sounds)
This state usually means something is wrong with the power switches or the power supply, as the PC will remain dead when you press the power button after building it.
2. Sounds or Lights but No Display
This situation requires checking almost every component, including the CPU, PSU, RAM, and most importantly, the GPU if you have one dedicated to the Motherboard.
3. PC Fails to Boot Completely
If your PC tries but fails to boot, something is possibly wrong with your Motherboard or its specific components.
Also Read: The Essential Guide to Choosing the Right PC Power Supply
Troubleshooting a PC if it Won’t Switch ON At All
If you have built a PC on your own and it won’t boot up at all can break your heart. Since your PC is not switching ON, you can hardly know what could be wrong with it. However, nothing happening is a clue that something is wrong with the Power Supply units or connections related to power.
1. Check Power Cables
First, check the power cable connection between the power outlet and PSU. Make sure that both the power supply and power outlet are switched ON. Also, check if the motherboard and CPU cables are appropriately connected. Also, make sure the power button is connected to the Motherboard.
2. Check With the Power Button
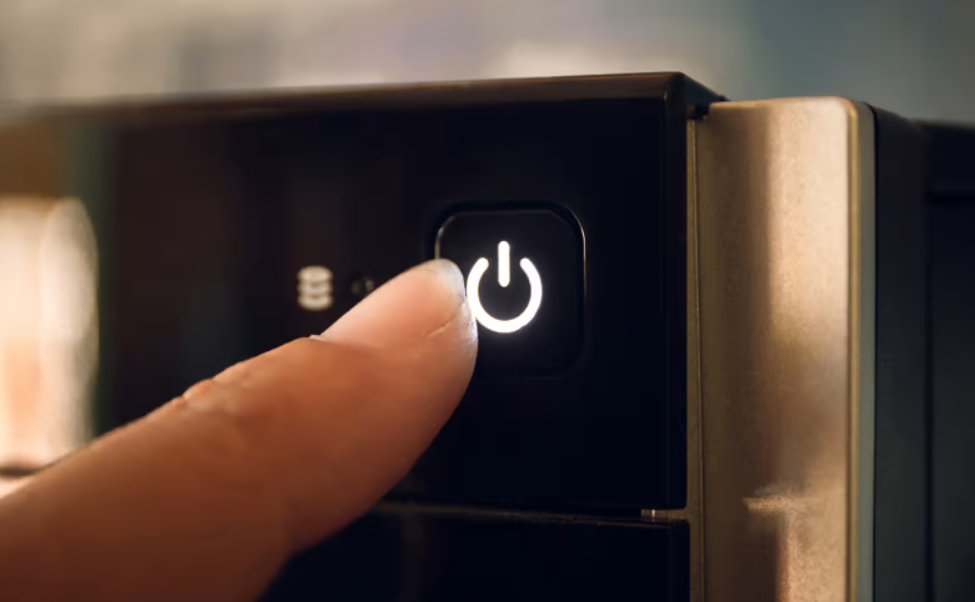
If everything is connected correctly, press the power button and check for any light indications on your Motherboard. This will help you to learn if any power is being transferred to the Motherboard. If that’s not happening, you might have a faulty PSU. But before changing the power supply, let us give it one last try to check if the Motherboard is getting any power.
3. Check Front Panel Cables
One of the most critical and confusing parts of PC building is connecting front panel cables. If your Motherboard is receiving power from the PSU, there is something wrong with the front panel cable connection of the power switches. These cables appear to be different in color and design for every case. You can usually find them at the bottom right side of the Motherboard with a range of other little cables, including power buttons, LEDs, and I/O port connections.
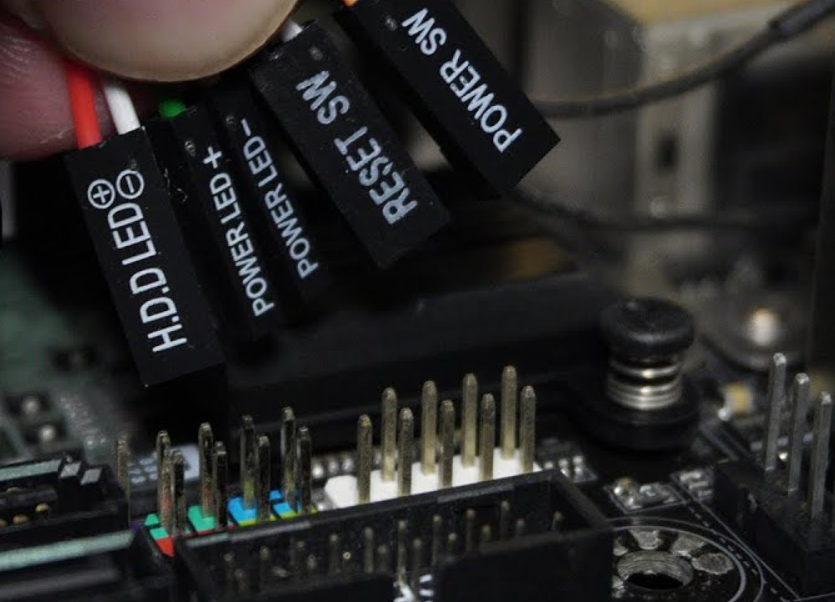
To check this connection, remove the side panel of your PC case and find the connection in the Motherboard with 8 to 9 sets of wires connected in the same wide socket. Find the front panel cables from the PC case that says ‘POWER SW’ and ‘RESET SW.’ Make sure these cables are plugged in, and if they are, remove them from the socket to see if they are connected correctly. The side with the cable name labeled on the wire should be facing inwards when plugged in.
Also Read: PC Case Sizes Explained: Which One Should You Choose?
Troubleshooting a PC if it Beeps or Blinks Lights Without Display
If your newly built PC is in a state where it beeps sounds or blinks LEDs but is not showing anything on the display monitor, things could be more complicated than you think. It may seem like a halfway resolved problem, but there are more things to check here, and this is how you should get started.
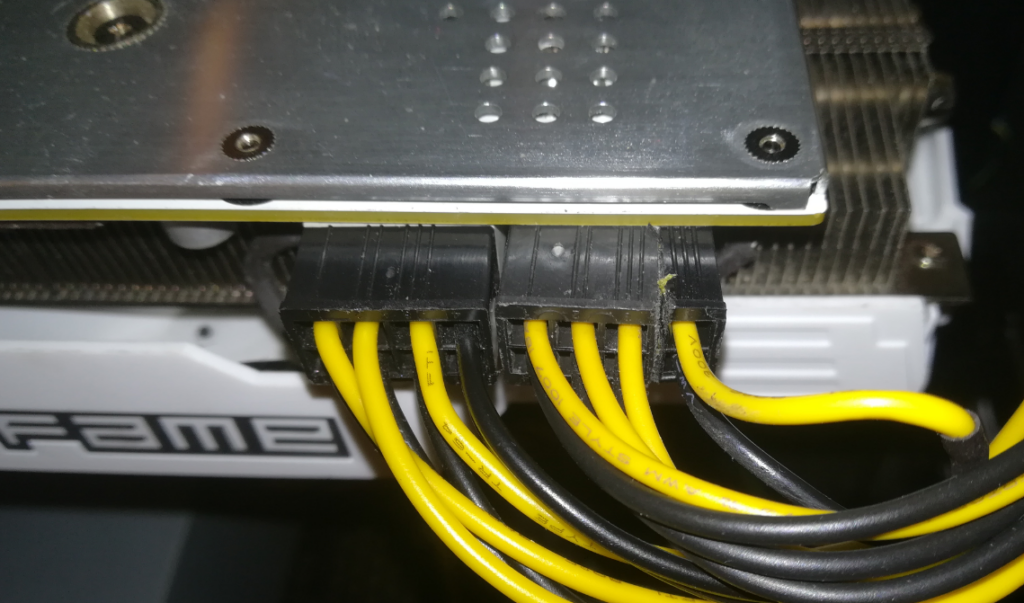
1. Check the GPU
To avoid getting a display, the essential thing is to check if the GPU is installed correctly and the PSU cables are connected. All the modern-day graphics cards required an 8-pin or 12-pin power connection from the PSU separately to power up.
You should also check if the GPU is installed in the correct PCIE slot. You can try installing it in a different one to see if that works. Lastly, you can check the display connection cable between the monitor and the GPU that connects both hardware components.
2. Check the Monitor
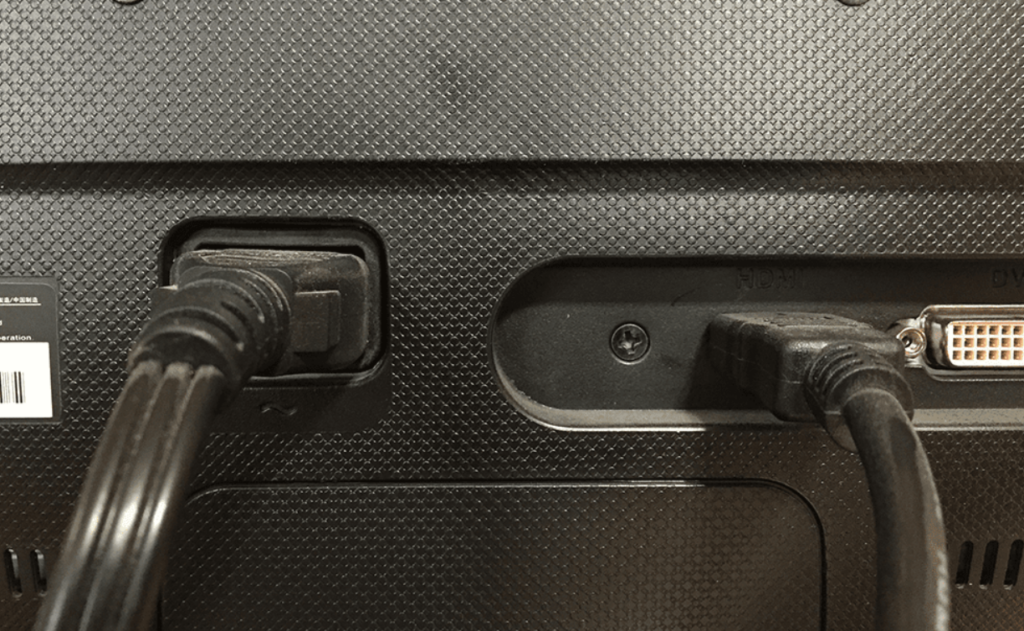
Like the GPU, checking the display monitor and its connection is vital to see if they are correctly connected. Check if the power outlet connected to the monitor is switched ON and the display connection is attached to the GPU and monitor socket. Also, check if the display monitor is switched ON by pressing the power button on the monitor.
Also Read: Here’s How to Choose the Best Resolution for PC Gaming
3. Reset All Power Cables
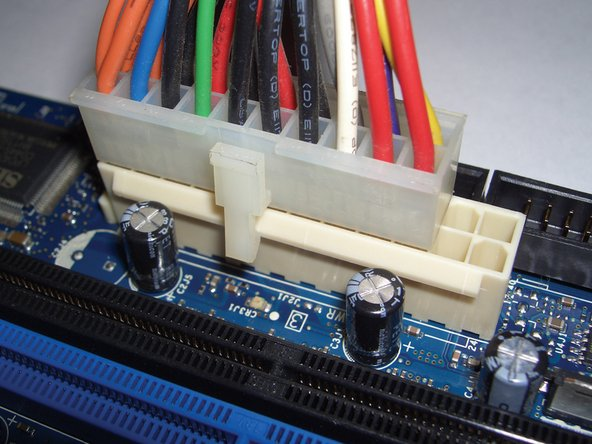
Once you have checked the display connections and hardware, you can now progress to troubleshoot the components of the Motherboard. The first thing you should check is the power connections featuring the 4/8-pin connection right next to the CPU and the 24-pin connection with a wide set of cables.
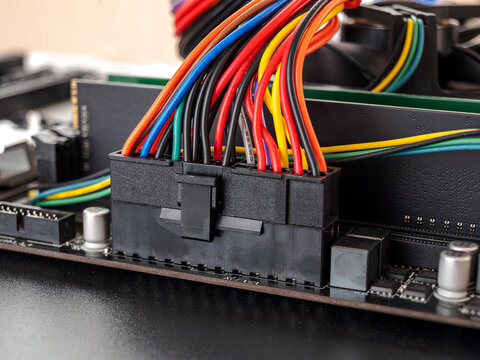
To check if they are working correctly, you can reset them by simply plugging them out and then back indirectly. You can also try plugging the CPU Cooler and SATA Drive connections in and out.
4. Check if the CPU is Installed Correctly
Installing the processor may seem simple with all the dedicated space and latch lock system, but it’s more complicated than we think. It’s important to correctly install a CPU without damaging any of the components from its socket.
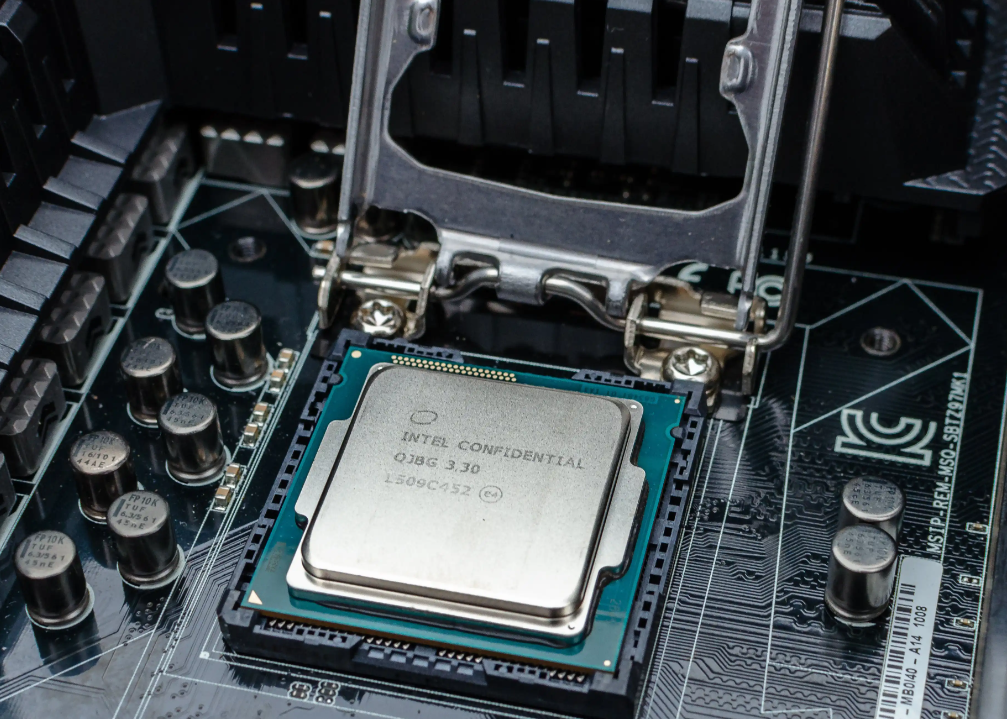
You can always check if your Intel or AMD processor is installed by observing if the CPU cooler is sitting correctly or if you’ve forgotten to close the retention arms to lock it in properly. Also, check if your CPU is compatible with the Motherboard, as it could be the root cause of all the problems that you’re facing.
5. Check the RAM Sticks/Slots
Defective RAM sticks or Memory slots can cause all kinds of issues with your PC, especially with the boot setup. First, you should check if you have installed RAM compatible with your Motherboard by comparing if you got all the DDR4 or DDR5 ones and their generation.
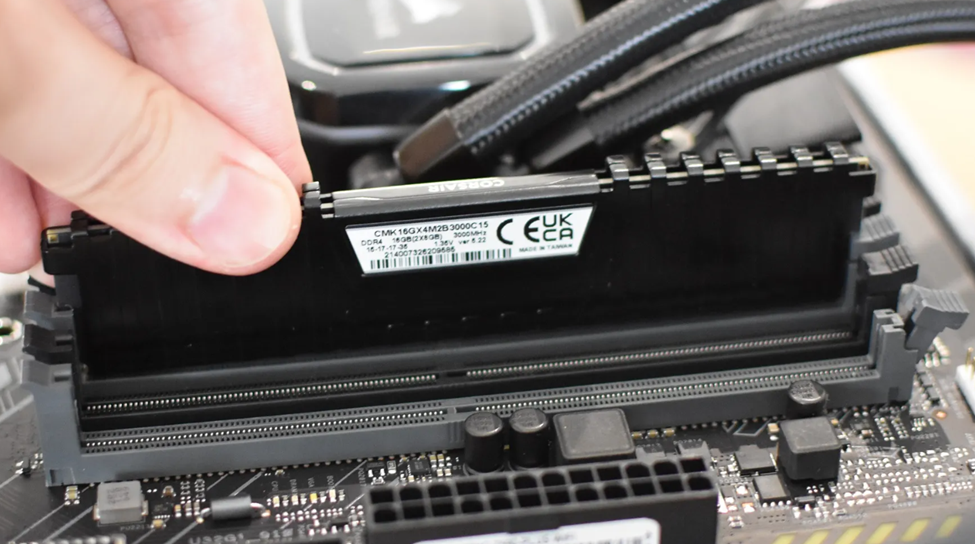
Once you have confirmed that you have the right RAMs, check if you have installed RAM correctly in the slots. Make sure that they are seated correctly in the right direction with locks latched properly from each end. Next, you must check the motherboard manual to learn about the correct configuration of RAM. Usually, a slot is empty between two sticks if you got a pair of identical-looking Memory sticks.
You can try reinstalling RAM sticks into other slots if everything checks out. You can also try booting the PC with a single RAM stick installed to see if that works. Sometimes it is all about the configuration and arrangement of RAM sticks. This way, you can check if the RAM stick or slots are damaged, which could cause the booting issues.
6. Diagnostic Codes or Beeps
The last thing you can check is by reading your Motherboard’s manual or checking the meaning of beep sequence and flashing light indications online to see what they mean. These diagnostic indications vary on the manufacturer and vendor of the Motherboard.
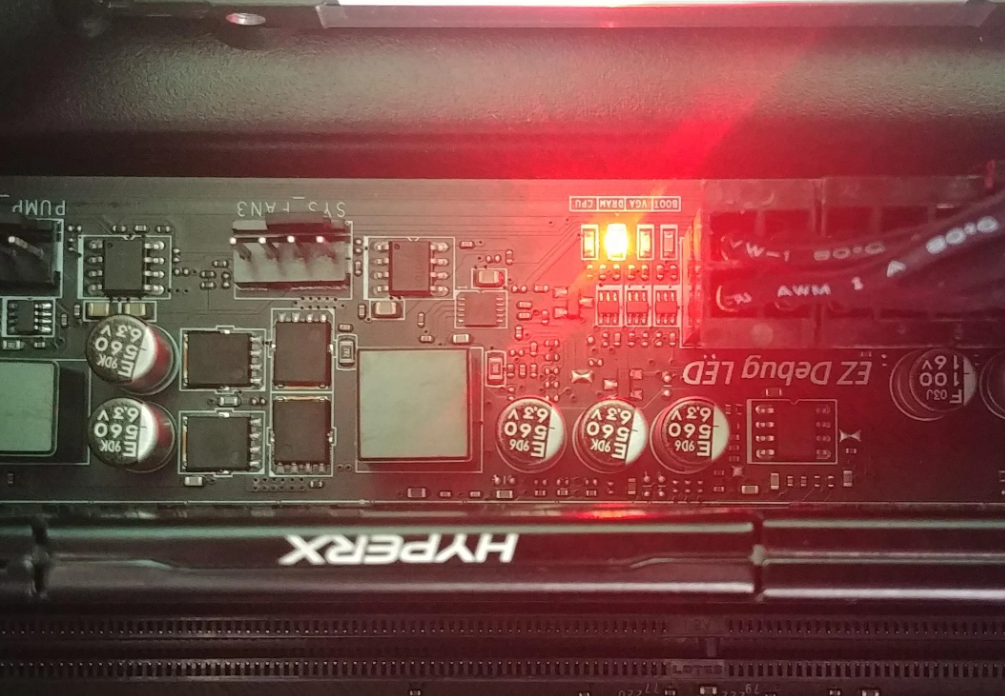
Hence, we recommend checking the manual to find the meaning of this indication to save time and effort. Once you have figured out what the beeping or flashing code means, you can progress to apply any of the before mentioned methods.
Troubleshooting a PC if it Boots but Fails Halfway Through
It’s a rare scenario where your PC nearly boots but fails to turn ON completely because a technical issue could block the boot sequence from completion. In that case, here is what you can try.
1. Check the Hard Drive Attachment

Installing an SSD or HDD is not very complex but can still leave you with some loosely bound connections. If you have installed an NVMe SSD, check if it’s correctly installed into the plug. As for other hard drives, ensure the cables are appropriately connected, including the SATA ports. Moreover, check the power supply cable connection with the HDD or SSD to see if seated correctly in their slots.
2. Boot in Safe Mode
If the issue occurs at the boot screen where the OS logo is stuck, there could be an issue with the operating system installation. You can try booting the OS in safe mode and reinstalling the operating system with a different version that seems more compatible with your system’s hardware. You can also try downgrading the OS version (From Windows 11 to Windows 10) to see if that works more stably with your PC.
Final Words
PC Building is an educational and fun experience as you get in touch with the technology by learning and resolving technical issues. Almost 90% of beginners in PC building face issues, technical errors, or hardware incompatibilities due to their lack of knowledge. Hence there is always a solution there unless the hardware is damaged. Hopefully, this article helped you to resolve issues with your PC build, and now your rig is up and running.