Looking to build a new gaming PC? We got you covered. Here are the complete guidelines and checklist to prepare your ultimate gaming rig for 2024.
With the advancement of CPU Intensive games, the demand for high-end gaming hardware is increasing daily. Every new title comes with various hardware requirements that outdate the old hardware. However, you might come across many questions when building a gaming PC.
Building a new gaming rig is a dream for many, and it can become a hectic job if you’re doing it on your own. You have to decide how much RAM you require. What’s better, Intel or AMD? Which is the perfect GPU for gaming? We will provide answers to all of your questions.
In this article, we will present detailed guidelines on how to build a gaming PC in 2024 with a complete checklist of hardware components you need for the right build. We will also share a quick solution for choosing the right hardware for your PC that is perfect for running your favorite games on smoother and more stable frame rates.
Essential Set of Tools for PC Building
Before you jump into putting your ultimate gaming rig together, it is essential to carry the right set of tools mentioned below.
- Phillips #2 Screwdriver
- Phillips #1 Screwdriver
- Phillips #0 Screwdriver
- Thermal Paste
- Zip Ties
All of this should be placed in a dedicated workplace where you will build your ultimate gaming PC. Make sure this place is free of dust particles and moisture that can cause temporary or permanent damage to your computer system. We do not recommend keeping eating or drinking items around during the process.
Checklist of Hardware Components your
Now let’s get to the exciting part, where you must collect all the parts to put in your gaming PC. Here is a checklist of the items you’ll need to put in your gaming PC for an up-to-date gaming experience.
- Processor/CPU
- GPU (Graphics Card)
- Motherboard
- RAM
- Storage
- PSU (Power Supply Unit)
- Cooling System/Cooling Fans
All these items will go in your PC case; you have to choose depending on the size of your components. For example, if you’re choosing a gigantic 40 series GPU, you might need a big casing. Plus, it would be best to consider where you would put your case (either below or above your gaming desk).
Choosing a PC case can leave you with three size options: full tower, mid tower, and mini tower. None of the cases come in standard sizes, and it majorly depends on the size of your motherboard.
Secondly, you have to choose the right motherboard before going for the rest of the hardware components. A high-end motherboard is important to consider since you’ll be looking to install all the latest hardware that’s mostly compatible with the new-gen slot design.
How to Find the Right Hardware for Your PC?
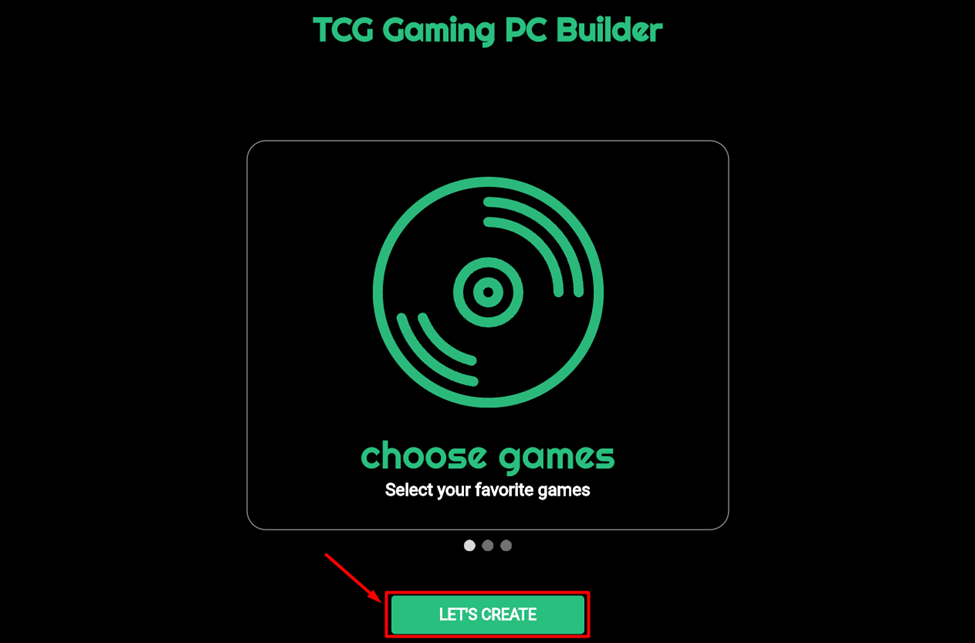
Enlisting the category of components is one thing, but the real challenge begins when you don’t know which GPU or CPU combination would be the right choice to fulfil the requirements for your favorite games. The same goes for RAM and Hard drives. But with TCG Gaming PC Builder, it is only a matter of minutes. Here is how you can use it.
- To build a suitable gaming PC for your favorite games, choose the games you want to play by clicking on ‘Let’s Create’.
- Now search and select your favorite games from the library.

- Once you’ve selected the games, click next, and the PC builder will present you with three different build options. Select any option and click the arrow icon to proceed next.
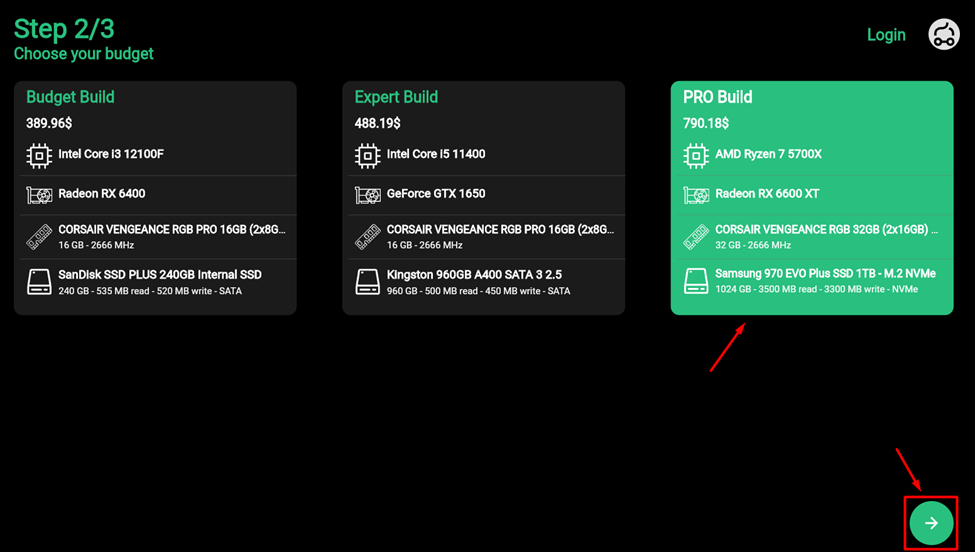
- Now you will be presented with the buying option for your chosen hardware components. Choose any of the build suggestions and click the arrow icon.
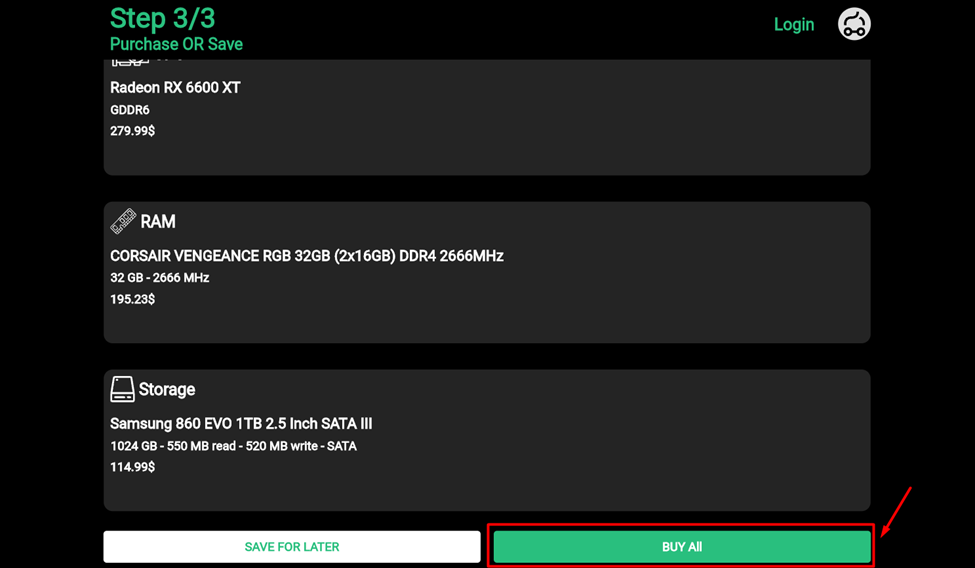
- Now click the ‘Buy All’ option, and you will see an ‘Amazon’ popup to purchase the recommended hardware for your gaming PC.
Once you’ve got the suitable GPU, CPU, Hard Drive, and RAM, you can fit all these components in your gaming PC’s case.
10 Easy Steps to Build a Gaming PC in 2024
To build a gaming PC in 2024, you must consider various factors while fitting each component in the casing. Let’s start by discussing how to install each component in your PC for the perfect build.
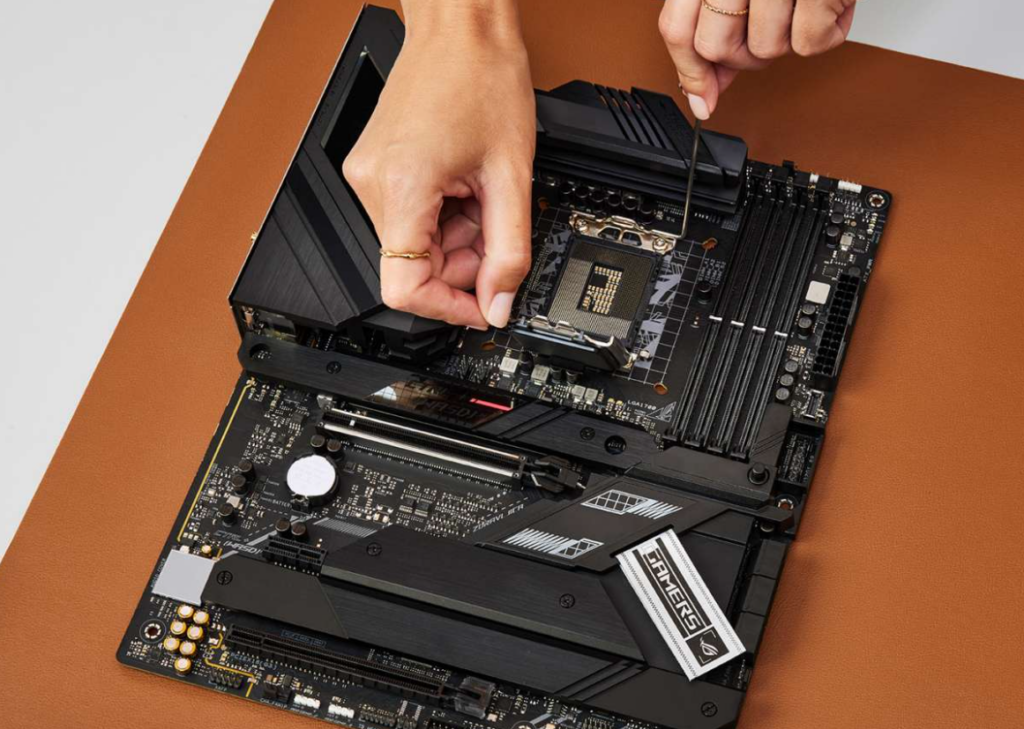
Step #1: Installing the CPU
Take your motherboard out of its packaging and carefully place it on the static sheet that comes in the packaging. The first thing we’ll be installing is the CPU. The modern-day motherboards use the LGA system featuring a small lever to release the latch that holds the CPU once installed correctly. Pull the small lever gently to unlatch it to expose the socket with golden contact underneath.
For choosing the right CPU, you must consider processor cores and threads more than the generation or clock speed. There are only two options for processors, so you’ll be installing AMD or Intel CPUs in your system, which goes pretty much the same if you have chosen the MSI Motherboard compatible with most CPUs.
Now carefully hold the processor from its edges and do not touch the golden contacts underneath as they are fragile and might bend by a single push or even the slightest pressure. Look for an arrow on your CPU and the motherboard socket, and align them properly to place the processor in the socket.
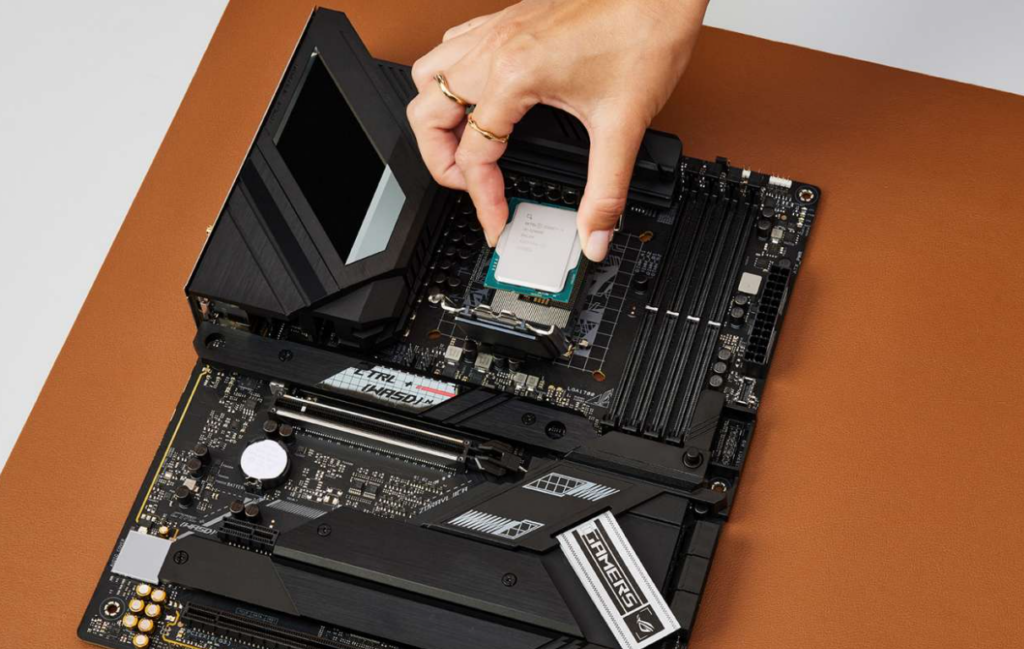
Once the CPU is placed in the socket, you can release the retention layer and apply a little force to lock the latch back in its place. Applying a little pressure on the latch is okay if you correctly align the CPU with the socket.
Step #2: Installing RAM
The next step brings us to installing the RAM for the PC, and we will do it the same way we did for the CPU. First, you’ll need to find the RAM slots on your motherboard, like the long strip with a pair of latches on each end. If you can’t find the slot, you can take help from the motherboard manual.
There wouldn’t be much of a problem if you were installing a single RAM slot in your motherboard. However, if you plan to install two or more slots, it’s better to identify the right ones to take advantage of the dual-channel mode. These slots are usually can be guessed as A2 and B2 slots.
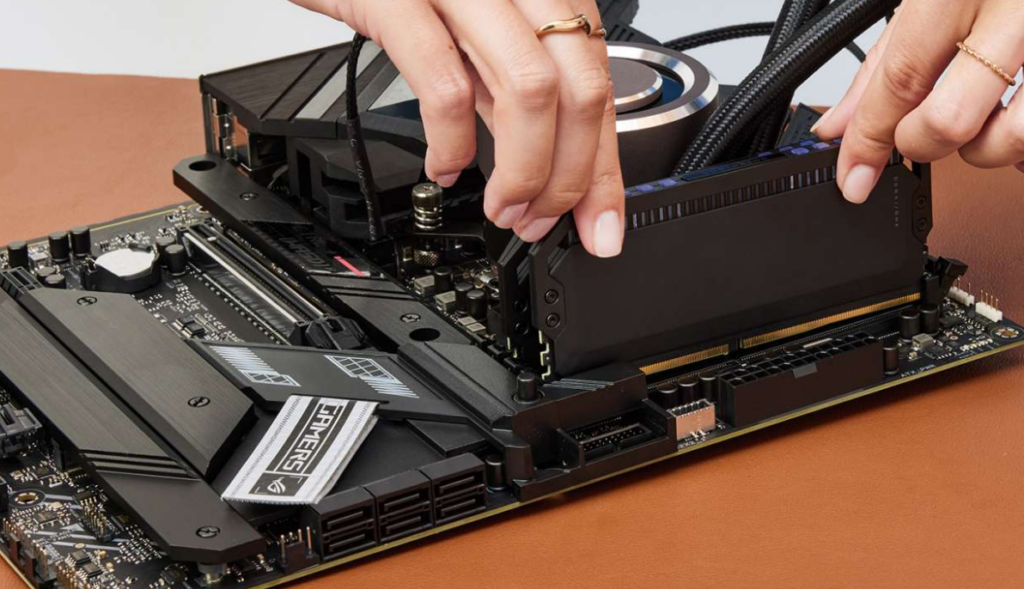
Now unpack your RAM slots and look for a small opening notch that matches the RAM stick and motherboard. Carefully press the RAM stick in the slot by aligning it with the small opening, and then gently press it in until you hear a slight click. The satisfying click sound will indicate that the RAM stick has been installed correctly. Ensure to check the latches on either side of the RAM slots to see if they are properly locked with the RAM stick.
Step #3: Installing NVMe SSD
Modern-day computer systems are more compatible with running CPU-intensive games with SSD installed on the PC. Therefore, it is best to go even one step closer with NVMe SSD since we are discussing gaming in 2024. This little hard drive is not like the usual bulky piece of metal. In contrast, it is more like a stick of gum that ports right on your motherboard without consuming additional space or cable attachments.
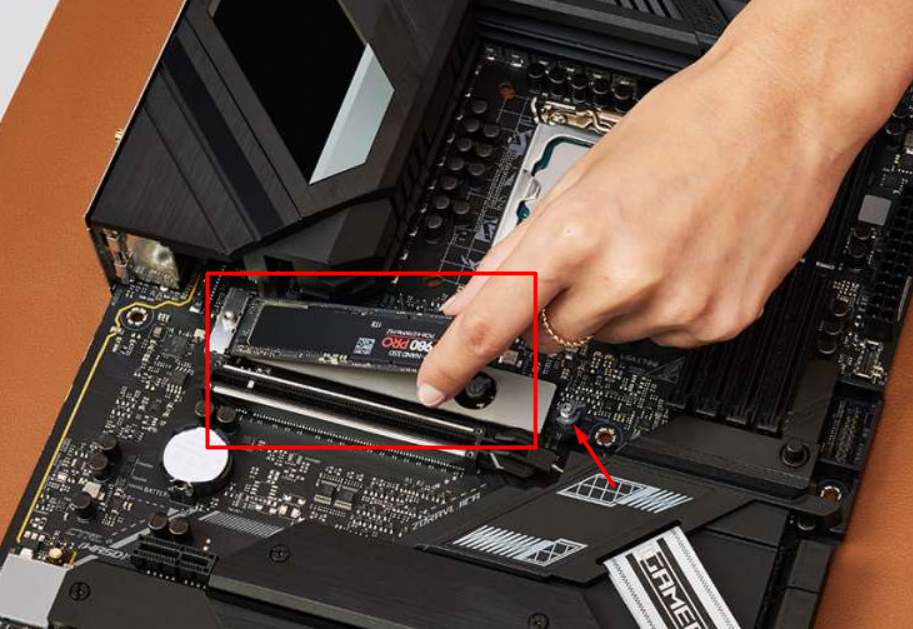
To install the NVMe SSD, you first have to find the small horizontal slot on your motherboard. You may find multiple NVMe SSD sticks for installing hard drives like the RAM sticks. Two screw attachments will accompany these slots.
You’ll have to unscrew the slot using the Phillips #0 screwdriver. Now gently slide in your NVMe SSD stick. When it is properly fitted, it will elevate to a 35-degree angle. Apply some pressure to push it down, then place the tiny screw back to hold it. And that’s it, and your NVMe SSD will be installed on the motherboard.
Step #4: Installing CPU Air Coolers
Typically, air cooling is preferred over liquid cooling for gamers who are building a PC on a budget. Some PC cases may come with more excellent fans pre-installed. However, you can always add more fans to your motherboard if you are concerned about every degree of temperature. Air cooling essentially funnels the hot air out of the computer system. Plus, it is affordable and fairly easy to install.
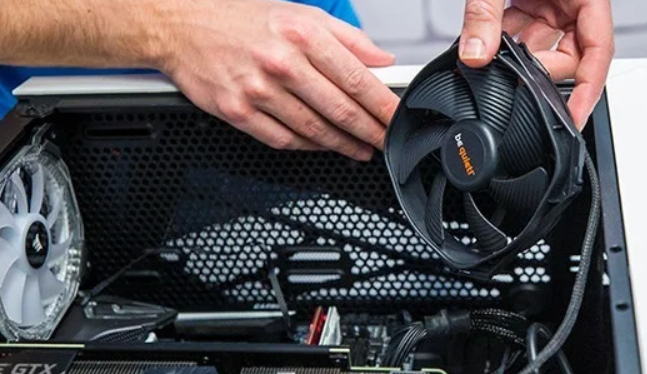
First, you must find the headers on your computer system with the screw attachments to install the fans. It depends on the headers and screw opening and what type of screwdriver you should use. If you have ARGB headers, you must be extra careful, as the RGB lightning may short-circuit if you install the cooling headers incorrectly.
Step #5: Putting Motherboard in the PC Case
The next step is to place your motherboard in the computer system’s casing. With the processor, hard drive, and RAM installed, the motherboard is ready to place in the system. Many cases come with pre-installed standoffs; you can descend the motherboard with opening holds of the board and the standoffs.
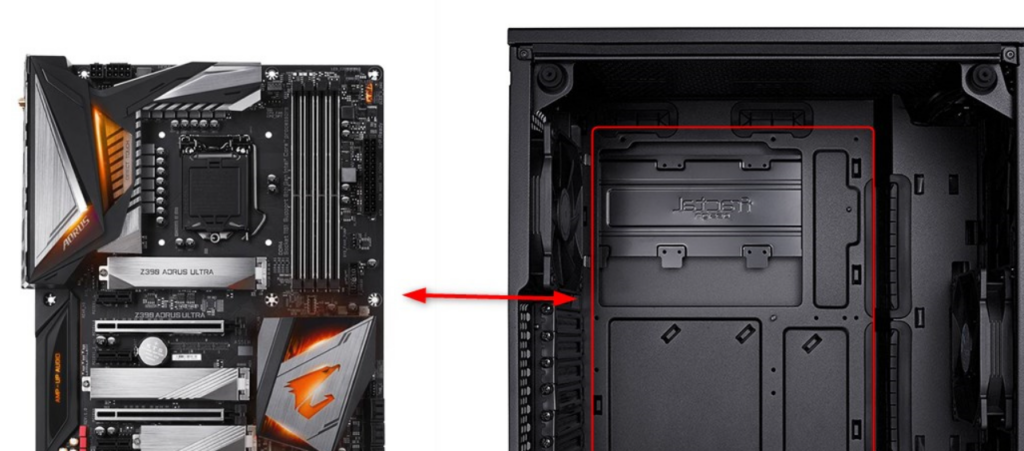
Now screw the opposite ends so the motherboard can be securely aligned in the casing. Then go for the other ends to screw in once the motherboard is aligned and appropriately placed. Make sure to check that the screws are tightly fastened to your case. Now you must attach the front panel cables, power buttons, and IO cables to the motherboard to make it functional with the casing. It is best to rely on your motherboard’s manual to make this task quicker.
Step #6: Prepare the Power Supply
The next step is to attach the power supply to the casing and connect it to the motherboard. It is essential to choose the right power supply for supplying the right amount of electricity for your GPU and CPU. If you have a modular power supply, attach the cables with the CPU, motherboard, and GPU before placing the power in your computer system.
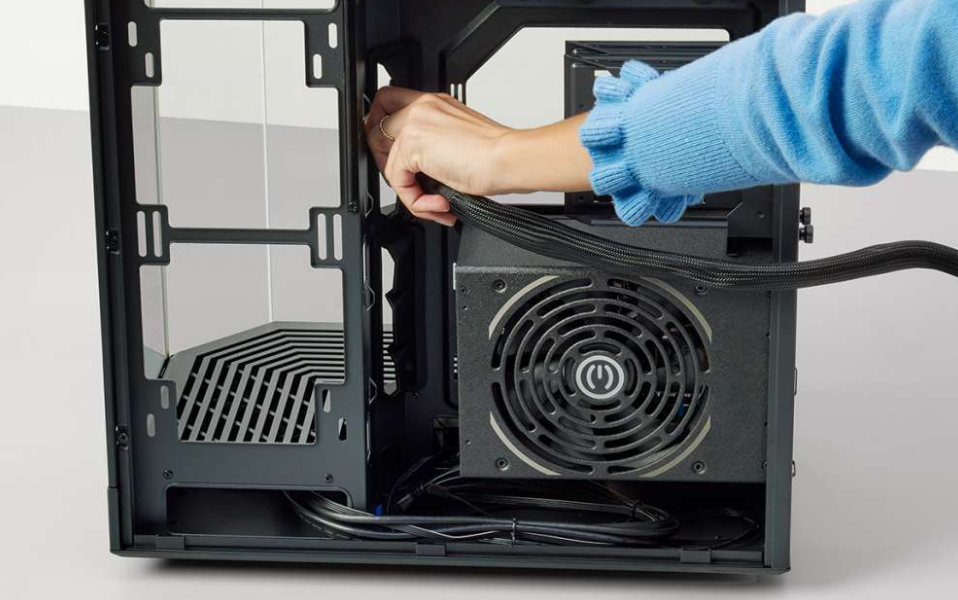
Carefully route the power supply cables from the intended position and use zip ties to hold the cluster in one place. Attach the 24-pin motherboard cable from the power supply in the board and the CPU connectors, and route the 6-pin/8-pin cable for the GPU to attach later.
Step #7: Installing All-in-One Cooling System
The all-in-one cooling system is preferable to install in your PC’s casing. First, you should install the fans and the radiator by aligning them with the headers or opening holes to attach them in one place, as discussed in step #4. Then you must carefully follow the manual to learn how many fans can be attached to your case.
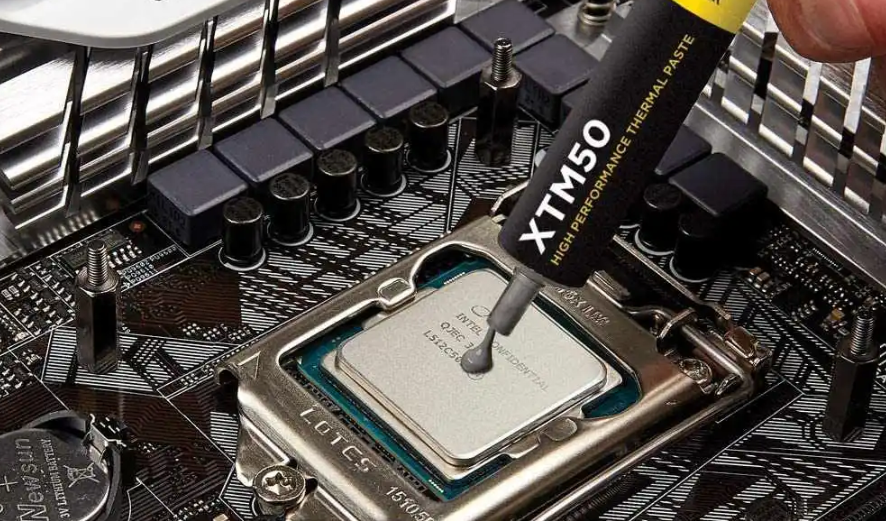
Now apply a small pea-sized pint of thermal paste on the CPU and then apply the AIO unit on the CPU. Make sure to fasten it tightly and secure it safely on the system. Then carefully install all the cables in their dedicated motherboard ports, including fan headers. If you need a SATA connection, simply attach the cable to your PSU, and you’re all done.
Step #8: Installing GPU
Installing the GPU is much like installing the RAM slot, but first, you may have to remove some brackets. Based on the size of your GPU, the brackets can vary anywhere from two to four slots. Now align the PCIe connector from the GPU with the notches on the motherboard.
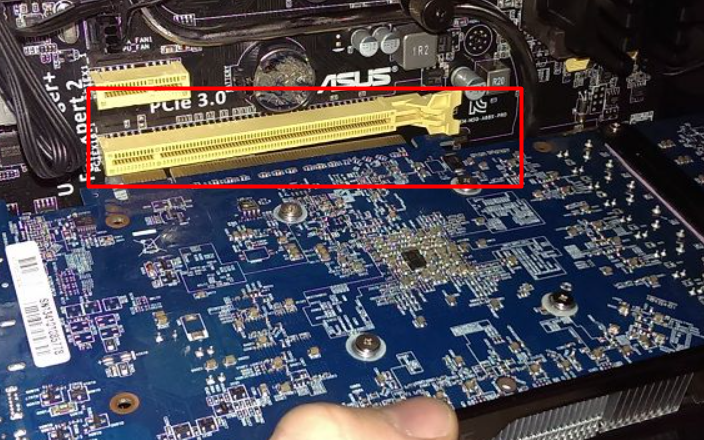
Apply slight pressure to push it in until you hear a click. Once the GPU is installed in the motherboard, screw the brackets back in the slots. Then connect the PSU connector to the GPU. That’s about it, and you have successfully attached the GPU to your PC.
Step #9: Run a Test Boot
Finally, the moment of truth, it’s time to see if everything has been installed correctly, and you have to perform a trial test boot. Attach the power cable and switch ON your PSU. Attach the display port or HDMI to your monitor screen to enable display. Press the power button, and the BIOS setup screen will appear on startup if everything is hooked up correctly.
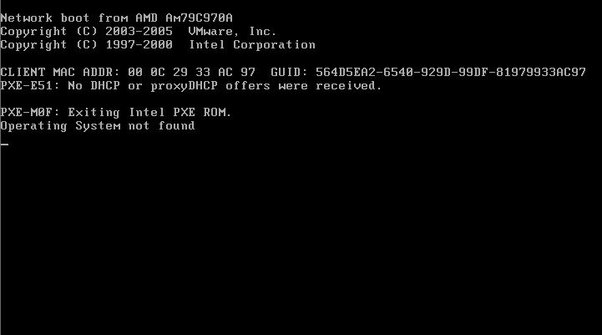
If your PC does not switch ON properly, you can check the connections from the motherboard to ensure that the power cables from the PSU and switch connectors from the front panel are plugged in correctly. You might hear a sound code following beeps or blinking LEDs indicating different issues. If you hear any warning signs from the motherboard, read the manual and retrace all your steps to check if everything is done correctly. If everything is done right, it is either faulty hardware or a power supply issue.
Step #10: Installing OS and Drivers
The final step is to install the operating system on your newly built gaming PC. Gamers usually go for Windows PC as it’s the most commonly used operating system in the gaming community. You’ll have to press the ESC or Enter key on startup to access the startup menu, and from there, you can install Windows using a bootable hard drive.
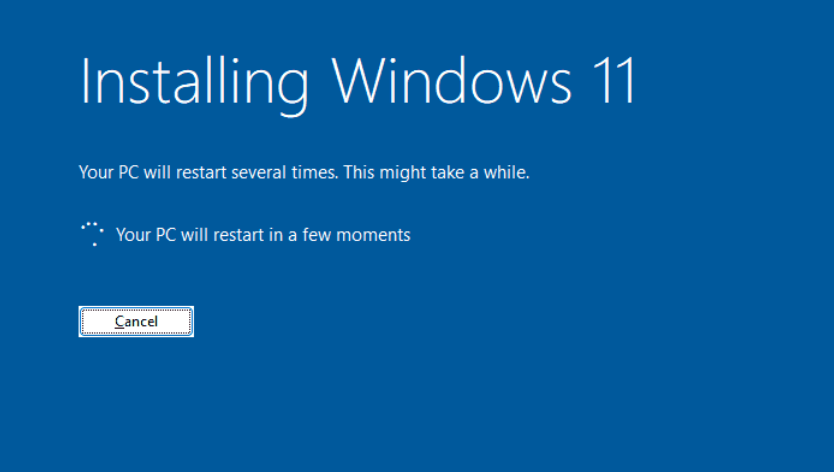
Furthermore, installing all the drivers in Windows 11, especially for your GPU, is important if you want everything to work correctly. An RGB software could be a useful option to control any lighting setup for the fans or LED lights attached to your computer system. Rest assured, you’re already with your newly built gaming rig.
Final Words
Building the best gaming PC is the ultimate dream of every gamer. However, it requires some effort and research to put in your rig correctly to save it from becoming a failed lab experiment. Therefore, we presented a detailed guide to help you build the right gaming PC. We hope our guidelines were helpful enough to assist you in putting together the right PC build with the best hardware for your favorite games.