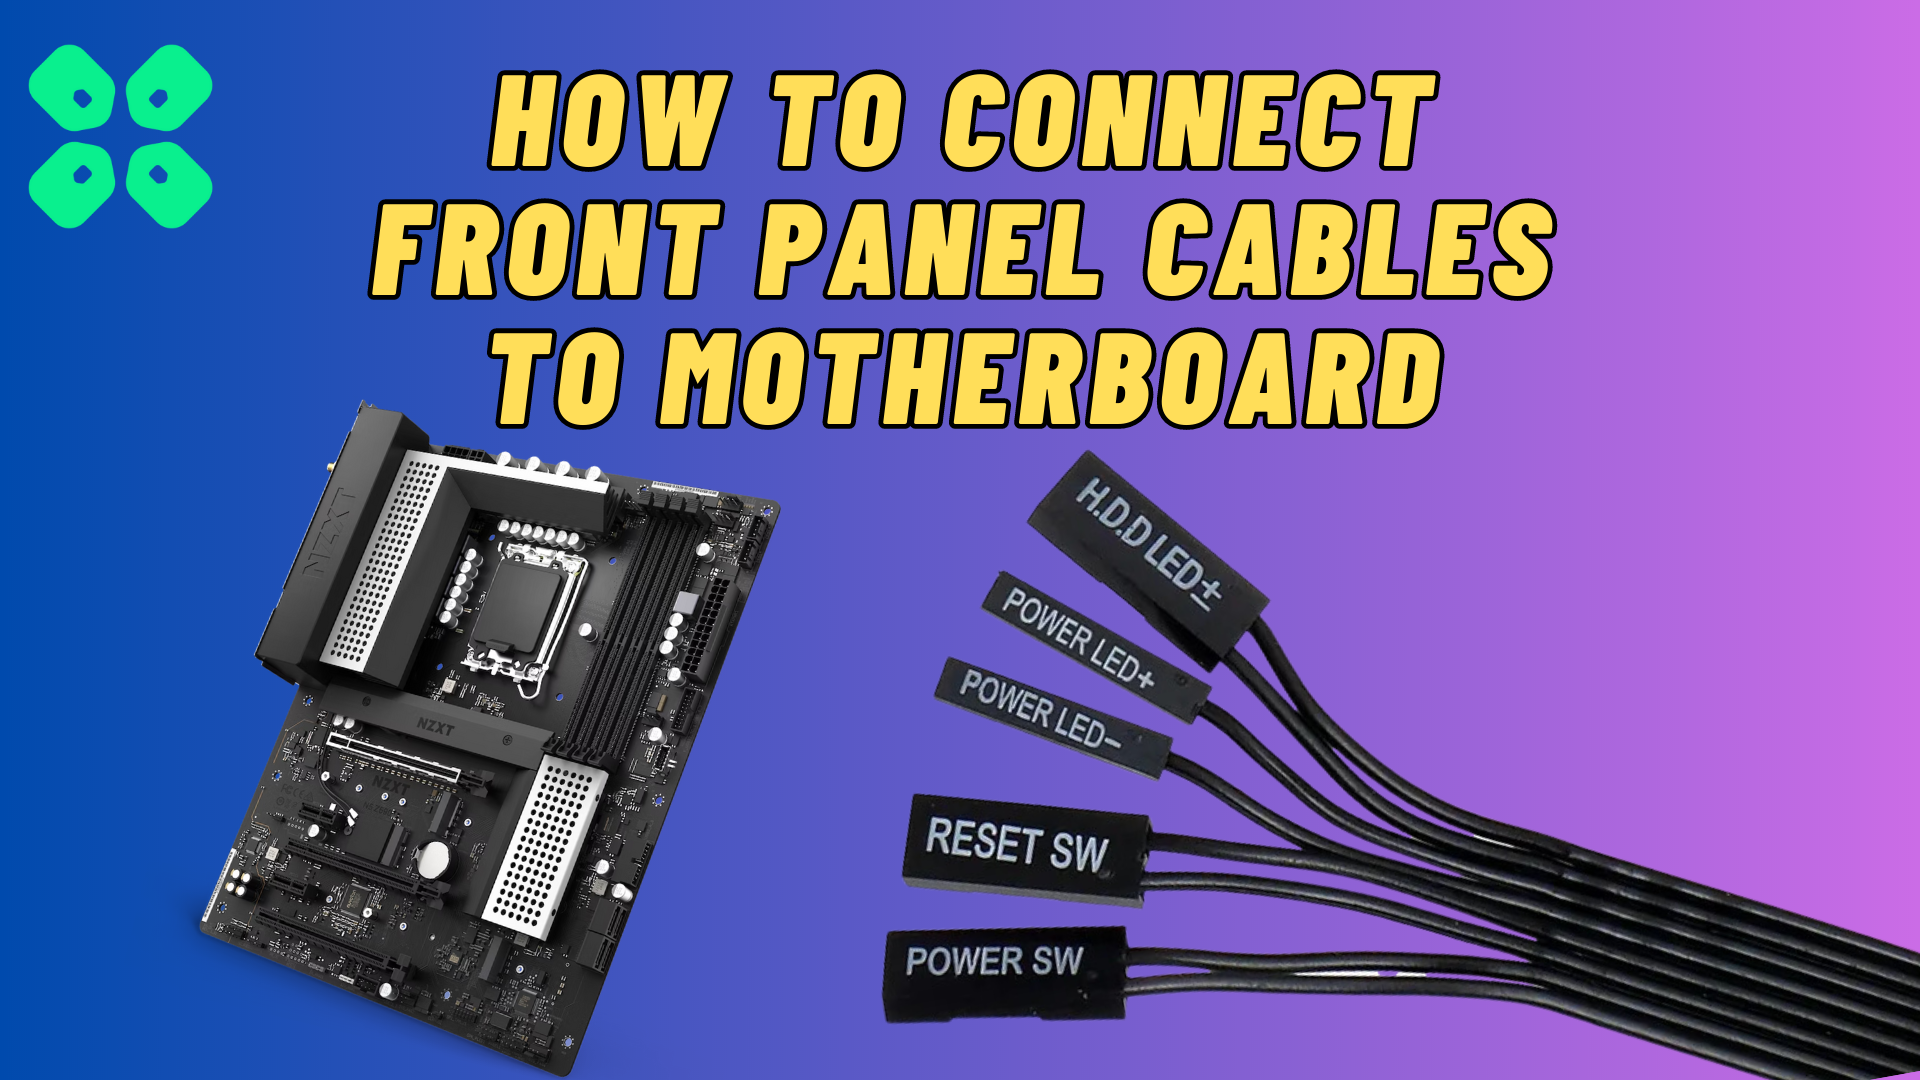
If you’re looking for how to connect front panel cables to your PC’s motherboard, try this easy step-by-step method to get the job done in minutes.
Connecting each cable to your PC’s motherboard can get tricky when you don’t have the right knowledge of electronics. The same confusing challenge is faced when you connect your computer system’s front panel wires to the motherboard. Luckily it is simpler than you think and requires only a few minutes.
In this article, we will guide you on how to connect the front panel cables to the motherboard by following an easy step-by-step method. We will also discuss how to route the front panel cables before connecting them to their respective headers attached to the motherboard.
Routing Front Panel Cables Before Connecting to Motherboard
Preparing your computer system’s front panel cables to route them through the case of your computer system is essential so they can pass through proper channels by following these steps.
- Untie the bundle of cables and pass them through the cutout in your computer system’s case.
- Ensure to pass these cables are through the proper channels to reach the headers on the motherboard.
- Pull the cables from the cutout to the motherboard’s front side.
- Carefully inspect these cables to make sure they are correctly reaching the motherboard.
- If you find a loosely bounded cable, tuck it slightly and use zip ties to hold them firmly.
Before connecting the cables, make sure you have your motherboard manual with you to understand the respective arrangement of headers to make the process quicker.
Connecting Front Panel Cables with Motherboard
To connect your front panel cables with the system’s motherboard, follow these step-by-step guidelines to achieve the task successfully.
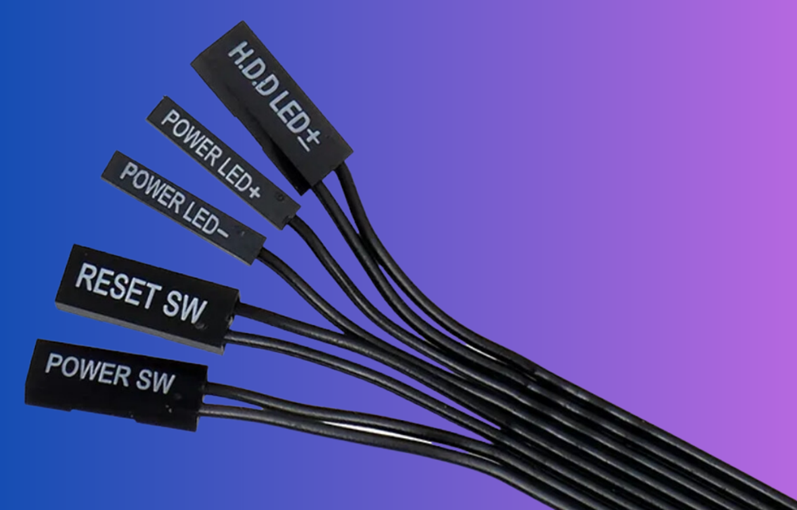
Connecting Front Panel Switches and LEDs with the Motherboard
Almost every computer system case will require you to connect the switches and LEDs with the motherboard from proper indications of boot sessions. First, we will connect the front panel cables to the motherboard.
Connecting Power Switch Cable with Motherboard
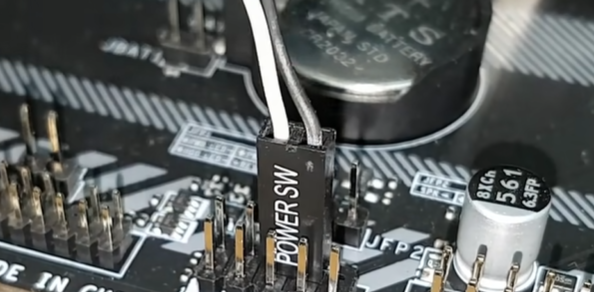
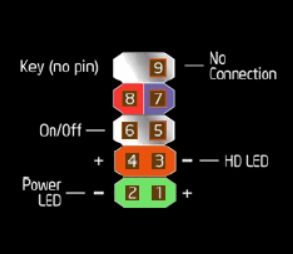
- Next to the power LED port headers, you’ll find the power switch port arrangement.
- Make sure the power cable connector side with text is facing upwards.
- Connect the power cable with the power switches in the motherboard.
Connecting Power LED Cables with Motherboard
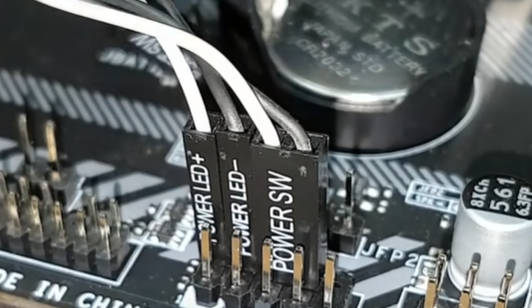
- Take both powers LED cables indicating the positive ‘+’ and negative ‘-‘ signs.
- Plug in the positive ‘+’ LED power cable in the left power LED port of the two-pin arrangement.
- Plug in the negative ‘-‘LED power cable in the right power LED port of the two-pin arrangement.
Connecting HDD LED Cable with Motherboard
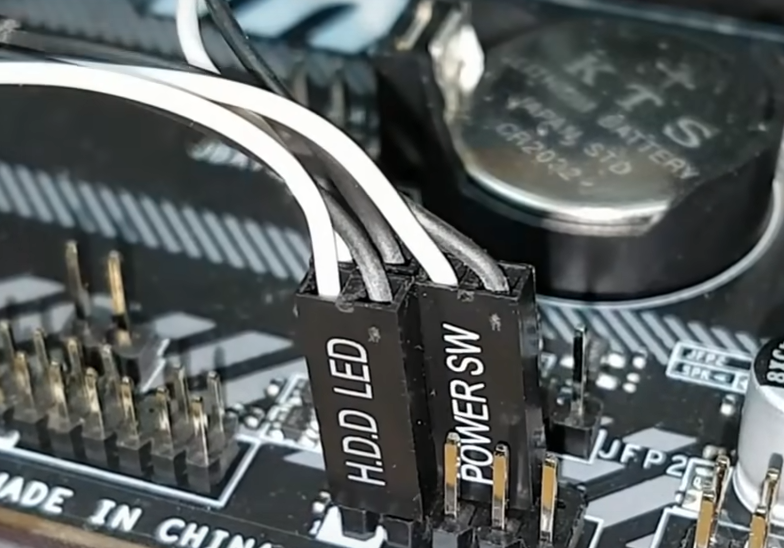
- Right below the power LED port arrangement is the drive LED connecting ports.
- Make sure the HDD LED connector side with text is facing upwards.
- Connect the HDD LED cable in the drive LED two pins.
Connecting Reset Switch with Motherboard
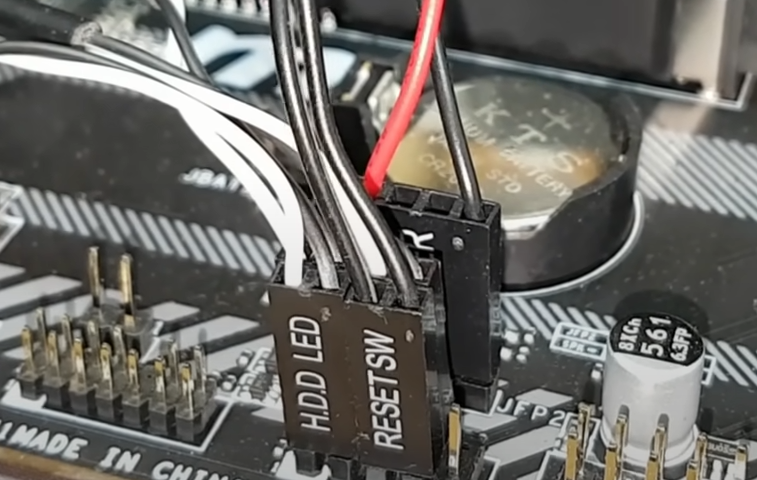
- The reset Switch pins are right below the power switch port arrangement.
- Make sure the reset switch connector side with text is facing upwards.
- Insert the reset switch cable in the two-pin reset switch arrangement, and you’re done.
After interesting all these connectors, we are majorly done with connecting the front panel cables with the motherboard.
Connecting Front Panel USB Slots and Audio Ports with Motherboard
The tricky part of connecting front panel cables is over, and now we will proceed to connect front panel multimedia ports with the motherboard by following some easy steps.
Connecting Front Panel Audio Cables with Motherboard
To connect the front panel audio cables with your motherboard, look for the following arrangement of ports and cables.
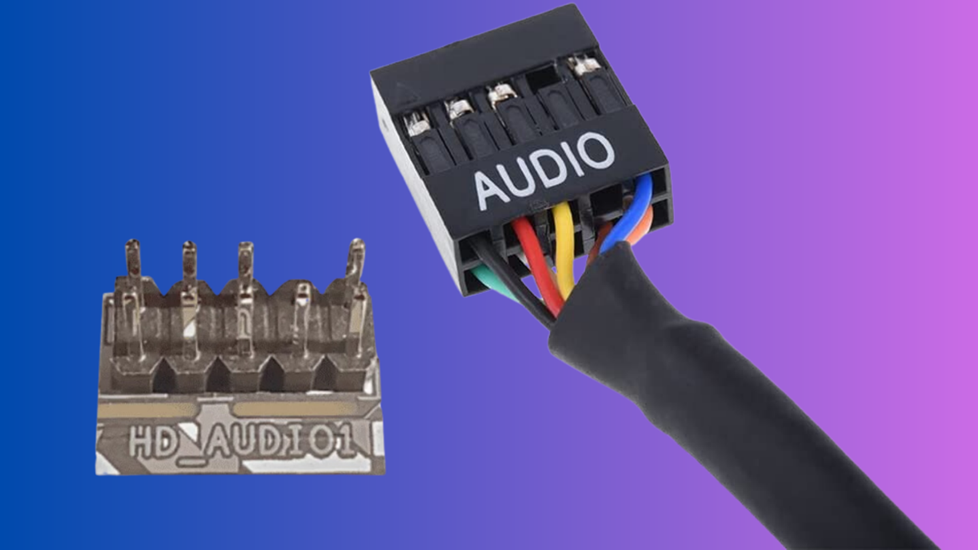
- Take the front panel audio cable from the opening end of the pc case.
- Ensure the side with the connector’s text aligns with the text on the audio pin arrangement on the motherboard.
- Connect the audio pin carefully and ensure it fits firmly in the port. And you’re all done.
Connecting USB 2.0 Cable with Motherboard
To connect the front panel USB 2.0 panel cable with the motherboard, identify the following cable and port featured in the figure below.
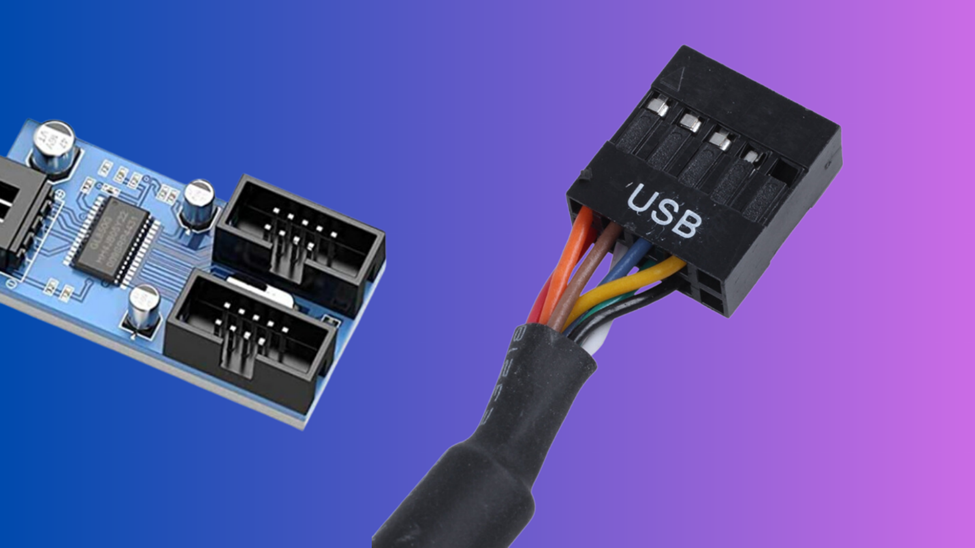
- Take the USB 2.0 cable and look for the 9-pin USB port in the motherboard.
- You may find more than one USB 2.0 port in your computer’s motherboard.
- Connect the USB 2.0 front panel cable and connect it with any of the USB 2.0 ports in the motherboard.
- Make sure the text side of the USB 2.0 cable aligns with the text in the 9-pin connector.
Connecting USB 3.0 Cable with Motherboard
To connect the front panel USB 3.0 panel cable with the motherboard, identify the following cable and port featured in the figure below.
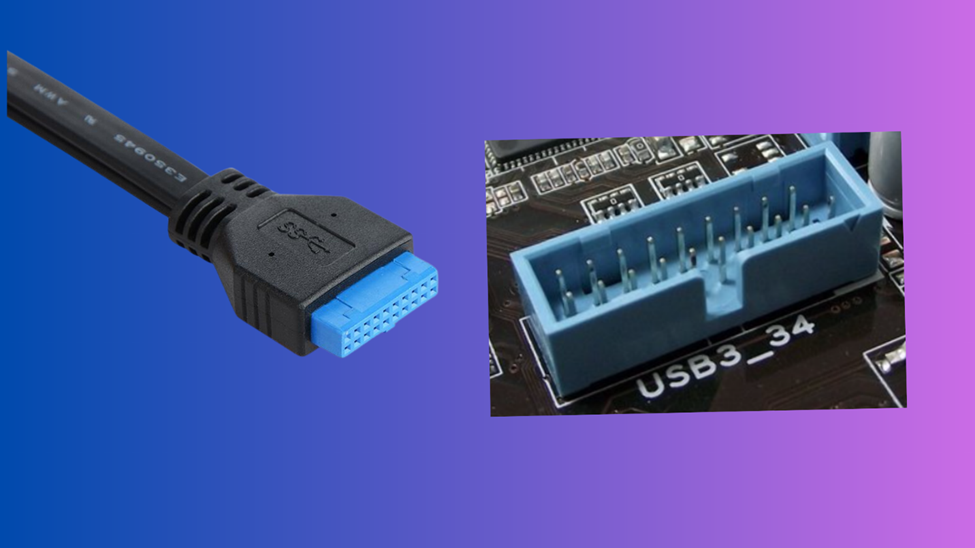
- Take the USB 3.0 cable and look for the 19-pin USB port in the motherboard.
- You may find more than one USB 3.0 port in your computer’s motherboard.
- Connect the USB 3.0 front panel cable and connect it with any of the USB 3.0 ports in the motherboard.
- Make sure the text side of the USB 3.0 cable aligns with the text in the 19-pin connector.
Once you’ve connected all the cables mentioned to their ports on the motherboard, you’re all done with connecting the front panel cables with your PC’s motherboard.
Conclusion
Front panel cables of a computer system are among the most tedious cables to connect with the motherboard compared to any other attachments. However, you should be careful while plugging in these cables as you might bend the pins if pushed with greater force. We hope our guidelines helped you connect the front panel cables with your PC’s motherboard.
FAQ
How to Identify the Positive Side of Front Panel Connectors?
Each front panel connector consists of a two-pin arrangement. On the connector’s end and the header’s port on the motherboard, you may find an arrow that indicates the positive side, or you can align the text on the connector with the port to plug it in correctly.
Do all Motherboards Consist of Front Panels?
There is no standard layout for the front panel design, and it depends on the number of ports and the PC case size. However, 90% of the motherboard designs have the same front panel layouts, and some feature color codded differences to make the identification more convenient.