Have you newly purchased Asus ROG Ally? Here is how you can perform the initial setup for ROG Ally for first time use with Windows and Armoury Crate.
Asus ROG Ally is one of the best handheld gaming consoles available online and it also seems to be the most compatible one yet. This console can easily run Nintendo games, Steam games, and Xbox games with its Windows 11 operating system. Now if you have newly purchased the console, then you’ll have to go through the ROG Ally initial setup with Armoury Crate and Windows setup which is fairly simple.
To setup Asus ROG Ally first time use, simply switch ON your console by pressing the power button and wait until the Windows logo appears. Add your credentials using the on-screen keyboard and follow the prompts on the screen to select your preferred settings. The same process is followed with the Armoury Crate which takes only a couple of minutes.
To explain things more clearly, we have written a detailed guide on how to perform initial setup on Asus ROG Ally for first time use. We will also share the guidelines on how you can use the Asus ROG Ally like a PC for convenience of operation.
How to Use Asus ROG Ally Like a PC
The control setup to access the keyboard and shortcuts on Asus ROG Ally is pretty simple and here is how you can use the controls to operate it like a PC.
- The right joystick performs as the mouse cursor.
- The left ‘RT’ button performs as the right click and ‘LT’ functions as the left click like mouse buttons.
- The keys on the d-pad or left joystick can be used for navigation to highlight the options.
- The ‘A’ button works like the Enter function and you can use it to select anything on the screen.
- To open the keyboard on-screen, tap on the input field or press M1/M2 button with the ‘Up’ key on the D-pad to instantly open the on-screen keyboard.
You can also connect Asus ROG Ally with a wireless mouse or keyboard via Bluetooth for ease of use if you’re not used to the interface of Asus ROG Ally. Once you have completed the setup, you can also remap buttons on ROG Ally to set primary and secondary shortcuts.
Setting Up Windows on Asus ROG Ally
To perform initial setup on Asus ROG Ally first time setup use follow these these steps.
- Press and hold the Power Button to switch ON Asus ROG Ally and it will prompt you to the Windows logo.
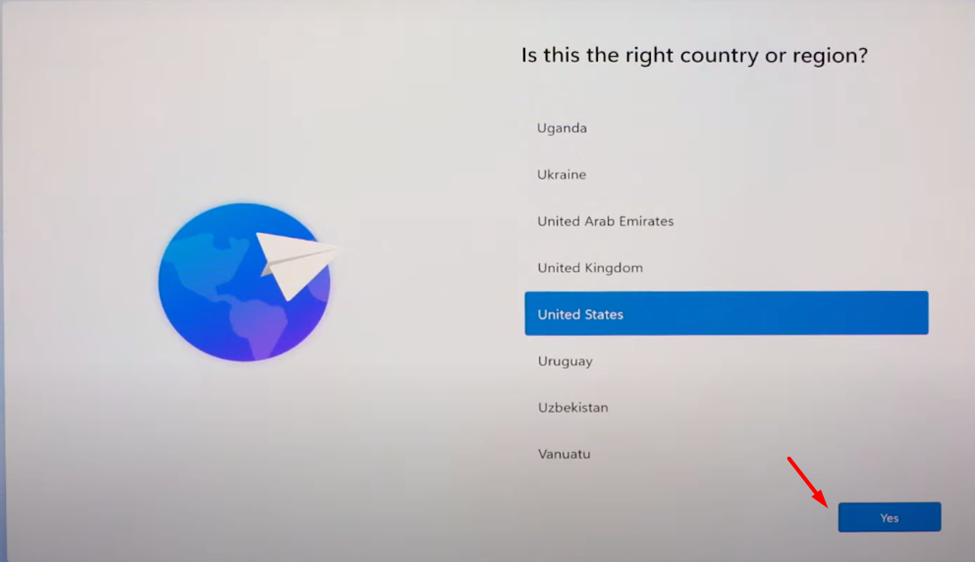
- Select your language from the region and country section and tap ‘Yes’ to proceed.
- Select the keyboard layout and optional secondary keyboard layout.
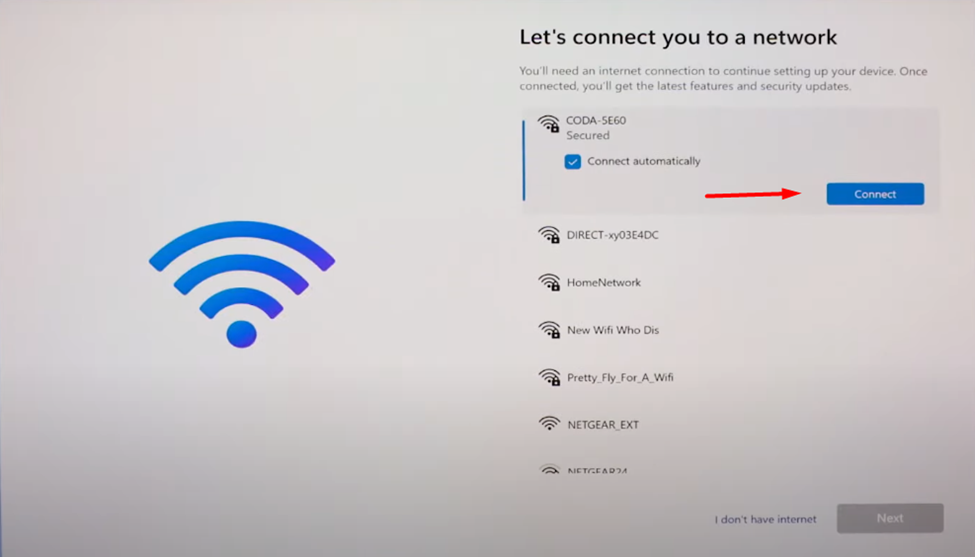
- Now you have to connect ROG Ally with a Wi-Fi network. Tap to select a network from the list, tap ‘Connect’ and enter the password using the on-screen keyboard, and tap ‘Next.’ Then let the console check for updates and do not let the console shut down during this process.
- Accept the Windows 11 License and Agreement by selecting ‘Accept.’
- Now you have to name your device using the on-screen keyboard. Then click ‘Next’ to proceed. This step is optional and you can also skip it for the moment if you want.
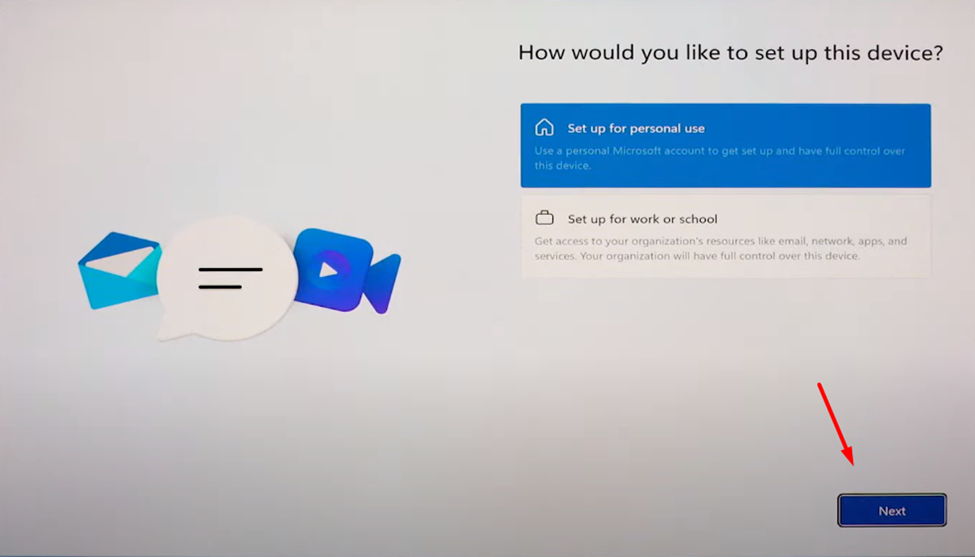
- Select ‘Set up for personal use’ and tap ‘Next’ to proceed enter your Microsoft Account credentials to proceed.
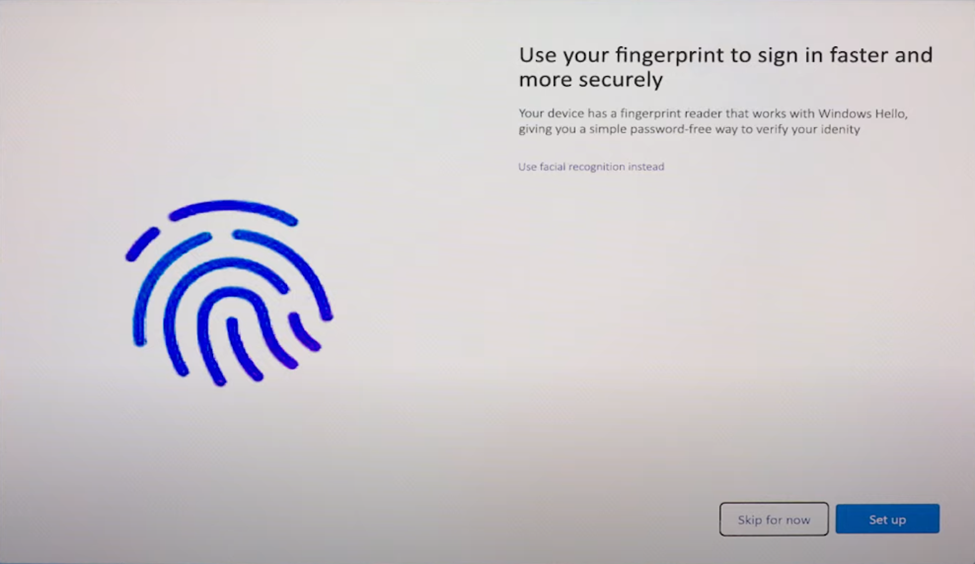
- Once you’ve signed in, you can set up Windows Hello with fingerprint recognition. The fingerprint sensor is located on the power button. Tap ‘Set up’ and you can gently tap on it to let it scan your finger in different orientations. You can also select ‘Skip for Now’ to set it up later.
- Tap ‘Create a PIN’ and then enter a code twice to click ‘OK’ for signing in to ROG Ally.
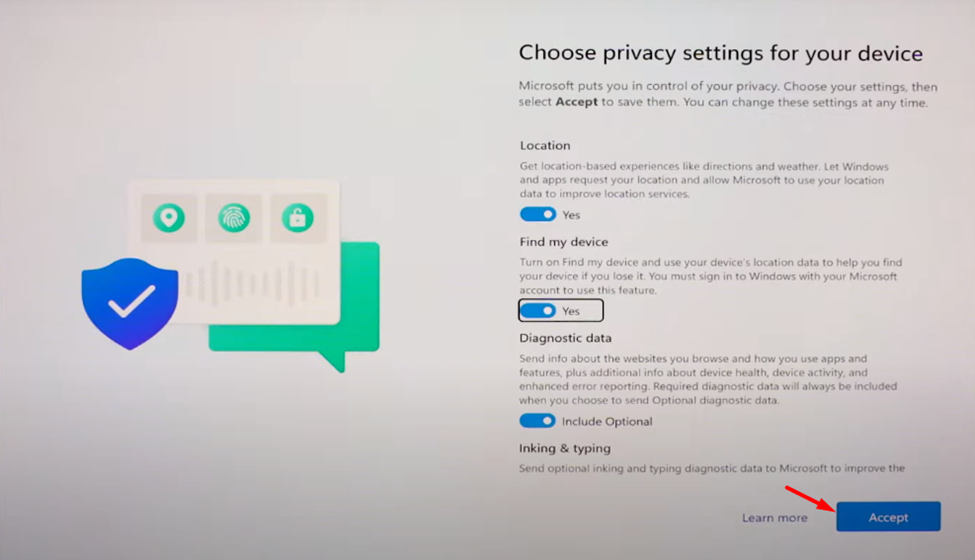
- From the next screen, select ‘Set up as new device’ and click ‘Next’ to select the privacy options, and tap ‘Accept’ to proceed.
- You can further select ‘Gaming’ from Customize Your Experience Screen or select ‘Skip for now’ as it is not a mandatory part of the setup.
- Then select ‘Backup my files with OneDrive’ and tap ‘Next’ to proceed.
And you’re all done! Once you have completed the Asus ROG Ally first time setup the screen will proceed to Armoury Crate by following the prompts on the screen where you can further customize and personalize the experience.
Final Words
Handheld gaming has taken a giant leap with Asus ROG Ally as it supports Windows 11. This operating system compatibility has made ROG Ally much like a portable gaming PC in your hands. You can pretty much do anything on Asus ROG Ally that you can on a Windows desktop with a punch of gaming-optimized settings from AMD. Hopefully, this guide has helped you to correctly perform initial setup on Asus ROG Ally for first time use by following steps mentioned in this article.