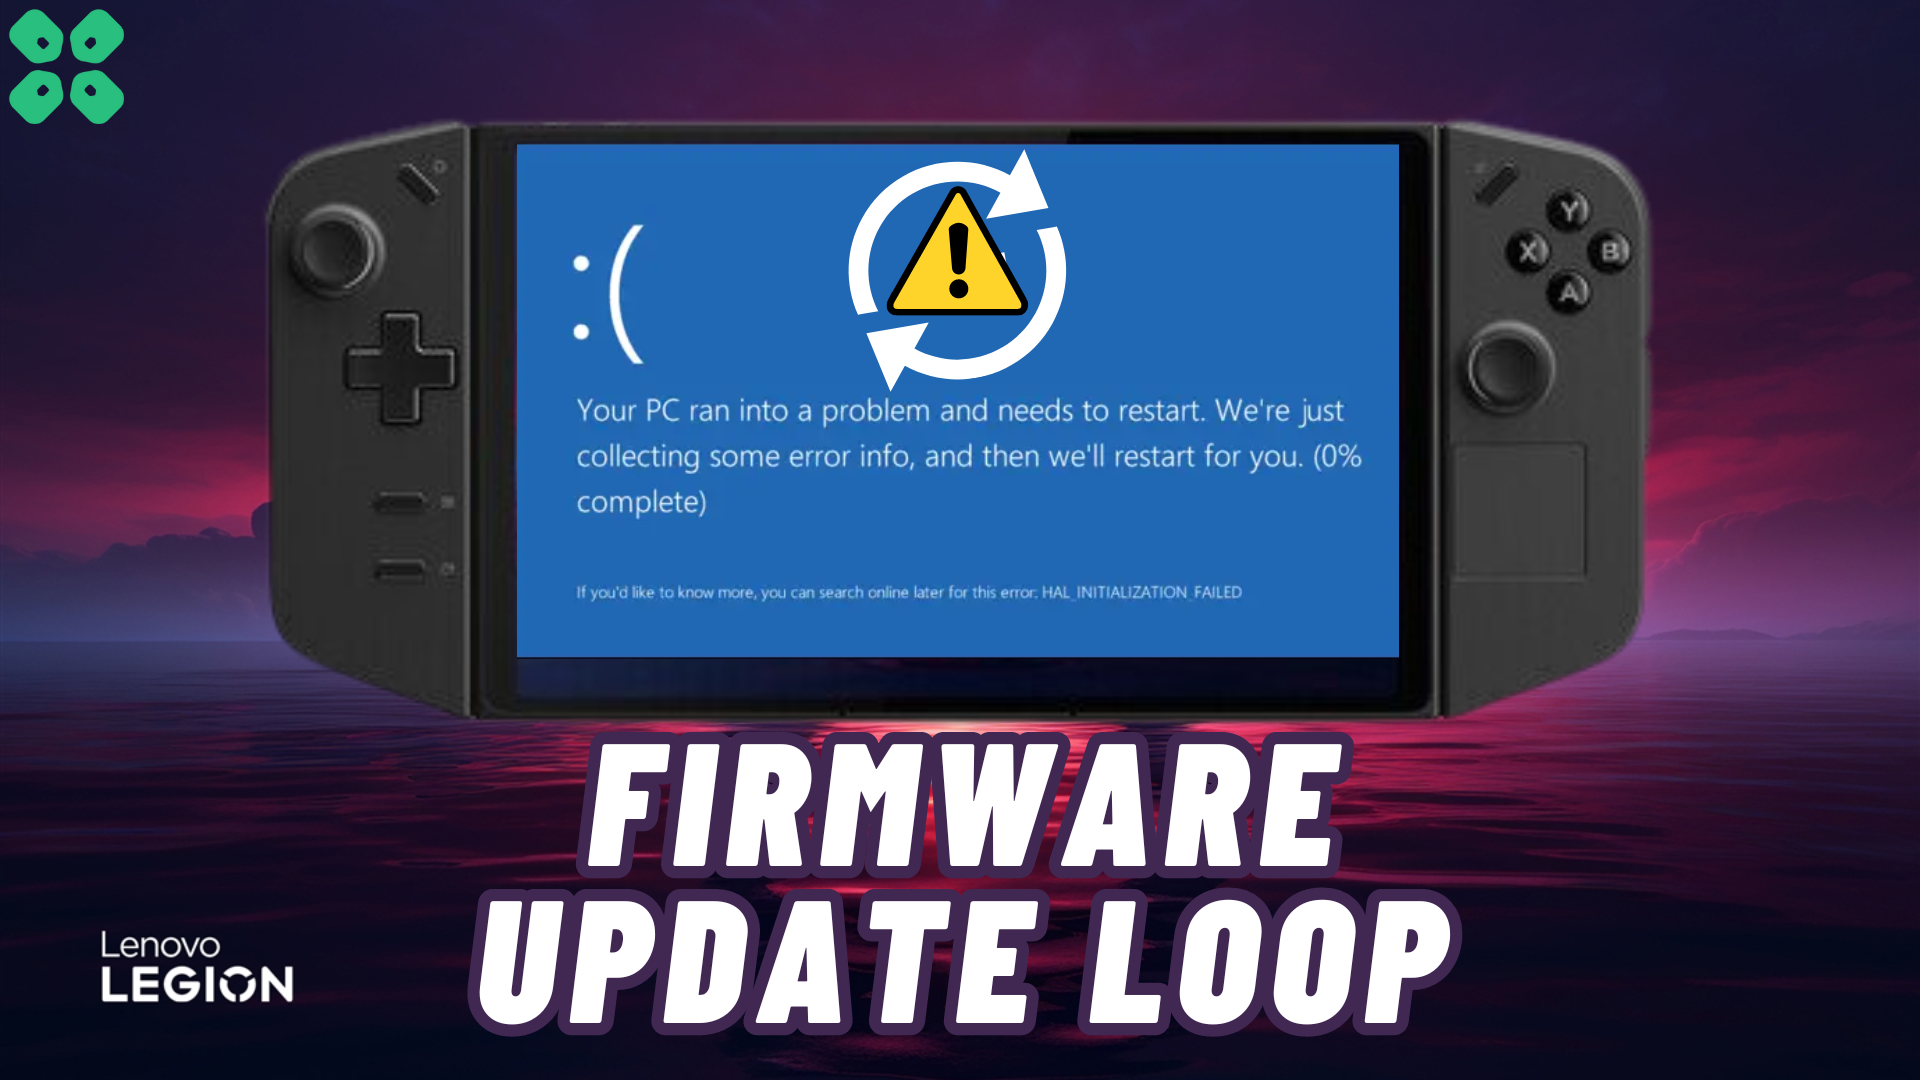
Lenovo is constantly releasing new firmware updates for Legion Go ever since its launch to improve battery life and to fix some of the common issues like slow wifi, Bluetooth not working, and microphone issues. Updating the firmware of any device running on batteries is a delicate job, especially for handheld gaming consoles like Lenovo Legion Go, which may result in possible crashing issues.
To get out of the firmware update loop causing firmware update issues with Legion Go, you can factory reset the console via Boot Menu. You can also try force restarting the console by pressing the power button for up to 10 seconds.
The best way to avoid the firmware update loop, make sure you have plugged in the charger while installing the new firmware update. But if you have encountered this issue, then we have discussed 4 effective methods to fix the firmware update loop on Legion Go.
Solution #1: Restart Legion Go Console
Software and hardware-related issues on the Lenovo Legion Go can occur due to glitches or malfunctions, which can be fixed with a simple reboot by following these steps.
- Press and hold the Power Button featured on the top right side of your Legion Go console for at least 10 seconds.
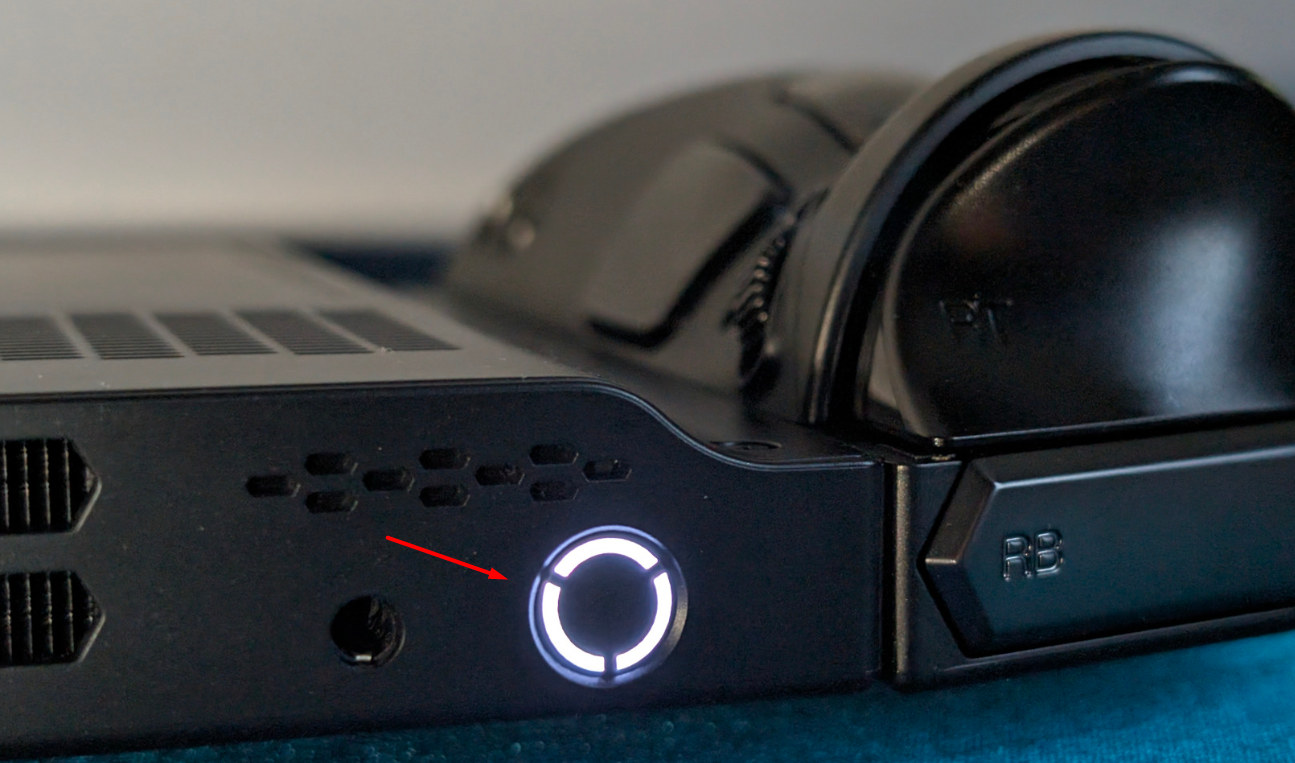
- Once the screen shuts down, it means the console has turned OFF.
- Now press the power button again to restart the console.
Solution #2: Factory Reset Legion Go from BIOS
Factory resetting Lenovo Legion Go is helpful if your console is stuck in an update loop or it’s simply not booting properly. Here is how you can factory reset Legion Go via BIOS.
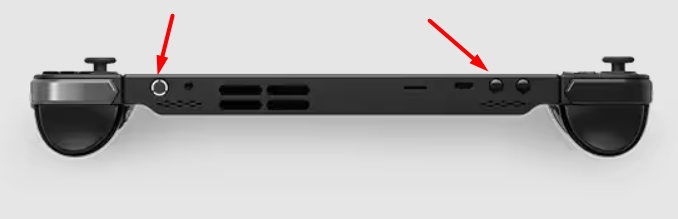
- Press the Power Button of your Legion Go to shut down the console.
- Once the console is properly switched OFF, press the Volume Down button (-) and then press the power button once. Keep holding the Volume Down button until the Novo Boot Menu appears on the screen.
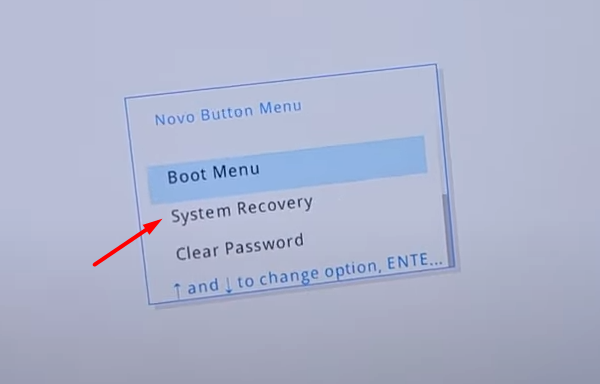
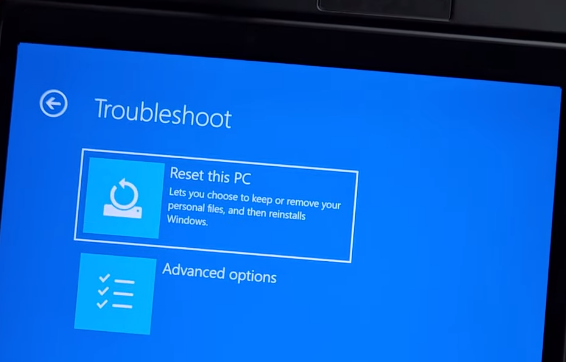
- Here, you can select ‘System Recovery’ to open the Advanced Startup Menu.
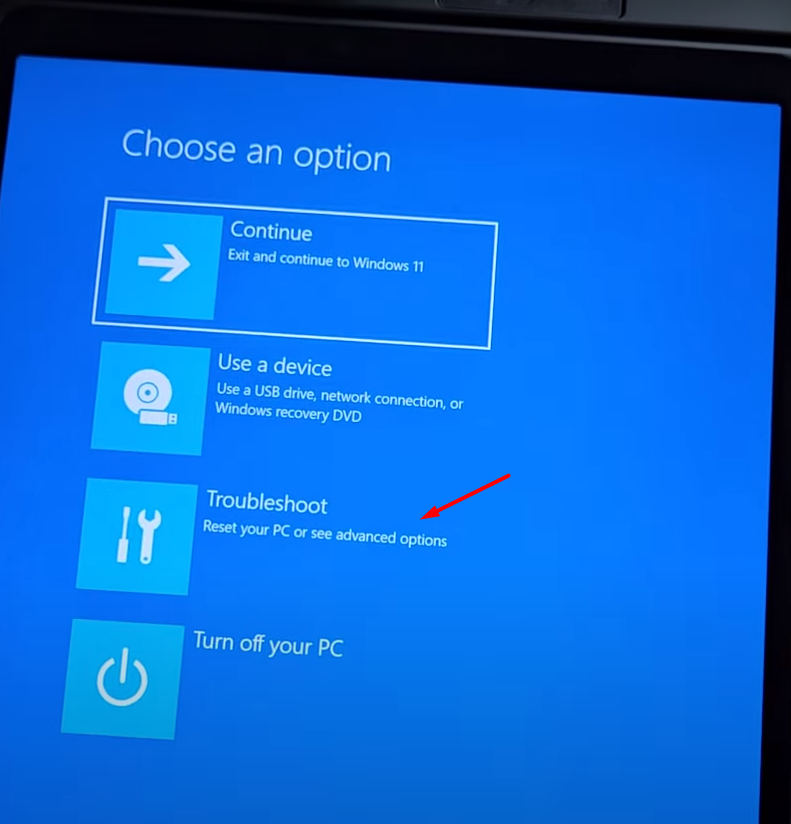
- Select ‘Troubleshoot.’
- Select ‘Reset This PC.’
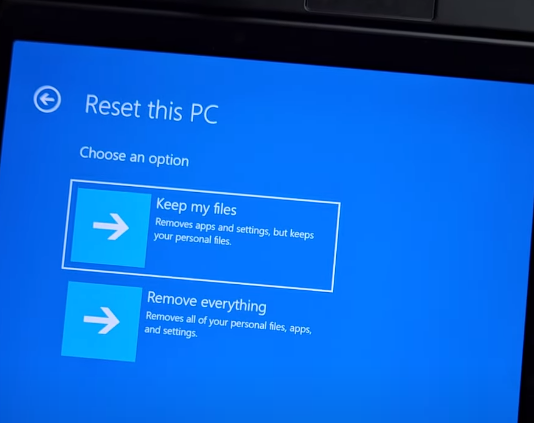
- Now you must select ‘Keep my files’ OR ‘Remove everything’ according to your preference.
- Then select ‘Local reinstall’ OR ‘Cloud Reinstall’ from the options, depending on your preference.
- Then follow the prompts on the screen by clicking ‘Next’ to factory reset Legion Go from the BIOS.
Solution #3: Charge your Console Properly
To avoid a firmware update loop on Lenovo Legion Go, it’s recommended to keep the console plugged into a charger. Always use the official Lenovo Legion 65W power adapter and USB Type-C that comes with it. Leave your console on charging for at least an hour until it automatically exits the firmware update loop.

Always let your console charge properly until it’s completely charged, and then unplug the port. Avoid lowering the battery to critical levels where the console shuts down abruptly, as it may cause permanent damage to battery cells.
Solution #4: Contact Support
If you are still facing issues with your Lenovo Legion Go console, we recommend contacting Legion Support to get 24×7 assistance via call and email. Your console may have some hardware or software issue causing the problem to persist.
If your console is still under warranty, you can also opt for the exchange or return option within 30 days from the date of purchase on the invoice.
Conclusion
Lenovo Legion Go firmware update loop can occur if the console shuts down abruptly due to a low battery or some other hardware malfunction. Therefore, you can get your console out of the not updating loop by applying the 4 step-by-step methods mentioned in our article. Hopefully, your issue has been resolved, and if you have any queries, let us know down in the comments.