Lenovo Legion Go has dominated the line-up of the best handheld gaming consoles with its powerful processor integrated with efficient GPU and Windows 11 compatibility. Playing AAA Games on this console is a real joy as it supports almost every game you can play on a Windows gaming PC. However, if you want to get a fresh start with your gaming console and are looking to factory reset your console, then here is how you can do it.
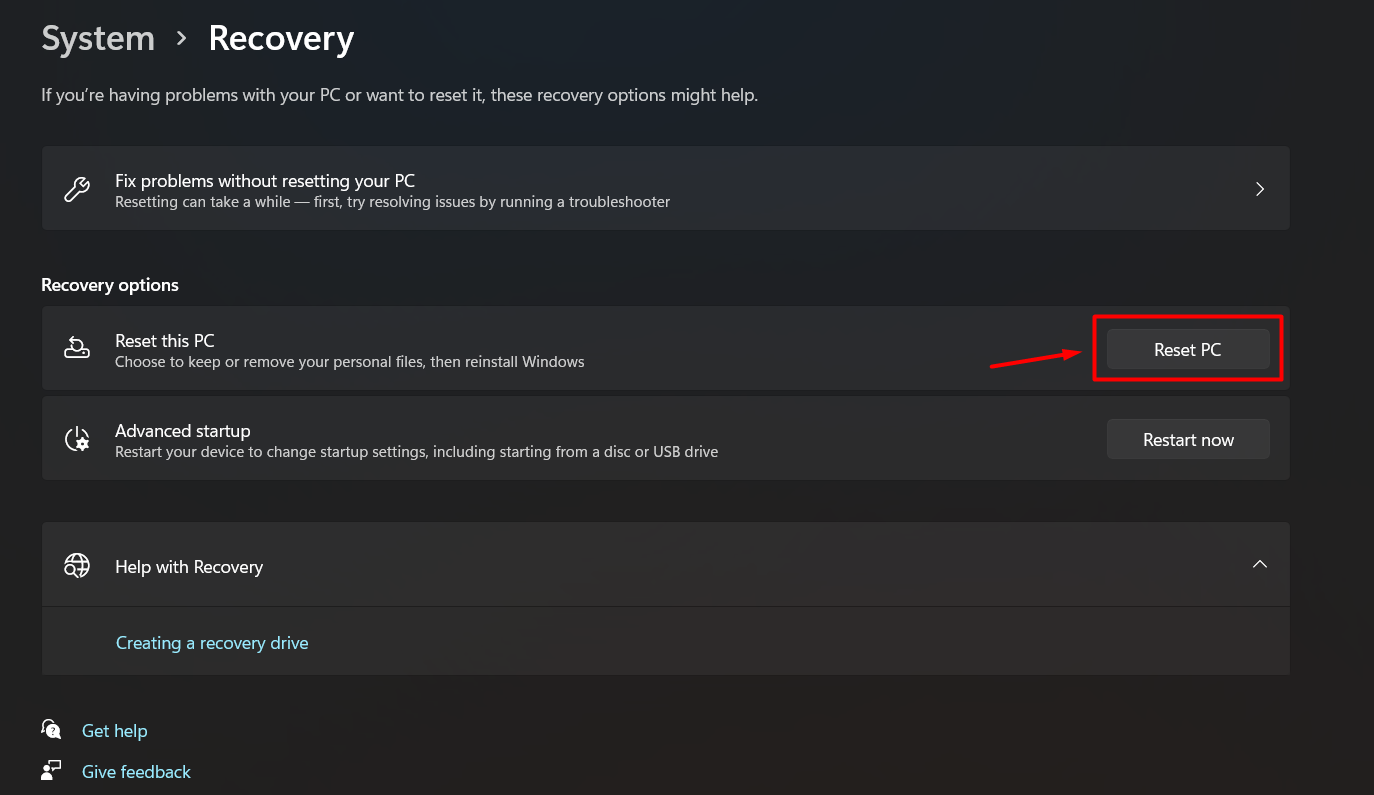
To factory reset Lenovo Legion Go, open Settings, go to System > Recovery, and select the ‘Reset PC’ button next to the Reset This PC option. Now you can select to either Keep your Files or if you want to delete everything, select ‘Remove everything.’ After a few minutes, your console will reset completely and restart like it’s fresh out of the box.
There could be many reasons why you may wish to factory reset the Legion Go console. To explain more briefly, we have written this detailed guide on factory resetting Lenovo Legion Go by following 2 easy methods.
Method #1: Factory Reset from Windows
Legion Go has Windows 11 as its operating system, which makes it easier for gamers to operate and explore troubleshooting features. To factory reset Legion Go from Windows, follow these steps.
- Open the Start menu from the Desktop of Legion Go console.
- Go to System > Recovery and find the ‘Reset this PC’ option.
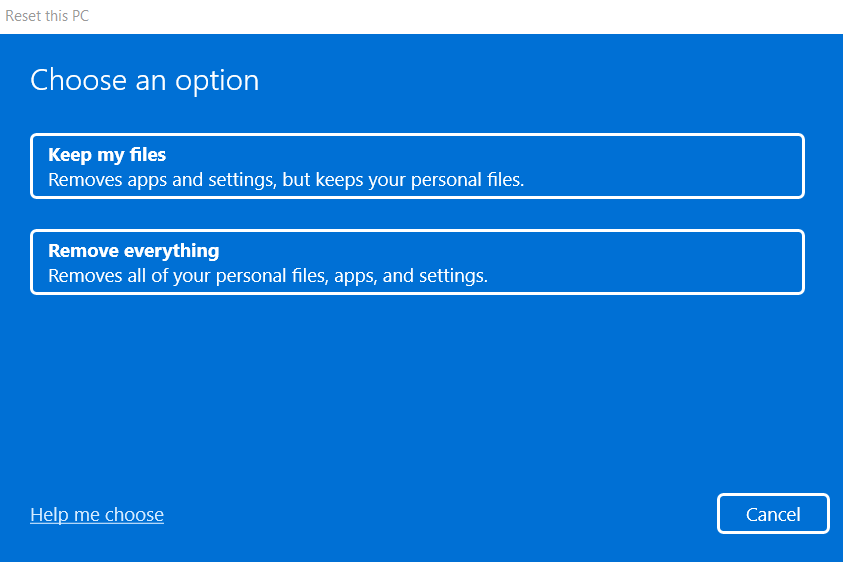
- Select ‘Reset PC’, and a new menu will appear.
- Select ‘Remove Everything’ if you want to wipe out all the data on the hard drives, OR you can select ‘Keep my Files’ to reset Windows and its settings only.
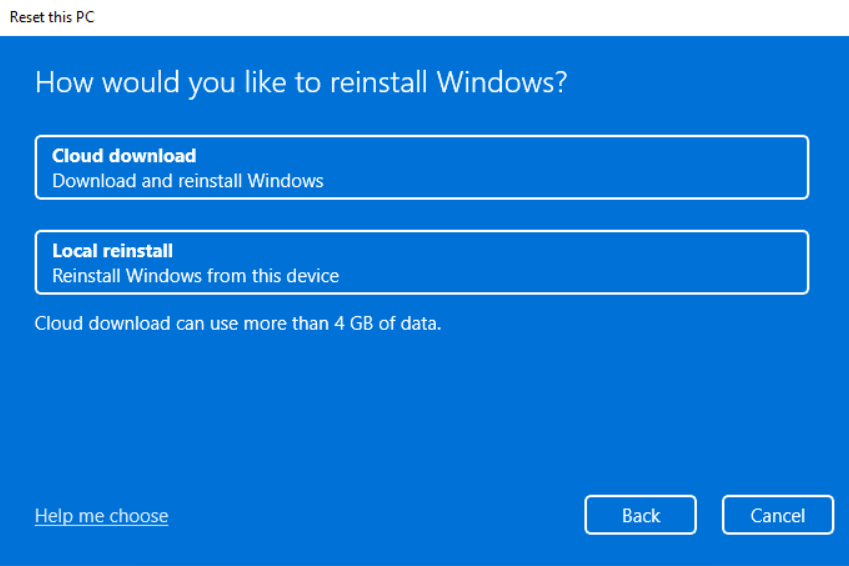
- Next, you can select either ‘Coud Download’ to install a fresh copy of Windows from the internet or you can select ‘Local Reinstall‘ to factory reset Windows from the same device.
- If you have chosen ‘Local Reinstall,’ then follow the prompts on the screen by clicking ‘Next’ to complete the factory reset of the Legion Go console.
Method #2: Factory Reset Legion Go from BIOS
This method to factory reset Lenovo Legion Go is helpful if your console is stuck in an update loop or it’s simply not booting properly. Here is how you can factory reset Legion Go via BIOS.
- Press the Power Button of your Legion Go to shut down the console.
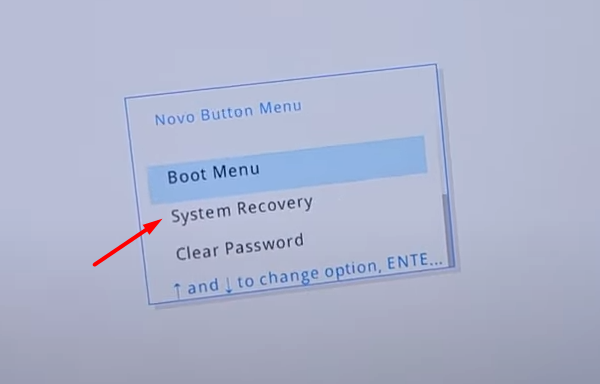
- Once the console is properly switched OFF, press the Volume Down button (-) and then press the power button once. Keep holding the Volume Down button until the Novo Boot Menu appears on the screen.
- Here, you can select ‘System Recovery’ to open the Advanced Startup Menu.
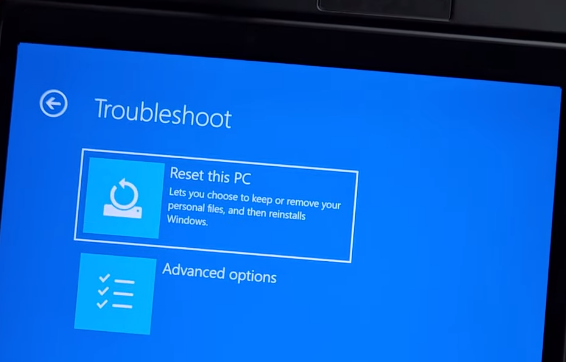
- Select ‘Troubleshoot.’
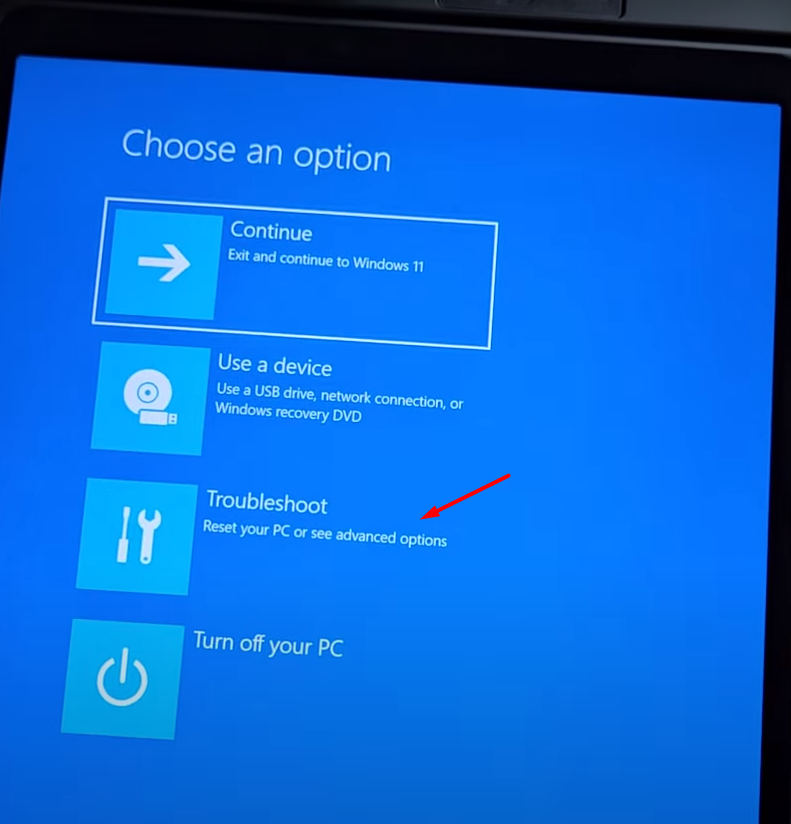
- Select ‘Reset This PC.’
- Now you must select ‘Keep my files’ OR ‘Remove everything’ according to your preference.
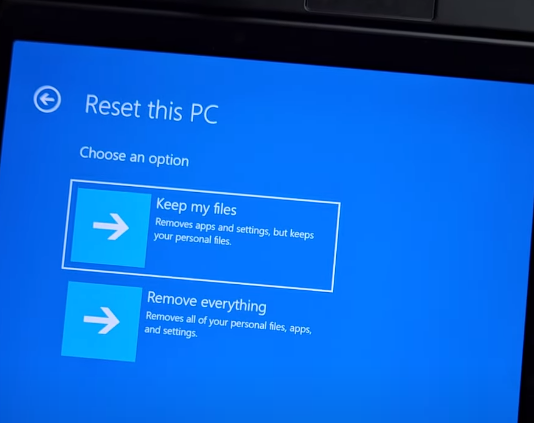
- Then select ‘Local reinstall’ OR ‘Cloud Reinstall’ from the options, depending on your preference.
- Then follow the prompts on the screen by clicking ‘Next’ to factory reset Legion Go from the BIOS.
How to Factory Reset Legion Go Controllers?
If your Legion Go controllers are malfunctioning or failing to connect, then it’s recommended to factory reset them by following these steps.
Left Controller
Press the L + LB + LS buttons simultaneously to reset the left controller of Legion Go.
Right Controller
Press the R + RB + RS buttons simultaneously to reset the left controller of Legion Go.
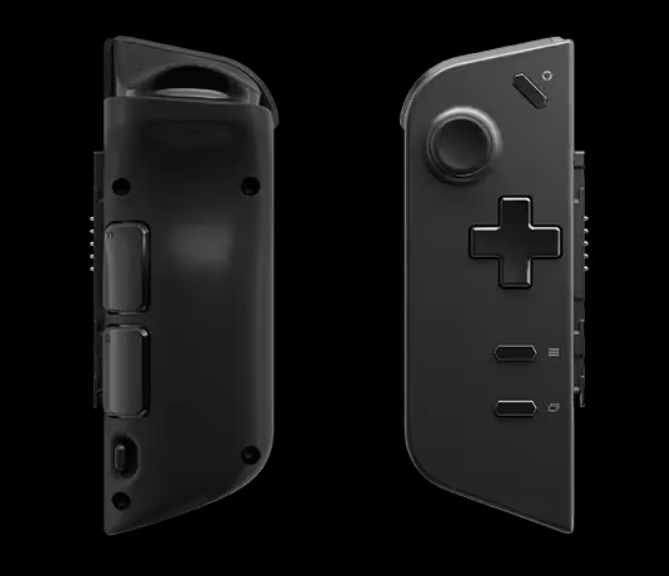
There is also a reset hole above the slide rail of both controllers, which is also known as the reset button. You can use a SIM card ejection pin to reset the controller by pressing the pinhole button on each controller while they are switched ON.
Conclusion
The process to factory reset Lenovo Legion Go is pretty much the same, as resetting any other Windows 11-based portable computer. With a factory reset, you can enjoy a fresh out-of-the-box experience with Legion Go and this troubleshooting may prevent any software or hardware glitches that occur on the console. We hope this article was helpful.