Slow Wi-Fi on Legion Go can be a nightmare since your multiplayer games and downloads completely rely on your internet connection. Since there is no way to connect an ethernet cable or 4G network support on Legion Go, you must have a reliable Wi-Fi connection.
Now, if you are facing slow Wi-Fi on Legion Go, it’s probably because of the metered connection. Moreover, if you have any automatic updates running in the background, they would consume more of your internet speed.
We have written this detailed guide with tried and tested methods to fix the slow Wi-Fi on Legion Go. We will also share some reasons you are facing slow Wi-Fi on Legion Go, which could be the root cause of the problem.
Why Am I Facing Wi-Fi Issues on Lenovo Legion Go?
Lenovo Legion Go runs Windows 11 home as the operating system, and the issues could be pretty much the same on the console as they are on a PC, which can occur for the following reasons.
- The metered connection is enabled in Windows on Lenovo Legion Go.
- Your Wi-Fi is malfunctioning due to certain hardware or firmware issues.
- There is a background process running that’s consuming more network resources.
- Automatic updates are consuming more networks.
- Your firmware needs an update to fix the bugs.
- The DNS is set to the standard path.
Fixing Slow Wi-Fi on Lenovo Legion Go
Here we have mentioned 6 step-by-step methods to fix slow Wi-Fi on Lenovo Legion Go with some hardware and software changes.
Fix #1: Restart Your Wi-Fi Router
This is probably the oldest trick in the book to solve a Wi-Fi issue, which still works. You can restart a Wi-Fi router by following these steps.
- Take the power adapter pin out of your Wi-Fi router.
- Wait for at least 5 minutes and then plug in the adapter to switch ON the Wi-Fi.
- Open Windows mode on the Lenovo Legion Go and search for Wi-Fi settings in the search bar.
- Press and hold on to the Wi-Fi network and tap ‘Forget.’

- You’re all set to reconnect to the Wi-Fi network by re-entering your password.
You can also check the control panel of your Wi-Fi network to reset the router while it remains plugged into the power outlet. However, the access to the control panel varies for each type of Wi-Fi, so you may have to check the router’s manual for it.
Fix #2: Disable Metered Connection
- Open Windows Mode on your Lenovo Legion Go and search Wi-Fi settings in the Start Menu.
- Tap on your Wi-Fi connection’s name to access its properties.
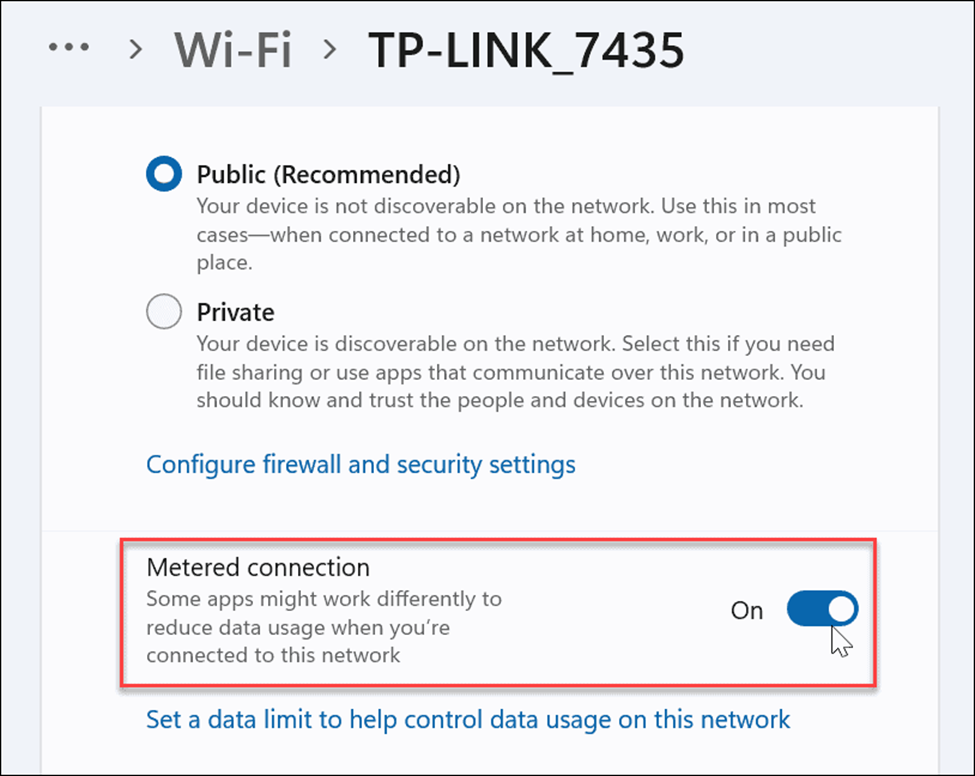
- Tap the toggle next to ‘Metered connection’ to disable it, and you’re done.
Now, you won’t have to worry about varying speeds on signal strength using a Wi-Fi connection on Lenovo Legion Go.
Fix #3: Troubleshoot Internet Connection
Windows troubleshooting is probably the safest way to resolve any issues automatically, which can be performed for the Wi-Fi connection by following these methods.
- Open Windows mode on Lenovo Legion Go and search Troubleshoot Settings in the Start Menu.
- Tap on ‘Other troubleshooters’ to access more options.
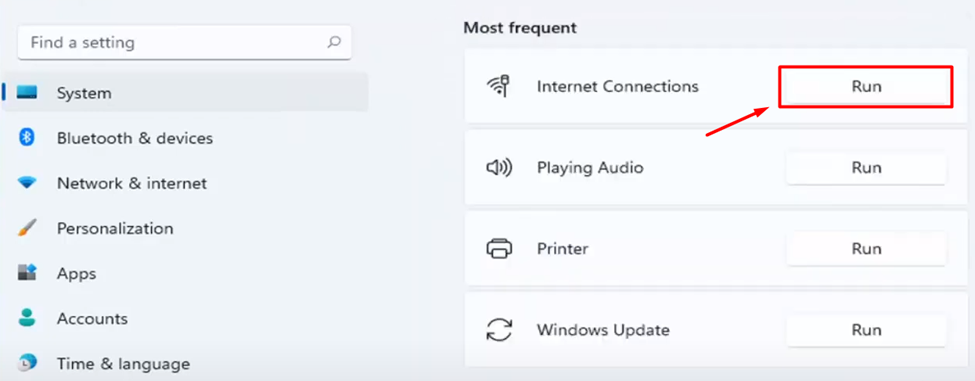
- Tap ‘Run’ next to the Internet Connections, and it will start diagnosing issues with your Wi-Fi.
Once the issues are discovered, Windows will apply possible software fixes to resolve slow Wi-Fi or connectivity issues with the Lenovo Legion Go.
Fix #4: Limit the Network Speed for Updates
Windows updates always occur in the background, which can consume the internet speed, causing Wi-Fi to become slower on Lenovo Legion Go. Therefore, following these steps, you can set a limit for internet speed consumption for updates.
- Open Windows mode on Lenovo Legion Go and go to Settings.
- Go to Windows Update > Advance options > Delivery Optimization.
- Toggle off ‘Allow downloads from other PCs’ and tap on Advance options.
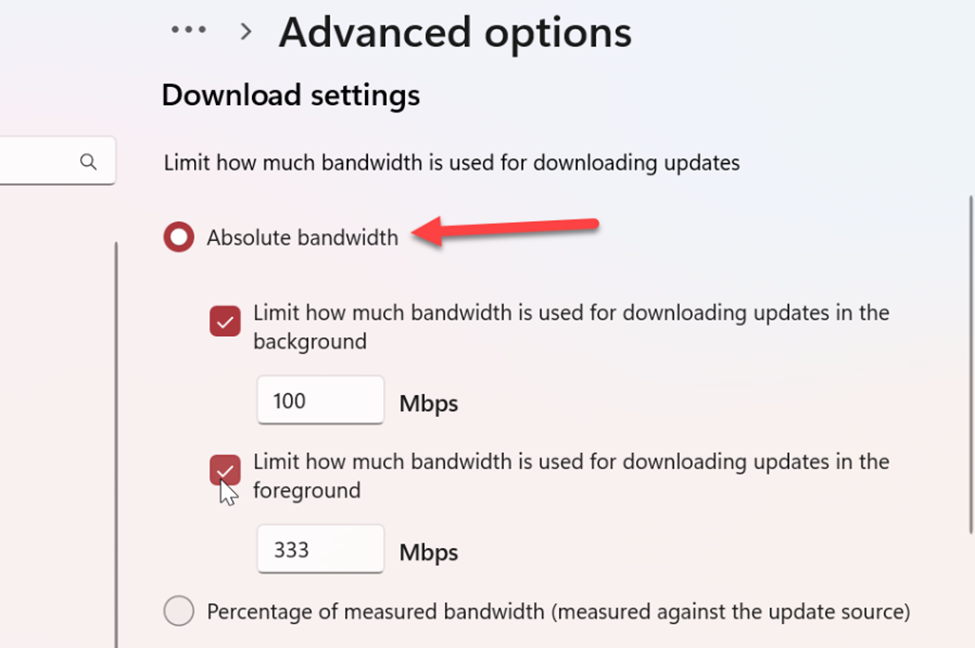
- Select ‘Absolute Bandwidth’ and check mark both Limit options.
- Set the speed limits you want to dedicate to both limits in the entry box.
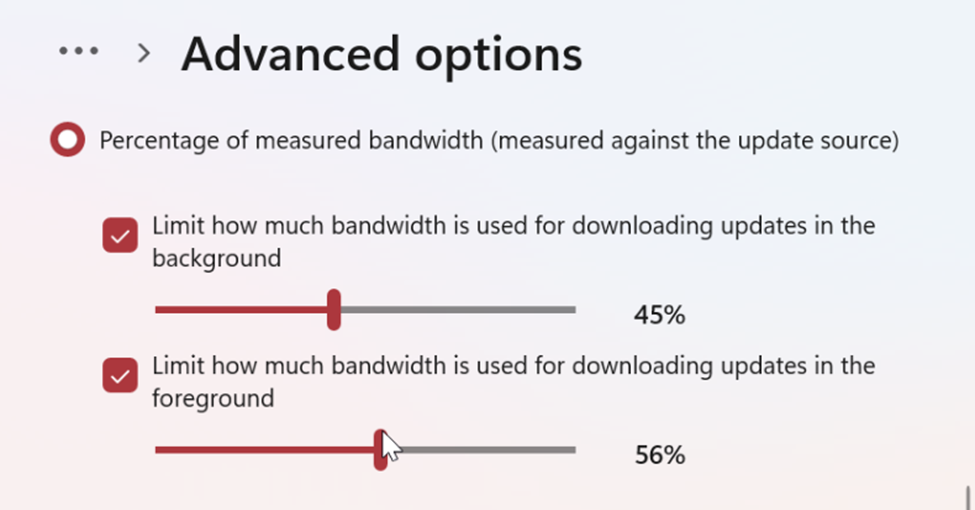
- Now tap the ‘Percentage of measured bandwidth’ and lower the percentages to bandwidths.
Once done, close the settings and restart the Lenovo Legion Go, and you’re all done.
Fix #5: Reset the Network
- Open the Windows mode on Lenovo Legion Go and go to Settings.
- Go to Network & Internet > Advanced network settings > Network reset.

- Tap ‘Reset now’ and restart the console to see if the internet speed has improved once you’re done.
Fix #6: Change DNS Server
If your DNS server is suffering from issues, it may affect the internet speed, causing slow Wi-Fi issues. Therefore, you can switch to open-source DNS by following these steps.
- Open Windows mode on Lenovo Legion Go and type Run in the Start Menu search to open the Run dialogue.
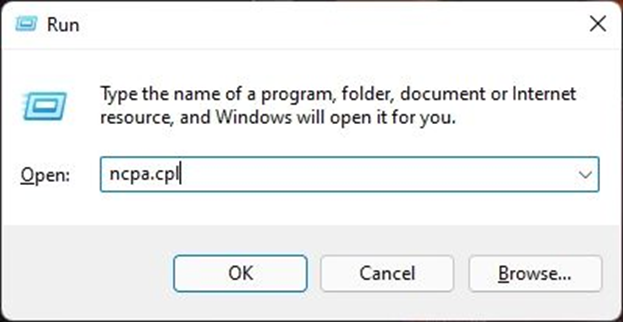
- Type ‘ncpa.cpl’ in the Run dialog and tap ‘OK.’
- The Network Connection windows will open, and here you have to open the ‘Properties’ of your Wi-Fi.
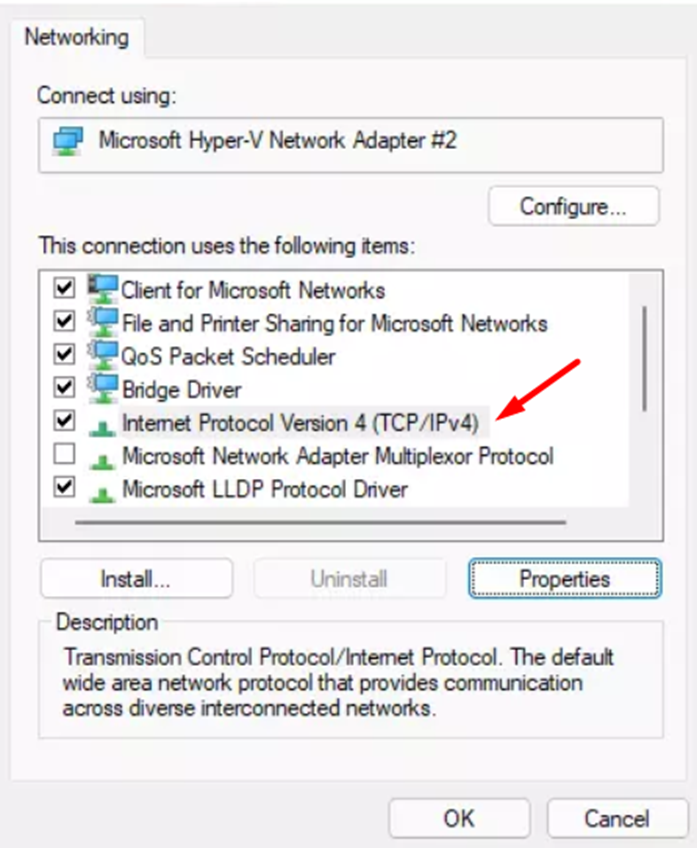
- In the ‘Networking’ tab, tap ‘Internet Protocol Version 4 (TCP/IPV4)’ to access its properties.
- Go to the ‘General’ tab and select ‘Use the following DNS.’
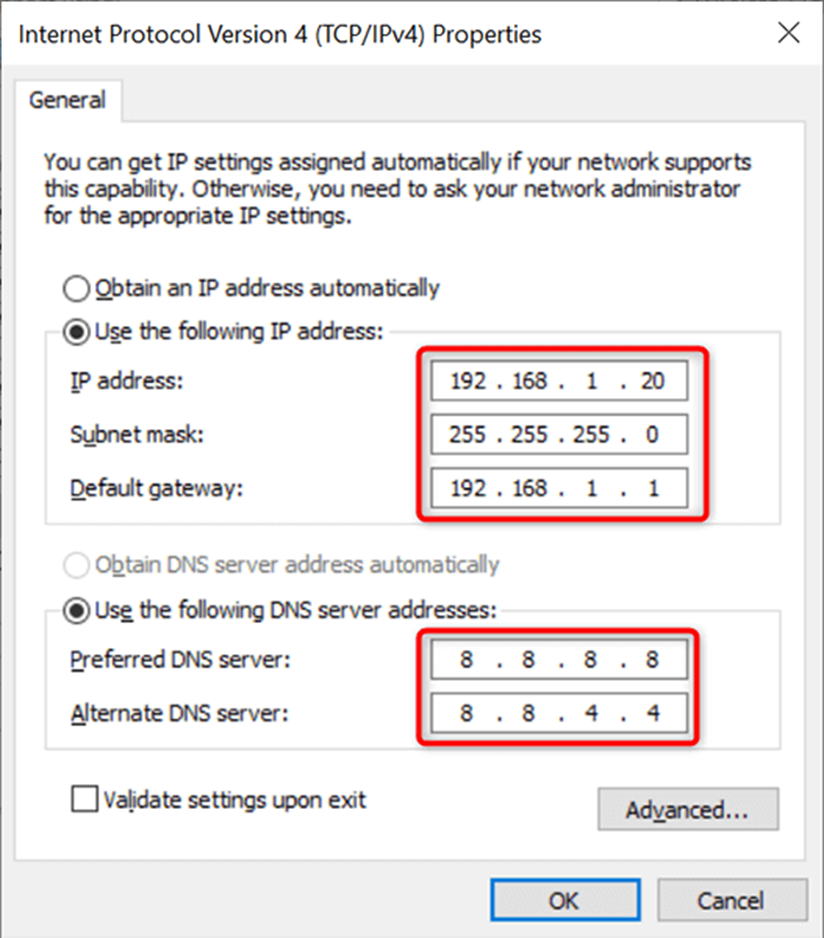
- Type ‘8.8.8.8’ in the preferred DNS, type ‘8.8.4.4’ in the alternative DNS, and press ‘OK.’
Save the changes and check if the Wi-Fi speed has improved.
Fix #7: Contact Support
If you are still facing issues with your Lenovo Legion Go console, we recommend contacting Legion Support to get 24×7 assistance via call and email. Your console may have some hardware or software issue causing the problem to persist.
If your console is still under warranty, you can also opt for the exchange or return option within 30 days from the date of purchase on the invoice.
Final Words
Lenovo Legion Go is currently the best handheld gaming console in the market that has outrageous specs and top of the line hardware to run games smoothly. However, the Wi-Fi issue is one of the most common technical problems that can occur with any handheld gaming console running solely on one mode of internet connection. Therefore, we recommend applying the tried and tested methods mentioned in our article to resolve slow Wi-Fi on Lenovo Legion Go. If you have any questions, let us know in the comments, and we will get right back to you!

![How to View or Change Your Friend Code on Nintendo Switch [Tutorial]](https://www.thecpuguide.com/wp-content/uploads/2022/12/How-to-View-or-Change-Your-Friend-Code-768x432.png)