Do you want to use your ROG Ally like a normal portable gaming PC? Then here is how you can uninstall Armoury Crate on Asus ROG Ally.
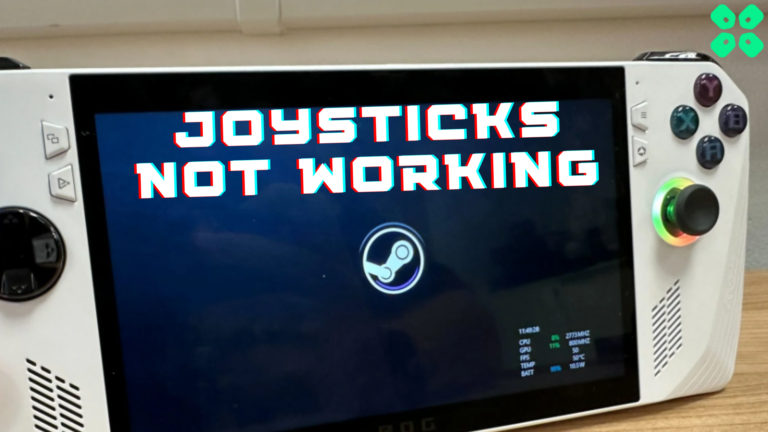
Software malfunctioning is a common issue in gaming technology, and the same can happen with Asus ROG Ally. At some point, you might feel like ROG Ally is not responding properly, or maybe it is overheating for some reason. In that case, it is best to clean Asus ROG Ally by properly installing and uninstalling Armoury Crate.
For uninstalling and reinstalling Armoury Crate, you’ll need assistance from the ROG Installer for Windows. It’s a two-step process requiring you to download the uninstaller and installer software separately. This way, you can properly perform software cleaning on ROG Ally. To explain things more clearly, we have written a step-by-step guide on how to clean Asus ROG Ally.
Uninstalling Armoury Crate on Asus ROG Ally
The Armoury Crate software works under the modular system, which downloads the software packages according to your hardware. It’s not recommended to uninstall Armoury Crate from the Window’s Control Panel. Hence for properly cleaning Asus ROG Ally, use the Armoury Crate uninstaller by following these steps.
- Open Windows Mode on ROG Ally from the Command Center and open a web browser.
- Visit the Armoury Crate Support Page and tap the ‘Show All’ button.
- Select your operating system, and the website will automatically present the compatible software.
- Tap the ‘Show All’ button and select the ‘Download’ button next to Armoury Crate Uninstall Tool.
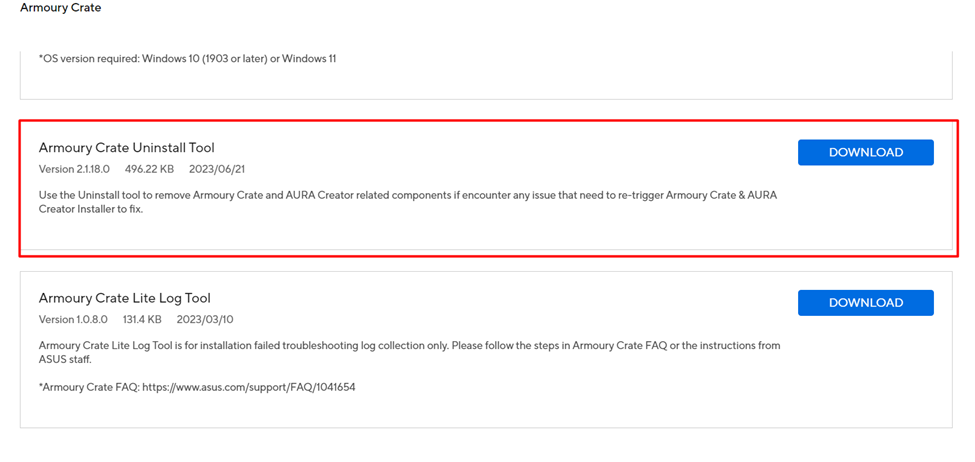
- Once the file downloads, unzip the file and run the ‘Armoury Crate Uninstall Tool.exe’ file.
- Restart the console by clicking ‘uninstall’ to complete the clean uninstallation process.
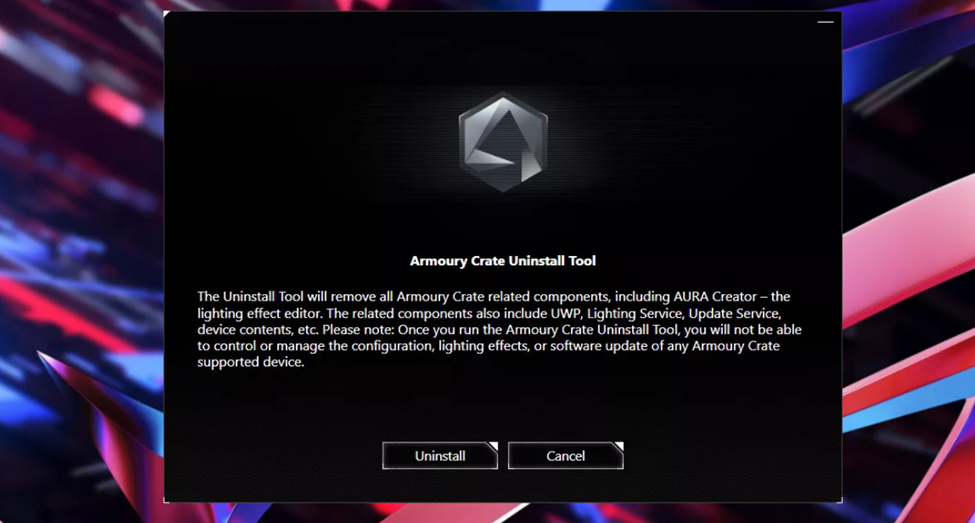
After uninstalling Armoury Crate SE, the console will prompt to the Windows 11 startup screen.
Reinstalling Armoury Crate on Asus ROG Ally
Now let’s talk about installing the Armoury Crate on Asus ROG Ally. While applying the steps mentioned below, ensure a stable internet connection.
- Open Windows Mode on ROG Ally from the Command Center and open a web browser.
- Visit the Armoury Crate Support Page and tap the ‘Show All’ button.
- Select your operating system, and the website will automatically present the compatible software.
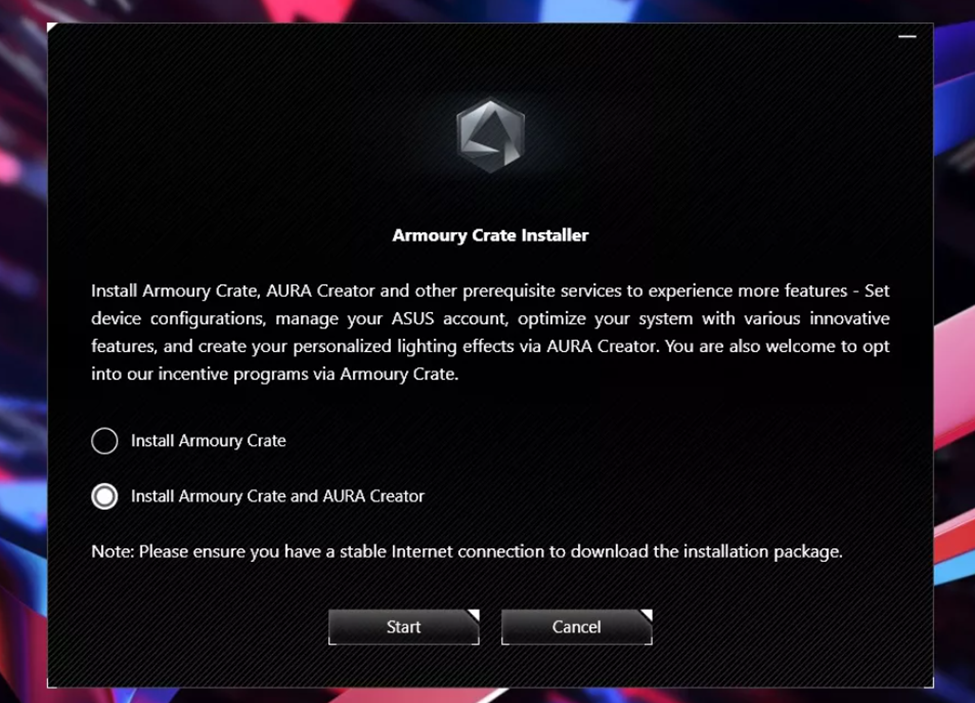
- Tap the ‘Show All’ button and select the ‘Download’ button next to Armoury Crate & Aura Creator Installer.
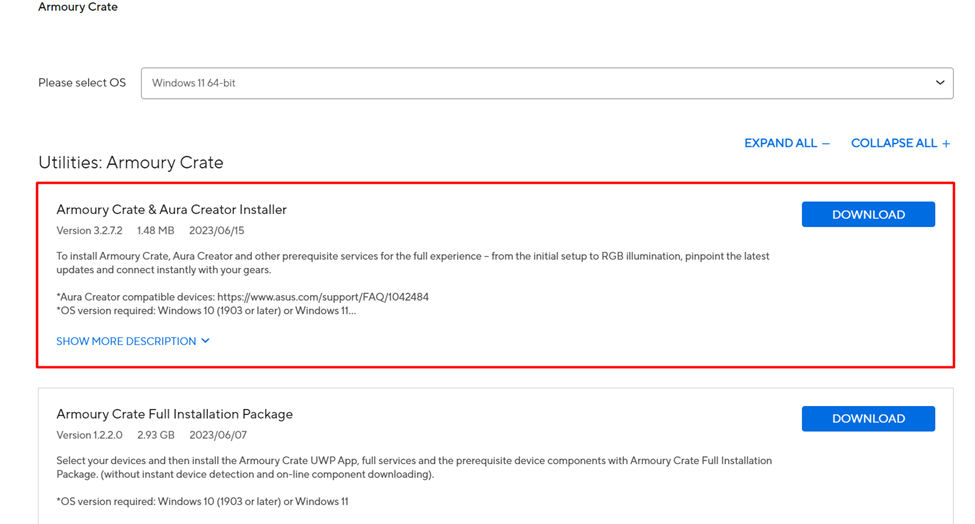
- Once the file downloads, unzip the file and run the ArmouryCrateInstaller.exe file.
- You get various options to either install Armoury Crate only or Armoury Crate + Aura Sync. Select whichever one you prefer to download and then tap the ‘Start’ button to begin the installation.
- Restart the console after installation completes to see the changes.
Now your console will turn on properly like a normal gaming PC and you can continue to install games via ROG Ally.
Final Words
Uninstalling and reinstalling Armoury Crate is much easier than performing a Windows setup on Asus ROG Ally. For any reason that you may want to perform this clean installation, we recommend always using Asus ROG Ally with Armoury Crate installed. Hopefully, this article guided you well on how to clean Asus ROG Ally, and now you have a wonderful gaming experience.