Have you suddenly experienced poor gaming performance after software updates? Then downgrade BIOS on Asus ROG Ally to fix things.
Software updates are supposed to improve things, and the same should be true for the Asus ROG Ally BIOS. However, the recent 319 BIOS update on Asus ROG Ally has significantly affected its performance with battery draining battery issues and CPU power optimization. So how do we fix it?
Fortunately, there is a way out of this, as you can downgrade BIOS on Asus ROG Ally by downloading the previous version from their official support website. We have mentioned how you can easily downgrade BIOS on Asus ROG Ally by following a few easy steps.
Step #1: Preparing USB to Downgrade BIOS on Asus ROG Ally
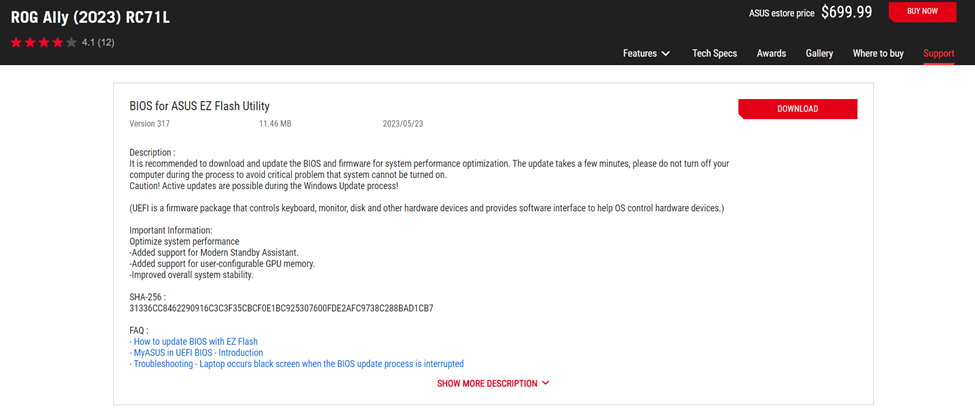
- Go to the Asus Support Website and download the BIOS version 317 from the ‘BIOS & Firmware’ tab.
- Open the folder where the BIOS file has been downloaded and open the zip folder to extract the file we need for installing BIOS.
- Using a USB-A to USB-C cable, plug in a portable flash drive in Asus ROG Ally.
- Right-click on this PC’s portable flash drive name and select ‘Format.’
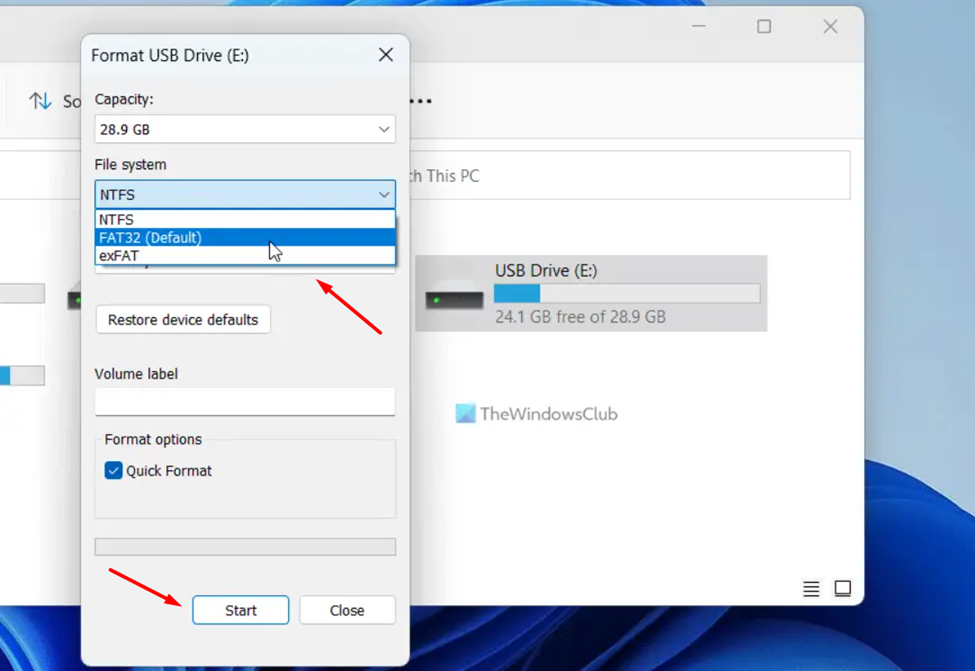
- Set the File System to FAT 32 and select ‘Start’ to begin formatting.
- Copy the ROG Ally BIOS file you extracted earlier, and make sure you copy the original file, not the .zip folder.
Step #2: Installing BIOS on Asus ROG Ally
Before you downgrade BIOS on Asus ROG Ally, ensure the console is fully charged to the installation process and not affected during any stage.
- Shut down Asus ROG Ally and make sure it’s completely turned OFF.
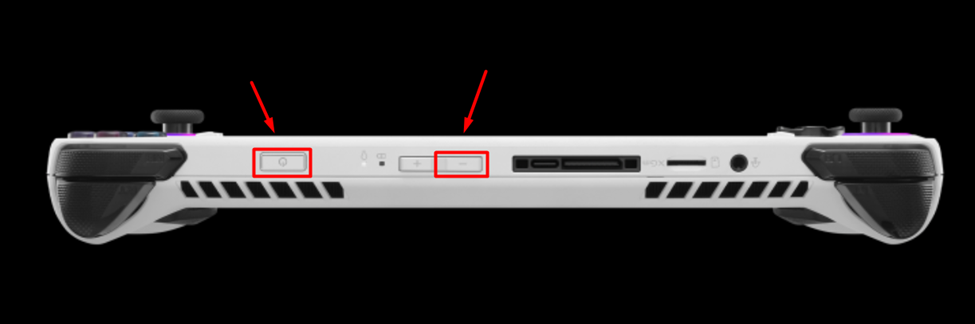
- Press the Power Button, and when you feel the vibration. Then leave the power button and press & hold the volume down button (-) until you land on the BIOS screen.
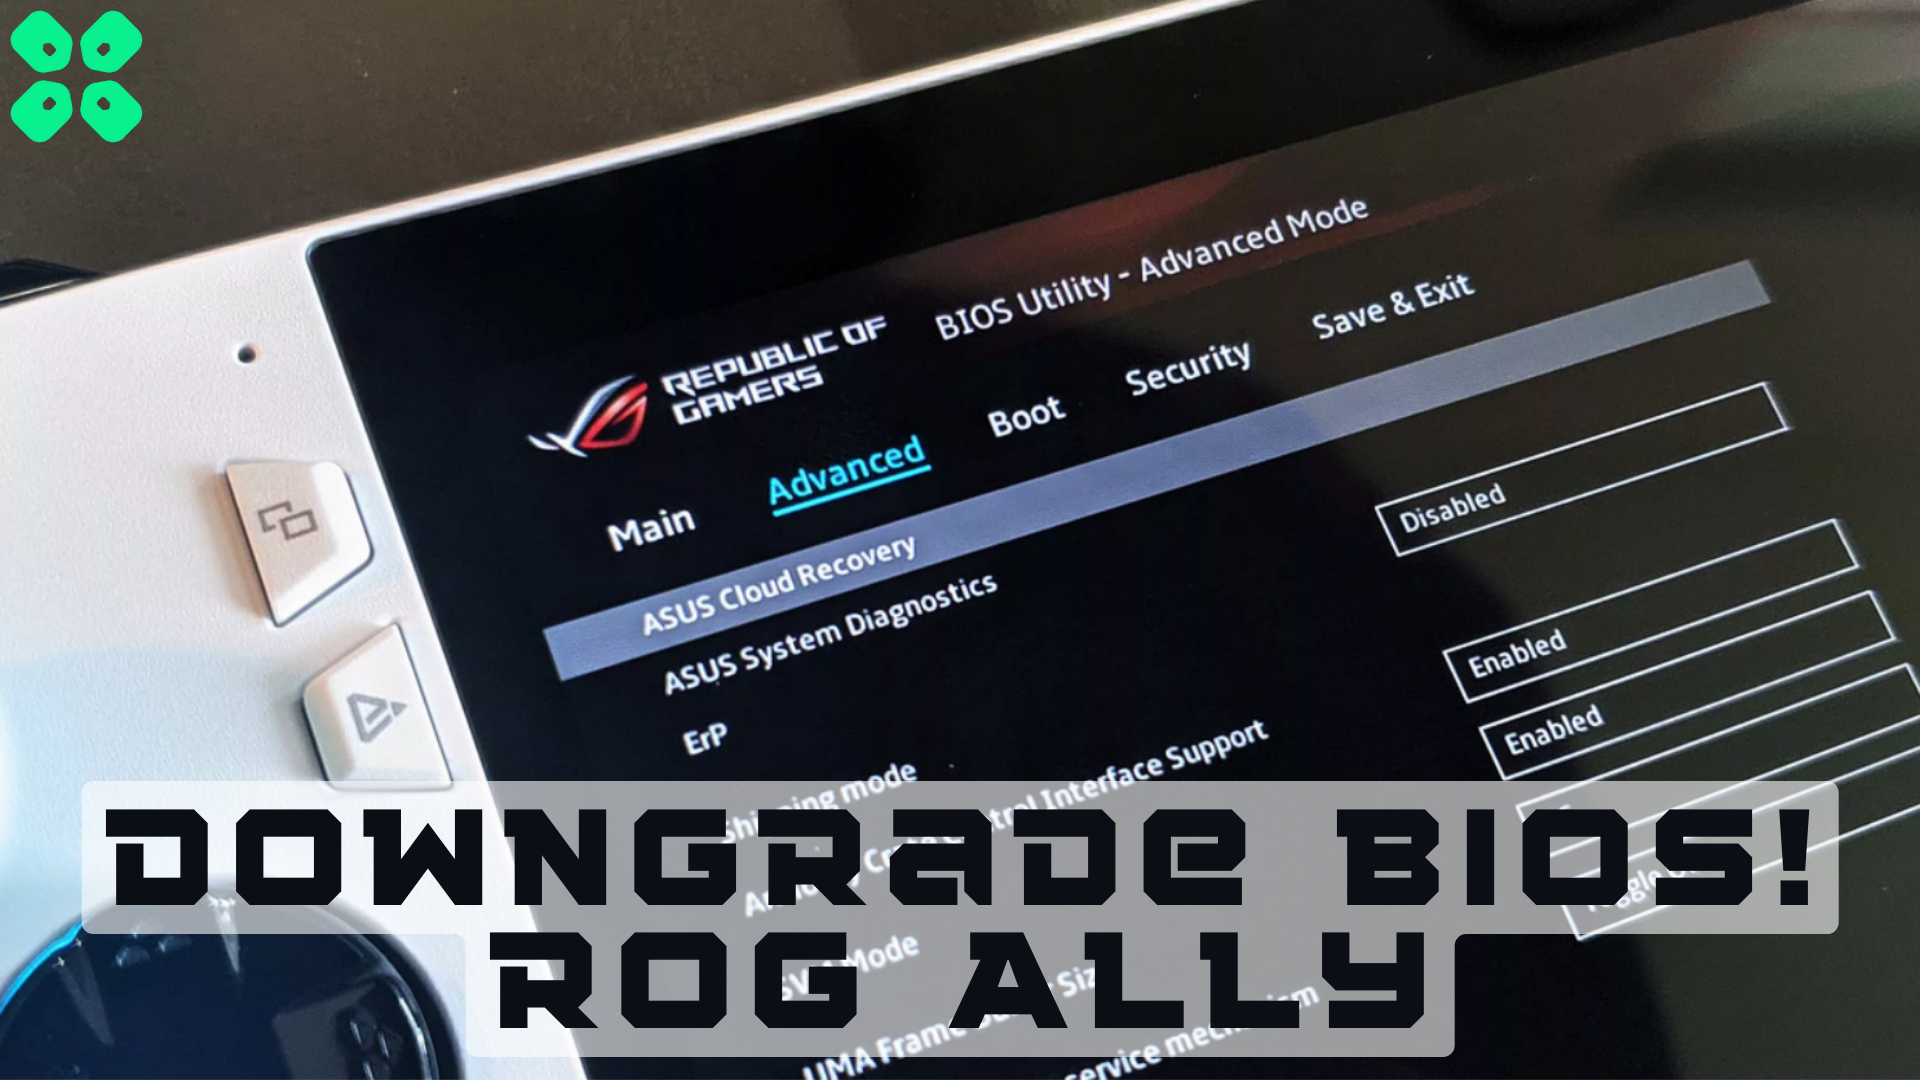
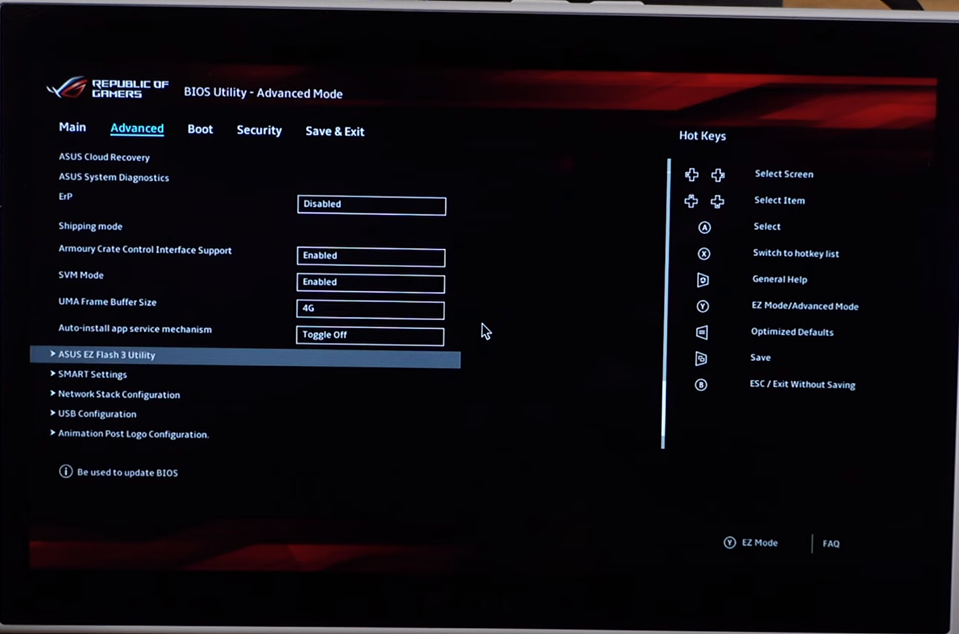
- With the help of the navigation buttons, go to the Advanced tab and press the ‘A’ button to select ASUS EZ Flash 3 Utility.
- Find your USB flash drive based on the storage capacity from the list. For example, we are using the 8 GB flash drive for installing downgrade BIOS on Asus ROG Ally, so we selected the fas1: \[7558MB] from the list.
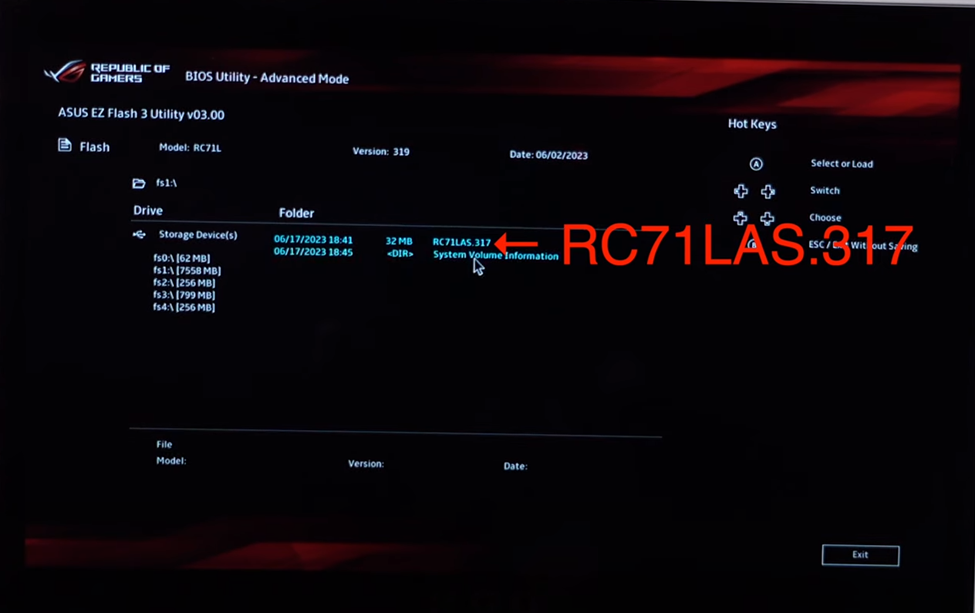
- After selecting your USB, you will find the BIOS file RC71LAS.317. Move the cursor on the file and press the button ‘A’ to open the file, and select ‘Yes’ to proceed.
- Now the console will reboot the begin downgrading the BIOS.
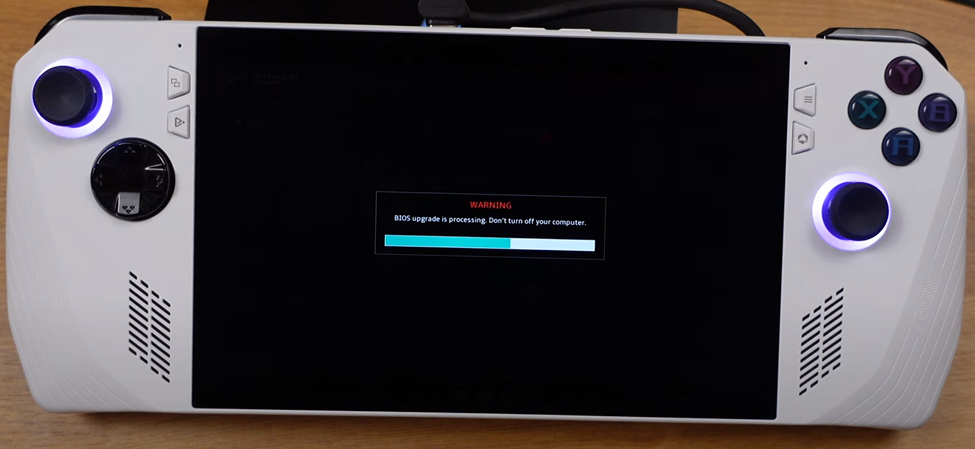
This process can take up to 5 to 6 minutes. Ensure not to touch any button and leave the console until it automatically prompts to the Windows screen. You can log in to Asus ROG Ally and use the downgraded version.
Final Words
Many gamers must have already upgraded to the 319 BIOS considering improvements and fixing in mind. But unfortunately, the upgrade turned out to negatively impact the console. Therefore, you can always downgrade to the older version by following the steps mentioned in this article to enjoy the best gaming experience.