Valorant players are currently experiencing voice chat issues that are affecting them during gameplay. Many players have reported that the voice chat suddenly stops in the middle of the game freezing Valorant, causing frustration and hindering effective communication among teammates.
Why is my Val voice chat not working?
The voice chat issues in Valorant can occur due to 6 reasons:
- Software conflicts: Conflicts between Valorant and other applications or overlays, such as Discord or antivirus software, can interfere with the voice chat functionality.
- Network connectivity: Unstable or restricted network connections can disrupt the voice chat feature, leading to intermittent or complete loss of communication.
- Audio driver problems: Outdated or faulty audio drivers on your computer can cause issues with the voice chat functionality in Valorant.
- Game or server-related issues: Technical problems within the game or on the server side can affect the voice chat system, resulting in it not working as intended.
- Configuration settings: Incorrect or misconfigured settings within Valorant or on the computer can impact the voice chat feature.
- Bugs or glitches: Like any software, Valorant may have occasional bugs or glitches that can affect the voice chat functionality for some players.
How to Fix Valorant Voice Chat not working?
To fix the Valorant voice chat not working:
- Check microphone settings and ensure proper connection.
- Verify voice chat is enabled and the correct input device is selected in Valorant settings.
- Restart the game and Riot Vanguard.
- Update audio drivers.
- Check the network connection and firewall settings.
- Disable conflicting applications and overlays.
- Contact Riot Games support for further assistance.
Now go to the detailed solution to fix the Valorant voice chat not working
Solution 1: Enable the Voice Chat in Valorant Via Settings
When you’re engaged in a game and the voices of the opposing team start to irritate and distract you, making it challenging to focus on defeating them, you might consider enabling voice chat.
By enabling voice chat, you can effectively communicate with your own team, coordinate strategies, and retaliate against the opposing team, even if their voices initially disrupt your concentration. Follow these steps to enable voice chat in Valorant and regain your competitive edge:
So here is how you are going to unmute the voice chat in Valorant:
- Open the Valorant game
- On the right side of the main screen, you can see the gear icon click on it
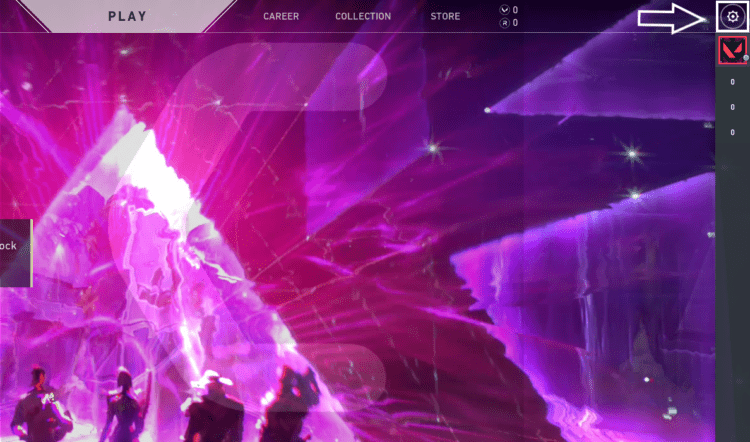
- A small menu with options will open
- Select the “SETTINGS” option
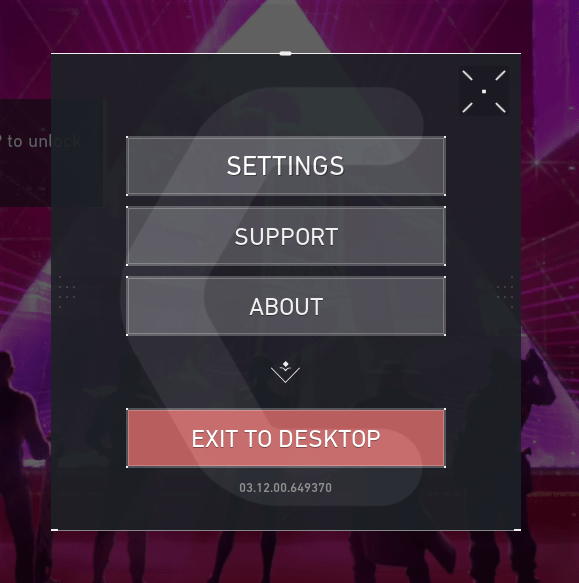
- The Setting window will open
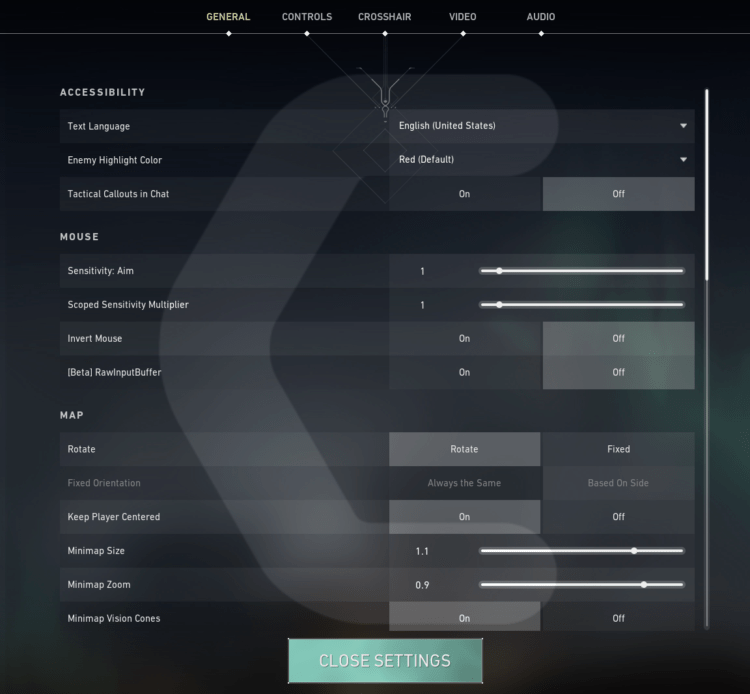
- Now you can see Five significant options in the top middle of the settings window
- Select “AUDIO“
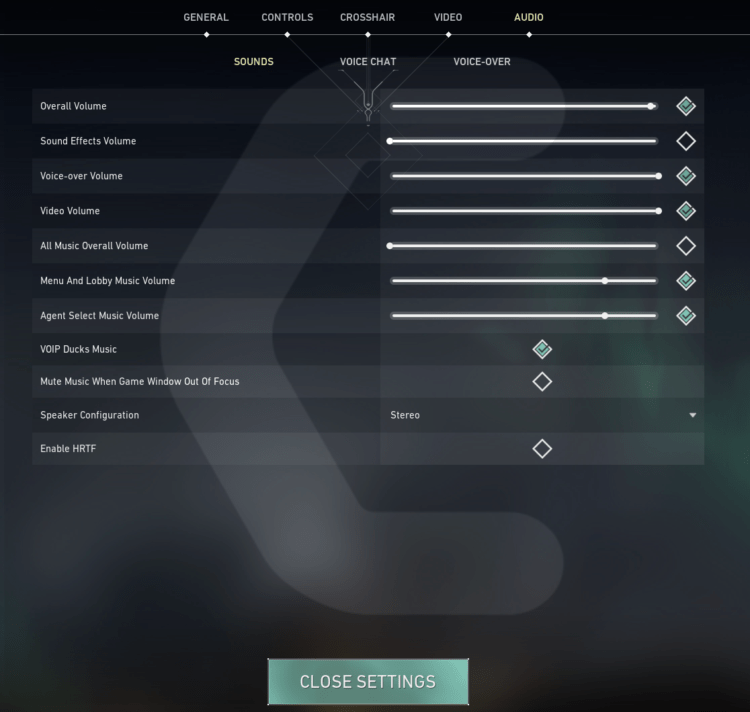
- From the sub-option select “VOICE CHAT“
- Find “Team Voice Chat“
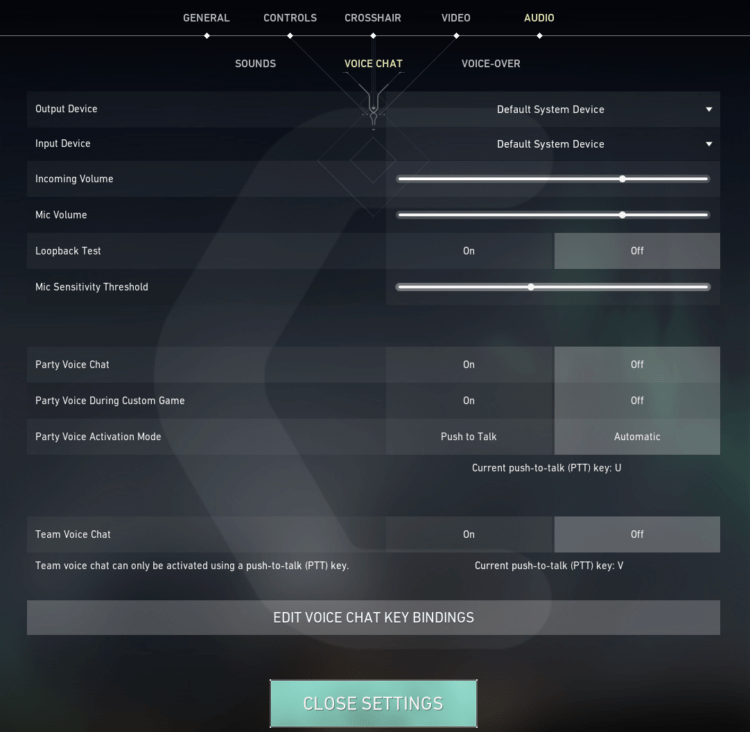
- Click on the On button in order to close the public voice chat
- Now CLOSE SETTINGS and you will be able to disable the Voice chat/Text chat in Valorant.
After Enabling the voice chat in the setting now disable the voice chat in the lobby in the next solution.
Read more: Valorant Black Screen Exactly After Loading
Solution 2: Enable the Voice Chat in Valorant While you are in the Lobby
If you initially disabled the voice chat in Valorant to avoid interacting with strangers or players who were being disrespectful, but now you want to enable it to communicate with your teammates, you can follow these steps:
Here’s how to enable the Voice chat/Text chat in Valorant:
- Open the Valorant
- Select the Match you like to play
- When you are in the lobby you can see player names are popping on the left side of the screen
- There is a speaker icon on the next username
- Click on the speaker icon to turn off the voice of the player
- If you double-click on the Speaker icon
- COMMUNICATION SETUP Will open
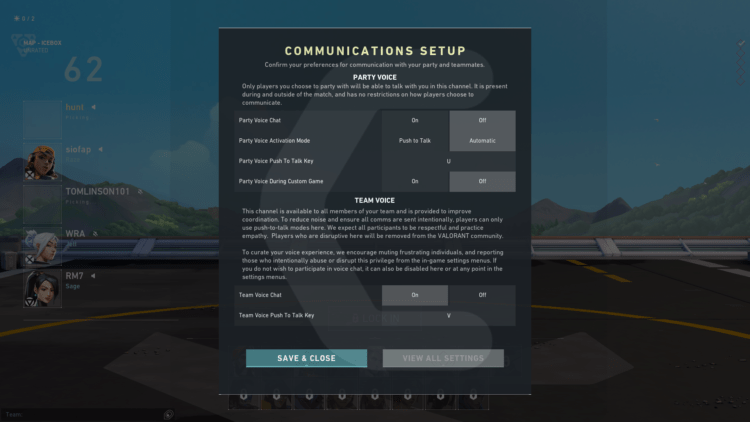
- Here you can change the PARTY VOICE settings and TEAM VOICE settings
- After that, you will be able to Enable Voice chat on Valornat.
If your enemies are still bothering you from chat then it’s time to follow the next solution in order to disable Disable the Voice chat.
Read more: 8 EASY Valorant Error code 57 Fixes! Vanguard Error
Solution 3: Run the Valorant as Administrator
Running the program as an administrator will definitely help you eradicate the Valorant Voice Chat Not Working as it might lack the privileges required to run the Application.
To solve the issue of the game crashing, running the program as an administrator could be a helpful solution as it may not have the necessary privileges to run the application. By granting administrative access to the program, you can ensure that it has all the necessary permissions to operate and potentially resolve any errors causing the game to crash.
Here is how you can run the application as an administrator:
- Go to the file/ folder.
- Then go to the Game Launcher/Steam client.
- Right-click on the Launcher icon
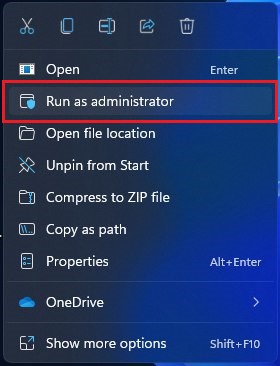
- A menu will open
- Select “Run as administrator“
Now the program will start running smoothly without giving you the error “Valorant Voice Chat Not Working“
The above solution is a temporary fix which helps you run the program or access folder. If you want to run the program permanently on administrator, then follow the next solution to solve Valorant Voice Chat Not Working Issue.
Read More: Valorant Error Code 0 “Connection Error”
Solution 4: Run the Program as an Administrator (Permanently)
When running a program or application on a Windows computer, there may be times when you need to give the program administrative privileges in order to access certain features or settings. However, simply right-clicking on the program and selecting “Run as administrator” may not always be enough, as you may need to grant these privileges permanently in order to avoid constantly having to repeat the process.
In this case, you will need to take some additional steps to ensure that the program always runs with administrative privileges, even if you forget to explicitly select this option. In this solution, we will walk you through the process of running a program as an administrator permanently, so that you can gain the access you need without any extra hassle.
- Go to the folder/Application
- Right-click on it
- A menu will open
- Select Properties
- A new window will open
- Navigate to the “Compatibility Tab“
- Under the Settings heading
- Find “Run this Program as an administrator“
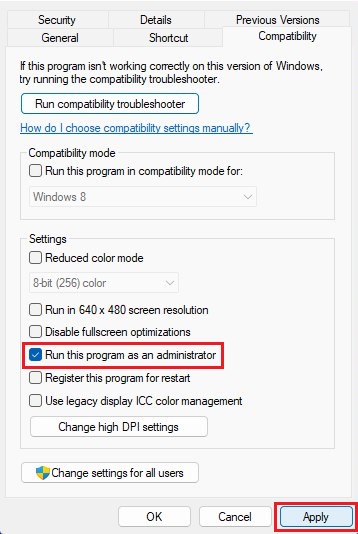
- Check the box for this option
- Click “Apply“
Now your program successfully Runs as an Administrator on Windows (Permanently) and you can easily open the program without repeating the steps again and again.
If you still facing errors then proceed to the next solution.
Read More: Valorant Error code 29? “There Was An Error Connecting To The Platform”
Solution 5: Made Expectations On the Firewall
Configuring the Windows Firewall settings is essential to ensure that Valorant’s voice chat and online multiplayer functions work properly. By allowing Valorant through the firewall, you can avoid any potential blocking of network connections that might interfere with the game’s performance. To make sure Valorant has the necessary permissions, follow these steps:
Windows 10
- Go to the Windows search bar Type Window Defender Firewall and click on it
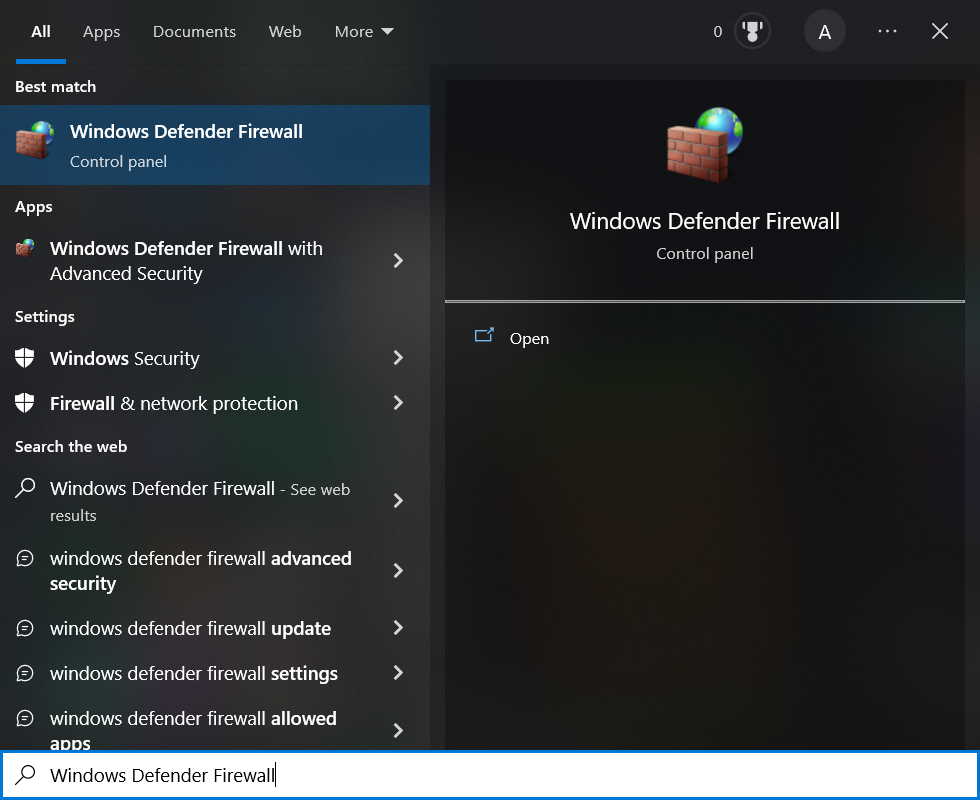
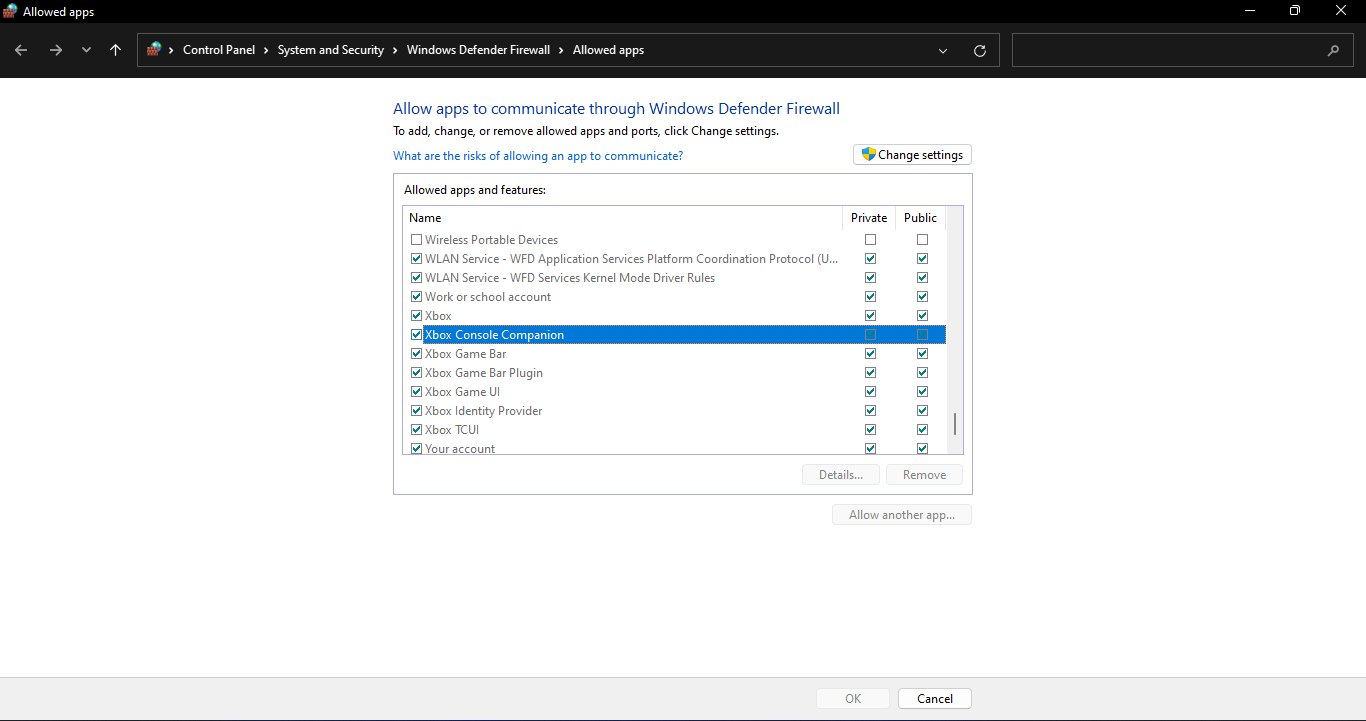
- Click on “Allow a program through Windows firewall“
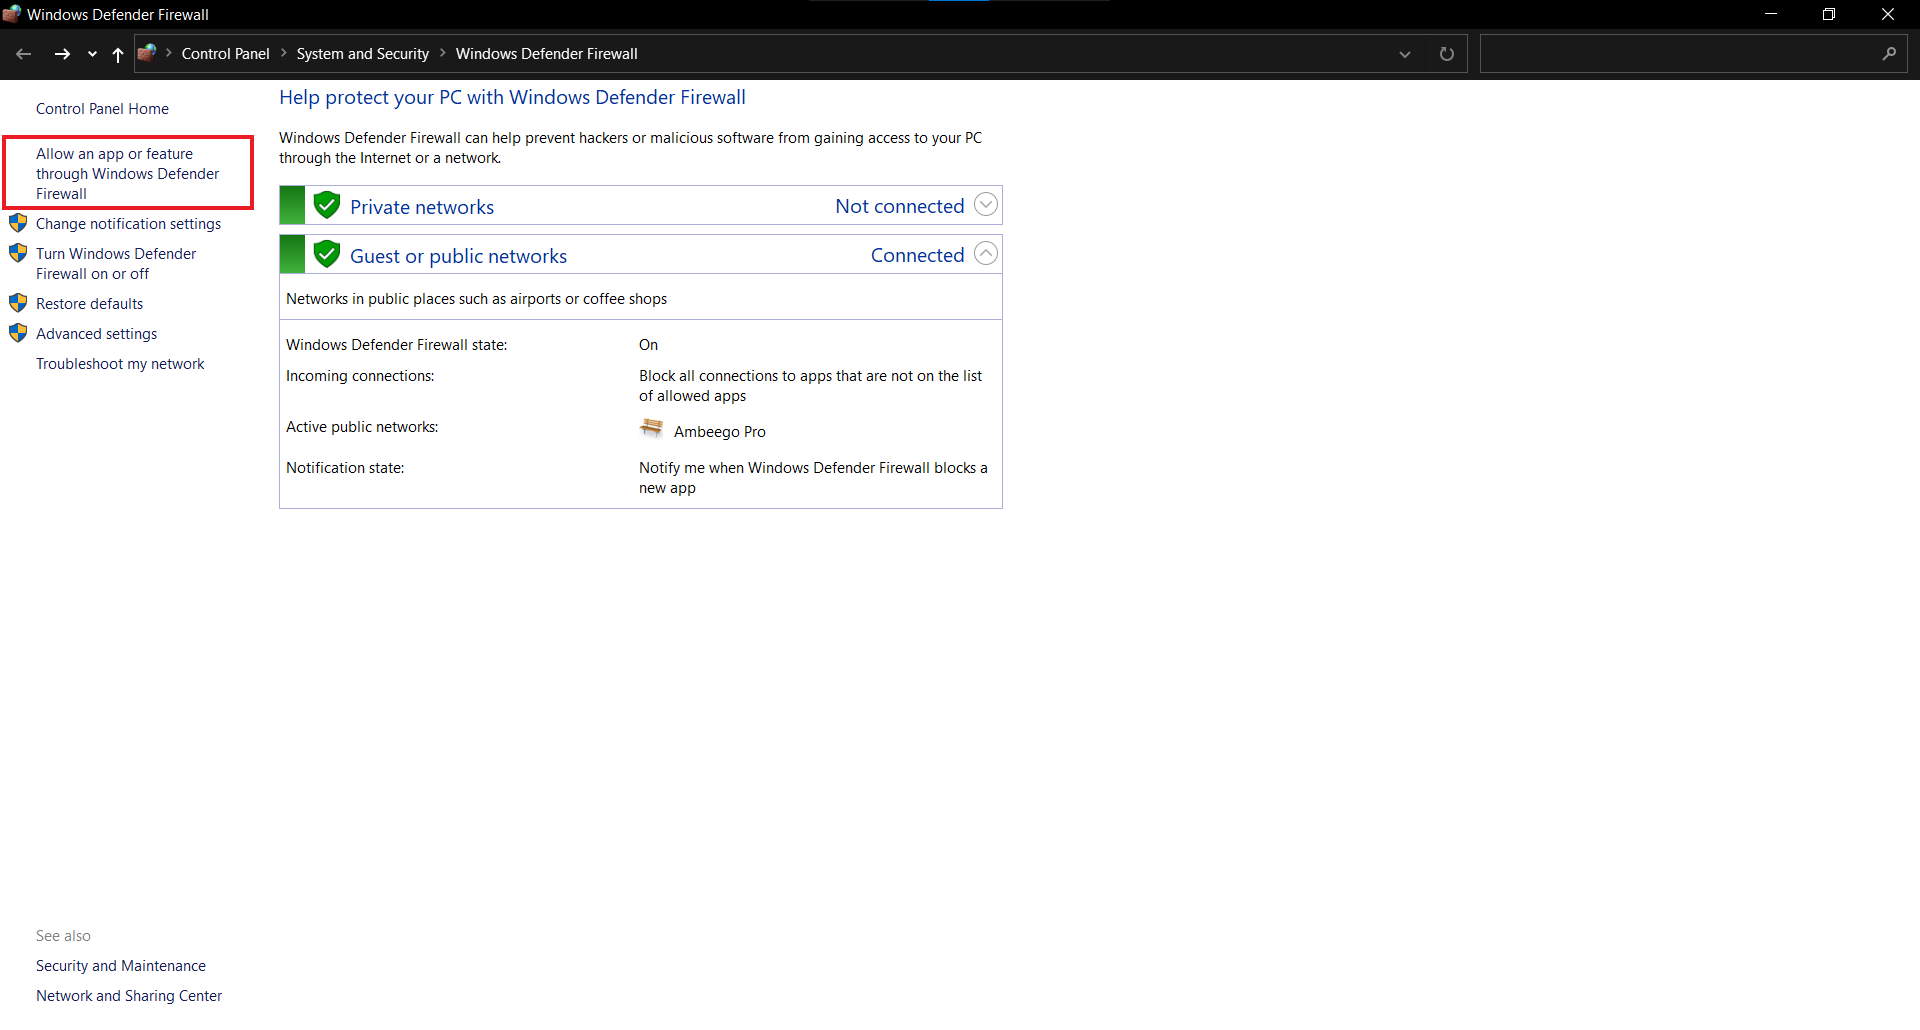
- Click on the Change settings button
- Remove any current VALORANT and riot Client entries then add a new one with the “Allow another app” Button below.
- Locate “C:\Riot Games\VALORANT\live\ VALORANT.exe” for the new firewall exception and press OK.
- On the Firewall exception, check all boxes for VALORANT and hit the OK button at the bottom.
- Do the same to add an exception for our anti-cheat at”C:\Programe files \Riot Vanguard\vgc.exe” and hit OK.
- Do the same to add an exception for our anti-cheat at “C:\Riot Games \Riot Client\RiotClientServices.exe” and hit OK.
- Finally, send a screenshot of these so I can make sure they are set up correctly!
Windows 11
To make an exception for Valorant in the Windows 11 firewall, you can follow these steps:
- Press the Windows + S Open Search Type Windows Security
- Click on “Windows Security”
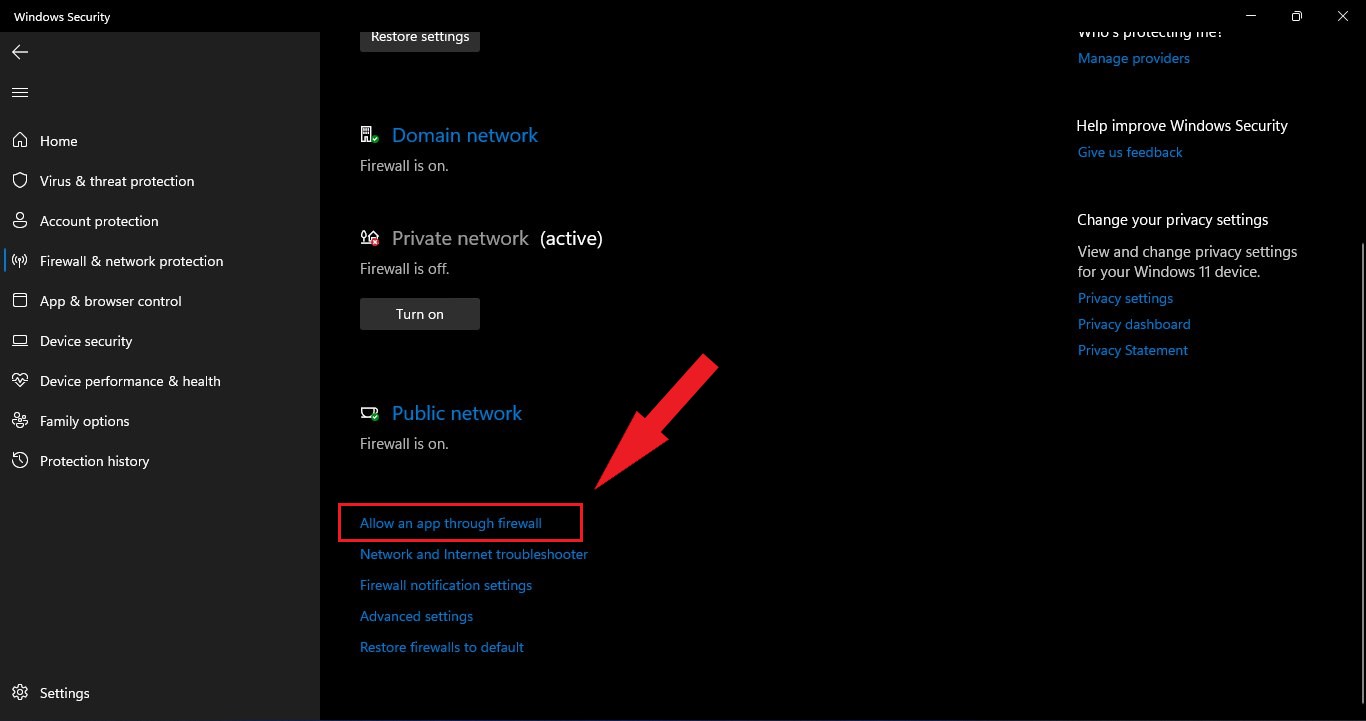
- Under the Windows Security settings, click on “Firewall & network protection“.
- Click on “Allow an app through firewall” or “Allow an app or feature through Windows Defender Firewall“.
- Click on the “Change settings” button, which requires administrative privileges.
- Scroll down the list of apps and locate “Valorant“. If you can’t find it, click on the “Allow another app” button and browse to the location where Valorant is installed. Typically, it should be in the “C:\Riot Games\VALORANT” folder.
- Check the boxes for both “Private” and “Public” networks next to Valorant to allow it through the firewall on both network types.
- Click the “OK” button to save the changes.
- By following these steps, you have successfully made an exception for Valorant in the Windows 11 firewall. This should allow Valorant to establish necessary network connections without any interference from the firewall.
Read more: Discord Overlay Not Working With CSGO on PC? Here are 9 Quick Fixes
Solution 6: Disable Nahimic Audio Driver
Nahimic is an audio driver that is often pre-installed on laptops, motherboards, and other devices to provide an enhanced audio experience. This driver is trusted by many users to optimize and fine-tune the audio performance of their computers.
However, if you are facing issues with your audio, such as crackling or sound cutting out or no sound disabling the Nahimic audio driver may help resolve the issue.
Sure, here are the steps to disable the Nahimic audio driver from Task Manager:
- Press Ctrl+Shift+Esc to open the Task Manager
- Click on the Startup tab at the top of the Task Manager.
- Find the Nahimic audio driver in the list of startup programs.
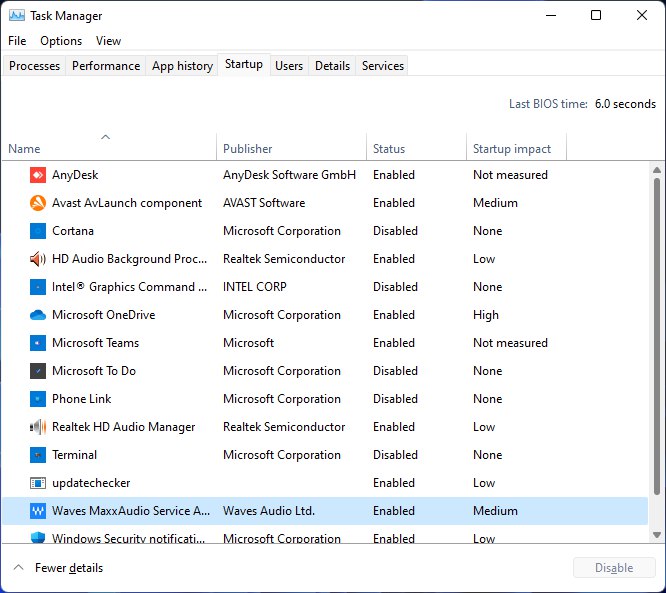
- Right-click on Nahimic and select Disable from the context menu.
- Confirm the action when prompted.
- Restart your computer to allow the changes to take effect.
- Check if the audio issue has been resolved.
Read More: Valorant Error VAN 9001? TPM 2.0 Error? Super Guide
Solution 7: Update the Sound Driver
Sometimes the audio drivers are outdated and cause audio issues and bugs with other software like games and audio tools. Some of the players also suggest updating the audio driver to just make sure is everything running fine on your PC.
Here is how you can update the sound driver on your PC:
- Click on the Search icon
- Type Device Manager
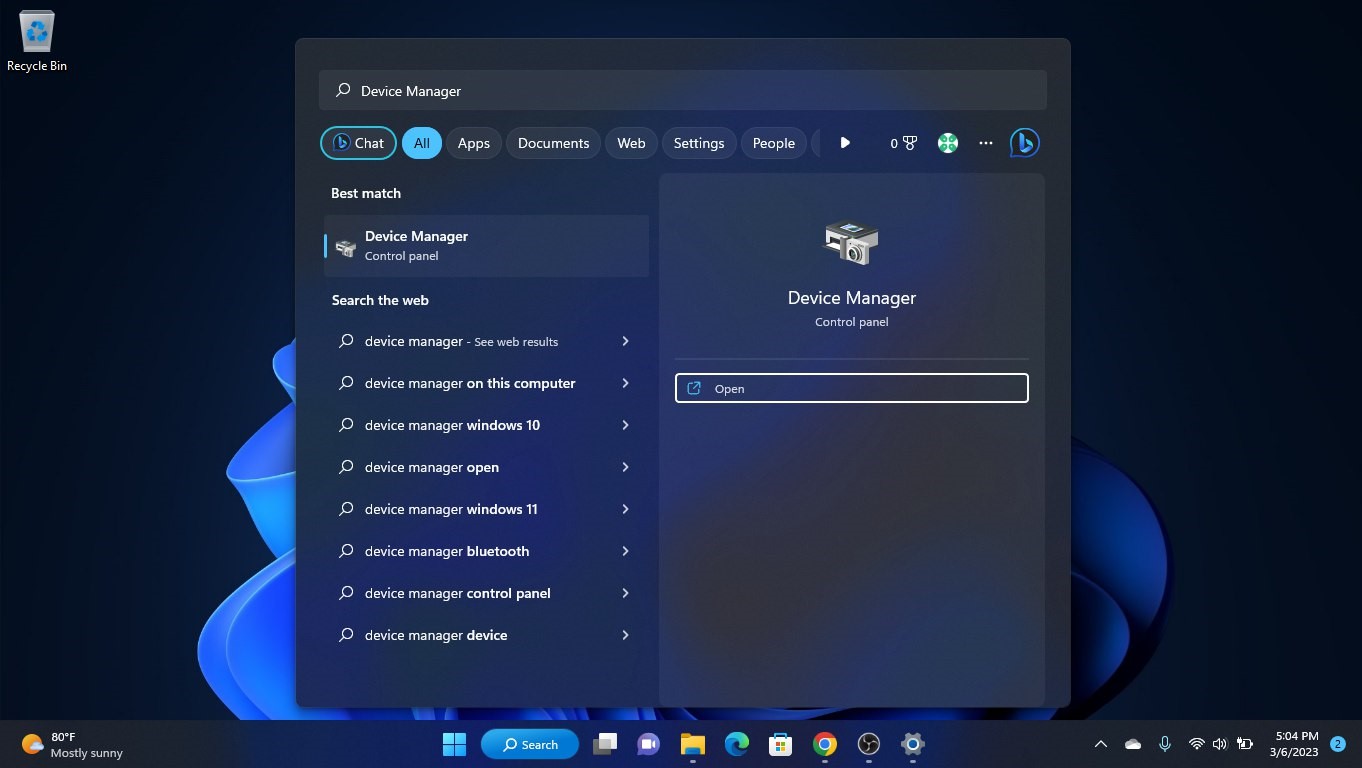
- Click to open Device Manager
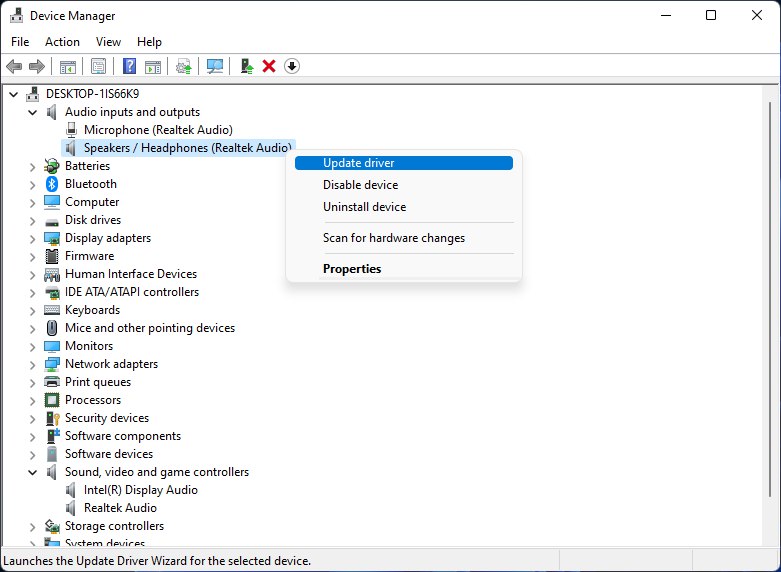
- Then select the Audio inputs and outputs
- A further menu will open
- Right-click on the Speaker / Headphone name
- Click on the Update driver
Solution 8: Perform a Clean Boot on PC
If you’re experiencing issues with your computer like slow performance or unexpected crashes, it could be due to conflicting applications running in the background.
A clean boot can help you start your computer with only essential services and drivers needed to run the operating system, helping you identify any conflicts or issues caused by third-party applications or services.
To perform a clean boot follow the steps down below:
- Press Windows Button + R Key

- The Run Dialogue Box will appear
- Type “MSConfig“
- Press Enter
- The System Configuration window will open
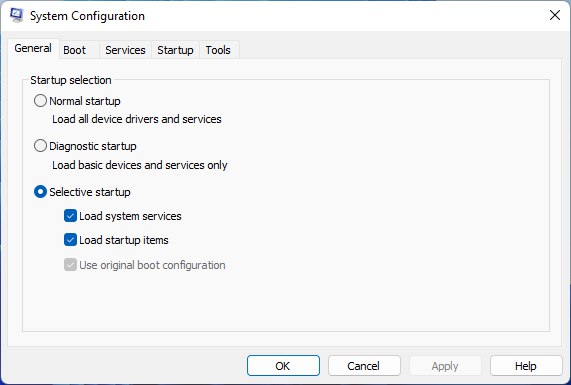
- Select Services tab
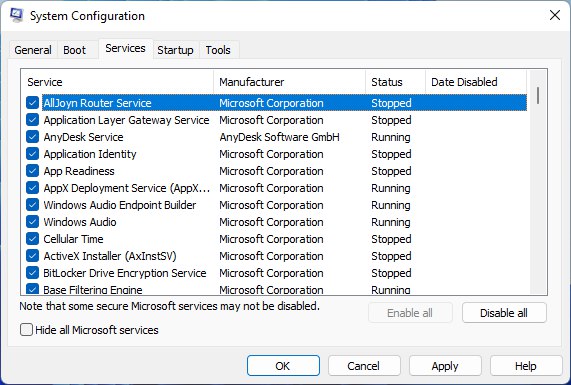
- Uncheck all the unnecessary services
- Only check those you need now
- Now click OK
If the error persists, then proceed to the next solution to solve the crashing issue on the PC.
FAQs
Why is my Valorant voice chat not working?
How can I troubleshoot voice chat issues in Valorant?
1. Check your microphone and ensure it is properly connected and functioning.
2. Verify that your microphone is not muted in the Valorant settings.
3. Restart the game and your computer to refresh the software.
4. Make sure your audio drivers are up to date.
5. Disable any other applications that might be using your microphone.
6. Check your network connection for any issues.