
Do you love to capture your favorite gaming moments? Here is how you can take a screenshot on Asus ROG Ally.
Capturing and sharing your favorite gaming moments with your friends is one of the coolest parts of gaming. Whether it is your first epic win in Battle Royale or if you find an unusual glitch in the game, it is always worth capturing your favorite gaming moments to share gameplay with your friends.
To take a screenshot on Asus ROG Ally, press the M2 buttons on the back of the console and then press ‘A’ from the gamepad to take a screen shot instantly. You can access the ‘Record Screen’ option from the Command Center for recording gameplay on Asus ROG Ally.
Here we have mentioned 5 different methods to take a screenshot on Asus ROG Ally, so you can choose whichever seems suitable. Before applying these methods, ensure you have installed Xbox Game Bar since the console uses its built-in screenshot capabilities.
Method #1: Pressing Buttons
- Press and hold on to the M1 or M2 buttons behind your console.

- Press the ‘ A ‘ button while pressing the M1 or M2 buttons, and it will instantly take the screen shot.
One drawback to this method is that if you’ve remapped any buttons, you may not be able to implement this method. In this case, you can opt for the second method mentioned below.
Method #2: Accessing Command Centre
- Open ‘Settings’ on Asus ROG Ally using the trigger buttons.
- Go to ‘Edit the Command Center.’
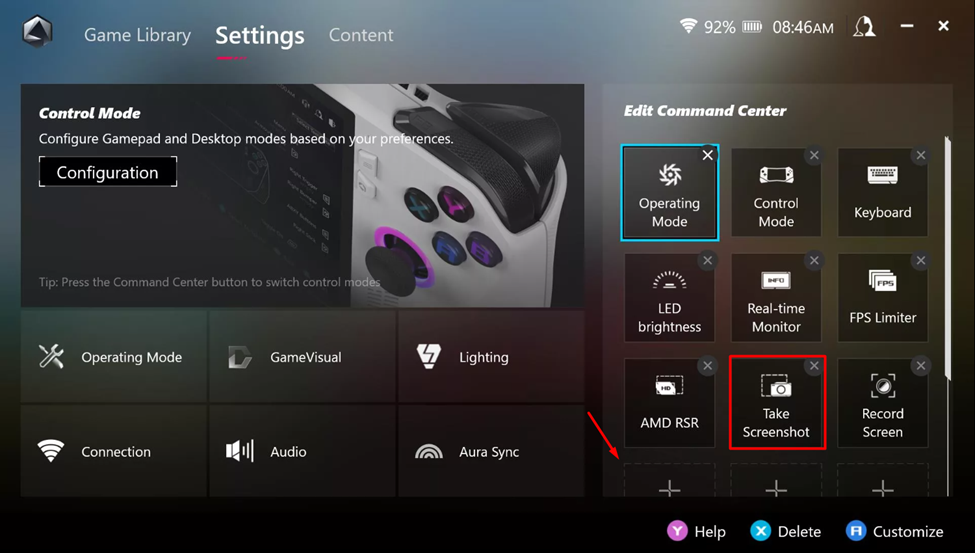
- Tap the ‘Add’ button and select the ‘Take Screenshot’ option to add it to the Command Center.
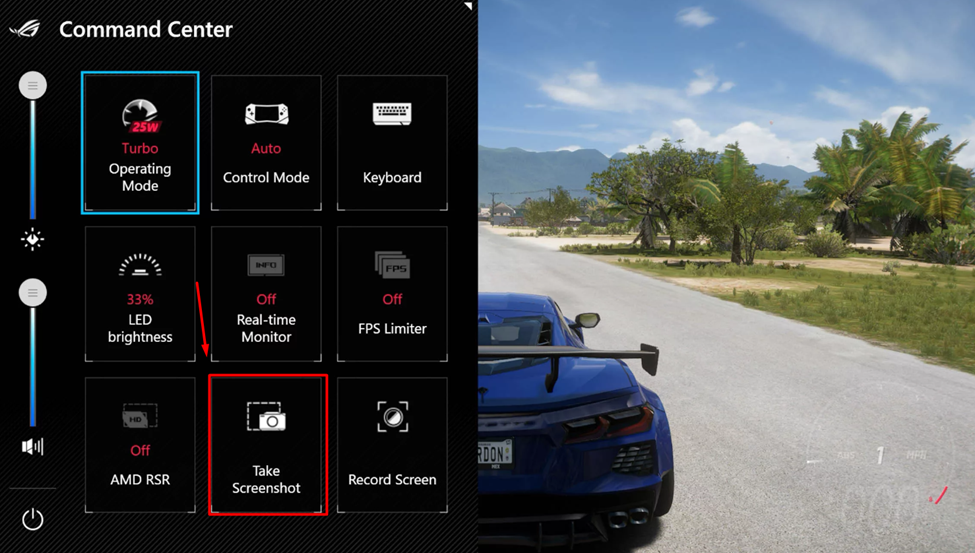
- Now press the Command Center button while playing the game and select the ‘Take Screenshot’ option to capture your moments.
Also Read: Bluetooth Not Working on Asus ROG Ally? Here’s How to Fix it
Method # 3: Using Xbox Game Bar
- Open Windows Mode on Asus ROG Ally and go to Start Menu.
- Search ‘Xbox Game Bar’ and tap ‘Open’ to run it.
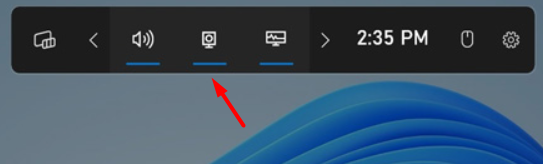
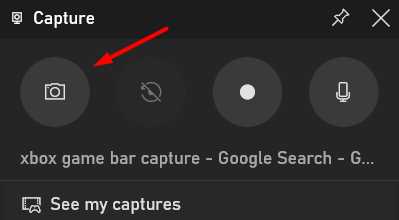
- Tap the Webcam icon from the bar and a new Windows will pop up.
- Tap the camera button to take the screen shot.
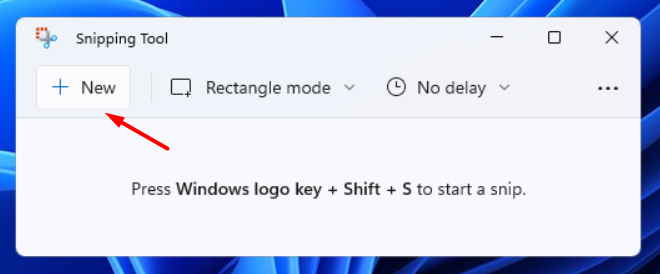
Method # 4: Snipping Tool
Taking screenshots on Windows 11 and Asus ROG Ally is pretty much the same with Snipping Tool and here is how you can do it.
- Open Windows Mode on Asus ROG Ally and go to the Start Menu.
- Search ‘Snipping Tool’ and tap ‘Open’ to run it.
- Tap ‘New’ and drag the ‘+’ icon to select the section you want to capture.
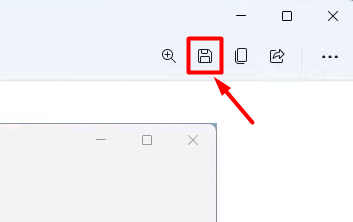
- Tap the ‘Save’ icon from the top bar and it will ask to save the screenshot.
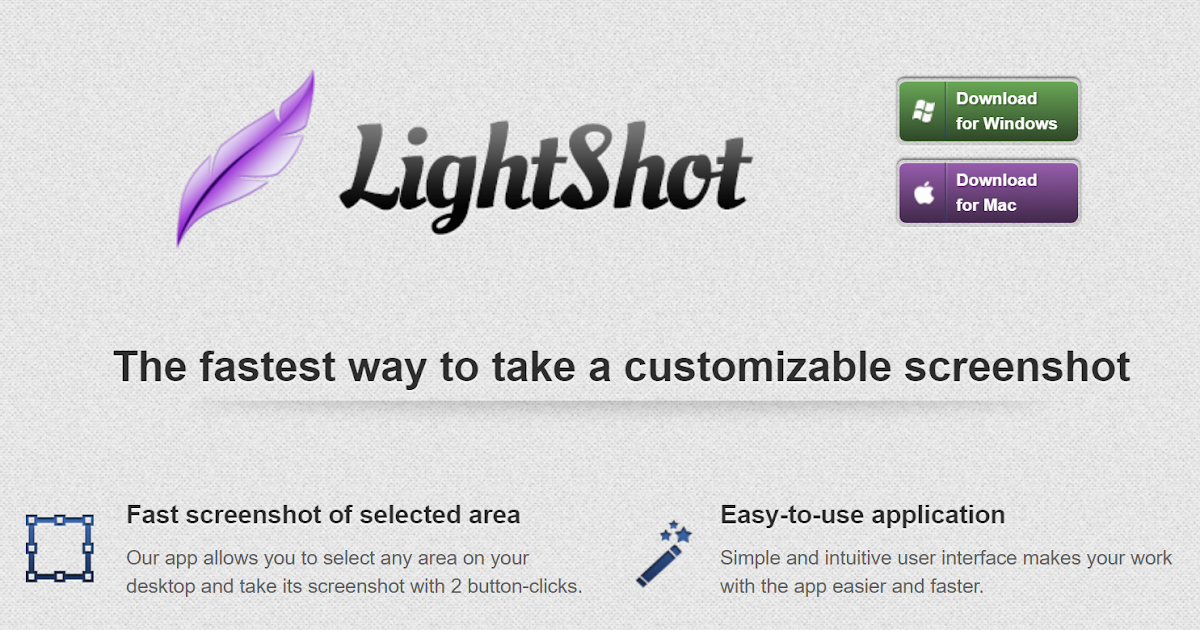
Method # 5: Using a third-party application
Since ROG Ally is running Windows 11, you can download third-party applications from the browser and use them for taking a screenshot on Asus ROG Ally by following these steps.
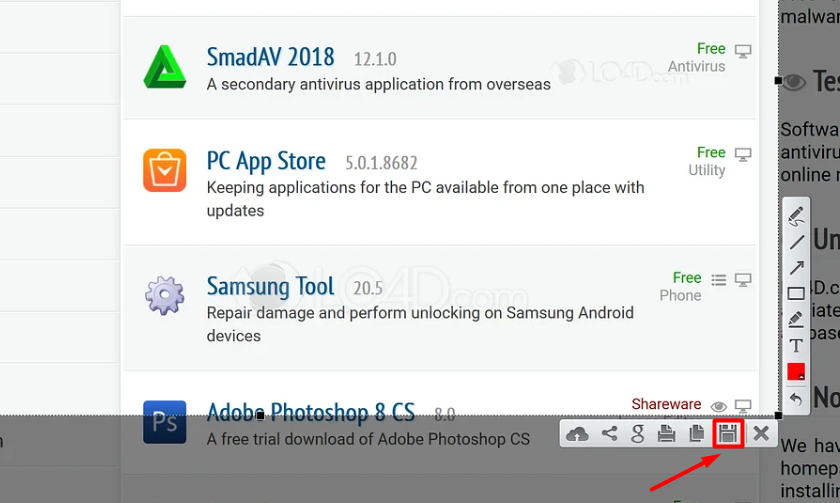
- Download and install Lightshot for Windows on Asus ROG Ally.
- After installing, tap its icon from the taskbar and the screen will go blur for a moment.
- Use the cursor or tap and drag the section to select it.
- Tap the disk icon to save the screenshot.
Final Words
Capturing your favorite moments while gaming or doing any other activity on Asus ROG Ally is fairly simple than any other handheld gaming console. Windows makes it possible to unlock the limitations of capturing and sharing your favorite gaming moments with friends a breeze. Hopefully, our guidelines were helpful enough and now you can take a screenshot on ROG Ally without any issues.