
Are you looking to get the best out of your computer system? Here are easy steps to enable or disable CPU Virtualization from the computer’s BIOS.
CPU Virtualization is a feature that allows the AMD and Intel processors to enhance from the single CPU capacity to act as multiple individual CPUs. This hardware feature allows your operating system to perform more efficiently while utilizing the power of a CPU compatible with your motherboard. Enabling virtualization makes your computer faster but is not a substitute for overclocking a CPU.
Whether you have installed AMD or Intel on your computer system, you can enable CPU virtualization under a different name for each. For Intel processors, it is called Intel VT (Intel Virtualization Technology); for AMD processors, it’s called AMD-V.
Since CPU virtualization is disabled by default on your computer system, you may have to enable it. Therefore, we have written a step-by-step guide on enabling or disabling CPU virtualization from your computer’s UEFI BIOS. We will also discuss how to check if CPU virtualization is enabled or disabled on your system.
How to Check if CPU Virtualization is Enabled or Disabled
Before we jump into the UEFI BIOS of our computer system, let’s talk about checking the CPU virtualization by following these steps.
- Right-click on the Taskbar and select Task Manager.
- Click the ‘Performance’ tab.
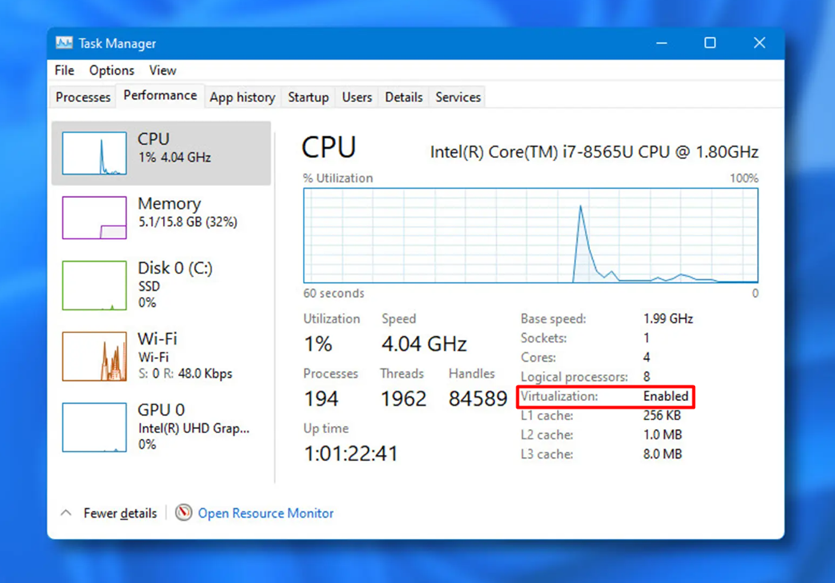
3. On the right side, under the graph, check if it is written ‘Enabled’ or ‘Disabled’ next to the Virtualization option.
Also Read: How to Enable or Disable Full Screen Optimization on Windows 11/10
Enabling or Disabling CPU Virtualization from UEFI BIOS
You can follow these steps to enable or disable CPU Virtualization from the UEFI BIOS of your computer system.
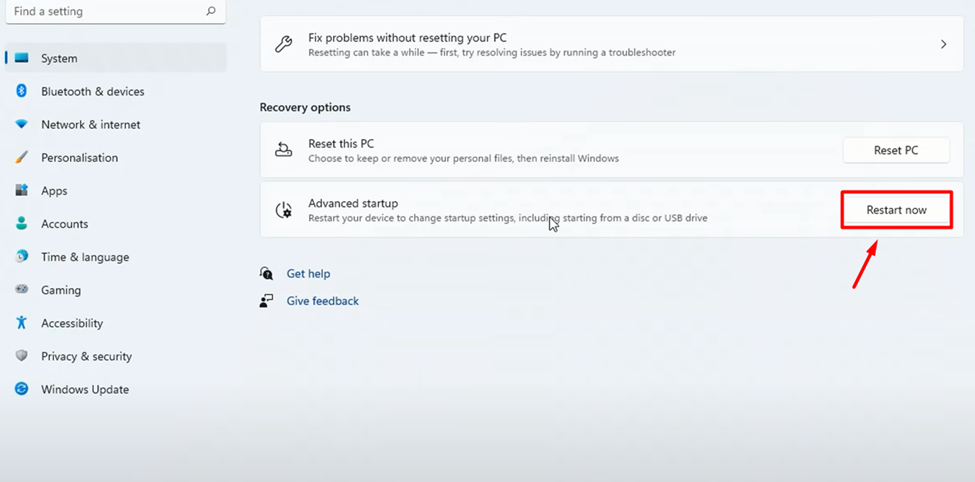
- Open Settings in Windows 11 and click on the ‘System’ tab.

2. Select ‘Recovery’ and click ‘Restart Now’ to run your OS in the advanced startup.
3. Go to Troubleshoot > Advanced > UEFI Firmware Settings and click ‘Restart.’
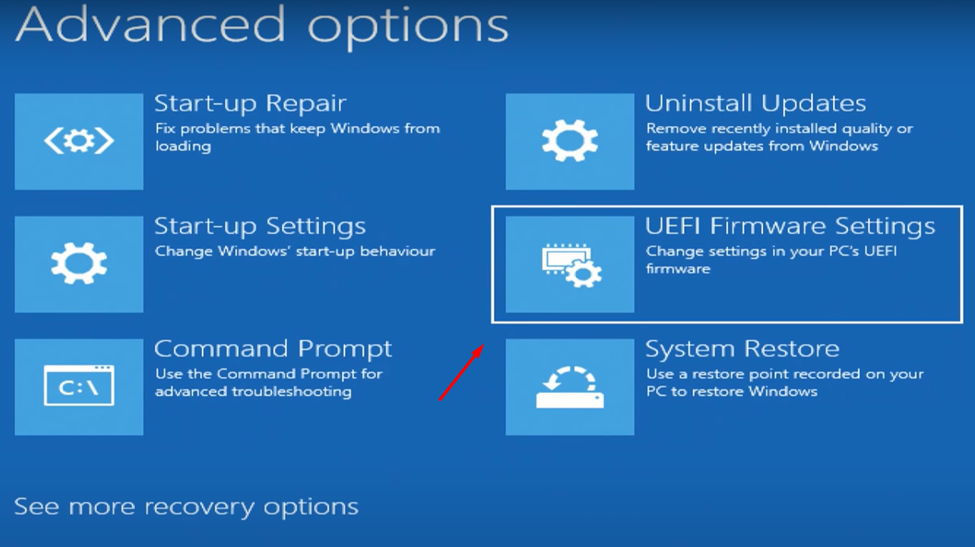
4. From the screen, press the button key that indicates ‘BIOS Setup’ to open the BIOS settings. You may have to press F1, F2, F3, F10, Esc or Delete keys the hotkeys depending on your PC model and generation.

5. In the BIOS Setup, go to the ‘System Configuration’ or ‘Advance Processor Configuration’ tab and find the ‘Virtualization Technology’ option.
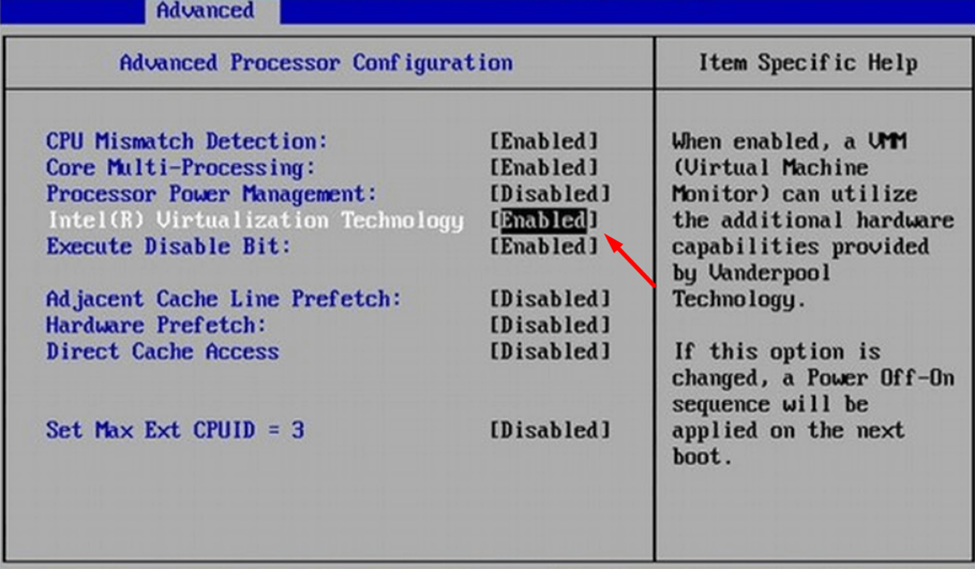
6. Press the ‘Enter Key’ to enable or disable the CPU Virtualization.
7. Make sure to select ‘Save Changes’ and click ‘Yes’ before exiting the BIOS utility.
Once the CPU virtualization is enabled, your computer system will reboot normally, and you’re ready to use it, where you can also check if virtualization is enabled from the Task Manager.
Also Read: How to Enable or Disable Core Isolation in Windows 11
Final Words
Windows users may wish to enable CPU virtualization to reduce upgrading costs and ensure downtime reduction to improve overall efficiency. In any case, Microsoft enables users to deliver a customizable experience that covers their needs. In this article, we discussed a step-by-step method to enable CPU virtualization from the UEFI BIOS of your computer system. We also discussed how you could check if the CPU virtualization is enabled or disabled on your computer. Hopefully, our guidelines were helpful enough to assist you in achieving the task successfully.