Enabling or disabling core isolation takes minutes following the step-by-step methods mentioned in our guidelines.
Windows Security options provide a built-in malware protection system for your computer to protect it from malicious software attacks. In Windows 11, we get the Core Isolation feature for an added layer of protection against malware or any malicious attack by isolating various processes from the operating system and device.
Core Isolation comes with a Hypervisor-protected Code Integrity security feature called Memory Integrity. Memory Integrity blocks the malicious code from accessing high-security tasks by creating an isolated environment for hardware virtualization in case of a malicious attack.
Hence Core Isolation’s Memory Integrity assures the security of your device. But will it affect performance, and is it worth enabling? In this article, we will guide you on how to enable or disable Core Isolation in Windows 11 by following two step-by-step methods. We will also discuss if Memory Integrity affects the overall performance of your device.
Enabling or Disabling Core Isolation in Windows 11
If you don’t know how to enable or disable Core Isolation in Windows 11, our two practical methods will help you to achieve this task by following a step-by-step approach.
Method #1: From Windows Security
This method follows a rather simpler approach to enable or disable Core Isolation by following these methods.
- Go to ‘Start Menu’ and type ‘Windows Security.’
- Click ‘Device Security’ from the panel on the left side.
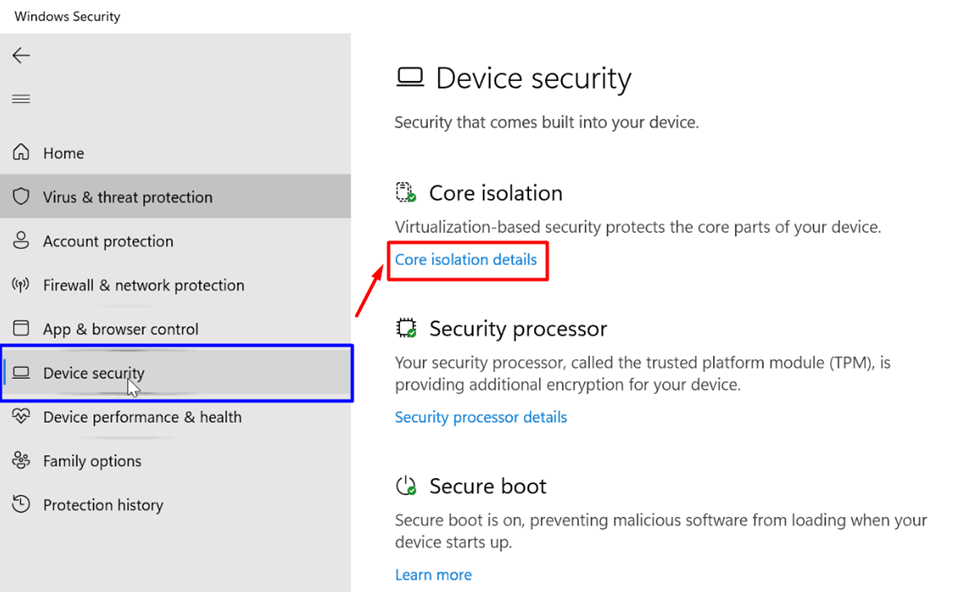
- Click the ‘Core Isolation Details’ in the Device Security tab.
- Click the toggle switch below Memory Integrity to turn Core Isolation ‘on’ or ‘off.’
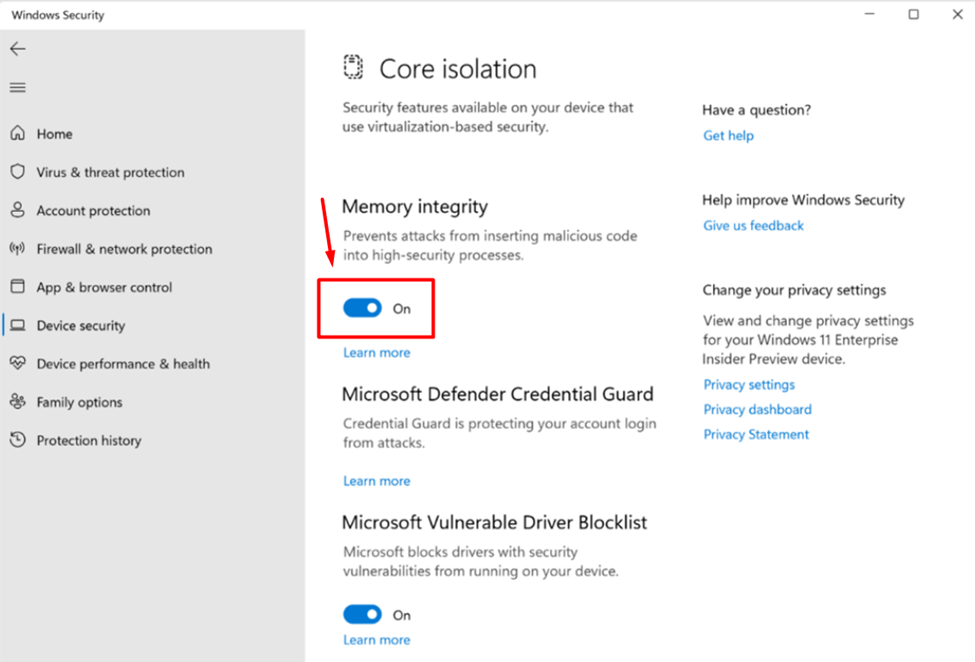
- Restart your computer system to apply the changes, and you’re all done.
Method #2: From Windows Registry
Enabling or disabling Core Isolation in Windows 11 from the Windows Registry only takes a minute by following these methods.
- Press ‘Windows Key’ + ‘R’ to open the ‘Run’ dialogue.
- Type ‘regedit’ and press Enter key.
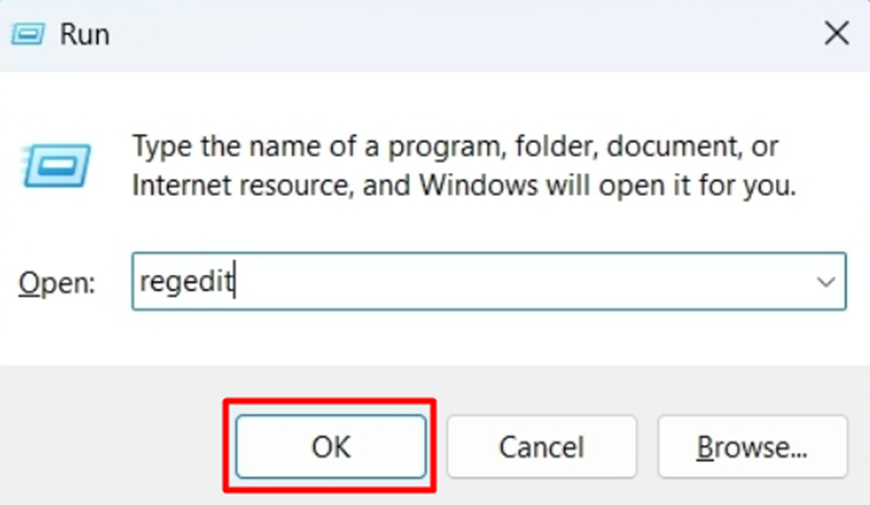
- Click ‘Yes’ to proceed and open the ‘Registry Editor.’
- Enter the following path in the search panel entry starting with ‘Computer’ HKEY_LOCAL_MACHINE\SYSTEM\CurrentControlSet\Control\DeviceGuard\Scenarios\HypervisorEnforcedCodeIntegrity
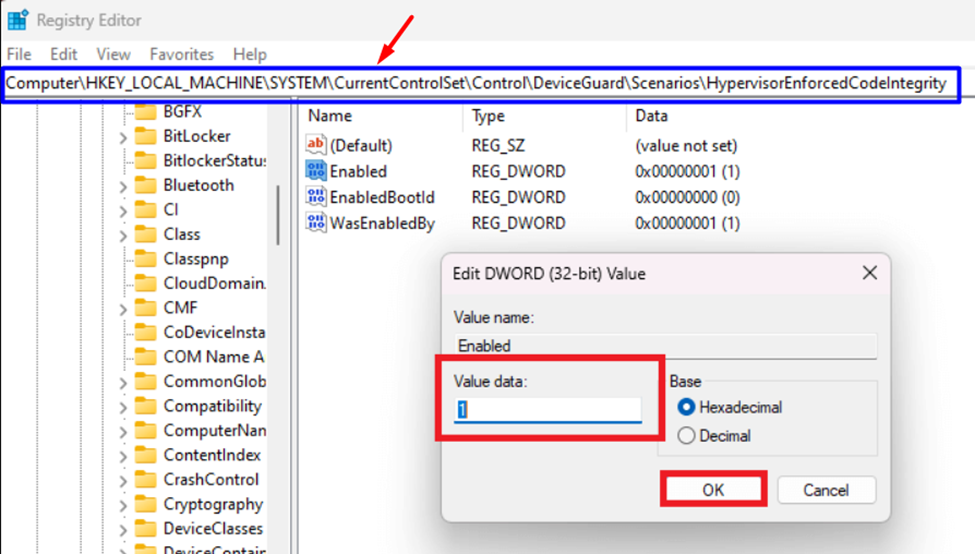
- Double-click the ‘Enabled’ registry file and set the ‘Base’ for Value Data to ‘Hexadecimal.’
- Enter ‘0’ to disable and ‘1’ to enable Core Isolation, and click ‘OK.’
- Restart your computer system to apply the changes.
Does Core Isolation Affect Gaming Performance?
Core Isolation is enabled on Windows by default and isolates the processes from Windows and the device, which means that it is actually consuming hardware resources and adding latency. Hence enabling Core Isolation can affect the performance while playing CPU Intensive games or performing any processor-consuming task. Based on CPU benchmarks with Core Isolation enabled, you may face less than a 5% drop in performance.
Final Words
Core Isolation & Memory Integrity protect your computer system from malicious attacks and viruses. Therefore, enabling the Core Isolation on your device is vital to enhance the security for a small compromise on performance is vital. However, if you’re more into gaming on an old CPU dated back to the 6th generation, you may want to disable it for a better experience.
FAQ
How to Resolve ‘Incompatible Drivers’ for Core Isolation on Windows 11?
To use the particular incompatible app or device with Core Isolation enabled, you must update it for the latest drivers. You can check the manufacturer’s website for the driver update of your PC’s model and generation. If no compatible drivers are available, you may have to remove the app that uses incompatible drivers.
Is it Safe to Turn off Core Isolation on Windows 11?
It is always better to have an extra layer of security to save your files and operating system from malicious attacks. Therefore, Core Isolation should be enabled on Windows 11.
Is Core Isolation Enabled on Windows 11 by Default?
In Windows 11 2022 Update (22H2), Core Isolation Memory Integrity is enabled by default, so you don’t have to do it manually. You can check Windows version to see if an update is required to enable the option.