Nowadays, backing up your whole system is highly essential. There are several ways you can take back up your system, but one common question people usually ask is whether they use a flash drive to back up their Windows 11 system?
The answer is yes! It’s possible to take the backup of the entire Windows 11 system to a flash drive. This process is called bootable backup, and this backup usually helps a lot during hardware failure, malware attacks, or operating system corruption to restore your files safely.
If you are one of those who wants to take the backup of your entire computer to a flash drive on Windows 11, then you are at the right place. Here we will provide you exact steps to take your whole system backup on a flash drive. So read the post till the end to know the precise process.
Two Ways to Backup Windows 11 Computer to Flash Drive
If you want to take back on Windows 11 computer, you can try two methods: Windows 11 Backup and Restore and EaseUS Todo Backup. We will discuss these two methods in detail, but before that, let us understand these two methods clearly with a short comparison table in terms of different aspects.
| Comparison | EaseUS Todo Backup | Backup and Restore |
| File Backup | Back up individual file or folder | Doesn’t support |
| Backup method | Incremental, differential backup, and Full backup | Only full backup |
| Schedule back up | Automatic scheduled backup upon time or event | Doesn’t support |
| Backup Storage | USB drive, external hard drive local disk, DTP server, network share, One drive, Google Drive, Dropbox, NAS, CD/DVD | USB drive or Local disk |
| Image compression | Compress backup images at different levels to save disk space | Doesn’t support |
| Restore Method | Local Restore and Universal restore | Local Restore |
Backup Computer to a USB Flash Drive With EaseUS Todo Backup
When it comes to taking Windows backup to a USB flash drive on your Windows 11 system, there are no doubt several third-party tools available that can perform this process. Still, if you are looking for a reliable and user-friendly tool, I will always recommend using the EaseUS Todo Backup.
EaseUS Todo Backup is one of the top-rated and reputed Windows backup and recovery software that can back up your complete computer to a USB drive within few minutes with the help of some simple clicks and restore everything immediately without any issue.
Now the question is, why should you use EaseUS Todo Backup? The answer is pretty simple! Because this tool comes with many advanced features such as clone OS to HDD/SSD and backup system, which make your backup process quick and straightforward.
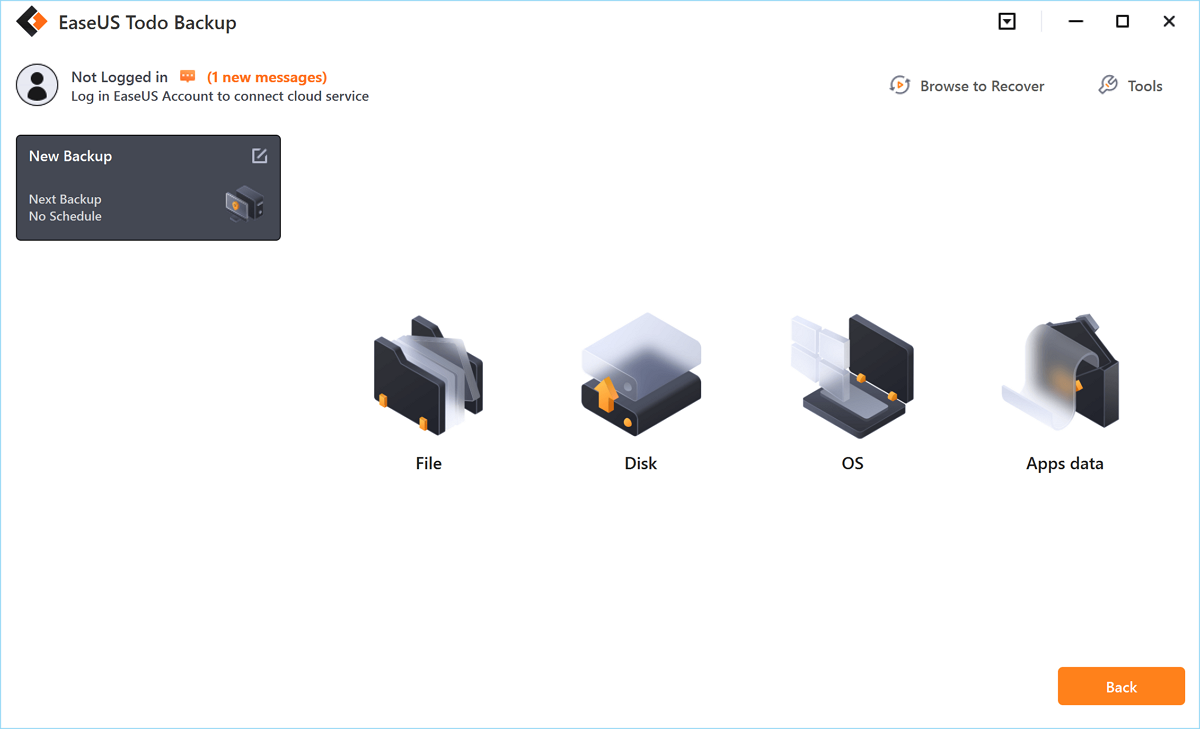
Step 1. To initiate a backup, click the Select backup contents option.
Step 2. There are four data backup categories, File, Disk, OS, and Mail, click File.
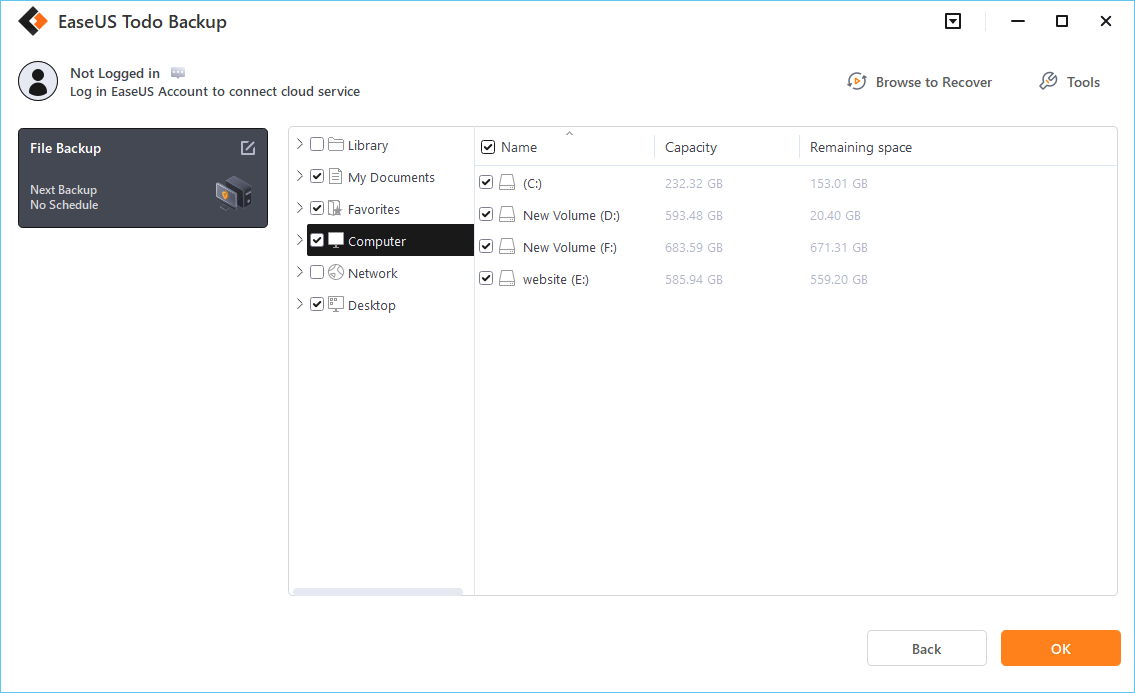
Step 3. On the left, both local and network files will be shown. You may extend the directory to pick the backup files.
Step 4. Follow the on-screen instructions and choose a location to store the backup.
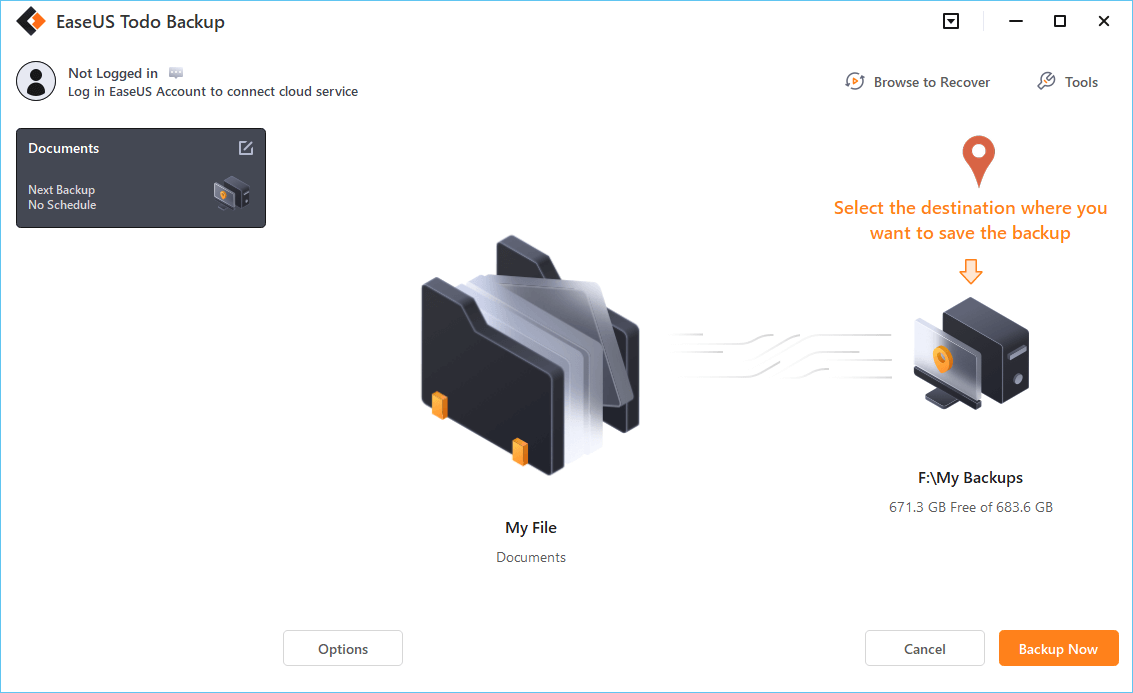
Click Options to encrypt the backup with a password in Backup Options, then click Backup Scheme to specify the backup schedule and start the backup at a certain event. There are also other additional choices you may choose to tailor the backup process to your requirements.
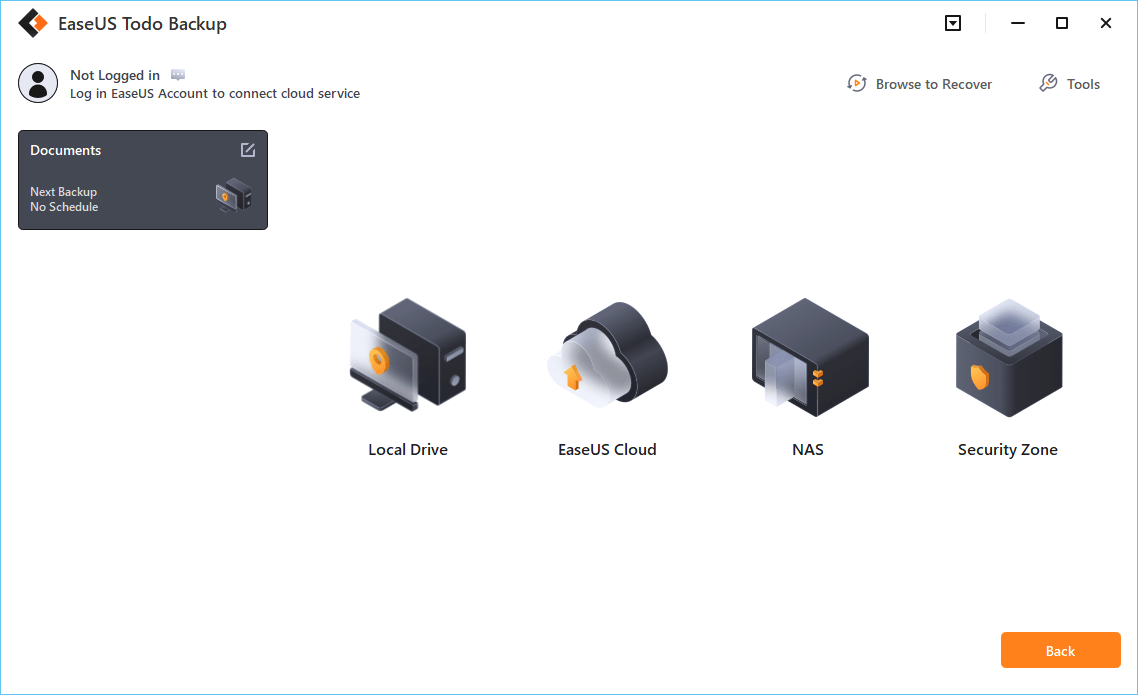
Step 5. The backup may be stored on a local disk, EaseUS’ online service, or NAS.
Step 6. EaseUS Todo Backup enables customers to back up data to a third-party cloud drive as well as its own cloud drive.
If you want to back up data to a cloud drive provided by a third party, choose Local Drive, scroll down to add Cloud Device, and then add and log in to your account.
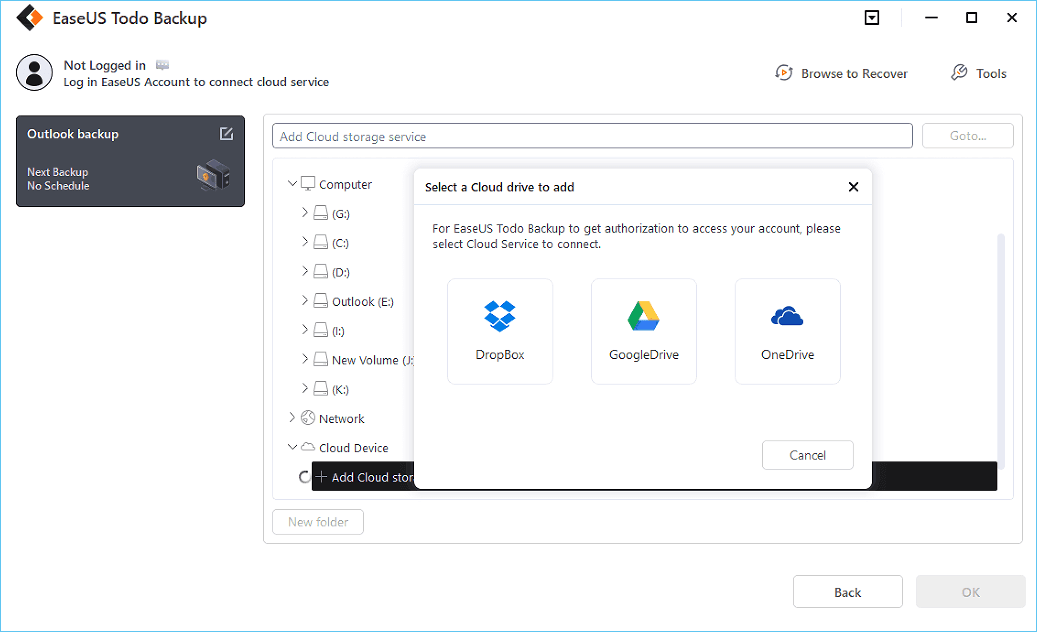
You can also choose the EaseUS cloud drive. Sign up for an EaseUS Account, then click EaseUS Cloud and log in.
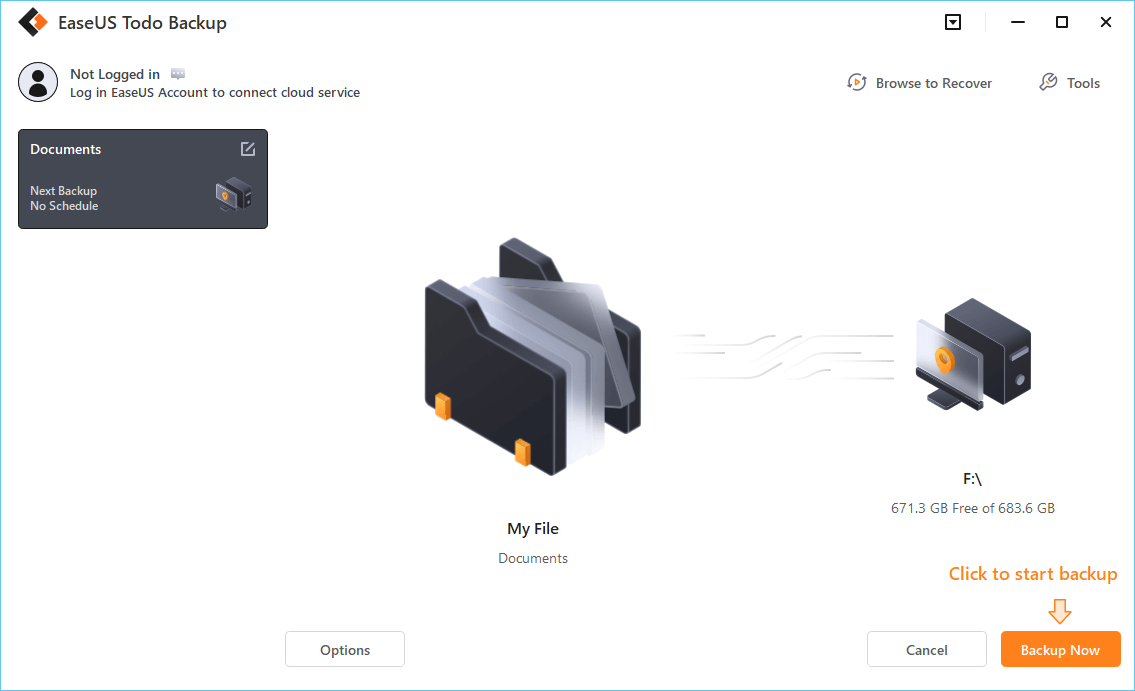
Step 7. Click Backup Now to begin the backup process. The backup job will be presented as a card on the left side of the panel after it has been finished. Right-click the backup job to handle it further.
Backup Windows 11 Computer to Flash Drive via Backup and Restore
If you want to take back up Windows 11 Computer to flash drive, then the Backup and Restore method is always an effective way to take backup. Follow the exact steps given below to perform the backup to the flash drive.
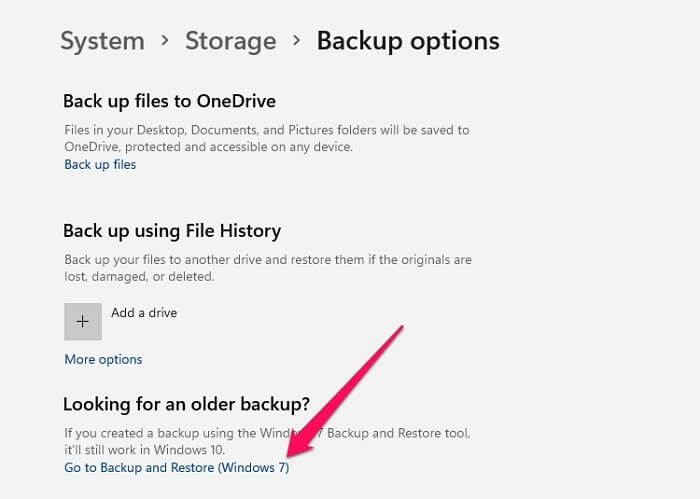
Step 1. Open Control Panel. Once it opens, locate Backup and Restore (Windows 7).
Step 2. Click on the Setup Backup link to start the process. In the setup Windows, select a destination drive. It is preferable to choose external storage instead of the drive on the computer.
Step 3. Next, you need to choose to let Windows choose what files to backup, or you choose it yourself. The latter is better as you can add additional files and folders with it.
Step 4. In the review screen, check if all the included option is as you needed, and then save the settings, and start the backup.
Once done, you can later change the backup location, backup files, and the backup schedule if you wish to change.
Conclusion
If you are following this post till now, no doubt you now know the process to take backup of your whole system on Windows 11. Instant system backup is always necessary and crucial to keep your data safe and secure, and you can do it easily by following the given steps above. So what are you waiting for? Start backing up your system data now with the help of Windows in-built backup and restore methods or use advanced tools like EaseUS Todo Backup to quickly and effortlessly finish your backup process.