Are you seeing High CPU Usage by Windows Search Indexer/Searchindexer.exe in Task Manager?
Or
You don’t know what even Microsoft Windows Search Indexer is?
Recently, users have reported that on average Searchindexer.exe uses 50 to 60% of the CPU but from the past few days when they opened the Task Manager, they saw that searchindexer exe Microsoft Windows search indexer using almost 90% of the CPU due to which their PC performance is getting low.
First of all, you don’t need to worry much because you are not alone in this and many users were trying some wrong fixes for searchapp.exe on Windows 11.
But,
We have compiled a list of the best solutions for you to fix the searchapp.exe error.
Before going to the fix, there will be some important questions regarding the Windows Search Index that might be in your mind.
What is SearchIndexer exe?
SearchIndexer exe is an executable file and stands for Microsoft Windows Search Index Builder and was introduced in Windows XP,7, 8, and can also be found in the latest versions of Windows 10 and 11 as well.
Microsoft Windows Search Indexer was originally known as Windows Desktop Search (WDS) and plays an important role in indexing files for Windows search meaning it keeps looking for the location of different files in the background and powers Windows File Explorer or Start Menu.
Searchprotocolhost.exe Microsoft Windows Search Indexer CPU is allocated in C:/Windows/System32/ folder and the file size is almost 427,520 bytes.
Is SearchIndexer exe a virus?
It’s totally safe as SearchIndexer exe digitally signed by Microsoft Corporation.
As it is legitimate but hackers can still attack the program to make changes and carry out their illegal activities through searchindexer.exe
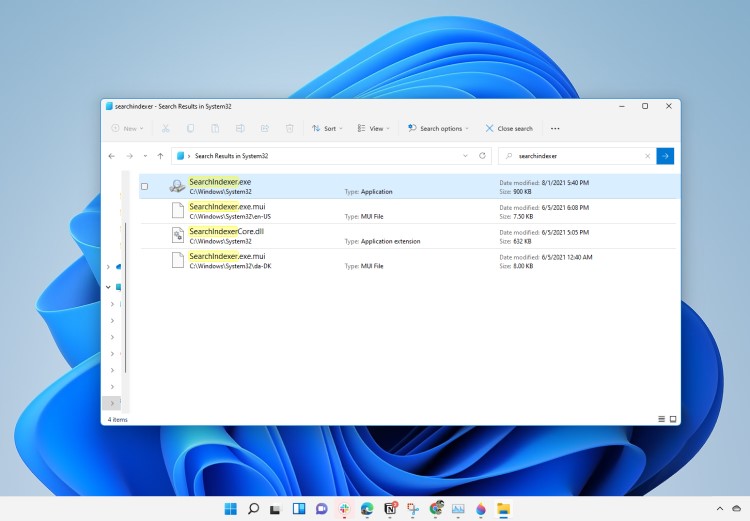
Also, we can clear our doubt that searchindexer exe Microsoft Windows search indexer is a virus or not by checking the file location as it should be located in its default file location when it was originally developed.
But still, to be on the safe side you can check if there’s a virus or not through Task Manager:
- Press together Ctrl + Shift + Esc keys to open Task Manager.
- Go to Details and look for searchindexer.exe
- Also on the right pane of the window, under the description column make sure its name is correct.
- Right-click on it and select Open file location.
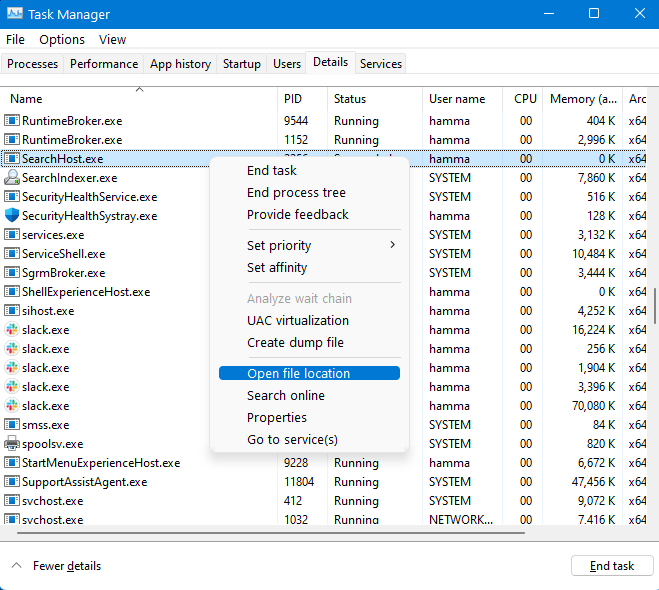
- If it is located at C:\Windows\System32
And if it’s not in the given address, then it might be a virus or spyware.
Also Read: FIX: Microsoft Compatibility Telemetry?
Video Guide: FIX: Searchindexer.exe? What is Microsoft Windows Search Indexing?
Solution 1: Performing a Clean Boot Using MSConfig
Clean boot will help you to eliminate the unnecessary applications which are running on the backend.
Also, it will help fix Windows Search Indexer High CPU usage and will replace the corrupted file that is helping in high CPU usage.
And shut down any applications which are conflicting with each other.
How do I perform a clean boot in Windows 11?
Here is how to perform a Clean Boot on Windows 11:
- Press Windows Button + R Key
- The Run Dialogue Box will appear
- Type “msconfig“ and press Enter.

- The System Configuration window will open
- In the General tab uncheck the:
- Load system services; and,
- Load startup items
as this will only use services issued by Microsoft when your PC will reboot.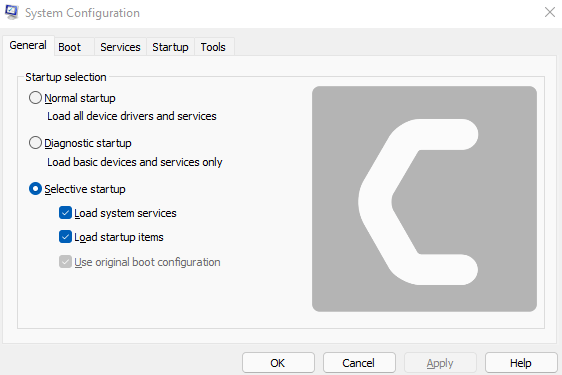
- Now Select the Services tab and uncheck all the unnecessary service
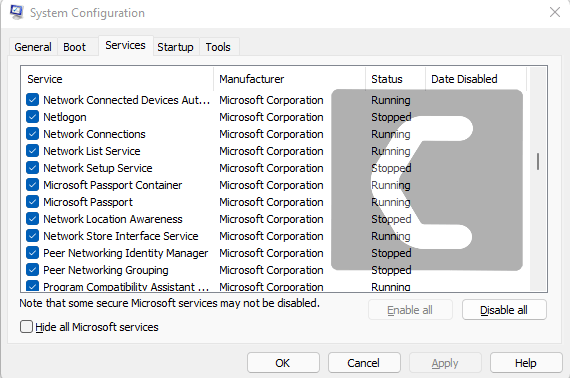
- Only check those who are not using high CPU usage.
- Now click OK
- And your clean boot is done and the unnecessary services are eliminated
After restarting, your PC your searchindexer.exe error on Windows 11 will be fixed.
Also Read: MMC.exe Error Blocked
Solution 2: Run Search and Indexing Troubleshooter to Fix Windows Search Indexer
This Search and Indexing will look for errors all-around your PC and will fix them.
Moreover, the corrupted files that will get fixed with it will also solve searchindexer.exe high CPU Usage.
How do I fix SearchIndexer exe?
So, here’s how you can fix searchindexer.exe by running Search and Indexing troubleshooter:
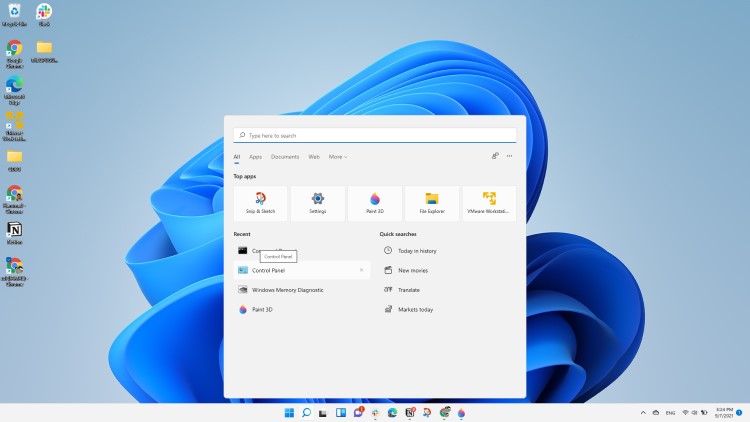
- Click on the Search icon
- Select Control Panel.
- Now look for Troubleshooting
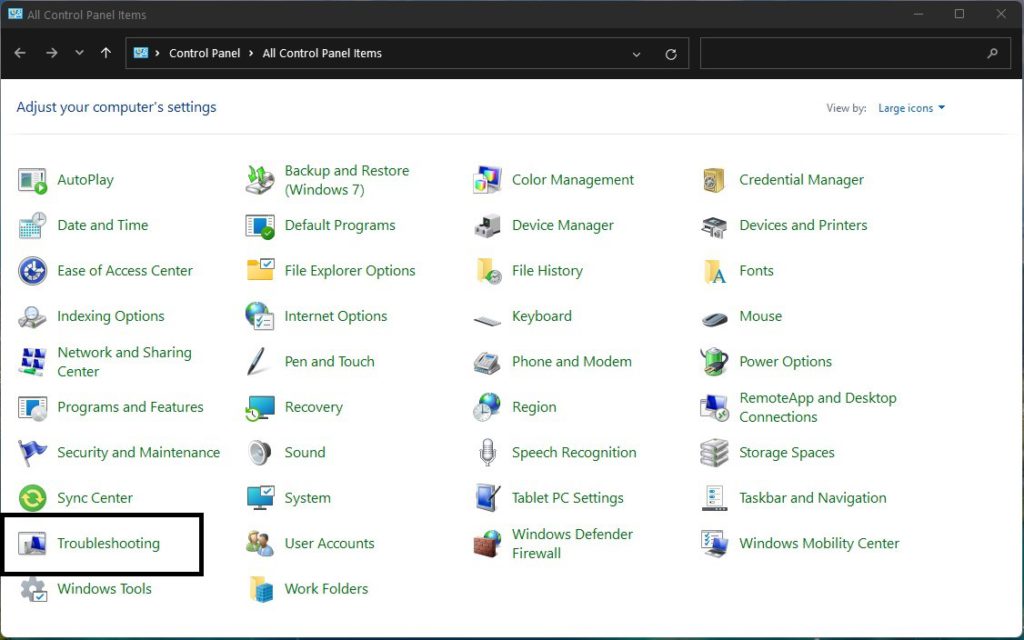
- In the left pane click on View all.
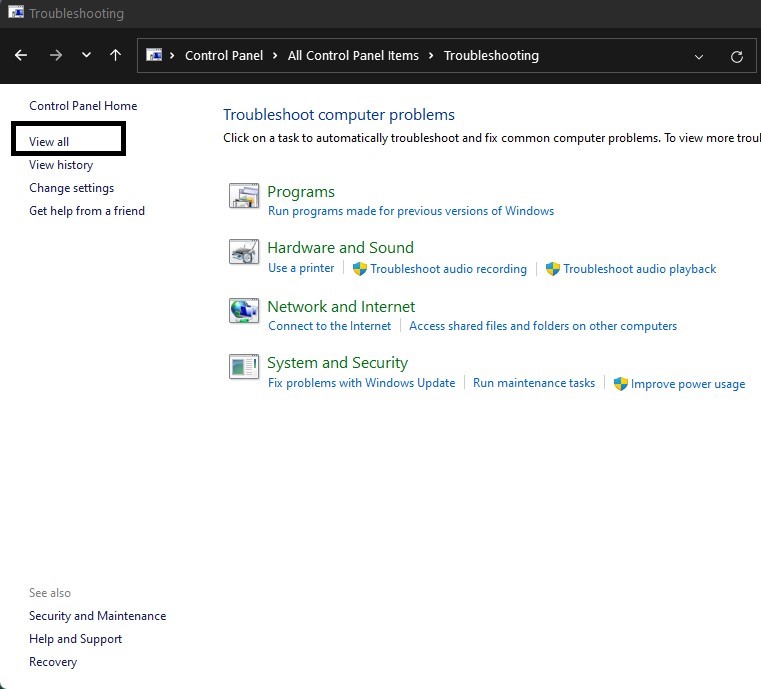
- Now double-click on Search and Indexing
After the troubleshooting is done, you need to run your Windows in Safe Mode.
And, you can do this by following the steps below:
- Press Windows Button + R Key
- The Run Dialogue Box will appear
- Type “msconfig“ and press Enter
- The System Configuration window will open and then click on the Boot tab.
- Now checkbox the Safe boot option.
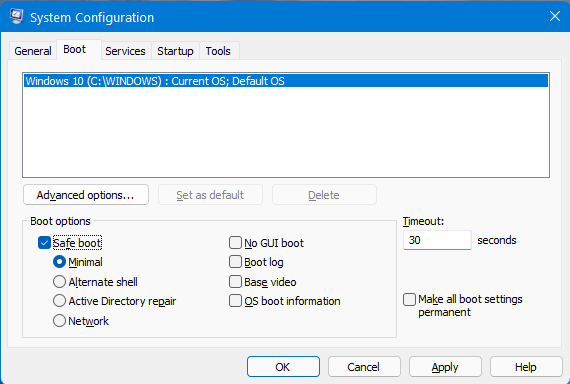
- Then click on Apply and OK for the system to reboot in safe mode.
- After rebooting check if Windows Search Indexer high CPU usage is fixed or not.
If booting in safe mode didn’t fix searchindexer.exe continue to the next solution.
Also Read: LockApp.exe? What’s It? Is It Safe?
Solution 3: Scan System File to Fix Searchindexer.exe High CPU usage
Most errors are caused by corrupted files, so start by checking the system files to fix the Microsoft Windows Search Indexer error
If you are wondering How do I scan all missing system files?
All you need is the DSIM tool which will replace missing files.
While typing commands be careful at the spaces between ‘/’ and word.
How Do I Run the System File Checker in Microsoft Windows?
So here’s what you need to do to fix the Microsoft Windows search indexing:
- Search by pressing the Window key and type “Command Prompt“
- Right-click “Command Prompt” and select “Run as Administrator“. The option is available in the right pane of the window too.
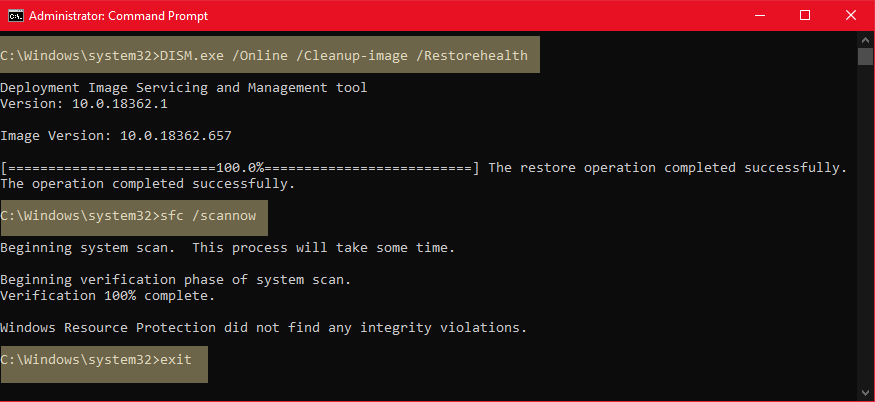
- Type “DISM.exe /Online /Cleanup-image /Res and press Enter.
- It Might take up to 30 minutes to complete the process
- Once the operation is completed successfully, type “sfc /scannow” in the command line and then press the Enter key.
- If there were any corrupted files you would see the following message on the command line: “Windows Resource Protection detected corrupted files and successfully restored them.”
- If so, type exit and hit enter.
- Searchindexer.exe error corrupted files would have been fixed by now.
- You can restart your windows and check if the Microsoft Windows Search Indexer high CPU usage error in Windows 7 exists.
If the above solution didn’t fix the Windows Search Indexer then move on to the next solution.
Solution 4: Changing Indexing Option
Another reason for Microsoft Windows Search Indexer is due to the indexer which cannot find some files in the system.
So it’s better to make some changes to the indexing option.
How To Change Advanced Indexing Options in Windows?
And here’s how to change the indexing option:
- Click on the Search icon and type Indexing Options.
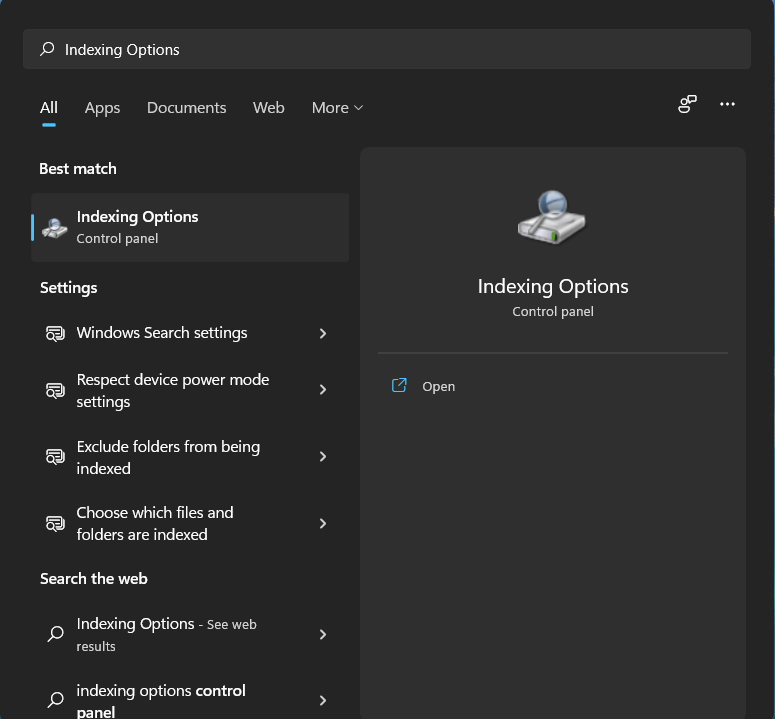
- Now click on Modify.

- Click on Show all Locations and uncheck local disk C location and other file locations which cause high CPU usage.
- Now restart your PC and check if the Windows Search Indexer is fixed or not.
What is Indexing in Windows?
Indexing in Windows meaning that it keeps looking for the location of different files in the background and powers Windows File Explorer or Start Menu.
Should I disable indexing Windows 11?
Yes, you can disable indexing on Windows 11 if you are not using the search feature that much and you use any other program for desktop search.
Does indexing slow down computer?
Also Read: FIXED: WaasMedic Agent.exe High Disk Usage?
Moving on to solution 5 for searchindexer.exe high CPU usage.
Solution 5: Scan For Virus and Threats to Fix Windows Search Indexer High CPU Usage
When you download something from a malicious website you may download a virus with it.
Can a virus cause High CPU usage?
Yes, a virus can cause high CPU usage as they mostly try to replicate themselves through an exe file.
Although you have an antivirus installed on your PC still it can’t protect your system 100%.
Also, it can lead to searchindexer.exe High CPU/RAM/Network usage.
So, to overcome Microsoft Windows Search Indexing High CPU Usage in Windows 11 it’s best to scan for viruses using the Windows 11 built-in virus protection software.
How can I fix searchindexer.exe high CPU usage?
Here’s how you can scan your PC for viruses and threats:
- Click on the Search icon
- Select Settings.
- Now click on Privacy & security > Windows Security
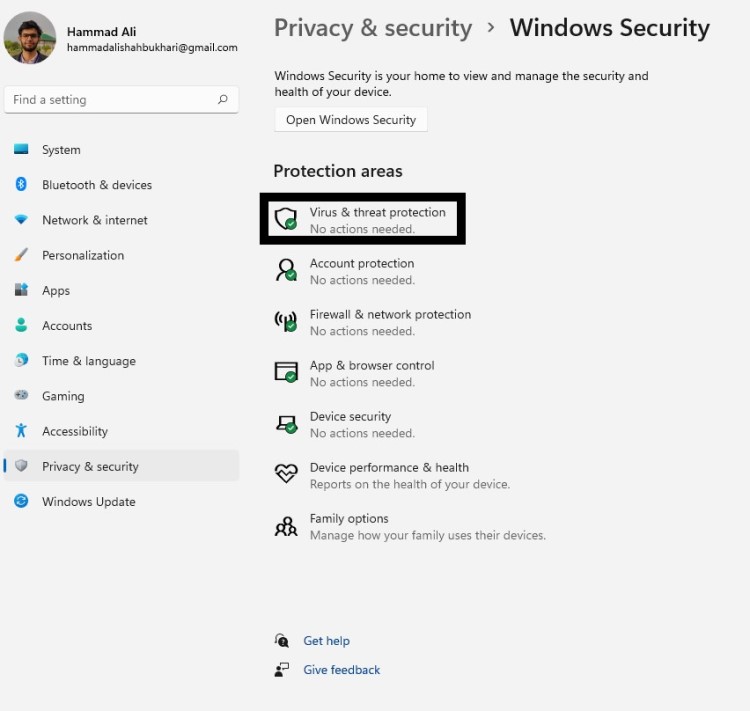
- Select Virus & threat protection and click on Quick scan.
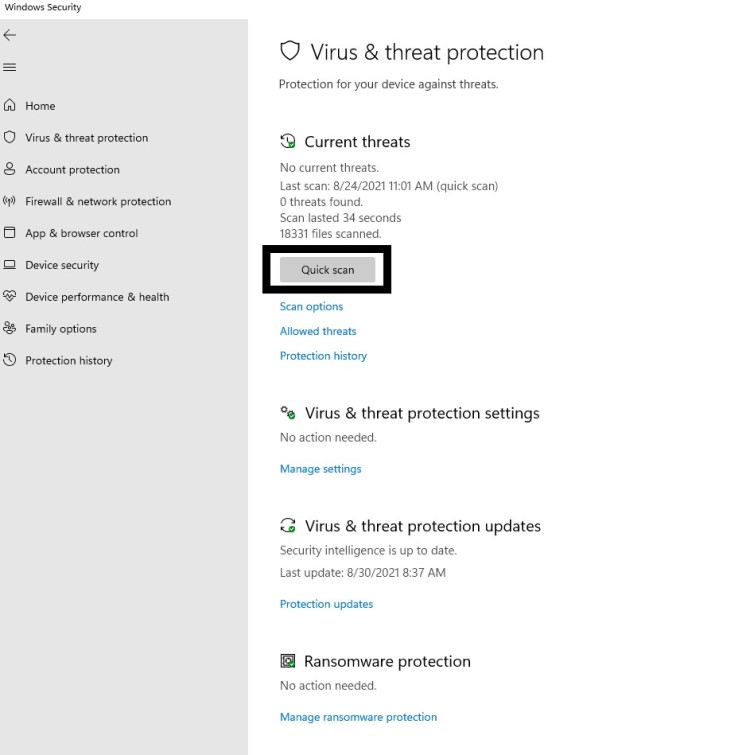
- Wait for the scan to finish and it will let you know how to deal with the virus either remove or block it.
- Then restart your PC to see Microsoft Windows Search Indexer CPU is fixed.
Having a High CPU Error CHECK OUT: What is Acrord32.exe?
If none of the above solutions have worked for you in fixing Windows Search Indexer then continue to the last solution.
Solution 6: Disable Windows Search to Fix Microsoft Windows Search Indexer CPU
Disabling Windows Search will help you get over Windows Search Indexer high CPU usage but you should know that Windows search is an important service for Windows and can have drawbacks when you disable it.
But you can disable it when you don’t need it in near future.
How do I turn off Windows Search? Can I stop SearchIndexer exe?
So, here’s how you can disable/stop Searchindexer.exe through Windows search:
- Press Windows key + R to open the Run window.

- Then type services.msc and click OK to enter the service app.
- Scroll down and find Windows Search and double-click the Services to open its properties.
- In the Startup Type section choose Disabled from the drop-down list.
- If the Service status is Running then click on the Stop button.
- Click on Apply and then select OK.
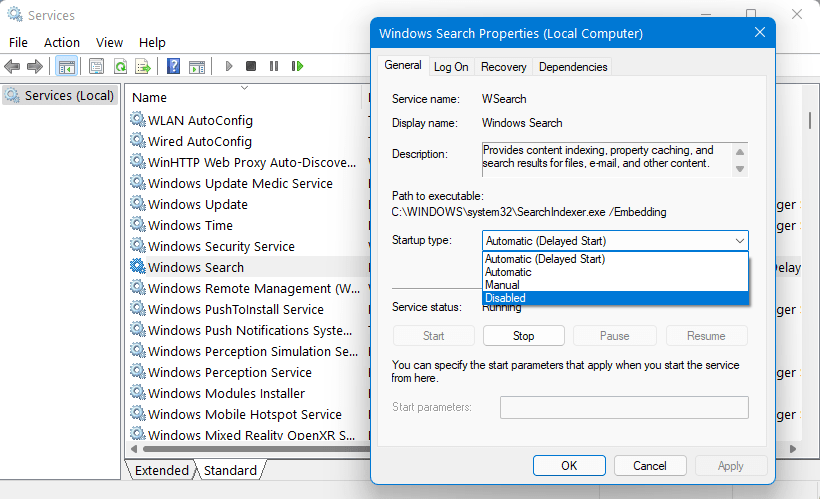
- After restarting your PC check if the searchindexer.exe high CPU usage is fixed or not and you can enable Windows search using the same steps once your error is solved.
What happens if you disable Windows Search service?
Yours Windows OS will stop indexing files so it will take a long time to search files every time.
Is it OK to disable Windows Search?
Yes, it’s totally okay to disable Windows search as long as it’s using a high CPU. And you can enable it when your error is fixed.
Conclusion
So, these are the best fixes we could get for you in fixing Windows Search Indexer High CPU Usage in Windows 11 and
Disabling searchindexer.exe from your system is not that much of an easy job and also we don’t recommend it to so that’s why we have provided you with the best possible solutions.
It’s best you try all the solutions and if you have any other fix related to Microsoft Windows Search Indexer CPU or any type of question then just let us know in the comment section below.
FAQs
How do I get rid of searchindexer.exe?
1. Update your Windows.
2. Disable Windows search feature.
3. Scan for malware