What is wsappx High CPU Usage?
And
you would be thinking what even is AppX Deployment Service?
Recently users have reported that their PC started is getting a bit laggy and the performance is getting low after they installed some updates
and when they opened the Task Manager they saw that Wsappx is using almost 90% of the CPU so, upon clicking on the process the user saw that two more processes appear naming Client License Service (ClipSVC) and AppX Deployment Service or AppXSVC.
So, many users did is restarted or tried to disable it which was a bad move to overcome wsappx high CPU usage.
First of all, you don’t need to worry much because you are not alone in this and many users were trying some wrong fixes for wsappx on Windows 11.
But,
We have compiled a list of the best solutions for you to fix the wsappx High CPU Usage.
Before going to the fix there will be some important questions regarding the Wsappx error that might be in your mind.
What Is Wsappx?
Wsappx is a legitimate service by Microsoft introduced in Windows 8 and can also be found in the latest versions of Windows 10 and 11.
It’s a part of Windows Store and Universal app and its role is to install, uninstall, updating apps from the store, and making sure that the apps are licensed.
Wsappx has two sub-processes, one is Windows Store Service (WSService) or Client License Service (ClipSVC)which you will find running in Task Manager on Windows 8.
The other process is known as AppX Deployment Service or AppXSVC which is responsible for the high disk usage.
Also, you can find out about these both processes below.
What Is AppX Deployment Service (AppXSVC)?
AppX Deployment Service function is to deploy store apps meaning that it’s responsible for installing, updating, and uninstalling apps.
Also help updates apps automatically such as Paint 3D, Mail, and others. And if you have noticed that whenever your PC is installing updates of your desktop apps it uses a high CPU.
AppX Deployment Service is also running in the background when you are not even installing any app because the service is currently updating your Stores app at the back.
Also Read: TOASTER.EXE Failed
What Is Client License Service (ClipSVC)?
Client License Service (ClipSVC) is responsible for the infrastructure support of the Windows Store on Windows 10.
It makes sure that you are using license apps for which you have paid for and your money won’t waste and disabling this service won’t do any good to you like the apps you have paid for won’t work properly.
Is Wsappx a Virus?
It’s totally safe as wsappx is a legitimate program digitally signed by Microsoft Corporation and most users have not found it safe.
As it is legitimate so hackers might attack the program to make changes and carry out their illegal activities through wsappx
Moreover, if you are a Windows XP or Windows Vista user and if you see this console window host process running on your PC then it’s an unwanted program as this file no longer works there.
Also, we can clear our doubt that AppX Deployment Service/wsappx is a virus or not by checking the file location as it should be located in its default file location when it was originally developed.
But still, to be on the safe side you can check if there’s a virus or not through Task Manager:
- Press together Ctrl + Shift + Esc keys to open Task Manager.
- Go to Details and look for wsappx
- Also on your right side under the description column make sure its name is correct.
- Right-click on it and select Open file location.
- If it is located at C:\Windows\System32
And if it’s not in the given address then it might be a virus or spyware so my advice is for you to run a full system scan with the help of your anti-virus program installed on your PC.
Also Read: LockApp.exe? What’s It? Is It Safe?
Can I end Wsappx?
No, you can’t end the Wsappx as all the apps are connected to it and if you try to disable it Windows OS will give you a warning message that the app installation and updates related to wsappx will shutdown or the system would crash.
Now moving on to the solution for wsappx High CPU Usage.
Video Guide: What is AppX Deployment Service?
Solution 1: Disable Windows Store Via Local Group Policy Editor
Remember that disabling the Windows Store won’t stop the wsappx high CPU usage process as it will be still running in the background.
But it will do stop wsappx from using a high CPU.
Here’s how you can disable it:
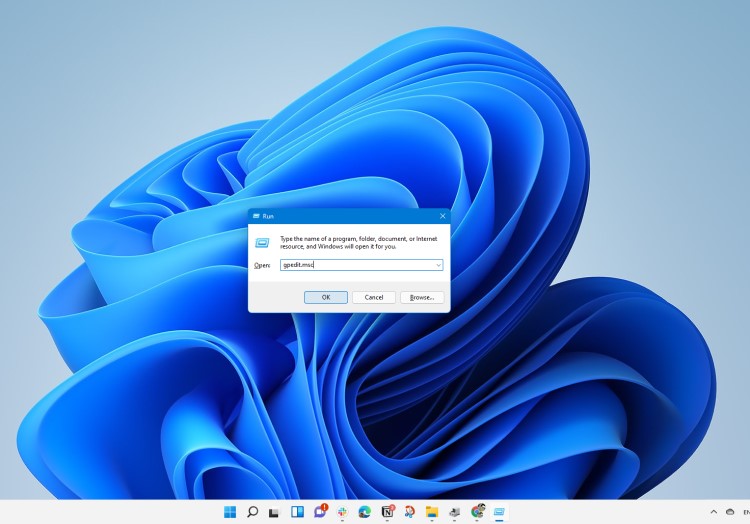
- Press Windows Key + R to launch the Run dialogue box.
- Type gpedit.msc and press Enter
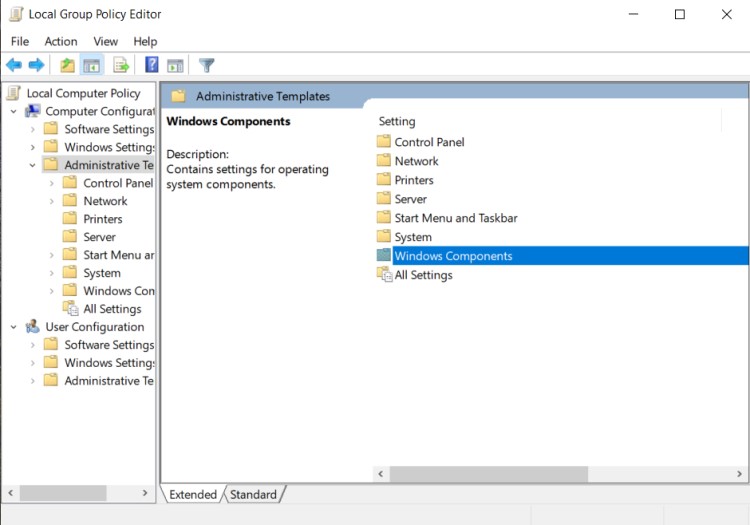
- In the Local Group Policy Editor double-click on the Computer Configuration located at the left pane.
- Now you will see a number of folders below and double-click on the Administrative Templates.
- After that double-click on Windows Components.
- Now scroll down to locate the Store folder and when you find it just click on it.
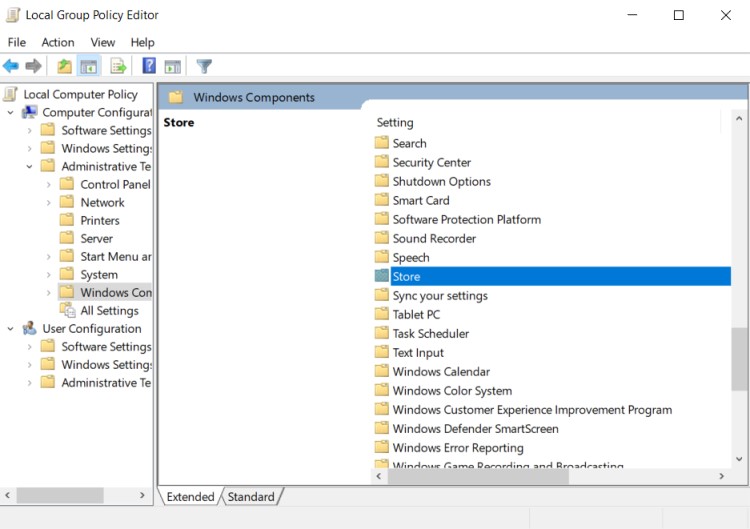
- In the Store folder, you see a few options on the right and you have to choose to Turn off the Store application.
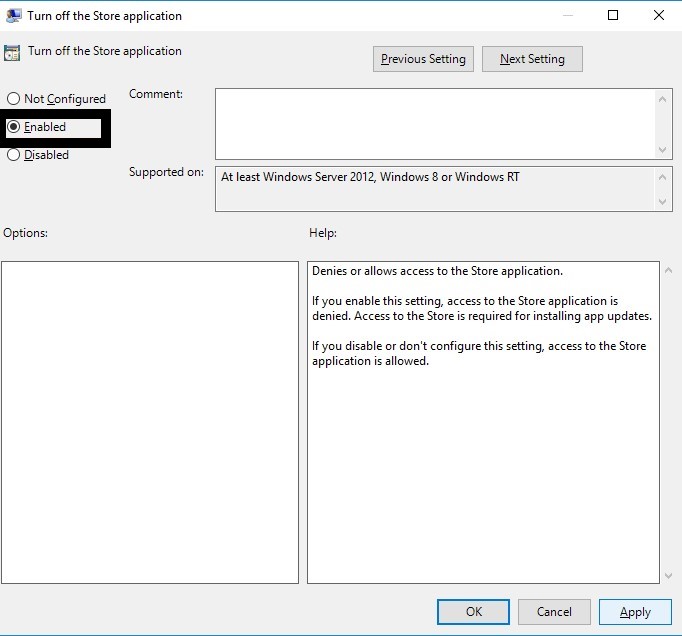
- Right-click on Turn off the Store application and select Edit.
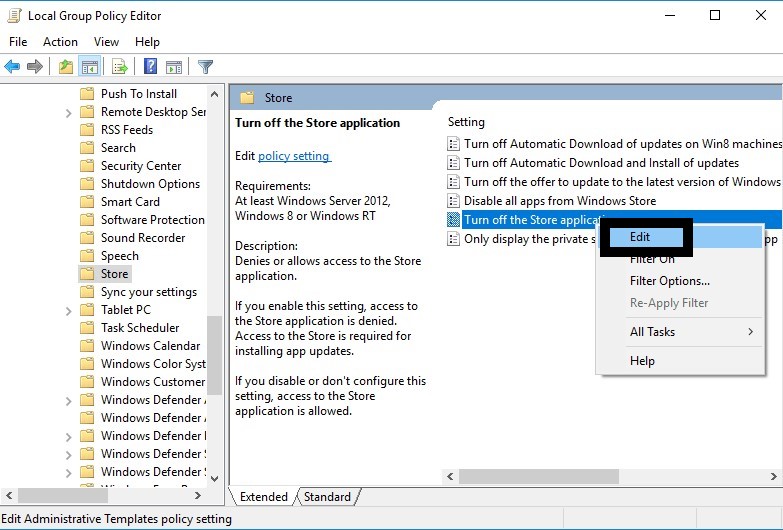
- Click on Enabled and then Click on Apply and OK.
- Now restart your PC and check if wsappx high CPU usage is gone or not.
Also Read: How to Disable Gamebar.exe in Windows 10
Moving on to the next solution for fixing wsappx high CPU usage
Solution 2: Disable Windows Store From Registry Editor to Fix wsappx High CPU Usage
If you are Windows 8 or Windows 10 Home Edition user you can use the registry editor to disable Windows Store and get rid of wsappx high CPU usage.
So, here’s what you need to do:
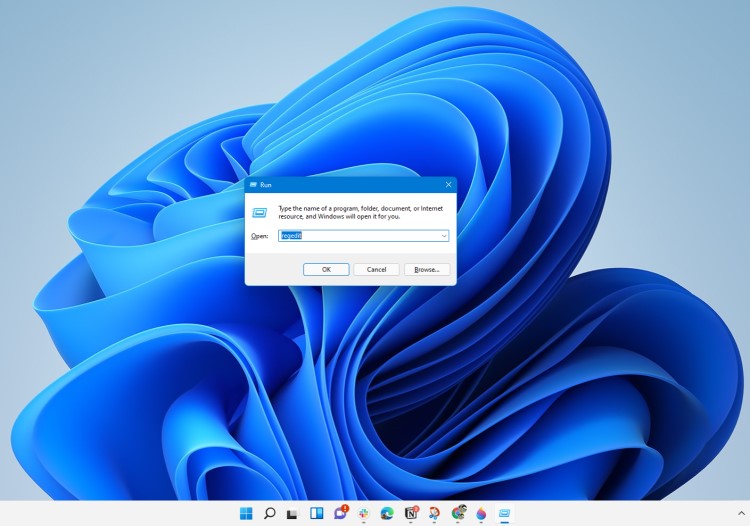
- Press Windows Key + R to launch the Run dialogue box.
- Type regedit and press Enter
- In the Registry Editor window double-click on the computer icon.

- You will see a number of folders and you need to double-click on HKEY_LOCAL_MACHINE
- Now you need to double-click on Software and then look for the Policies folder.

- After clicking on the Policies folder double-click on Microsoft.
Now look for the WindowsStore key and click on it and if there isn’t one then you have to create a new folder naming WindowsStore.
Here’s how you can create it:
- Right-click on the Microsoft folder which you found above.
- Click on New and then select Key.
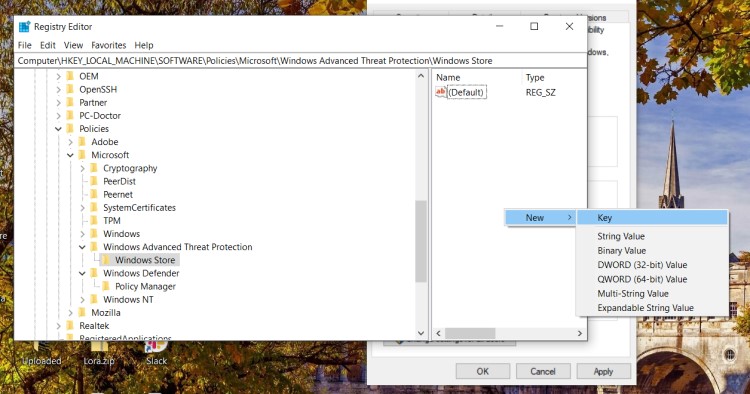
- Type the name WindowsStore and press Enter.
- Next, select the WindowsStore from the left pane which you created.
- Right-click on the right empty space and click on New and then choose DWORD (32-bit) Value
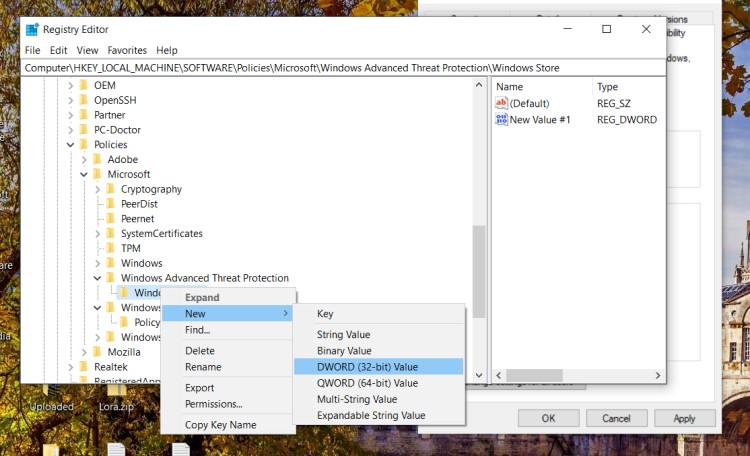
- Now name the new folder RemoveWindowsStore and press Enter.
- Double-click on the RemoveWindowsStore folder and type 1 in the Value data.
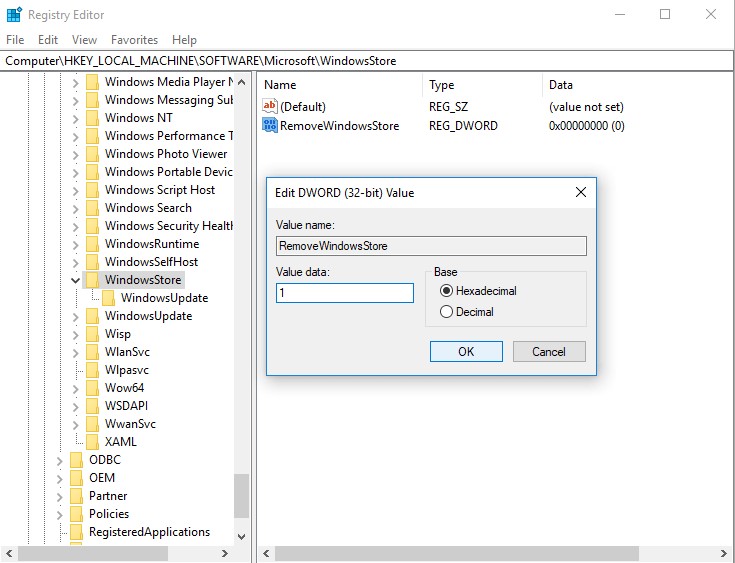
- And click OK to save changes and check if wsappx high CPU usage is solved or not.
If the above solution didn’t fix wsappx High CPU Usage you need to follow the next solution.
Also Read: MMC.exe Error Blocked
Solution 3: Update Driver on Windows 11 through Device manager
If you have outdated graphic drivers, network drivers, or any other driver in the device manager list on your PC
it can lead to many issues such as lag in games and one of the main issues will be the wsappx in Windows 11.
For example, if you get a wsappx high CPU usage while using a printer then the printer driver might be outdated and the same goes for any other driver.
So, it’s best to make sure that your graphic drivers or your printer, or any other driver are updated in order to overcome wsappx high CPU usage Windows 11
You can use this technique to update other outdated drivers too.
Here’s how you can check for updates:
- Click on the Search icon
- Type device Manager
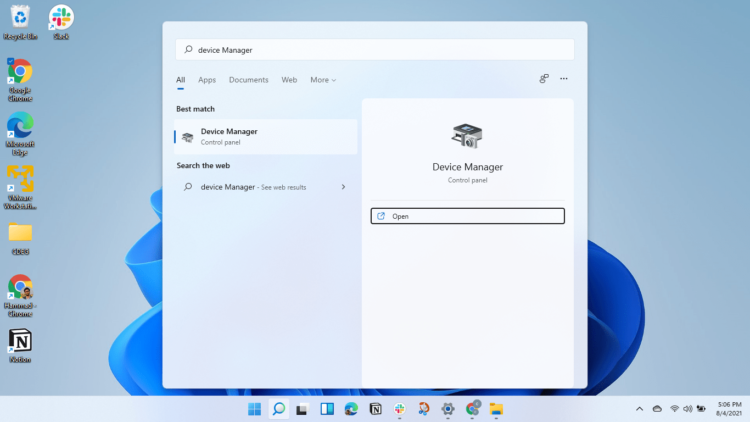
- Click to open Device Manager
- Then select the Print queues

- A further menu will open
- Right-click on the printer you are using.
- Click on the Update driver
- And then select Search automatically for drivers.
- After the updates are done restart your PC and check if wsappx high CPU usage Windows 11 is fixed.
Also Read: What is Acrord32.exe?
Moving on to solution 4 to get wsappx high CPU usage solve.
Solution 4: Update Windows 11 to Fix wsappx High CPU Usage
Sometimes your outdated PC is the main cause of the appx deployment service in Windows 11
For the best performance of your PC, you need to make sure that your Windows OS is up to date
and with new updates, the bugs or errors like appx deployment service and high CPU usage will be fixed.
So, here is how you can update your Windows 11 OS:
- Click on the Windows icon
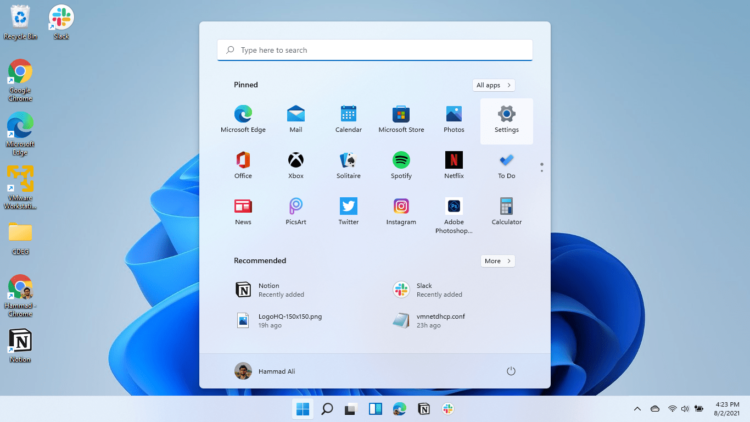
- Click on the settings icon
- A new window will pop up
- Select Windows Update from the left menu
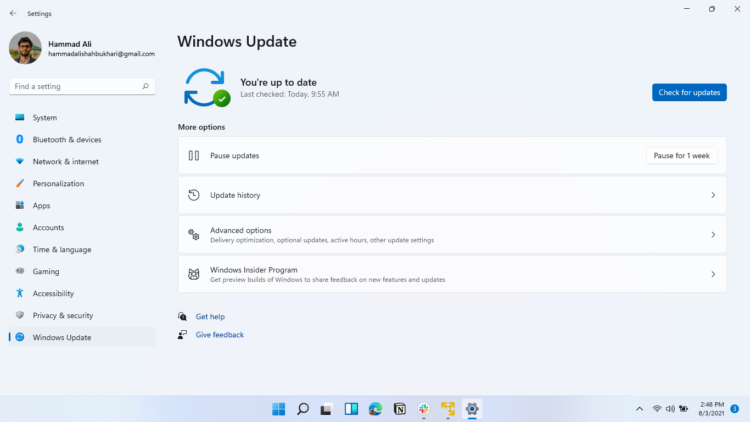
- The new window will pop up
- Then click on Check for updates button.
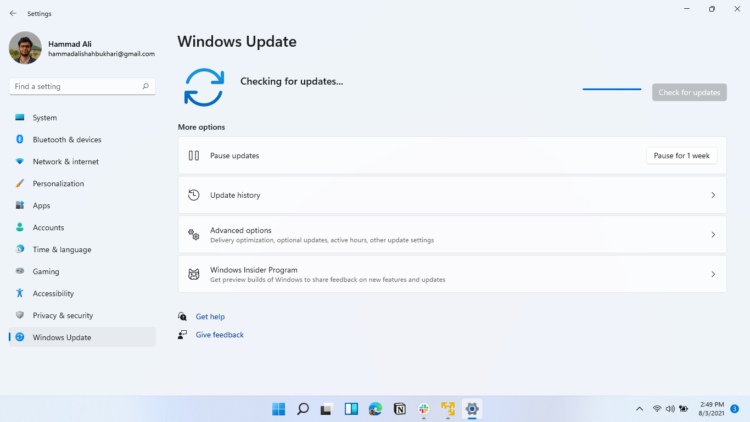
- If there is any update it will start updating the PC
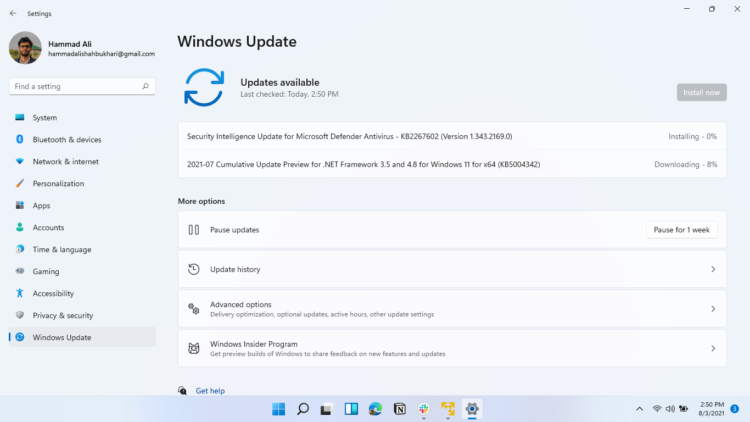
- It will take some time to update Windows OS and after that, you can restart your PC.
If the above solution didn’t work you can move on to the next one for fixing wsappx high CPU usage.
Also Read: ntoskrnl.exe BSOD
Solution 5: Disable Superfetch and Windows Search
Disabling Superfetch and Windows Search will help you get over wsappx high CPU usage but you should know that Superfetch is an important service for Windows when you need data for your apps.
But you can disable it when you don’t need it in near future.
So, here’s what you need to do:
- Press Windows key + R to open the Run window.
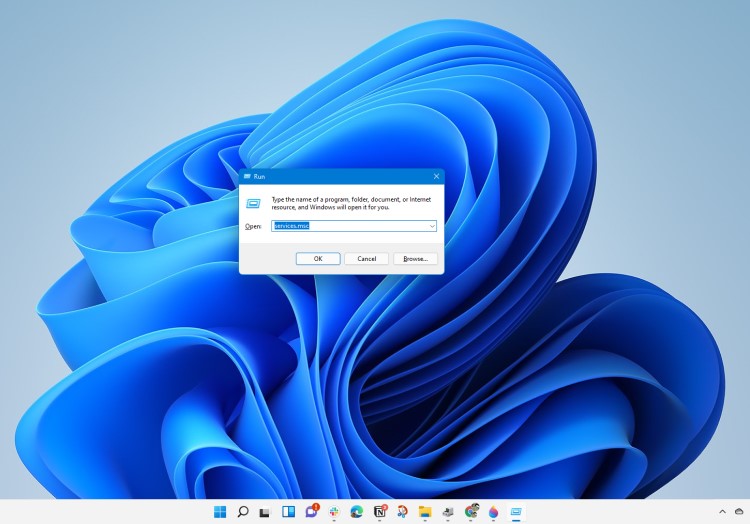
- Then type services.msc and click OK to enter the service app.
- Scroll down and find Superfetch and double-click the Services to open its properties.
- In the Startup Type section choose Disabled from the drop-down list.
- Click on Apply and then select OK.
- After closing the Superfetch properties window go back to the Service list and look for Window Search and double-click on it.
- In the Startup Type section choose Disabled from the drop-down list.
- If the Service status is Running then click on Stop button.
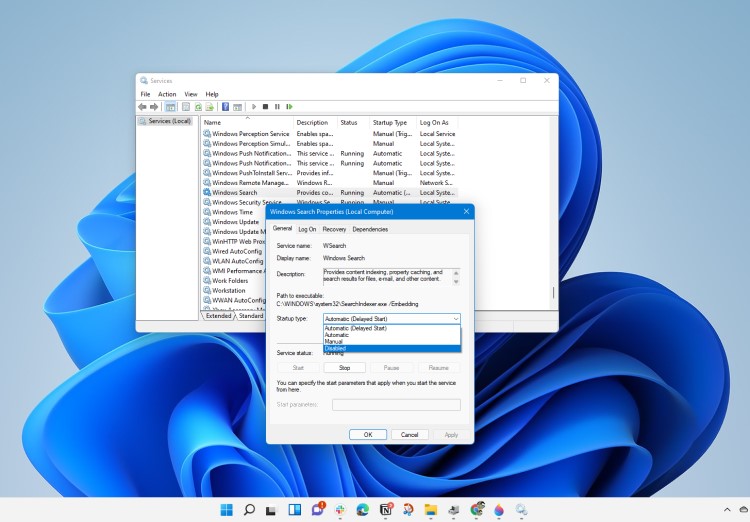
- Click on Apply and then select OK.
- After restarting your PC check if the appx deployment service is fixed or not.
Also Read: FIX: Console Windows Host High Memory Usage?
Solution 6: Increase Virtual Memory to Fix wsappx High CPU Usage
Another way you can fix wsappx high disk usage or CPU usage is to increase your system Virtual memory.
And here’s how you can do it:
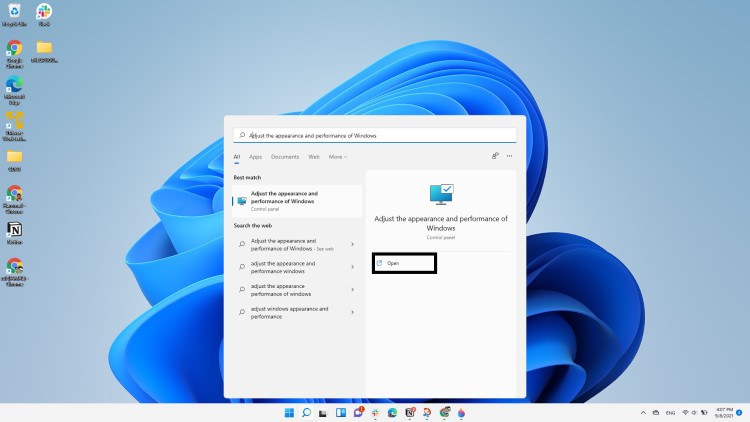
- Click on the Search icon
- Type Adjust the appearance and performance of Windows.
- In the Performance Options window go to the Advanced tab and click on the Change button.
- Now uncheck Automatically manage paging file size for all drives box.
- Choose the drive where Windows OS is installed and click on Custom size.
- Type your RAM size in the Initial size(MB) box
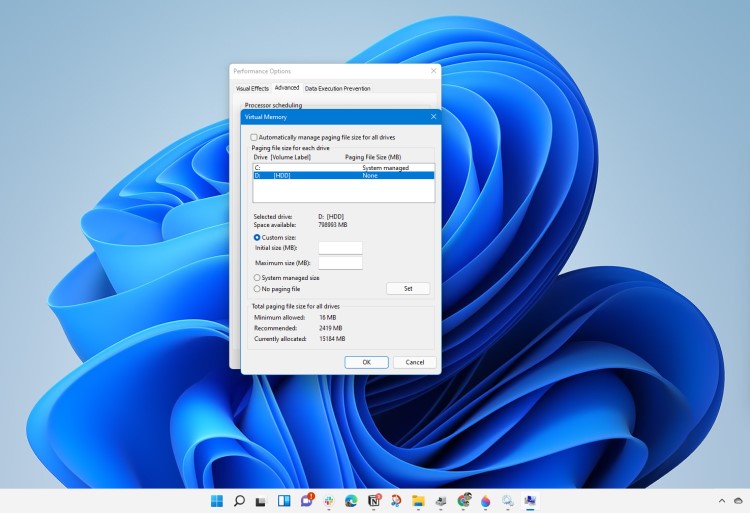
- And in the Maximum size box type double the size of your RAM.
- Click on Set and then choose OK.
- After this reboot, your PC and see if wsappx high disk usage is fixed or not.
If you couldn’t fix appx deployment service then move on to the next solution.
Solution 7: Run Windows Store Apps Troubleshooter to Fix wsappx High Disk Usage
This Windows Store Apps troubleshooter will look for errors all around your PC and will fix them.
Moreover, the corrupted files that will get fixed with it will also solve wsappx high CPU Usage.
So, here’s what you need to do:
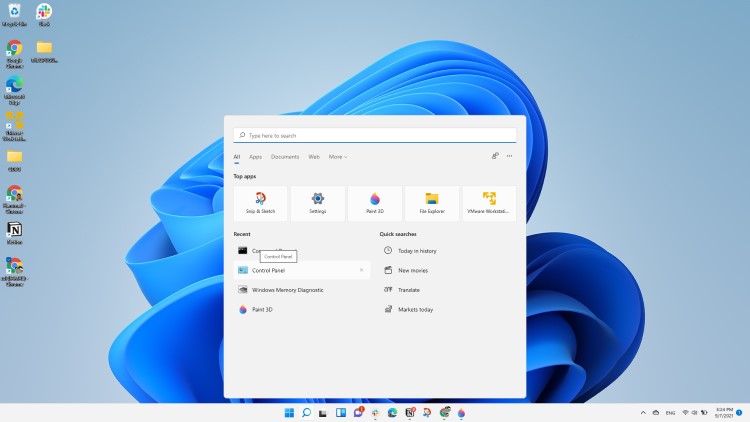
- Click on the Search icon
- Select Control Panel.
- Now look for Troubleshooting
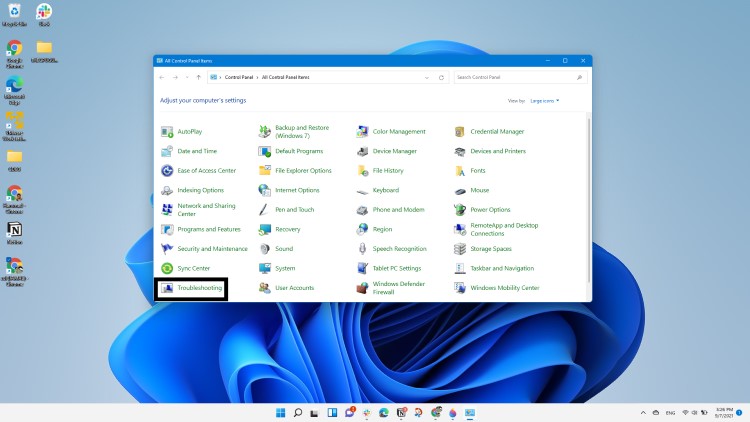
- In the left pane click on View all.
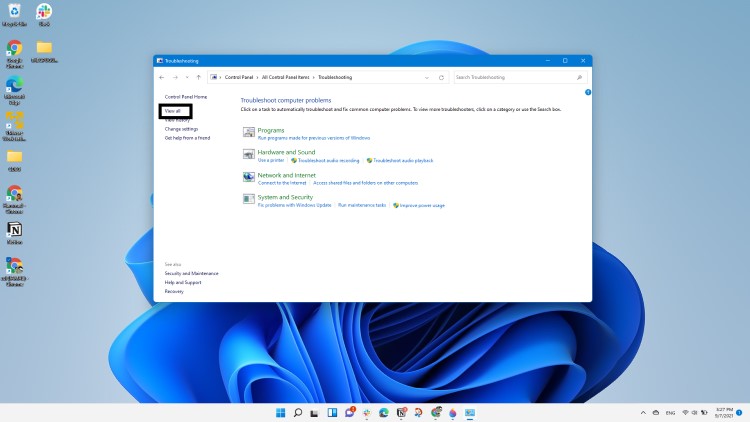
- Now double-click on Windows Store Apps
After the troubleshooting is done you need to run your Windows in Safe Mode.
And you do this by following the steps below:
- Press Windows Button + R Key
- The Run Dialogue Box will appear
- Type “msconfig“ and press Enter.
- The System Configuration window will open and then click on the Boot tab.
- Now checkbox the Safe boot option.

- Then click on Apply and OK for the system to reboot in safe mode.
- After rebooting check if wsappx high CPU usage is fixed or not.
Solution 8: Scan For Virus and Threats to Fix Wsappx
When you download something from a malicious website you may download a virus with it which replicates itself with the wsappx name.
This can result in a wsappx high disk usage process.
Although you have an antivirus installed on your PC still it can’t protect your system 100%.
Also, it replaces the damaged files.
So, to overcome wsappx high CPU usage in Windows 11 it’s best to scan for viruses using the Windows 11 built-in virus protection software.
Here’s how:
- Click on the Search icon
- Select Settings.
- Now click on Privacy & security > Windows Security
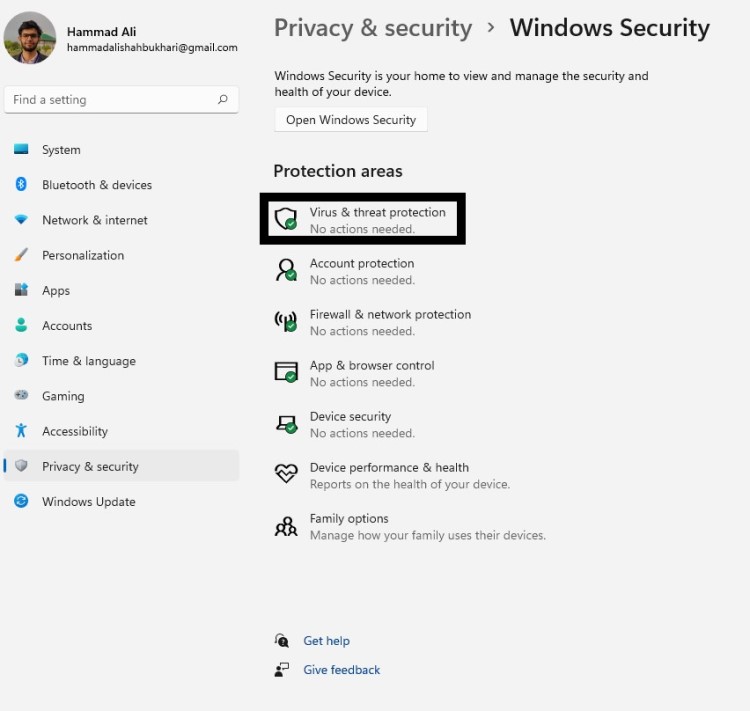
- Select Virus & threat protection and click on Quick scan.
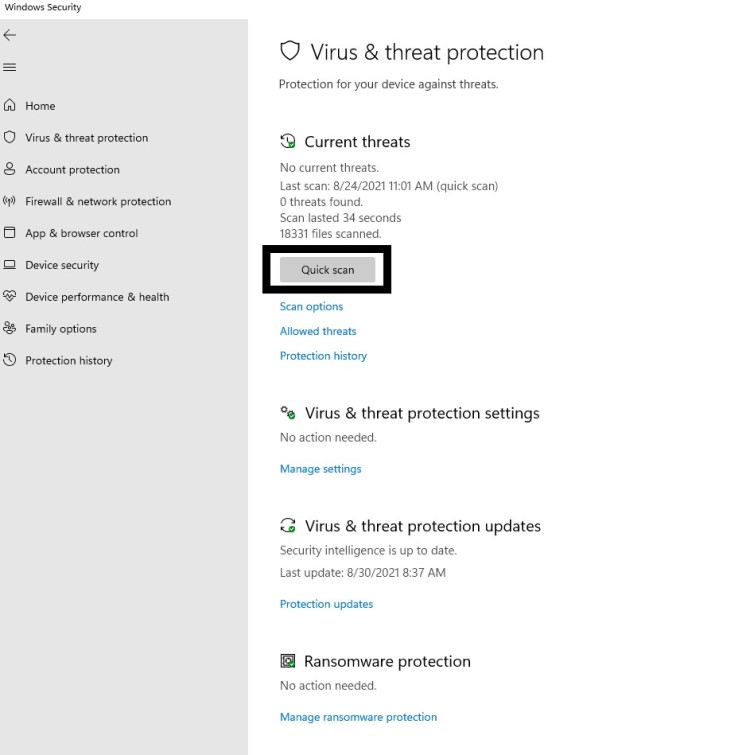
- Wait for the scan to finish and then reboot your PC to see wsappx high CPU usage in Windows 11 is fixed.
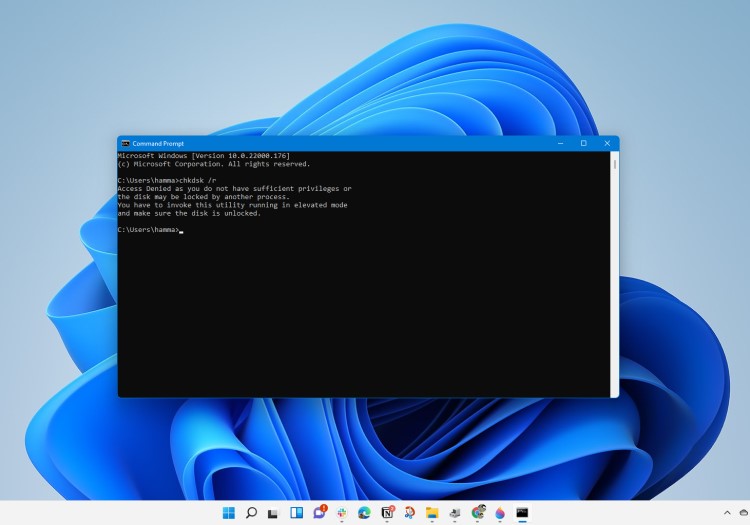
Solution 9: Run a CHKDSK Scan to Fix wsappx High CPU Usage
The chkdsk(Check Disk) scan function replaces all the missing and corrupted files that were leading to wsappx high CPU usage.
Sometimes your disk captures errors related to the system such as internal corrupted files and leads to high disk usage.
So, here’s what you need to do to fix the appx deployment service:
- Open Command Prompt as an Administrator, press Windows Key + X
- Or, search “Command Prompt” in the Startup menu, then choose Run as administrator
- Click the Yes button for confirmation when the dialog box appears
- Type chkdsk /r and press Enter
- You will receive a message saying if you want the disk scan to be performed when you reboot your PC next time
- Type Y and press Enter.
- After the disk drive scan is complete then check if wsappx high CPU usage is fixed.
Conclusion
So, these are the best fixes we could get for you in fixing wsappx High CPU Usage in Windows 11 and
Disabling wsappx from your system is not that much of an easy job and also we don’t recommend it to so that’s why we have provided you with the best possible solutions.
Also, it’s related to Windows Store infrastructure, installing and updating apps in the background, and AppX Deployment Service.
So, you shouldn’t take it lightly and never try to ignore it if the wsappx high CPU usage is acting like malware and it might get your personal data.
It’s best you try all the solutions and if you have any other fix related to wsappx high disk usage or any type of question then just let us know in the comment section below.