Are you looking to transfer files or ROMs to Steam Deck from a PC to get a backup or extra storage? Here are 3 easy methods to do it.
Steam Deck is one of those handheld gaming consoles that feels much like a portable gaming PC in your hands. The feasibility of Steam OS, which seems more like a Linux operating system, makes it easier for you to transfer any sort of files and install launchers like Ubisoft Games or Heroic Games on Steam Deck seamlessly.
However, if you’re looking to transfer your Steam Deck files to a Windows or Linux PC to clear some extra space on your console, then the process is pretty simple. In this article, we will show you how to transfer your files or ROMS to Steam Deck from a PC and vice versa by following 3 step-by-step methods.
Method #1: Using a File Transferring Software
- Switch to Desktop Mode on Steam Deck.
- Open the Discover Store and search for Syncthing.
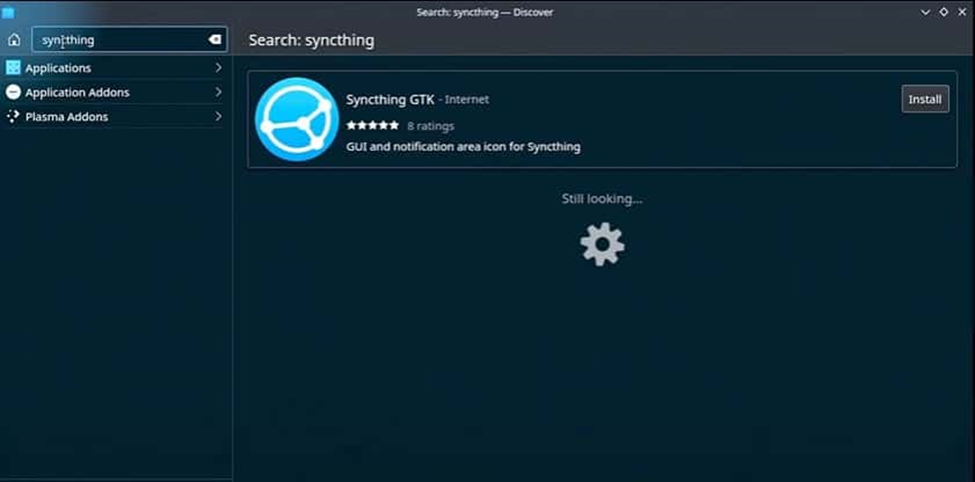
- Click ‘Install’ on the Syncthing GTK and download the application from the store.
- Run the Syncthing GTK from the Applications tab.
- Select ‘Start’ by checking ‘Always start demon automatically’ from the pop-up menu.
- Download Syncthing for PC and run the zip file.
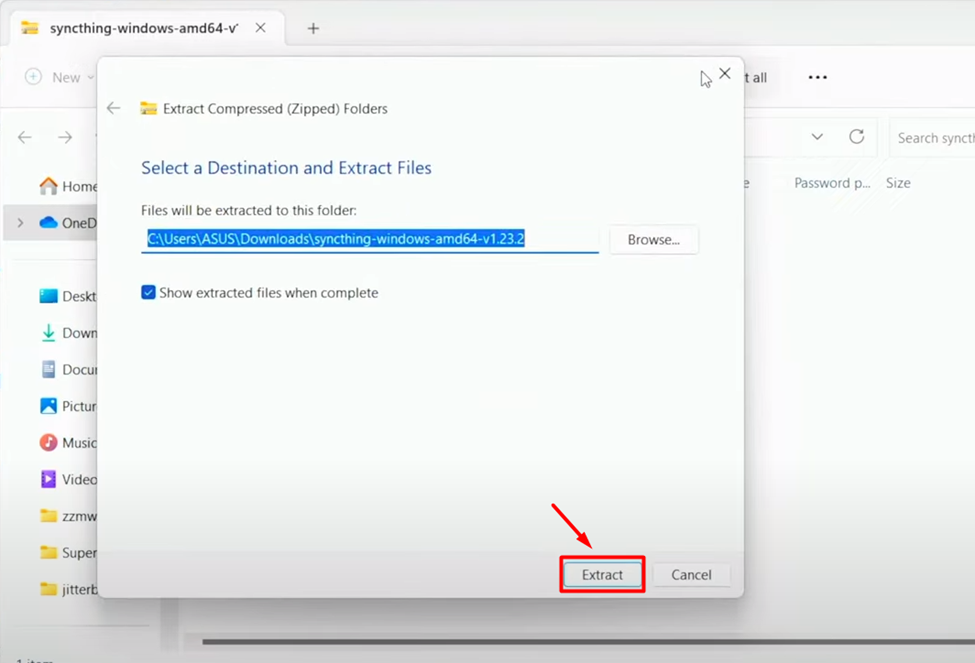
- Click ‘Extract All’ and set your destination for unzipping the files. Then click ‘Extract.’
- Open the extracted folder and run the Syncthing file, as shown below.
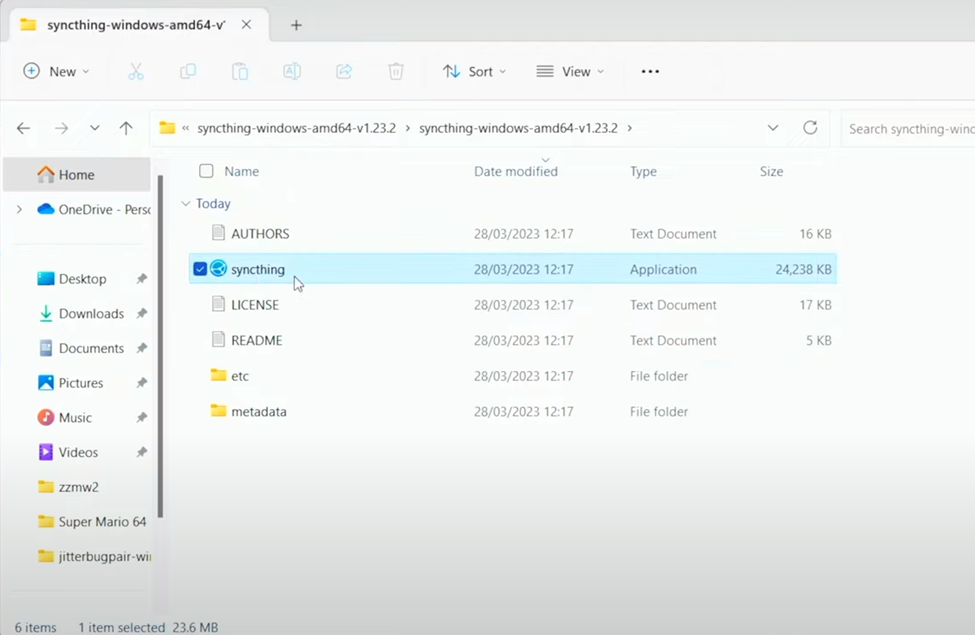
- Click ‘Run Anyway’ to run the application successfully.
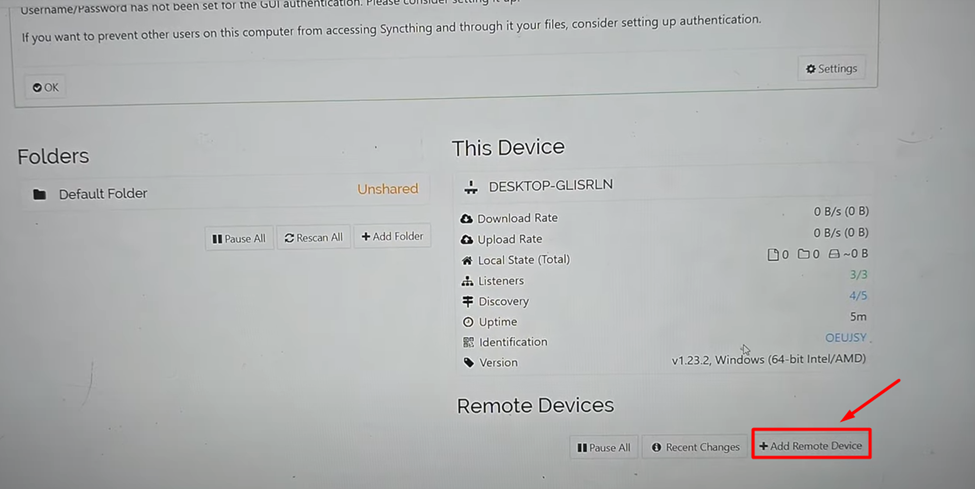
- Syncthing will open, and then you have to select the ‘Add a device’ option under the Remote Devices option.
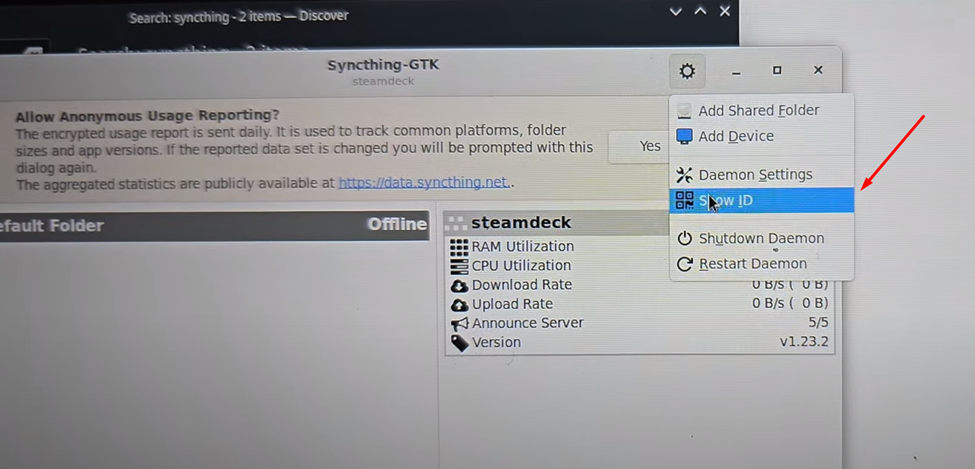
- Now switch to Syncthing on the Steam Deck console and click on the gear icon and select ‘Show ID.’
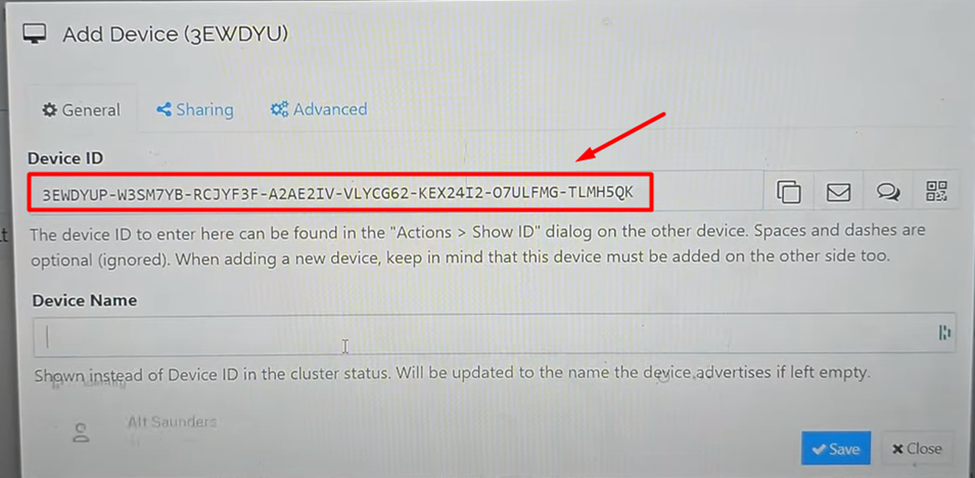
- Add the device ID to the Add a device pop-up shown on your PC and click ‘Save’ to pair the console and PC.
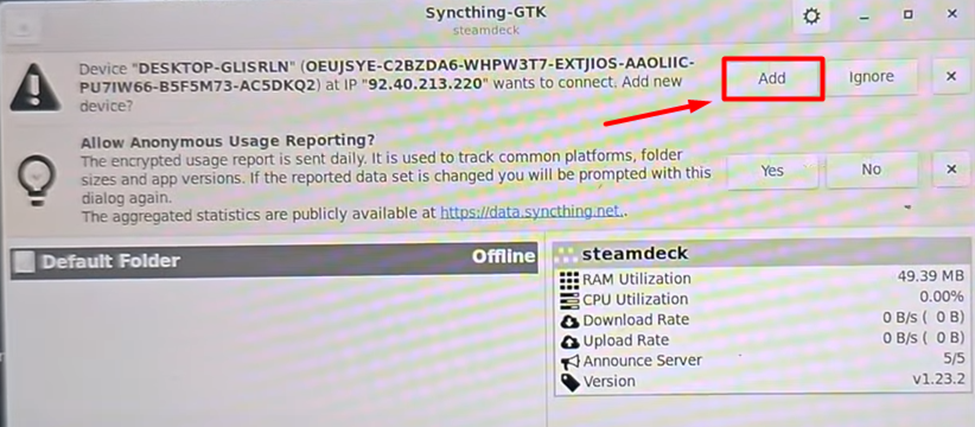
- Once you have added the ID and clicked ‘Save’, accept the invitation on your Steam Deck console.
- Select Accept device “PC Name” from the pop-up menu on your console. Then click ‘Add’ from the Syncthing on the console.
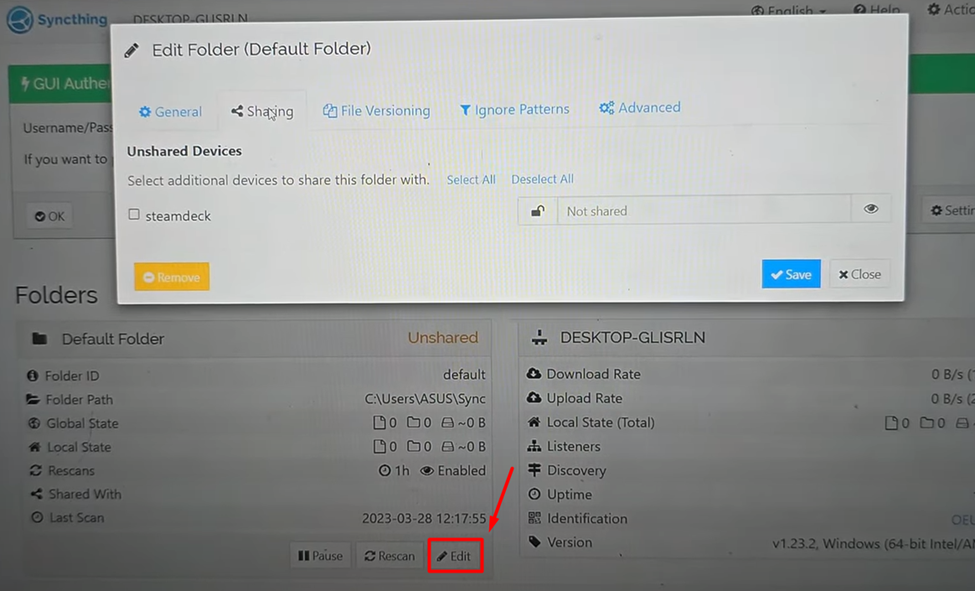
- Click on ‘Unshared’ and select ‘Edit’ to go to the ‘Sharing’ tab.
- Check the ‘steamdeck’ box and click save.
- Switch back to your Steam Deck console and click ‘Add.’
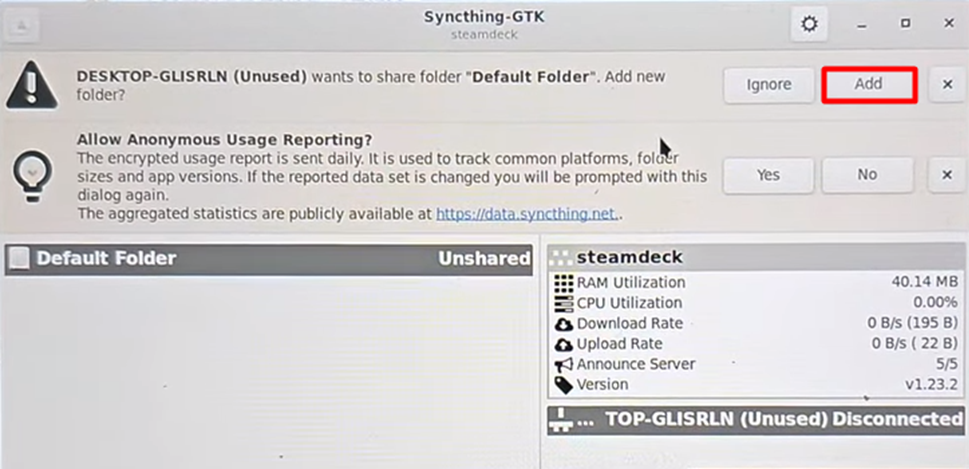
- Click ‘Save’ from the pop-up menu, and click Accept Folder from the side panel pop-up.
- The default path for the Shared Folder will be C:\Users\ASUS\Sync. This default path will be saved on your computer system. Here, you can paste the files to share on your Steam Deck. Similarly, your console will have the same folder from which you can share the files from Steam Deck to your computer.
Method #2: Using Flash Drive
Before following these steps, make sure to format the USB Drive in the exFAT file system. exFAT is the file format that is compatible with both Linux and Windows operating systems and hence makes the file transfer feasible.
- Connect a USB or SD card drive to your PC. For the SD card, you may need an SD card reader.
- Right-click on your USB drive’s name and select ‘Format.’
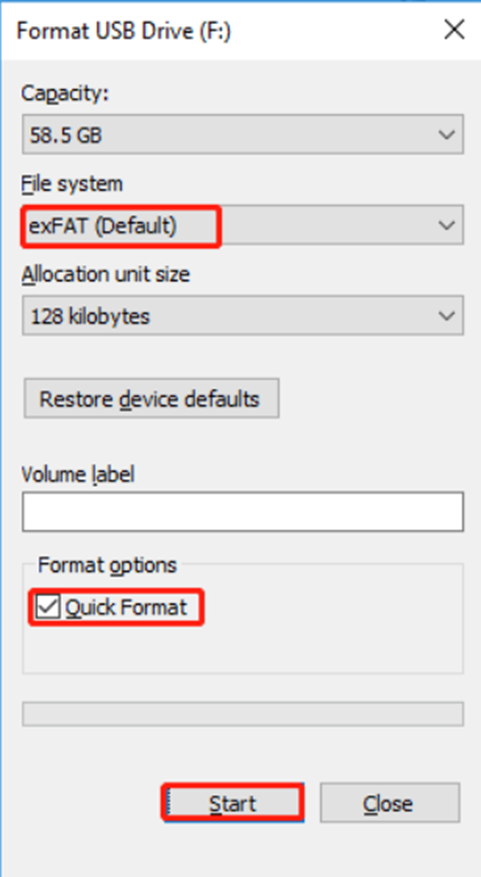
- Select the file system as ‘exFAT’ from the pop-up menu and click ‘Start.’
- Once the USB flash drive is formatted to the exFAT file system, you can continue to use it for transferring files like a portable hard drive.
Method #3: Network Drive
The Network Attached Storage on Steam Deck can also help you to transfer files to and from a PC. Here are the steps you need to follow via a NAS device.
- Switch to Desktop Mode on Steam Deck and open the Dolphin file explorer.
- Select Network.
- Select any NAS device to access files on Steam Deck.
You can also set up Samba Shares on your PC to access the files using the Dolphin File Explorer on your PC. Run the Open File Explorer on your PC and go to Network > Shared Folders to find Samba Share.
Final Words
File transferring via Steam Deck to a PC or from a PC is a very seamless process. The only limitations are set due to the difference of Steam OS, which is more like a Linux-based system. But with the methods mentioned in this article, you can overcome any incompatibility issues and seamlessly perform files transferring between Steam Deck and PC.