If you don’t fancy Steam Deck’s Linux-based OS, then here is how to install Windows 10/11 on Steam Deck with controller support.
Handheld gaming consoles like Steam Deck come with their special operating systems to give you a unique experience. However, this special operating system sets the bars to restrict running executable files on Steam Deck.
Even though there is a large collection of free-to-play Steam Deck games, gamers have numerous reasons to run other game launchers like Epic Games, Ubisoft Games, and Origin Games launchers on Steam Deck. Hence, to simplify things, it’s convenient to install Windows on Steam Deck and here is your step-by-step guide on how to do it.
Things You Need to Install Windows on Steam Deck
Here is a little list you might need to begin with the installation of Windows on Steam Deck
- Windows License
- USB Flash Drive (at least 32 GB Space) or Micro SD card (at least 32 GB space)
- Windows PC
- Wireless mouse and keyboard (optional)
Installing Windows 10/11 on Windows PC
The process for installing Windows on Steam Deck is the same for Windows 10 and 11, and here are the step-by-step methods you need to follow for this.
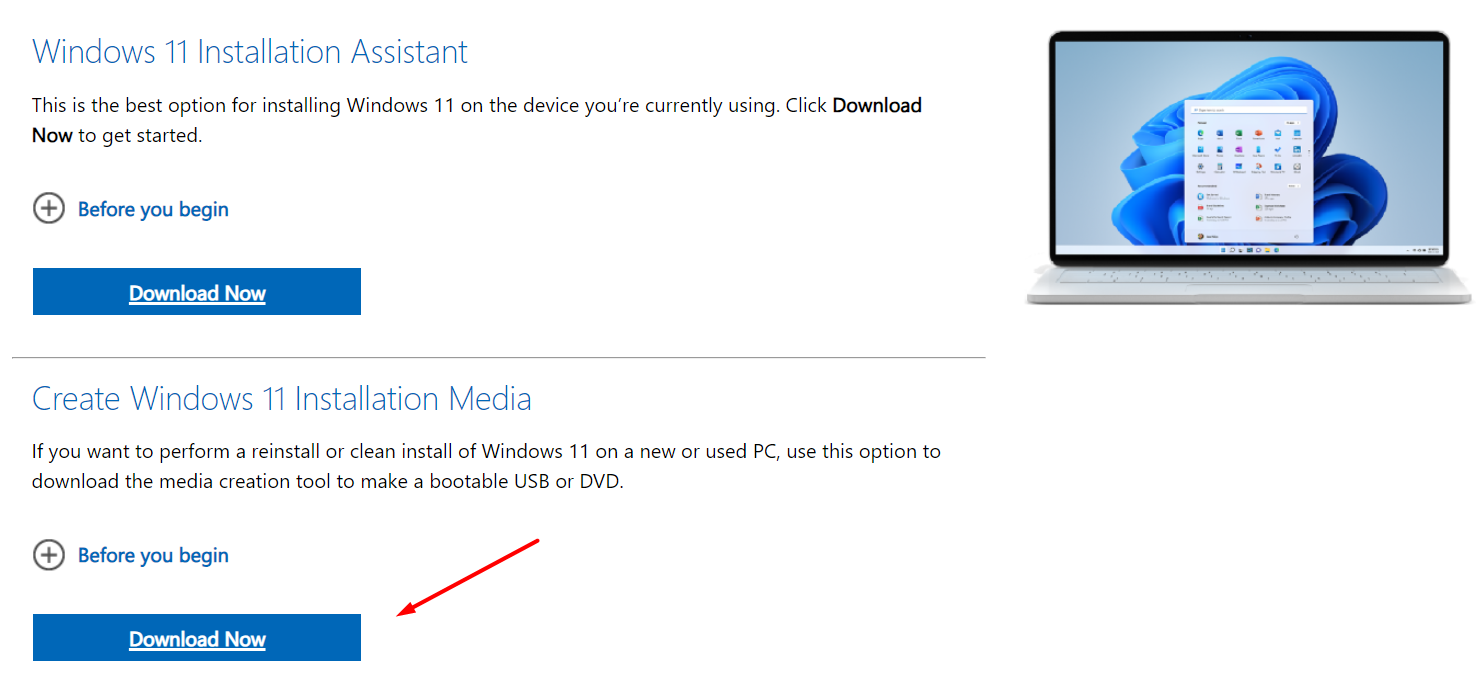
- Head over to your Windows PC and download the Windows 11 or Windows 10 files for media creation from Microsoft’s website. Click the ‘download’ button under the ‘Create Windows installation media’ section.
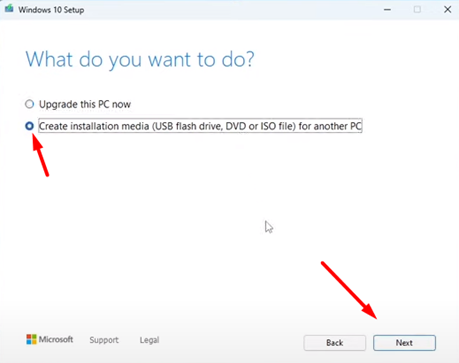
- Run the installer file and follow the prompts on the screen until the media installation asks to upgrade and create a new installation file. You must select ‘Create installation media for another PC’ and click Next.
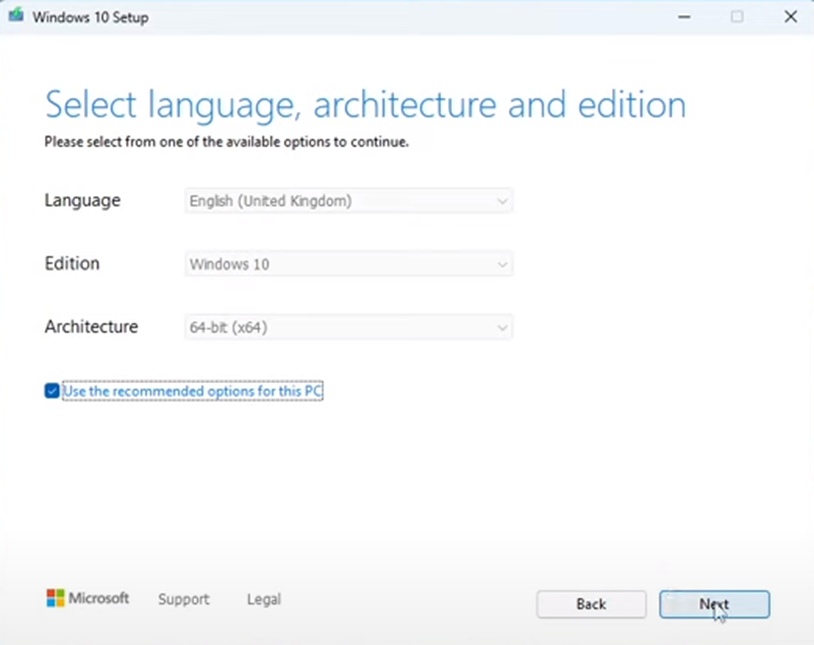
- Check the ‘Use the recommended options for this PC’ box and click Next.
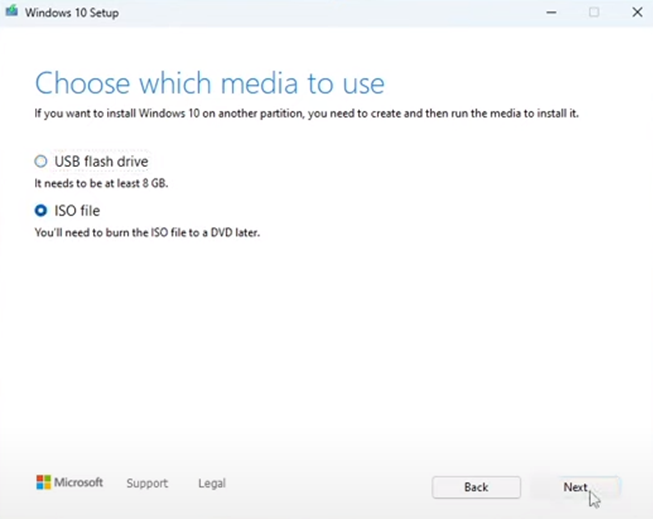
- Select ‘ISO File’ from the Choose which media to use screen.
- Once the process is completed, click Finish to close the installer.
- Next, you have to download Rufus for Windows. Install this partition tool on your PC and run it to transfer Windows files on removable media.
- Now plug in your USB flash drive in your PC and run Rufus software.
- After running Rufus, select the ‘List USB hard drive’ option and select your USB Drive from the device options.
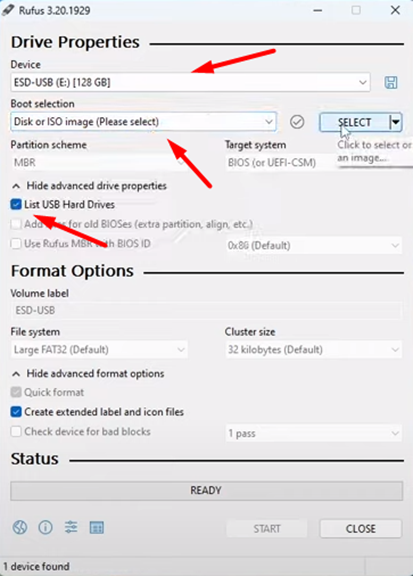
- Then select the ‘Disk or ISO image’ option under the Boot Selection section and click ‘Select.’
- After selecting the file, change the Boot Option to ‘Windows to Go’ and set the partition scheme to ‘GPT.’
- Click ‘Start’ but do not change any settings, and follow the prompts on the screen to proceed.
- Now download the Windows drivers for Steam Deck and transfer all the drivers’ files on the transferring media on which you have transferred Windows.
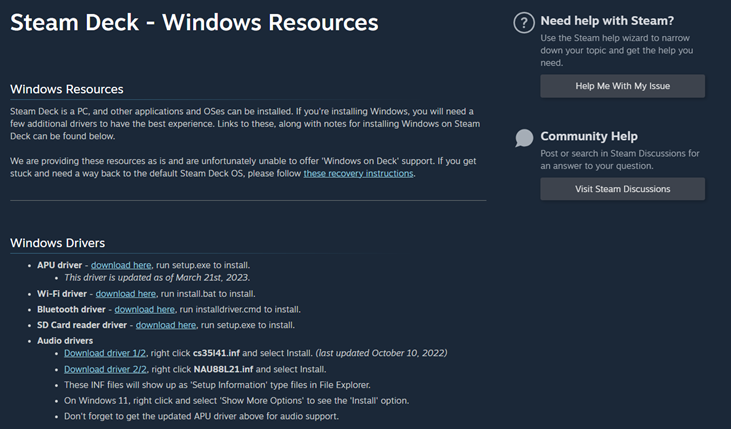
- You can also make a dedicated folder for this and extract the driver files so they are ready to install when attached to Steam Deck.
- Now shut down your Steam Deck console and restart it by pressing the Volume Down (-) button and Power Button simultaneously. Leave the Power Button, but keep pressing the Volume Down button once the console switches ON.

- Select the EFI USB Device from the list in the Boot Manager screen.
- Wait for a few minutes until the console restarts automatically.
- Again, shut down your Steam Deck console and restart it by pressing the Volume Down (-) button and Power Button simultaneously. Leave the Power Button, but keep pressing the Volume Down button once the console switches ON.
- Again, select the EFI USB Device from the list in the Boot Manager screen.
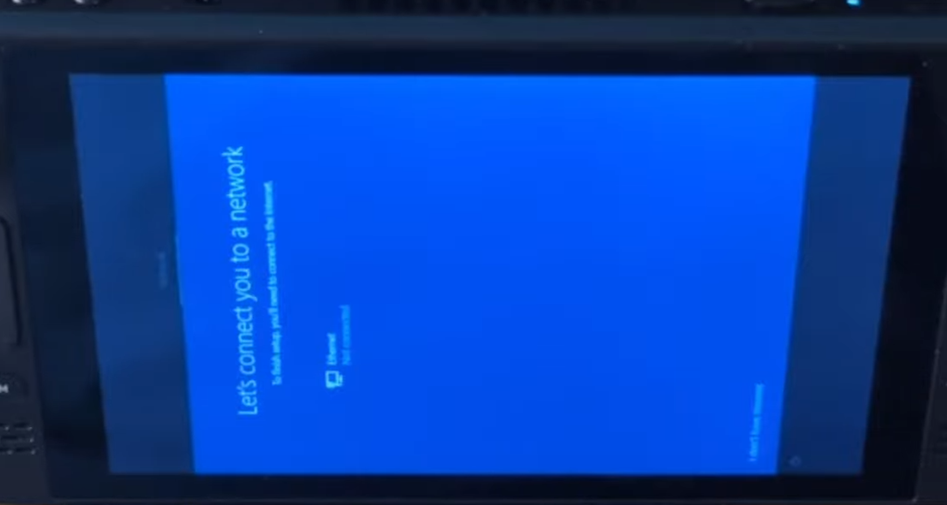
- Wait until Steam Deck reboots with the Windows Screen, and for some reason, the display might seem a bit disoriented, so there’s no need to worry about it.
- Once the ‘Let’s connect you to a Network’ screen appears, select ‘I don’t have internet.’
- Complete the Windows setup by following the prompts on the screen; it will be the same as installing Windows on a laptop or a Desktop computer.
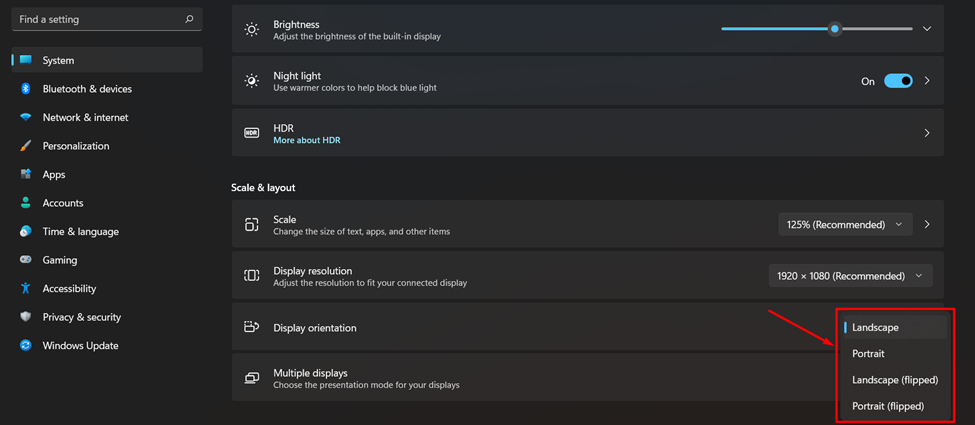
- Once you have finished the setup, go to Settings > System > Display and change the screen orientation to ‘Landscape.’
- Once you have fixed the screen orientation, go to My PC and open the attached USB you used to find the drivers that we downloaded earlier.
Now that the Windows is ready, we can set up the controller with Steam Deck. You can connect a wireless mouse or keyboard with Steam Deck to seamlessly scroll around in Windows.
Setting Up Controller in Windows on Steam Deck
For setting up the controller in Windows on Steam Deck, we will use the SWICD program by following these steps.
- Open a web browser on your Steam Deck console, go to the SWICD repository.

- Download and install MS Visual C++ with it. Follow the prompts on the screen to complete the installation. Click on Steam Windows Controller Driver.
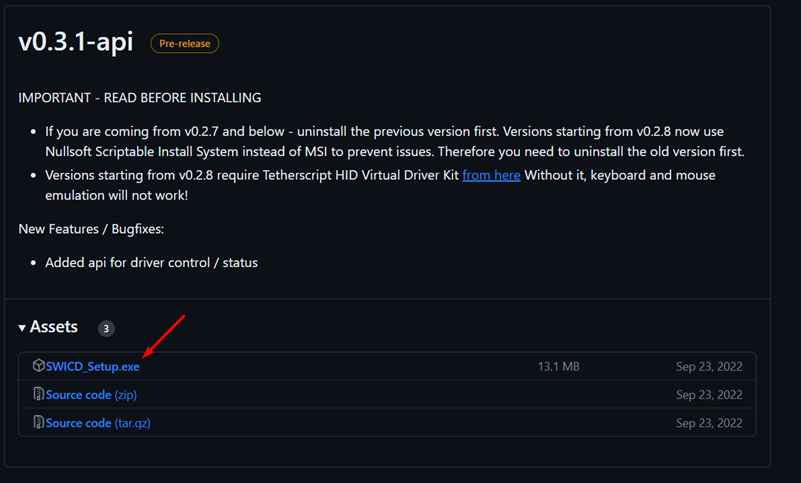
- Click on Asset under the v0.3.1 API and click SWICD_Setup.exe to download the setup file.
- Once the file is downloaded, open it and click ‘Run anyway’ to open it.
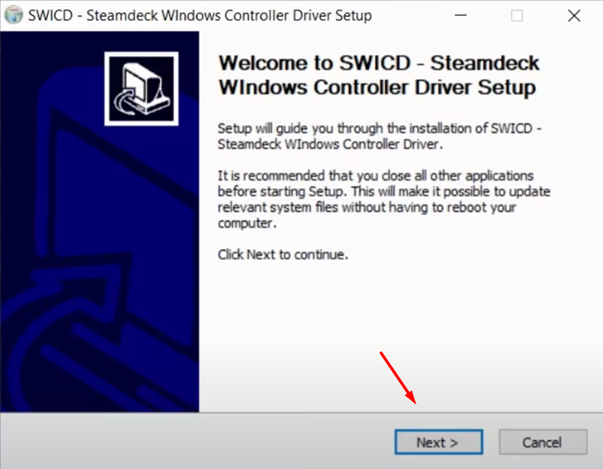
- Follow the prompts on the screen to install the SWICD.
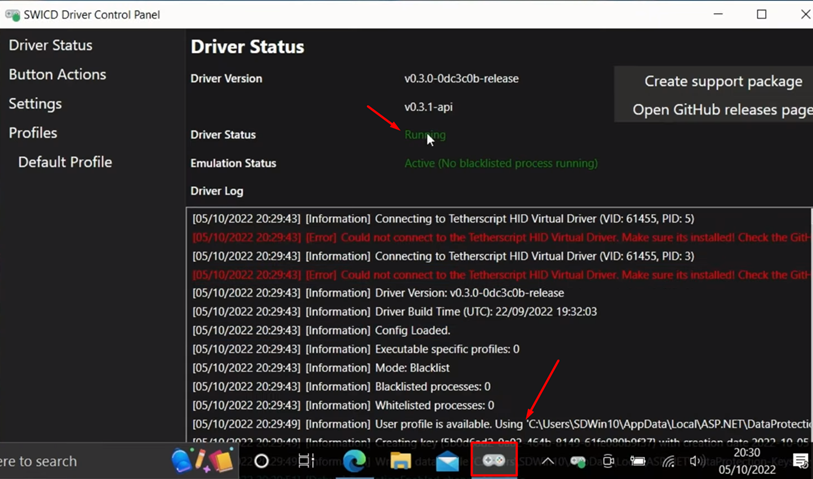
- On the taskbar, you will see the SWICD icon. Right-click on it and select ‘show.’ You will see the controller settings running in the SWICD.
- Click on Default Profile in the SWICD, and if you want the default settings, check Mouse Movement Disabled and select Buttons Enabled.
- You can also open the controller settings, and according to Windows, it will show the Xbox controller layout for controls.
There you have it. Once you have installed the SWICD, your Steam Deck controller will be configured with Windows to work properly.
Final Words
Settings up Windows on Steam Deck may seem like an effort, but it is worth your time. You only need a few tweaks and changes to make your handheld console Windows-compatible. Hopefully, this guide has helped you to understand how to install Windows on Steam Deck. If you are facing any issues or have any queries, let us know in the comments.


![Nintendo Switch OLED Black Screen of Death Issue [FIXED]](https://www.thecpuguide.com/wp-content/uploads/2022/12/Nintendo-Switch-Oled-black-screen-issue-768x432.png)


![[Solved] Marvel’s Avengers Crashing Issues](https://www.thecpuguide.com/wp-content/uploads/2022/08/Marvels-Avengers-Crashing-Issues--768x432.jpg)