Diablo 4 Error Code 1703 “There was a problem logging in” on PS5 usually occurs when you are trying to select the character that you want to log in with or it can occur in the middle of the game too
This is similar to your account currently locked error which many users faced
A quick restart and waiting for a few minutes and then logging back in can fix it.
If this doesn’t work we have compiled a list of 7 workable solutions in the guide below.
Solution 1: Ensure Battle.net & PSN Accounts are Linked
To start off, you need to ensure that the PlayStation Network account, through which you purchased the game, is properly linked with your Blizzard.net account.
You can verify this by checking your linked accounts on the Battle.net Connected Account page
Solution 2: Check Blizzard Battle.net Server Status
The next thing you can do is check if the Blizzard Battle.net server is Up and running as the Diablo 4 error code 1703 could be due to server down
You can visit the Down Detector website and check from there.
If the server is down then all you need to do is be patient and wait
if not then continue to the next solution.
Solution 3: Restart PS5
Whenever you encounter error code 1703 on Diablo 4 or even if it’s a game bug/glitch, you should try restarting your PS5.
WHY?
Restarting the console will eliminate any temporary errors/glitches occurring due to the old/corrupted cache.
So, here is how you can restart your PS5:
- Press the PlayStation (PS) button on your controller.

- From the menu shown, Select the Power option (right-most)
- From the small menu that will appear on the power icon, select the last option “Restart PS5”
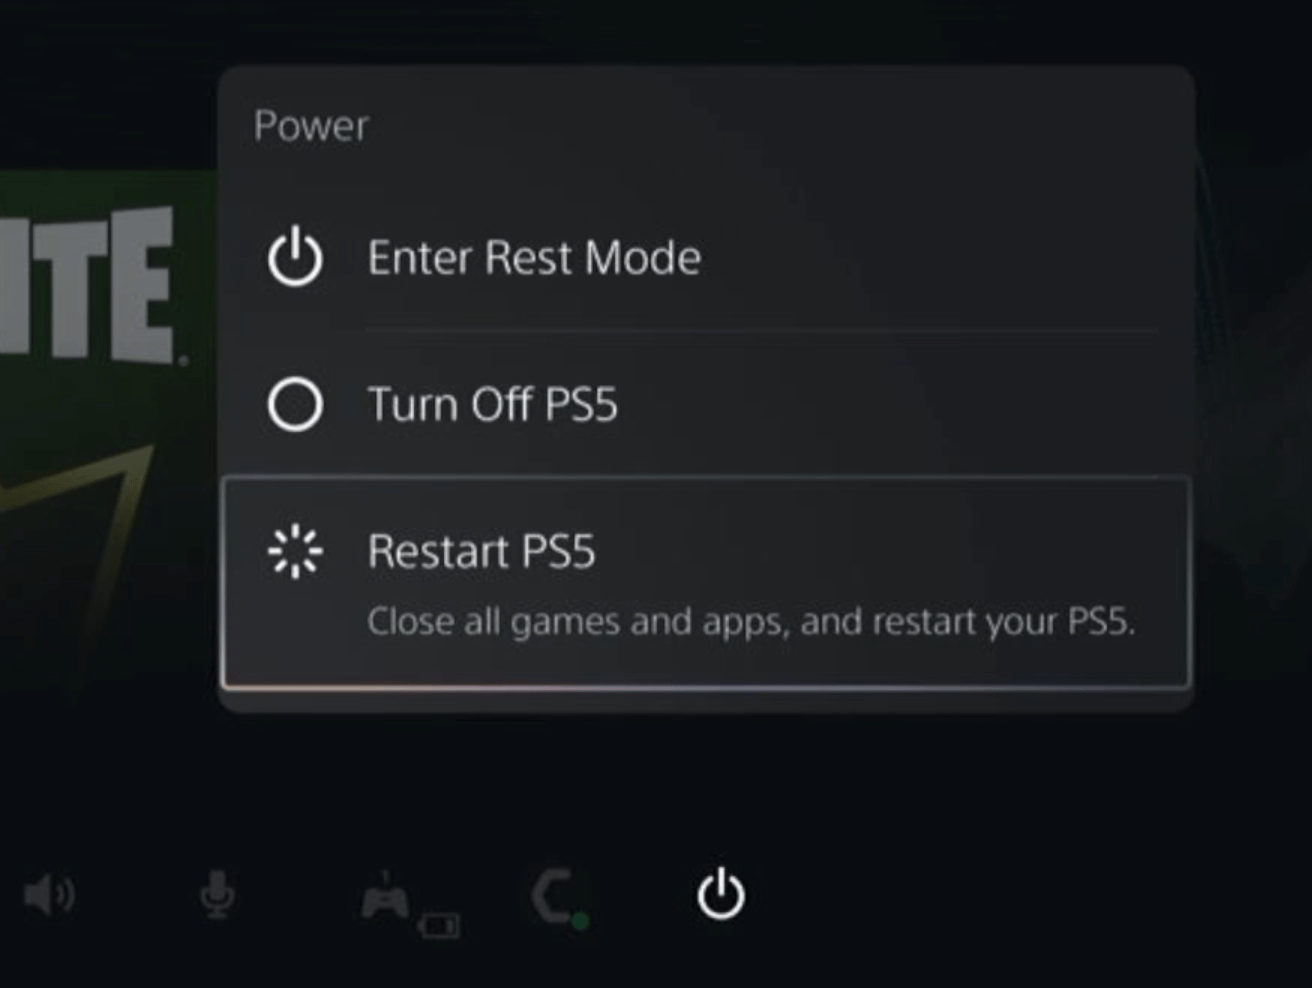
- While your PS5 restarts, don’t unplug any cord to avoid any hardware failure.
Here’s a supporting video to restart PS5 for your ease:
Solution 4: Power Cycle Your Router
If you’re still experiencing Diablo 4 error code 1703 on your PS5 after trying the previous solutions, power cycling your router could help you establish a better internet connection and potentially solve the problem.
Here’s how to do it:
- Completely turn off your router by disconnecting the power cable from the power switch.
- Leave it turned off for 5 to 10 minutes before plugging it back in.
- Check if the Wi-Fi network is visible and properly connected to your devices.
It’s important to note that you should restart all devices affected by the power cycling process to ensure an accurate fix.
Solution 5: Use an Ethernet Cable
If you are experiencing unstable internet on your PS5 and your Wi-Fi has a good enough speed, then maybe some receiving or glitches could be causing an unstable connection.
Alternatively, PS5 comes with an ethernet port that would let you experience uninterrupted connection.
Here’s how to do it:
Step A. Connecting Ethernet Cable to PS5
At the rear of your PS5 where you have put your power cable and HDMI cable, you’d find an Ethernet port where you need to insert an ethernet cable from your router.
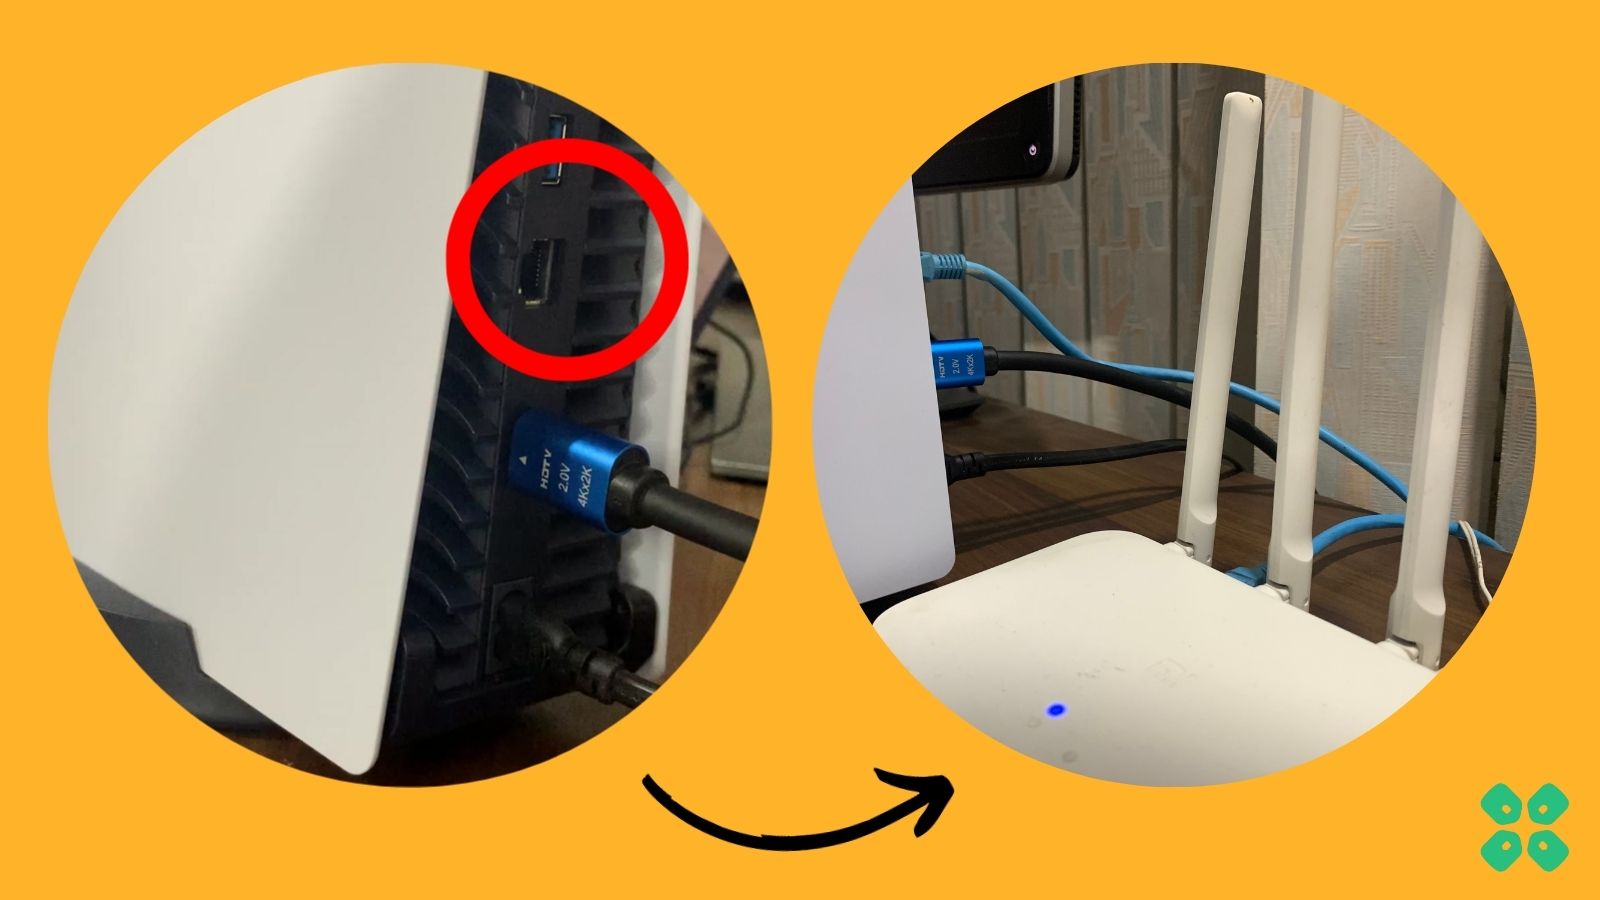
Make sure you have inserted in the output port of your router, your network is active and the cable works fine.
Step B. Setting Up LAN on PS5
- Go to Settings from the PS5 homepage

- Scroll down to Network and click on it to access Network Settings
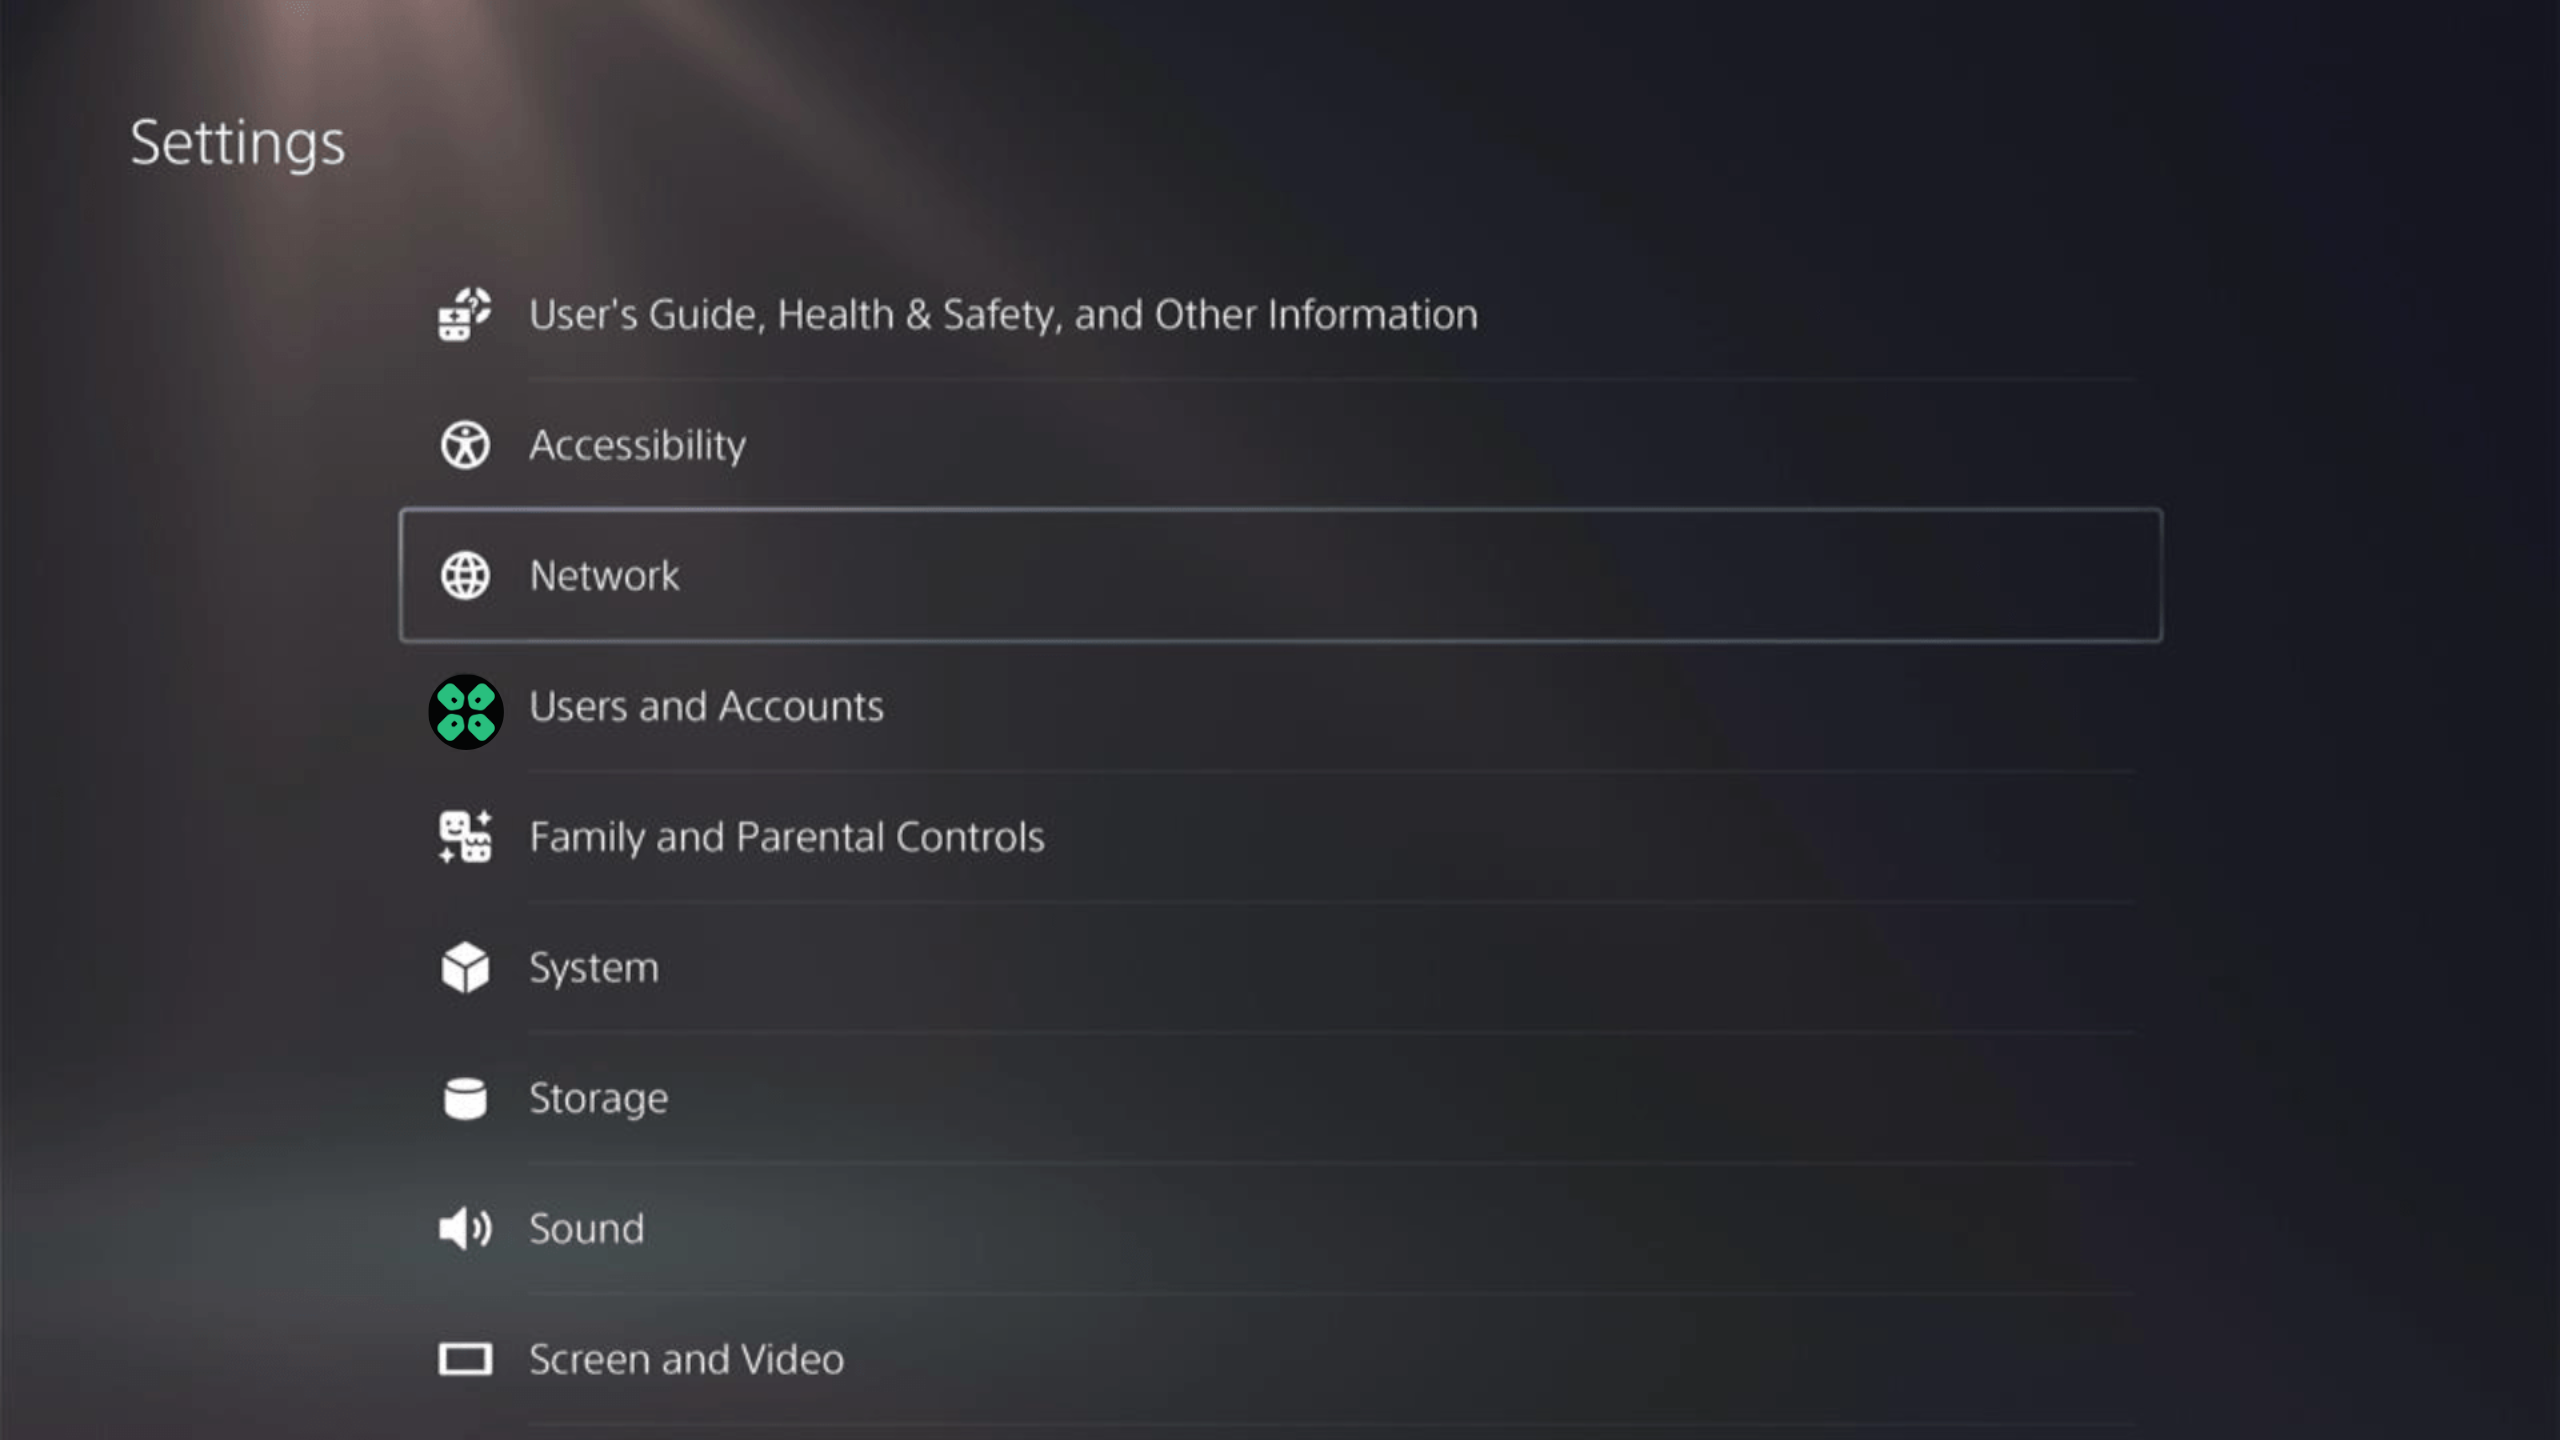
- Choose Settings from the left sidebar and scroll down to Set up Internet Connection from the expanded menu
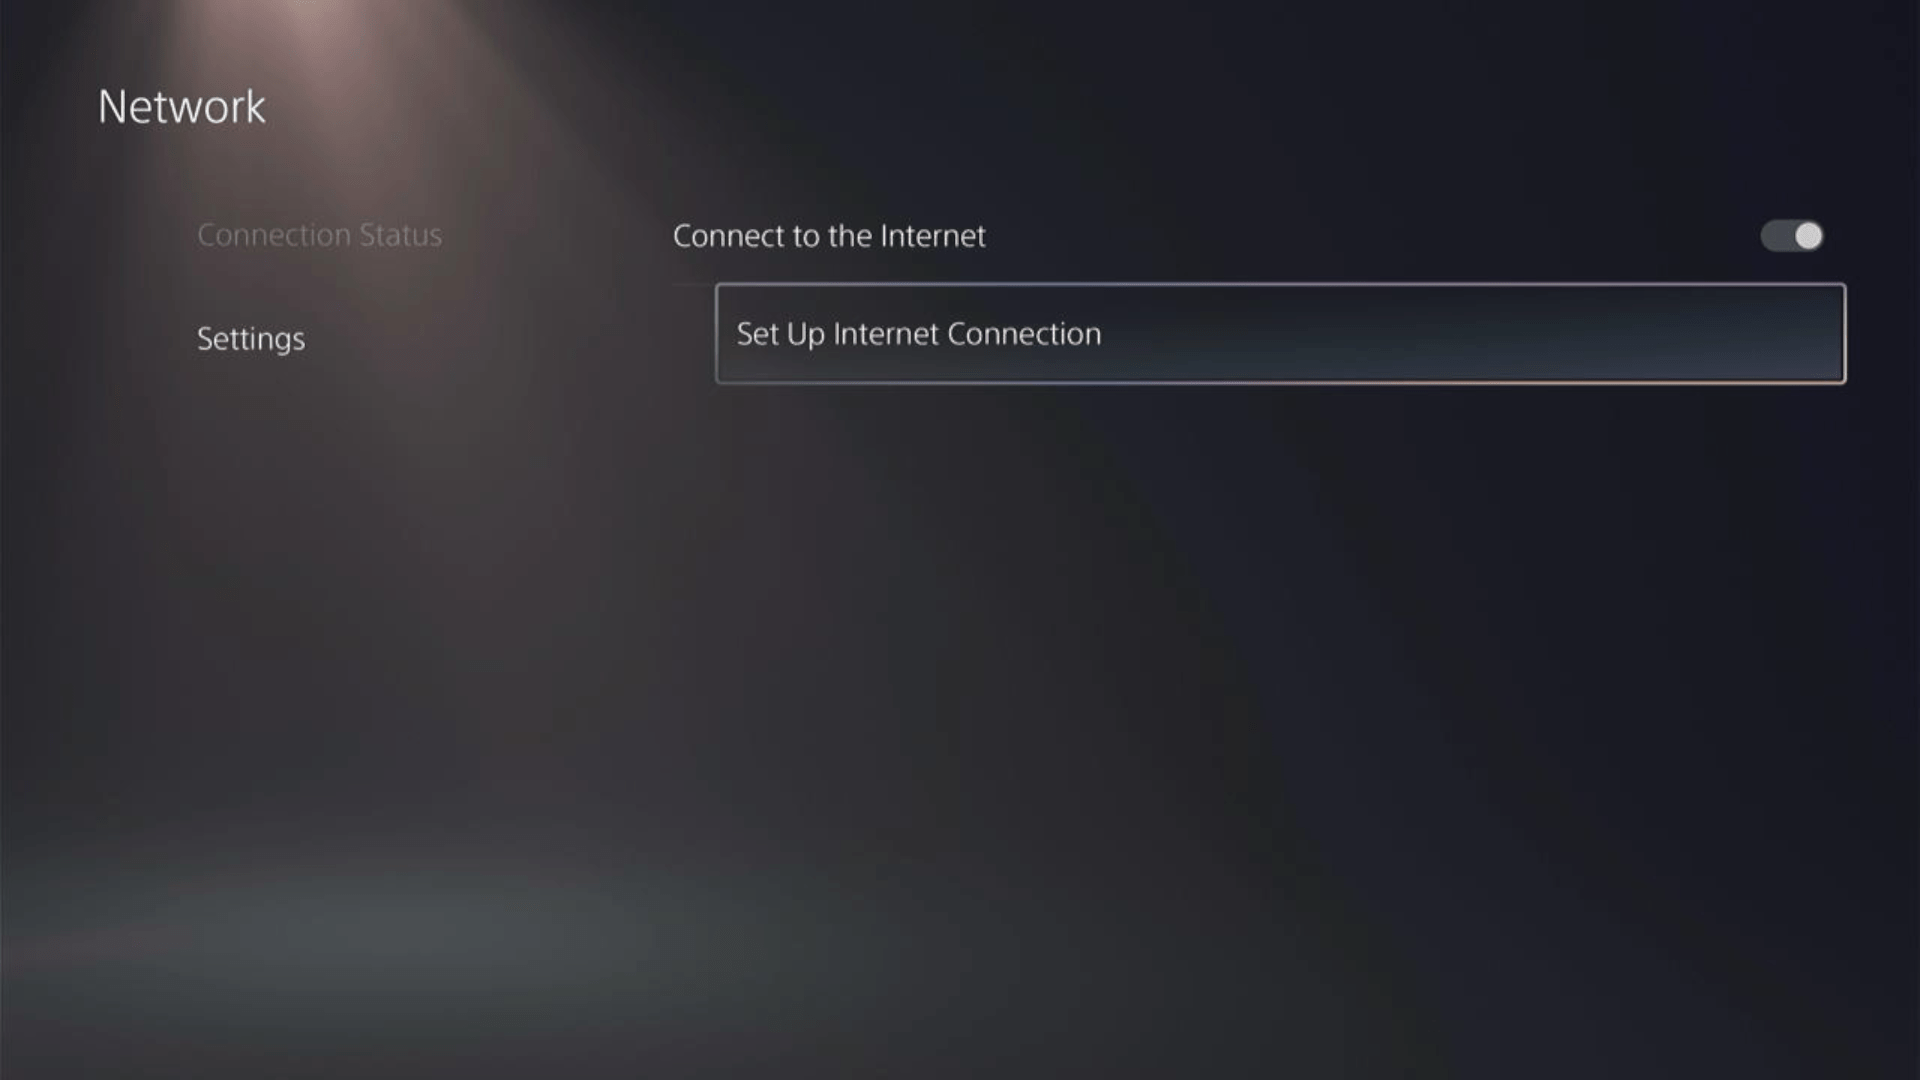
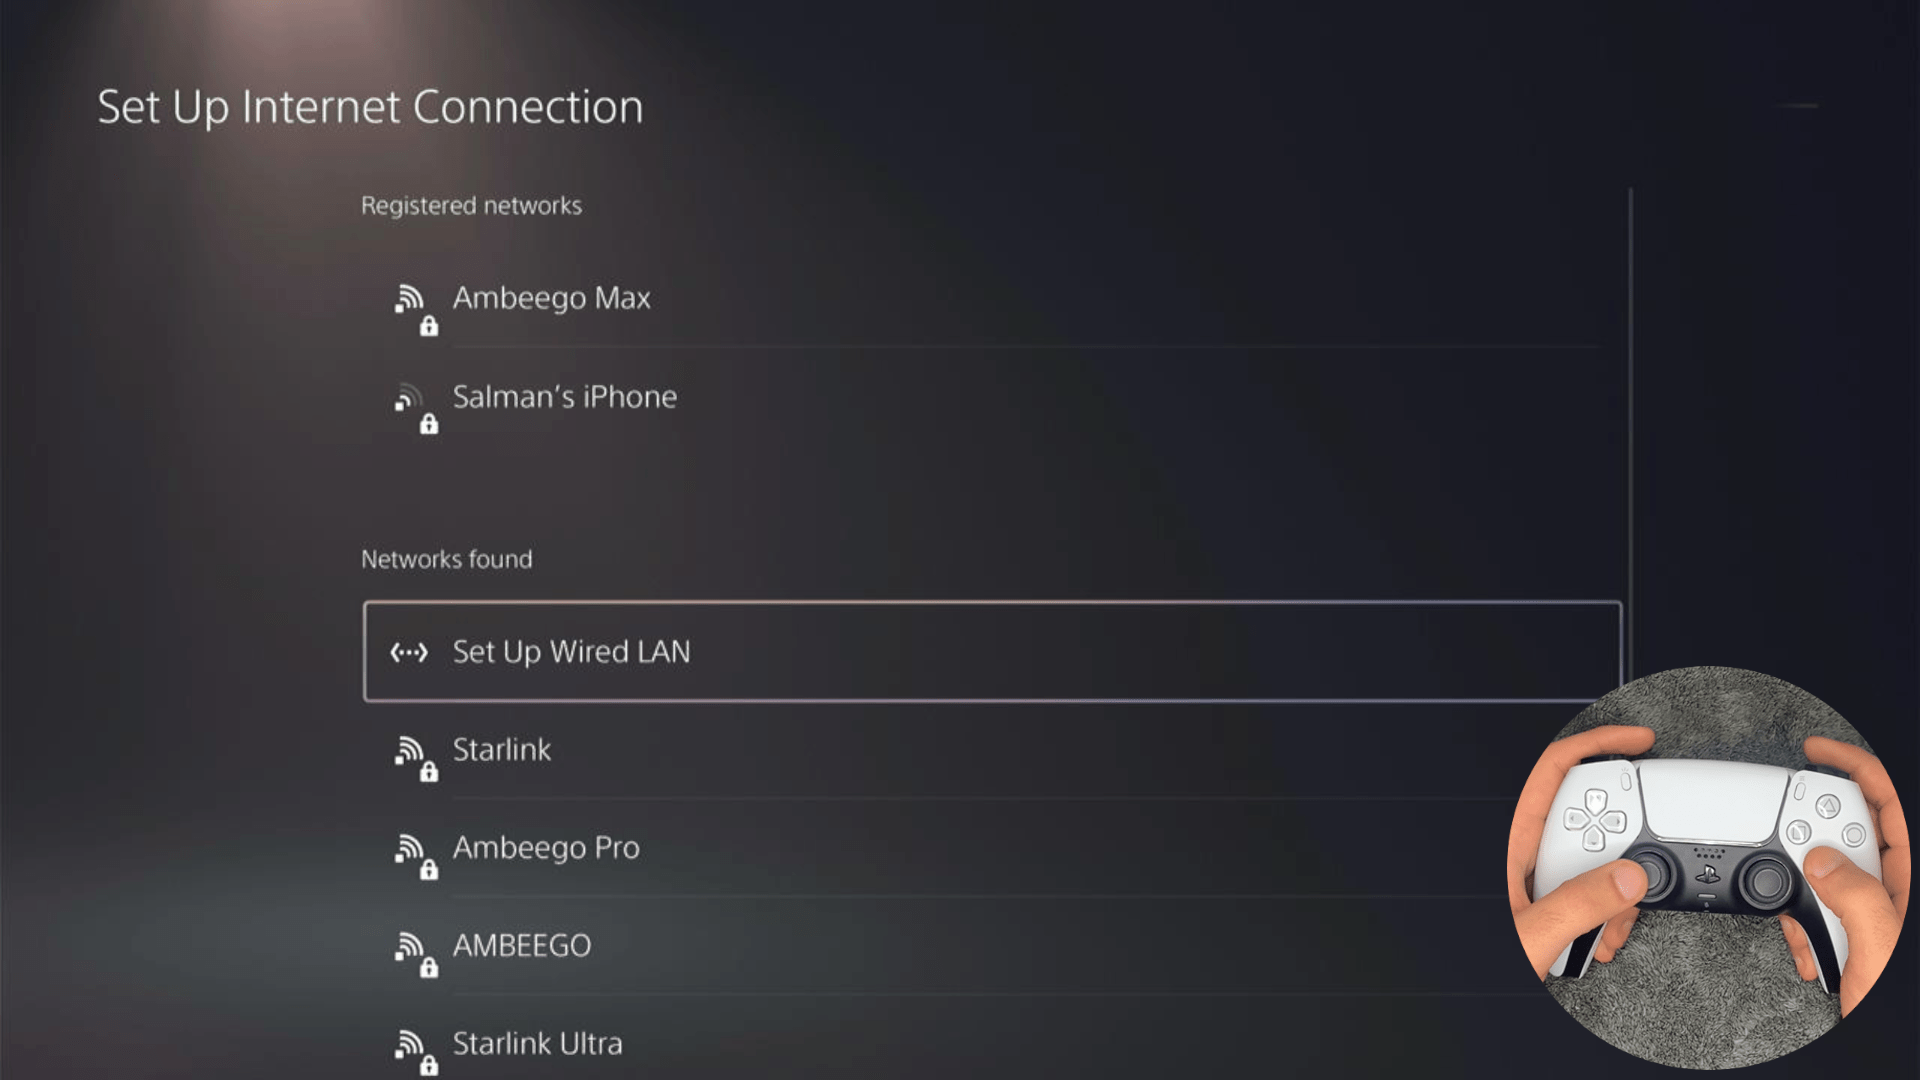
- In the new screen, scroll down to Set Up Wired LAN and press X on it from your controller.
- A new dialog would open where you can rename your connection and then proceed to Connect to it.
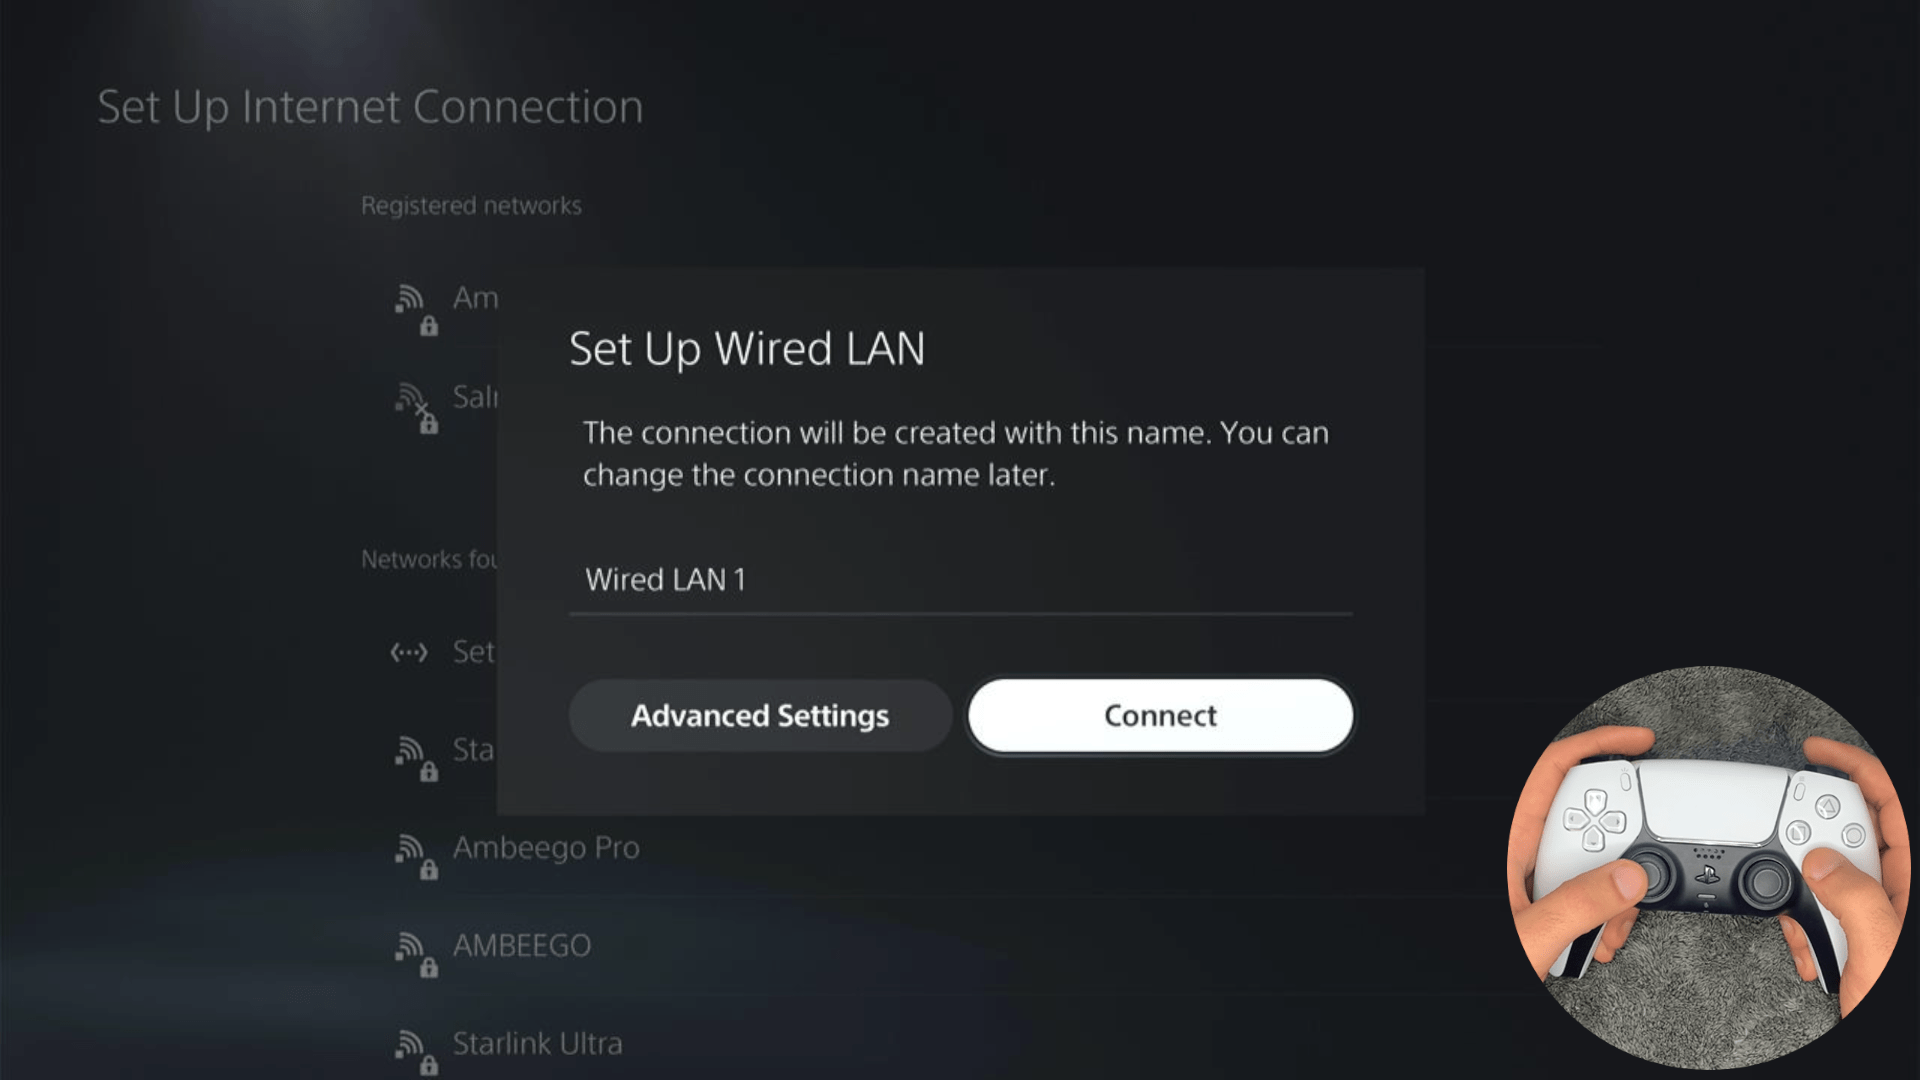
- It would take a short while to get you connected to your Wired network.
Solution 6: How to Change Your DNS Settings On PS5?
There are some faulty DNS servers that may cause error code 1703 while logging into PS5
So, let’s change the DNS Settings:
- Go to Settings from the PS5 homepage
- Scroll down to Network and click on it to access Network Settings
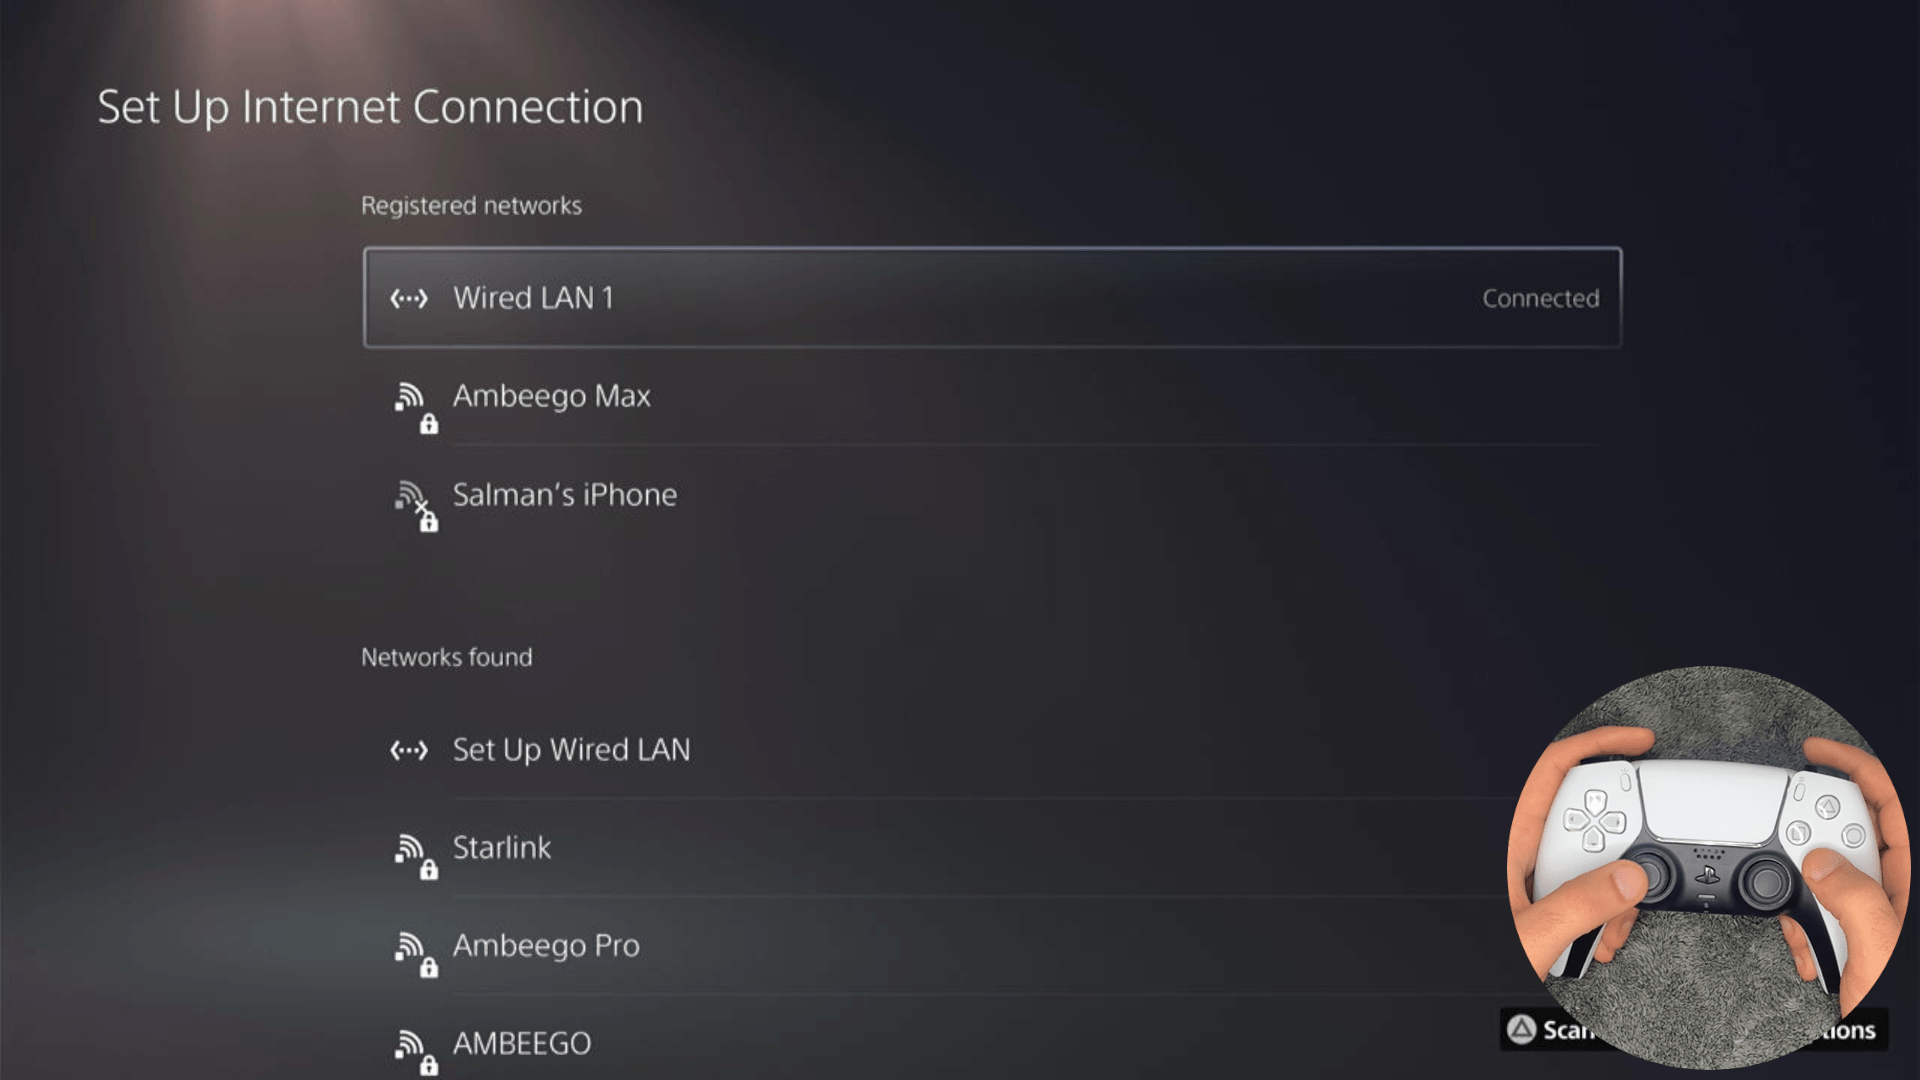
- Choose Settings from the left sidebar and scroll down to Set up Internet Connection from the expanded menu
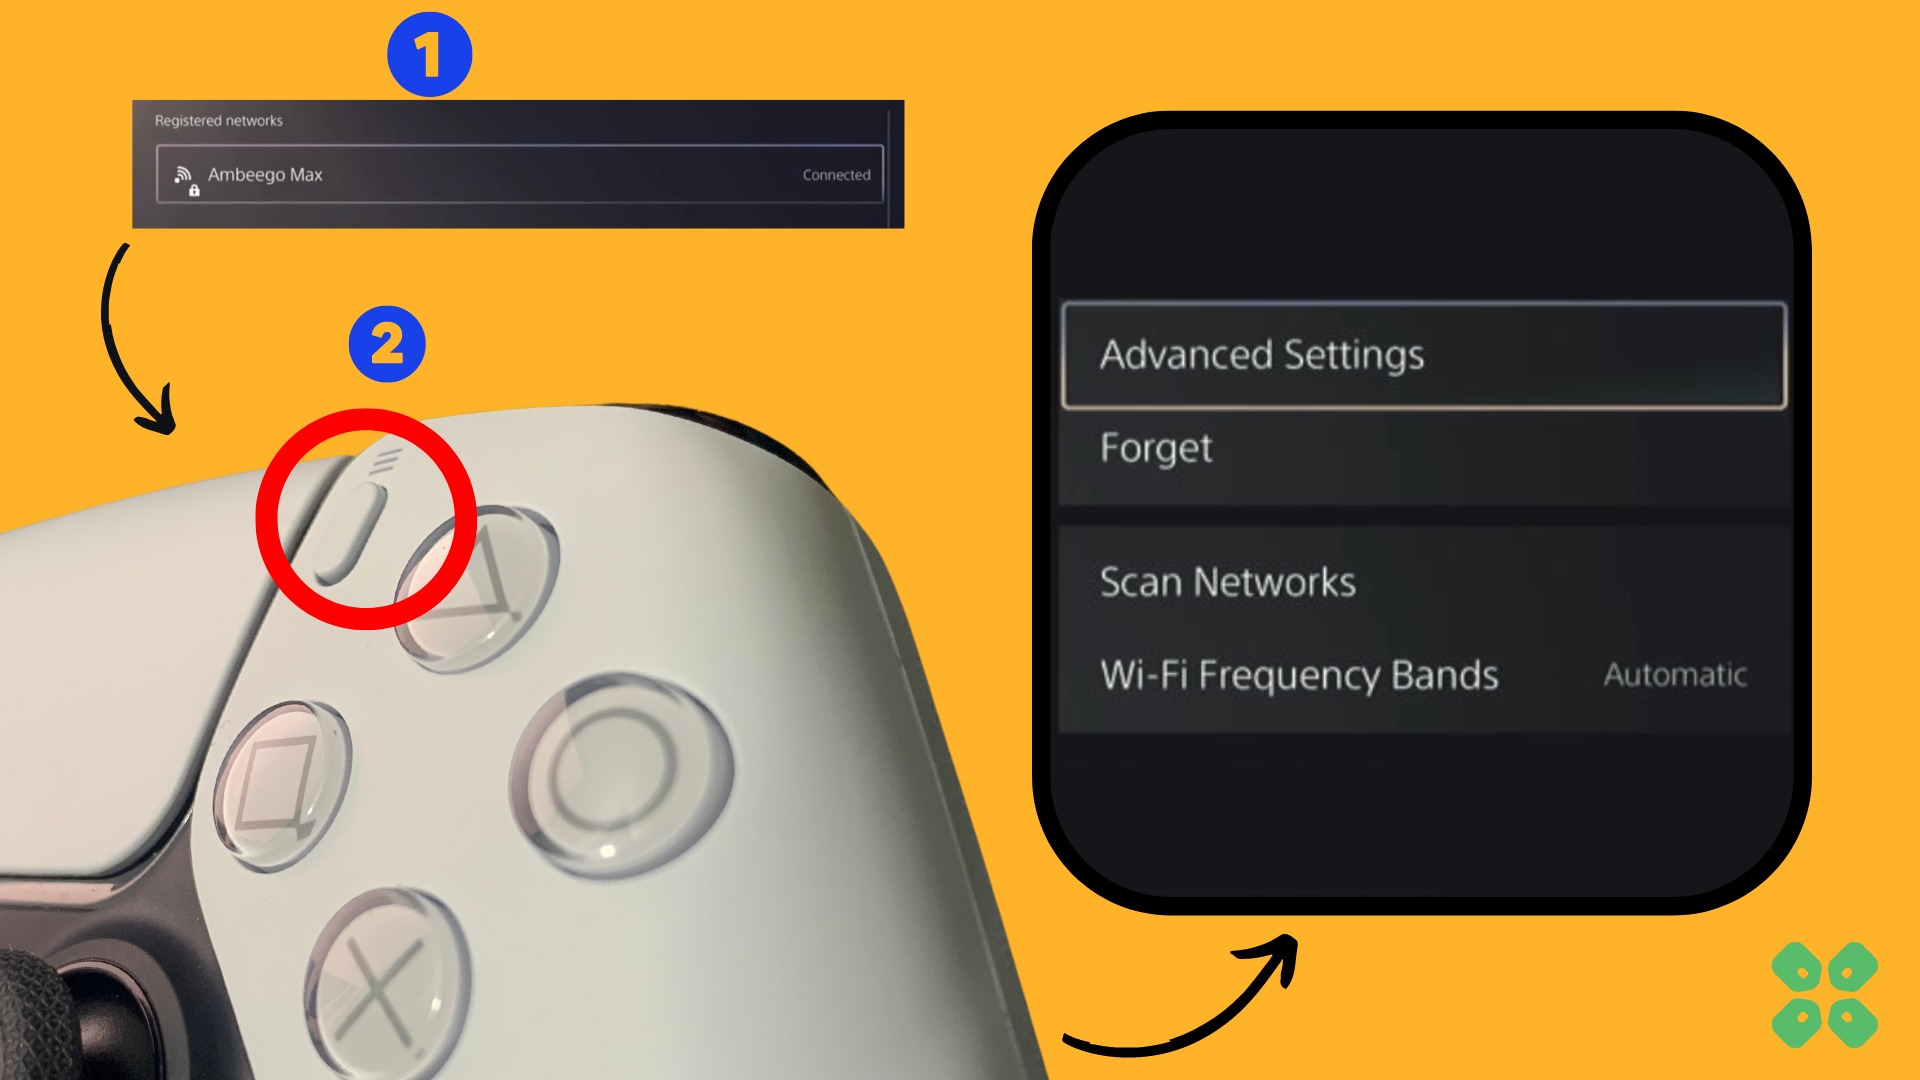
- Now, press the options button on the Connected Network to access Advanced settings as shown in the image.
- Scroll down in the Advanced Settings menu to access DNS Settings. Click on it and the small menu, select Manual.
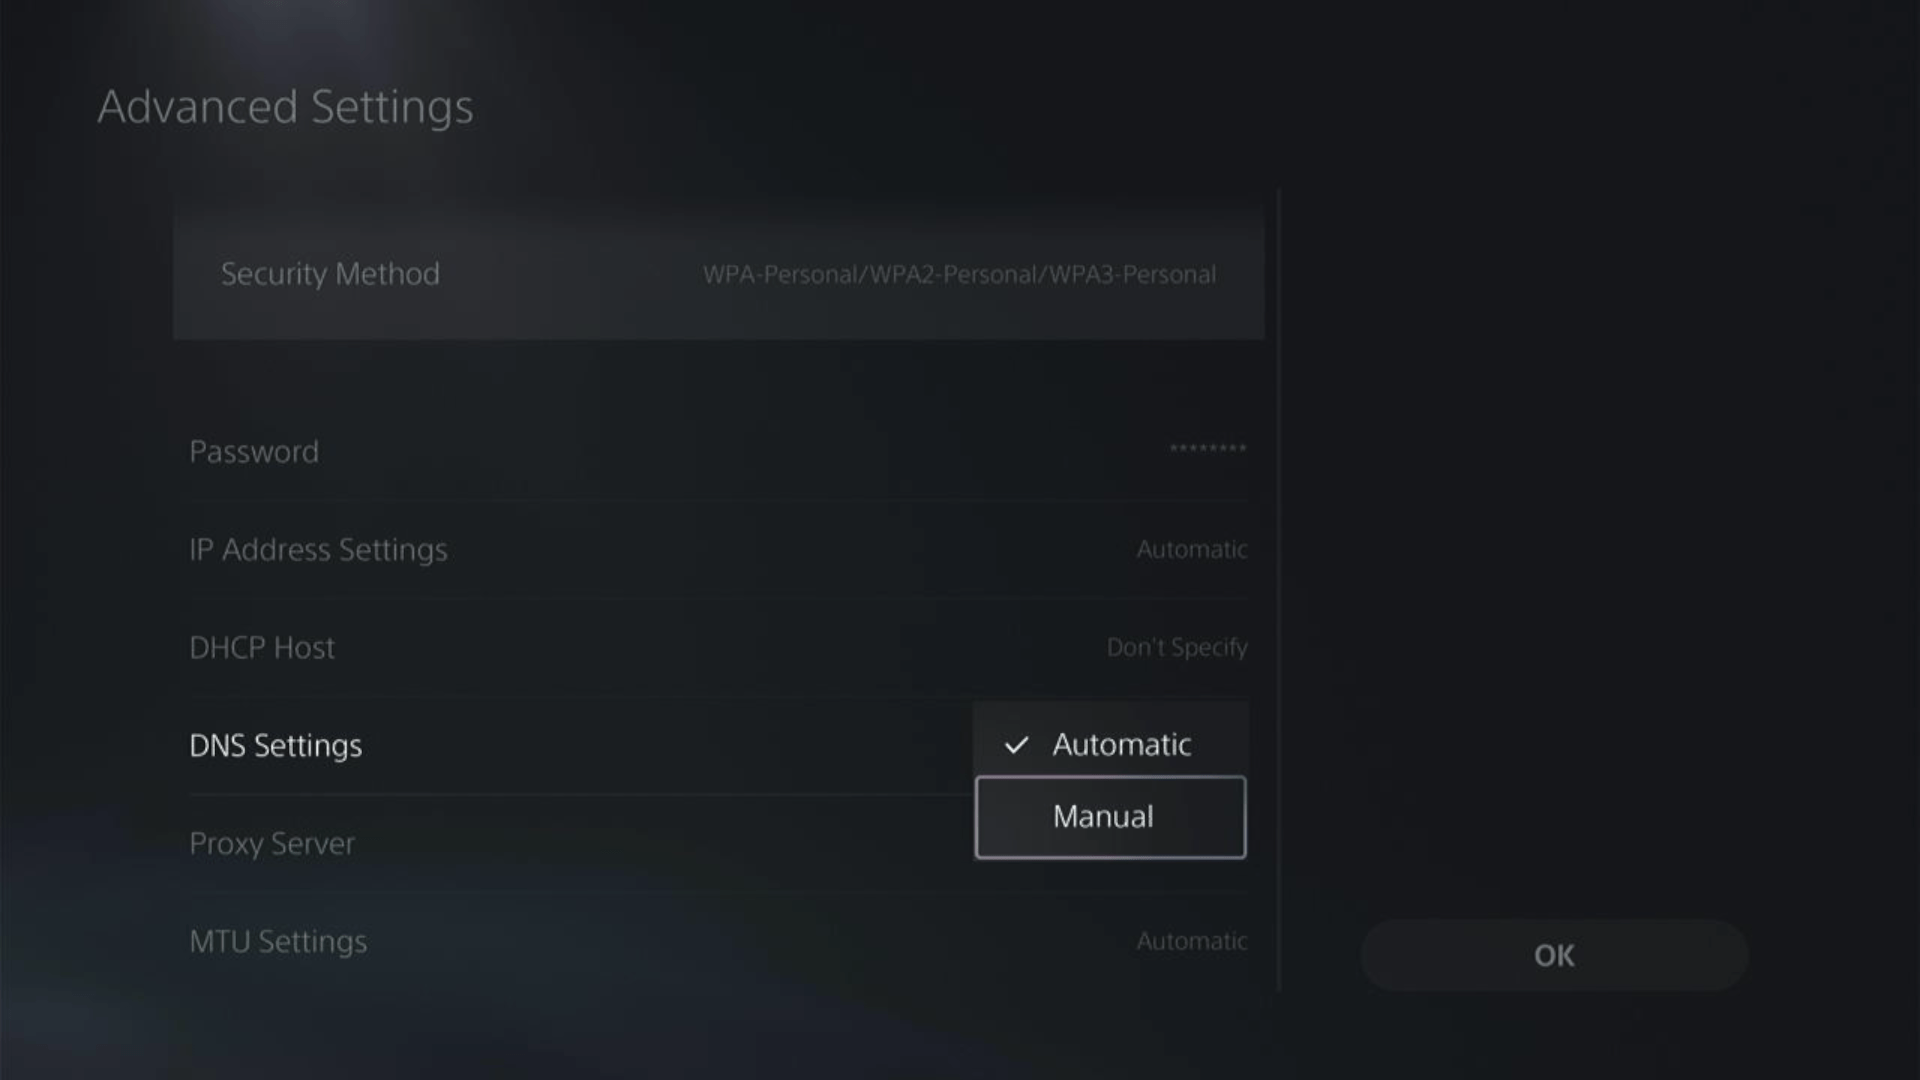
- More Settings would appear:
- For Primary settings enter 8.8.8.8
- For Secondary 8.8.4.4 to match the Google DNS.
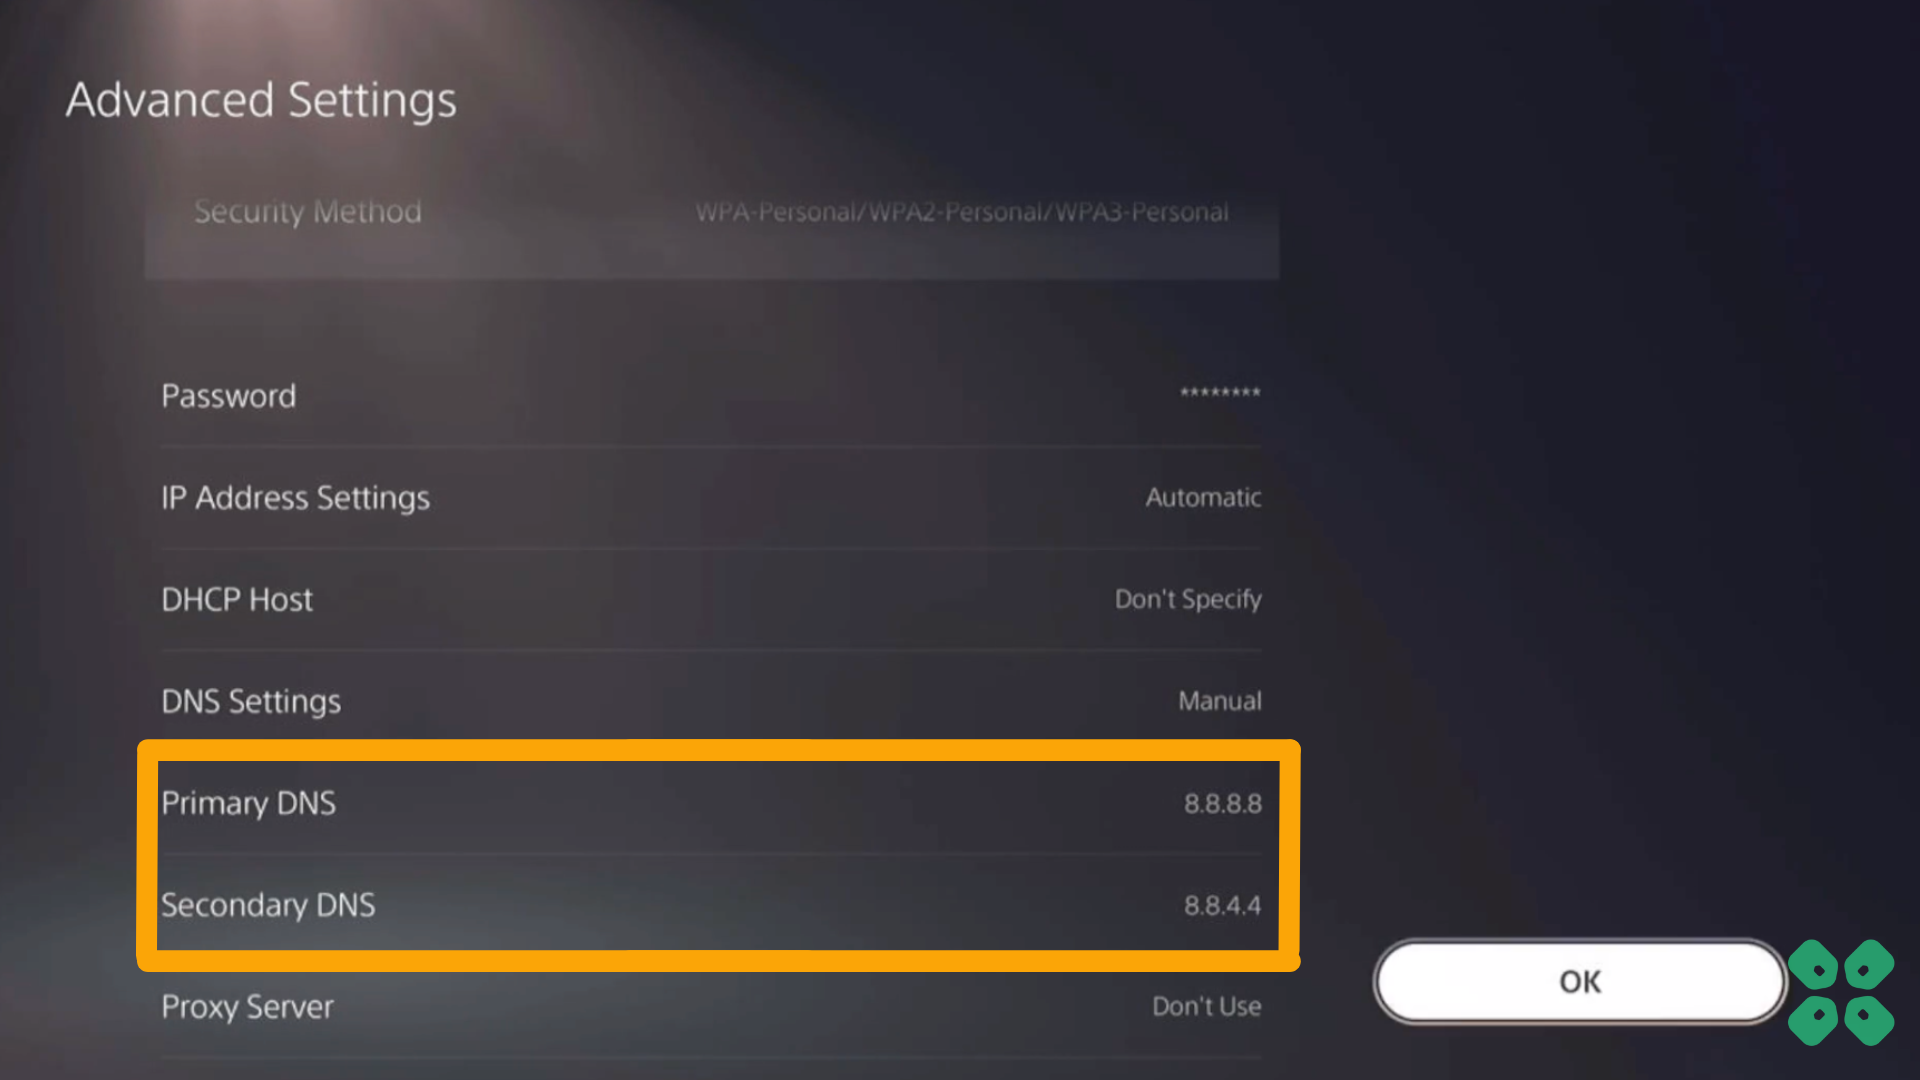
- Then click OK to save the changes.
- And Reboot your PS5 to check if the error is gone.
Solution 7: Reset PS5
This is the final resort that you can take. Being a PlayStation Plus member would make this easy for you as you would be able to save all your game’s progress which is really necessary for the hours of work that have been put in.
CAUTION:
Resetting PS5 will completely wipe off everything from the console whether it’s a game, save data, or any other content.
So its best to backup data first on your cloud storage and here’s how you can do it:
- Go to Settings and then select Saved Data and Game/App Settings.
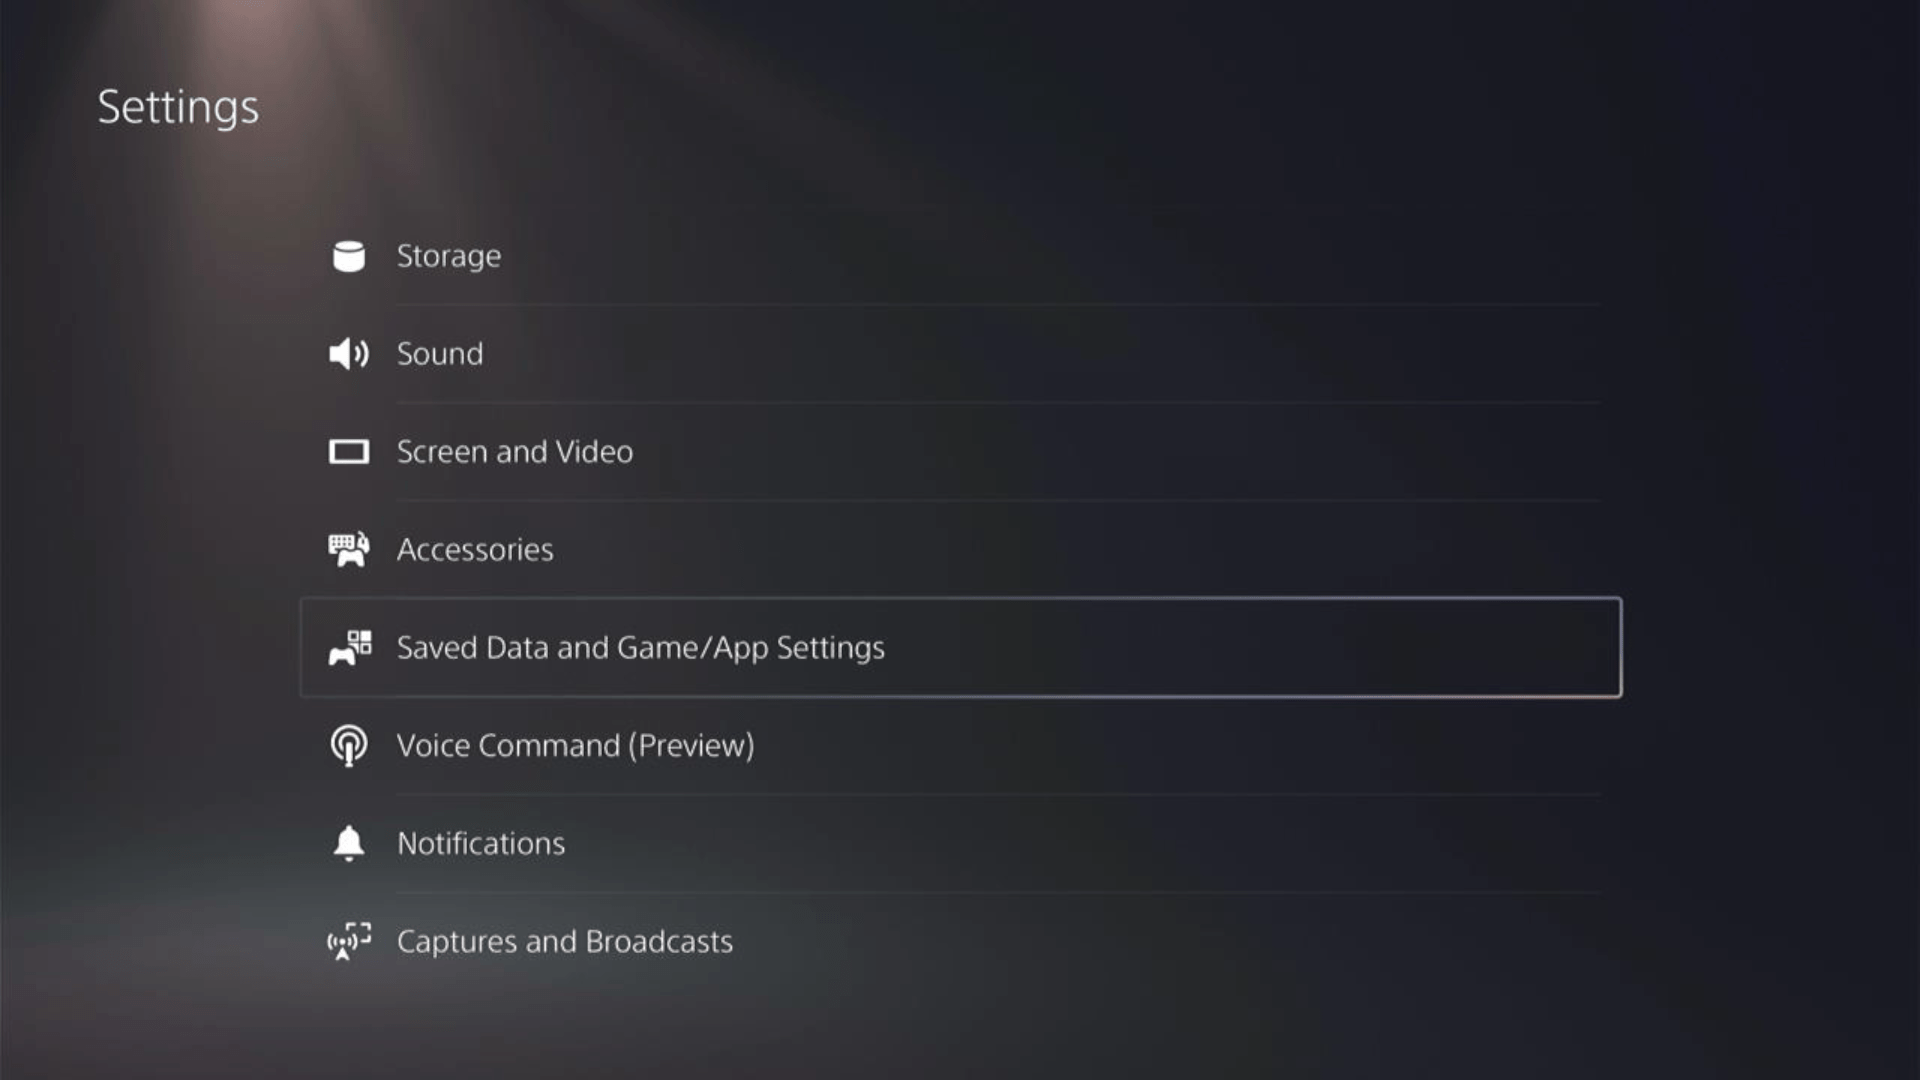
- Now choose the type of data you want to backup:
- PS5 Data:
Select Saved Data (PS5) > Console Storage and in the next Screen Upload to Cloud Storage
- PS4 Data
Select Saved Data (PS4) > Console Storage and in the next Screen Upload to Cloud Storage
- PS5 Data:
- And PS5 will upload your saved game data.
After backing up your data, now you can Reset your PS5:
- Go to Settings
- Then go to System
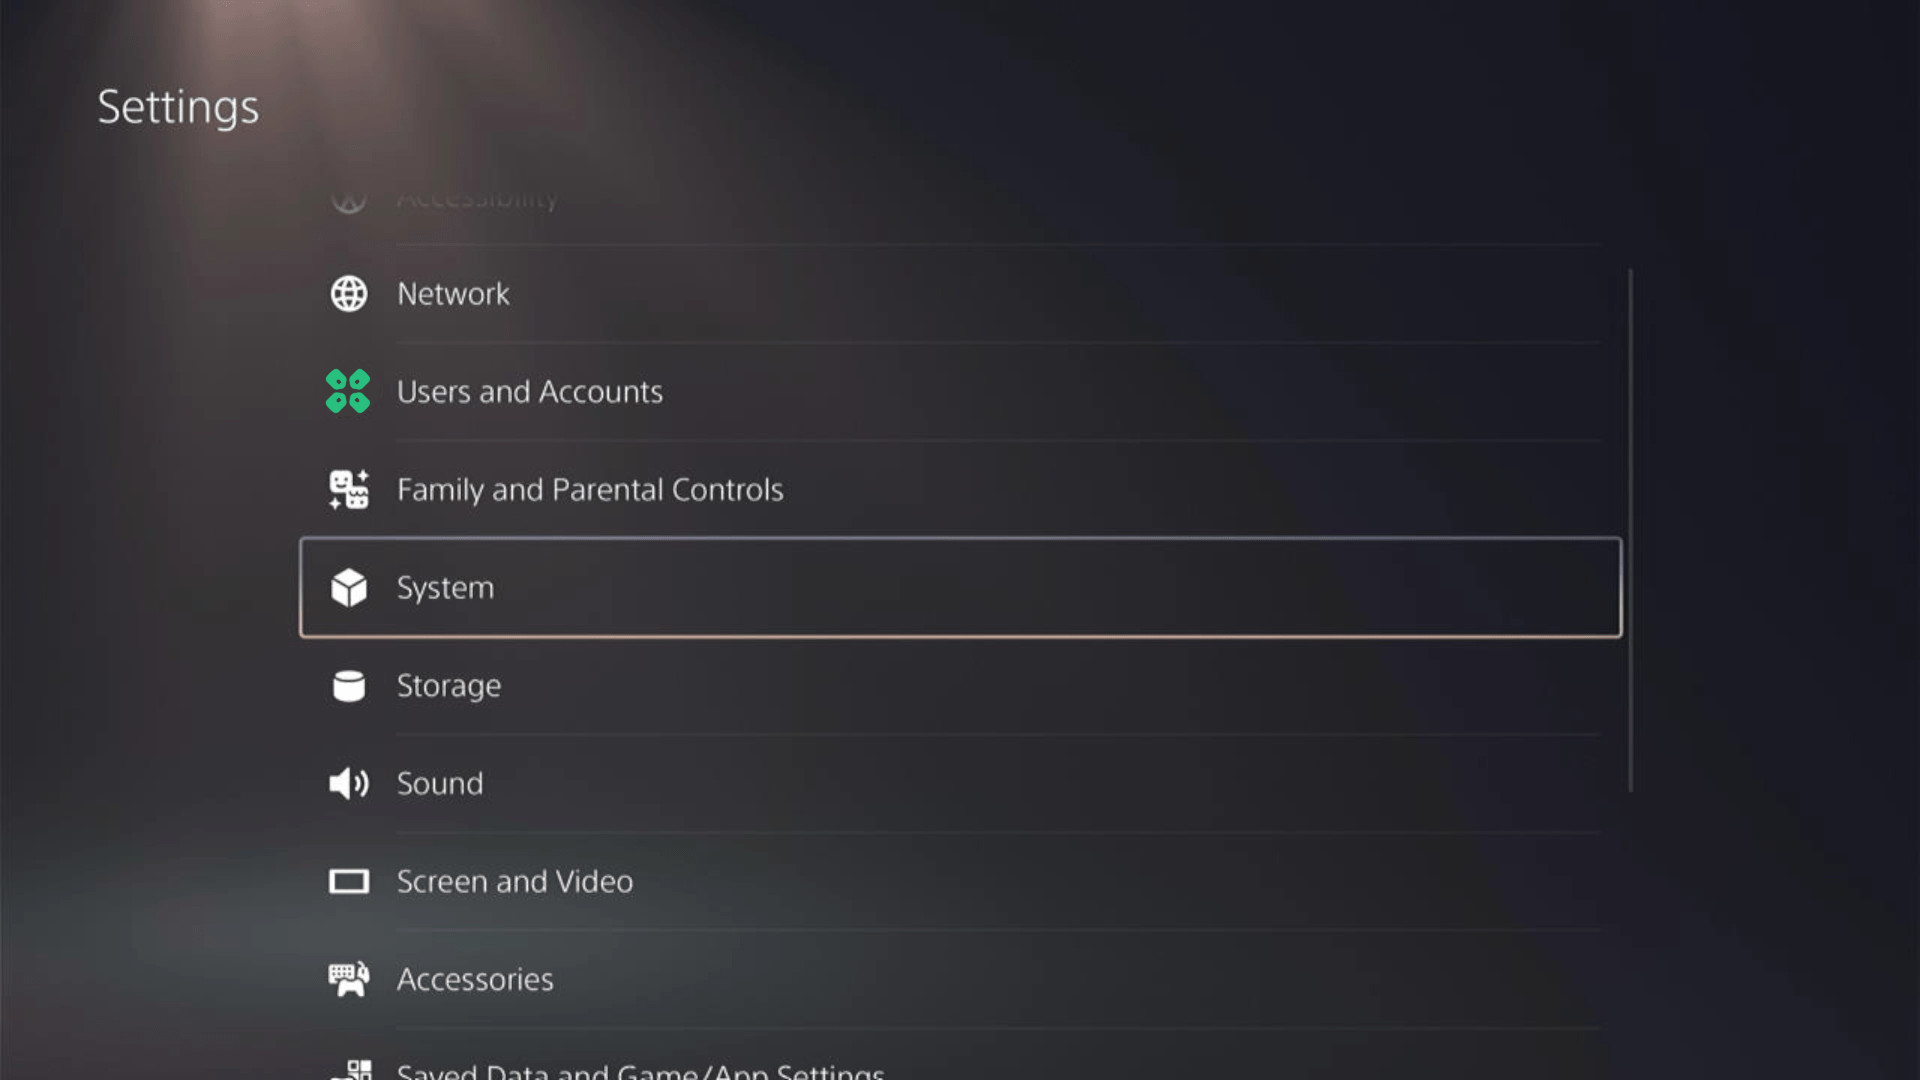
- Select System Software from the left menu and Reset Options (the last item in the expanded menu)
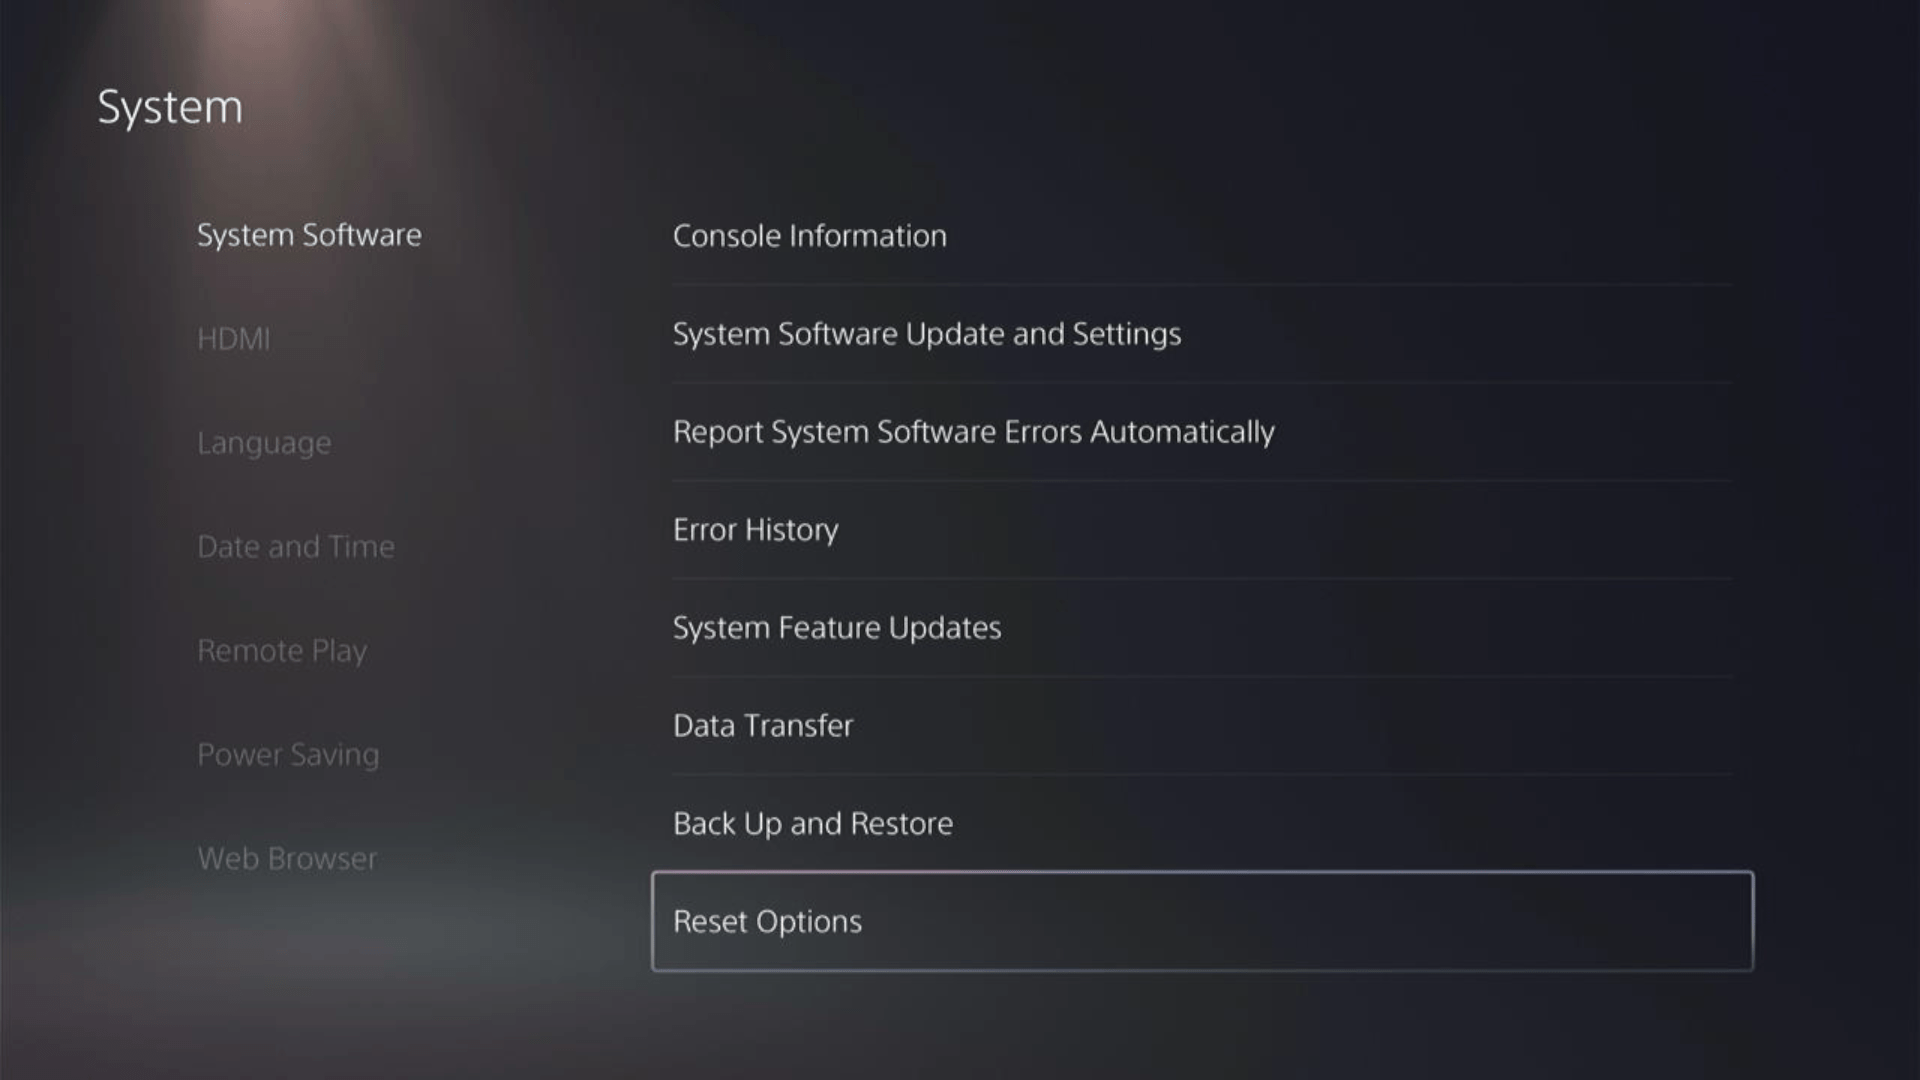
- Select Reset Your Console and follow the on-screen instructions. Wait until PS5 will restart and you are directed to the setup process.

Here’s a video of this process.
So, if you got any questions just let us know in the comments section below.