Mapping a network drive allows you to share files and folders over a connection, and you can enable it by following these 3 easy methods.
Network drives make it convenient for various computer systems to mutually share a storage space over a network by simply sharing a router or the same internet connection. It unlocks access to multiple computer systems to visible or hidden files and folders on Windows.
Such type of accessibility is pretty useful for organizations and businesses who have a setup of multiple computers connected to the same internet router or server. To map a network drive in Windows 11, you have to configure network discovery in Windows by going to Settings > Network & Internet > Advance network settings > Advance sharing settings > Private networks and setting the Network discovery toggle to ON.
Now other devices on your network can access files and folders on your system. But still, you have to map specific drives on your computer system. In this article, we will guide you on how to map a network drive in Windows 11 by following 3 easy methods. We will also discuss how you can disconnect a network drive mapped from your system.
Also Read: How to Recover Deleted Files on Windows 11
Enabling Network Discovery Mode
Before mapping specific drives on your computer system, you must configure network discovery mode by following these steps.
- Press the ‘Win+I’ keys simultaneously to open Settings.
- Go to Network & Internet > Advance network settings > Advance sharing settings.
- Expand the ‘Private Networks’ tab and turn ON the toggle button next to Network Discovery.
- If you wish to share the print from the system with other networks, you can also turn ON the toggle next to the ‘File and printer sharing’ option.
Once you have enabled the network discovery mode, the security risks and malware attacks become easier to perform. Therefore, make sure to enable core isolation memory integrity, especially if you have recently upgraded to Windows 11.
Mapping a Network Drive in Windows 11
Here we have mentioned 3 step-by-step methods to map a network drive in Windows 11. Each of these methods applies to any version of Windows 11, and you can implement whichever seems the most suitable option.
Method #1: Using Windows PowerShell
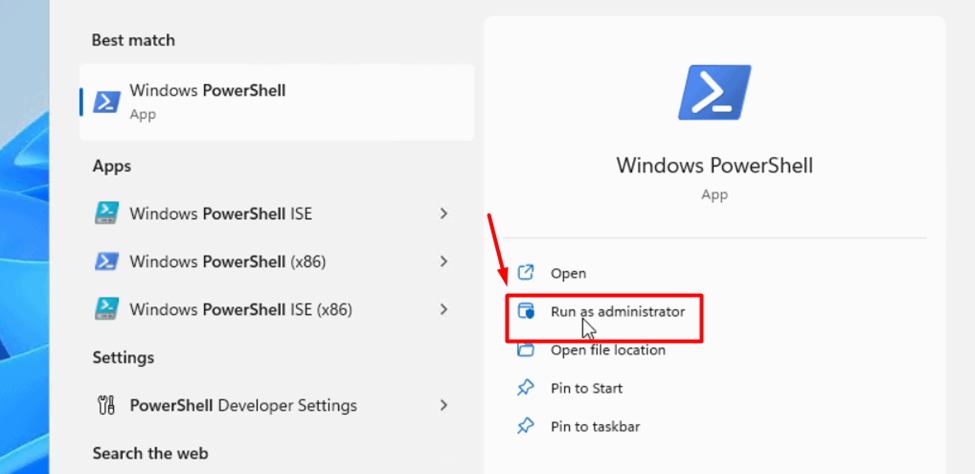
- Open Start Menu and type Windows PowerShell. Click ‘Run as Administrator.’
2. Type the following command (replace the word DRIVE with the drive’s letter name) New-PSDrive -Name DRIVE -PSProvider FileSystem -Root and \\ServerName\SharedFolder (input the path to the folder that you want to share) and press Enter key.
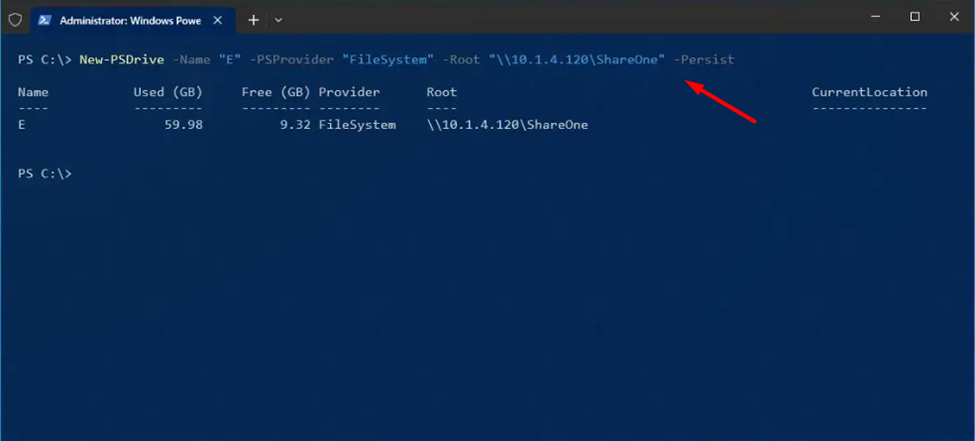
3. Suppose the shared folder requires a username or password. In that case, you can enter the drive name and folder path in the following command New-PSDrive -Name X -PSProvider FileSystem -Root \\ServerName\SharedFolder -Credential username password and press Enter Key.
Once you have run these commands in Windows PowerShell, you will be able to access the shared network via File Explorer.
Also Read: 7 Proven Techniques to Resolve Low Disk Space Issues
Method #2: Using File Explorer
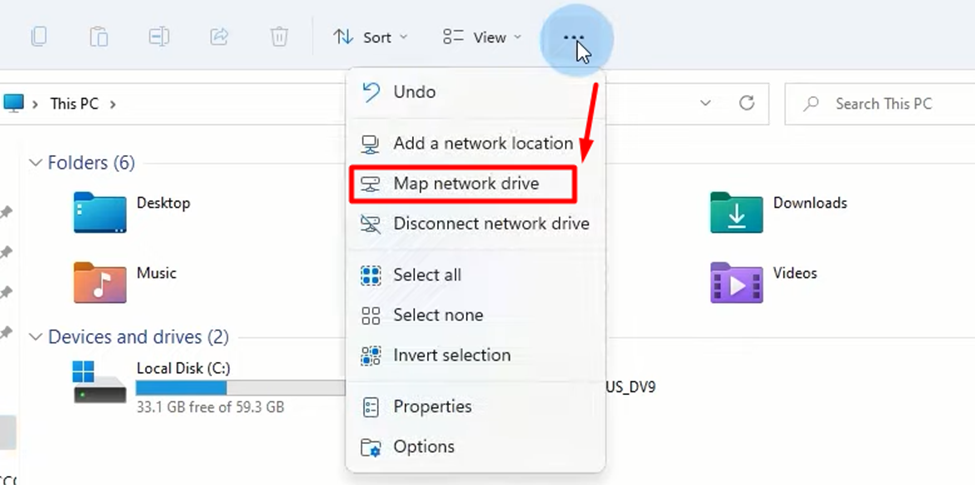
- Press the ‘Win+E’ keys simultaneously to open File Explorer and select This PC.
- Right-click on three dots from the top panel and select the ‘Map network Drive’ option from the pop-up menu.
3. Set a unique letter for the drive name. For example, we have entered the letter Z in the image below.
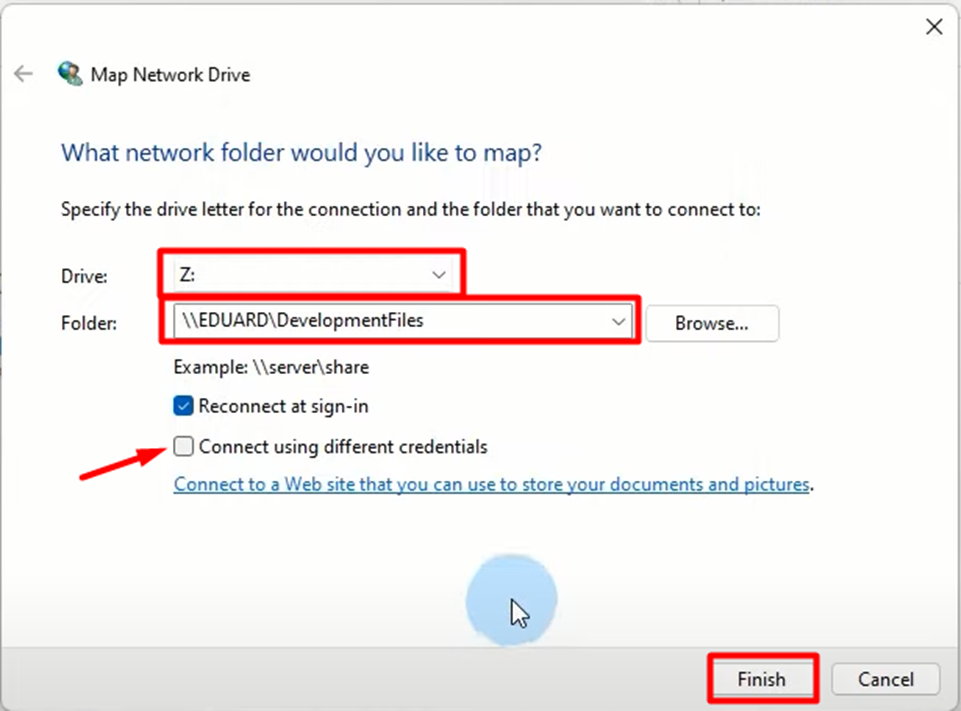
4. Next, you must provide the folder path you wish to share in the input field below the drive name.
5. You can checkmark the ‘Connect using different credentials’ option if a specific username or password is required to access files and folders.
6. Once you’re done, click ‘Finish’ to save the changes.
And that’s about it; now your folder with a specific drive letter name will be shared over the network in File Explorer, and other computers can access this shared folder.
Also Read: How To Free Up Disk Space On Windows 11
Method #3: Using Command Prompt
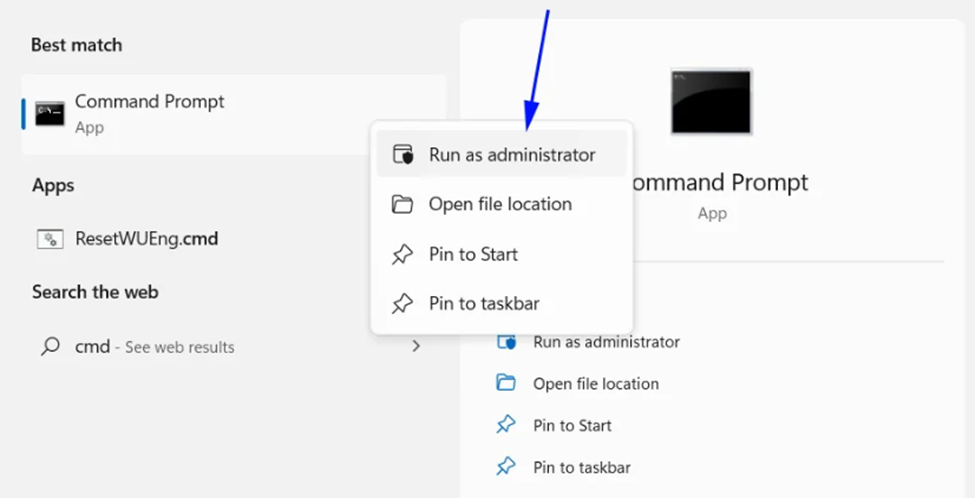
- Search for Command Prompt in Start Menu and right-click on it to select ‘Run as Administrator.’
2. Enter the following command net use DRIVE \\ServerName\SharedFolder, and make sure to replace DRIVE with the letter name of the drive you wish to map and enter the path for the folder you want to share.
3. If the drive is protected with a username and password, you can enter the following command net use DRIVE \\ServerName\SharedFolder /user: username pass with the same changes for the drive and path to provide.
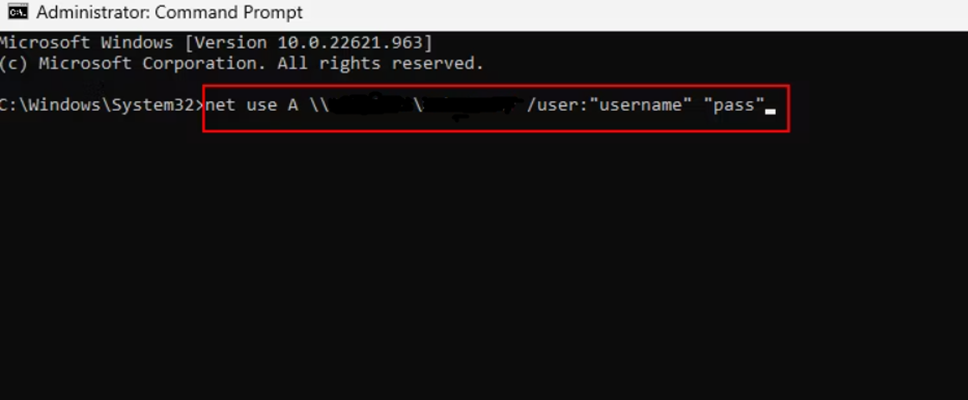
4. For the blank spaces in the image above, you can enter the path of the folder you wish to share and then Press the ‘Enter’ key to apply changes.
Once you have run these commands, the specific folder path will be shared, and you can access it easily via the file explorer.
Disconnecting a Mapped Network Drive
It’s much easier to un-map a network drive to revoke its access by following the few easy steps below.
- Press the Win+E keys at the same time to open File Explorer.
- Click on three dots on the upper panel and select ‘Disconnect network drive.’
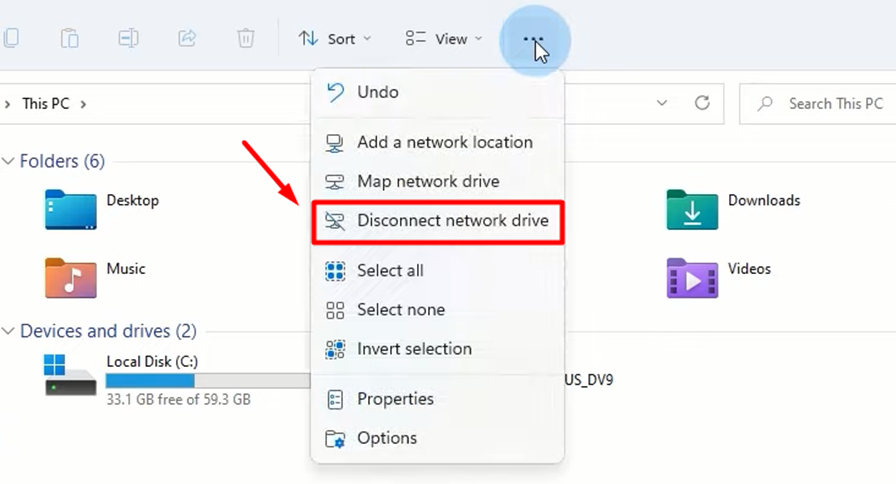
3. Select the drive you want to disconnect from the network and click ‘OK’.
Also Read: How to Set Up a Second Hard Drive on Windows 11?
Final Words
Sharing files and folders over a network saves you from the trouble of exchanging drives and connecting portable drives with each computer separately. It’s a faster and more reliable approach for sharing and exchanging files and folders within a complete network of computer systems. We hope our guidelines were helpful enough to assist you in mapping a drive over a network.