Recently many players of Destiny 2 are facing the issue of “Batlleye unable to update”. According to the user, this issue arises right after the game server downtime.
As we investigate that this issue has also been faced by many other Destiny 2 players in the past too.
Don’t worry about it
The CPU Guide brings you the best working solution to solve Battle Eye Unable to update on the PC.
Solution 1: Run Battleye Manually
If the game or launcher is unable to update BattlEye, try running the installer directly from the game files. This may resolve the issue. Make sure to run the installer with administrative privileges for the best results.
- Open the Window File Explorer
- Now navigate to the Battleeye folder
- Here you going to find install_Battleye click right on this application
- A small menu will pop up then select the Run as Administrator option
- Now try to update the Battleye
If this solution works for you then follow the next solution to completely remove the error form Destiny 2.
Solution 2: Run the Program as an Administrator (Permanently)
- Go to the folder/Application
- Right-click on it
- A menu will open
- Select Properties
- A new window will open
- Navigate to the “Compatibility Tab“
- Under the Settings heading
- Find “Run this Program as an administrator“
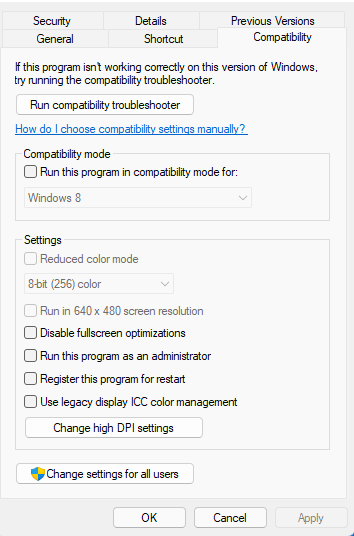
- Check the box for this option
- Click “Apply“
Now your program successfully Runs as an Administrator on Windows (Permanently) and you can easily open the program without repeating the steps again and again.
If you still facing errors then proceed to the next solution
Solution 3: Verify the Game Files
Sometimes the game file will get corrupted or get deleted, which eventually causes a Battleye unable to update issue.
Verify the Game File in Steam
Follow the steps to verify the game file on steam software:
- Launch the Steam Software
- Now login in the steam
- Navigate to the library
- Select the game and right-click on the game
- Now select properties
- Now click on the “Local file” Option
- A further menu will open
- Click on the “Verify Integrity of the Game Cache“
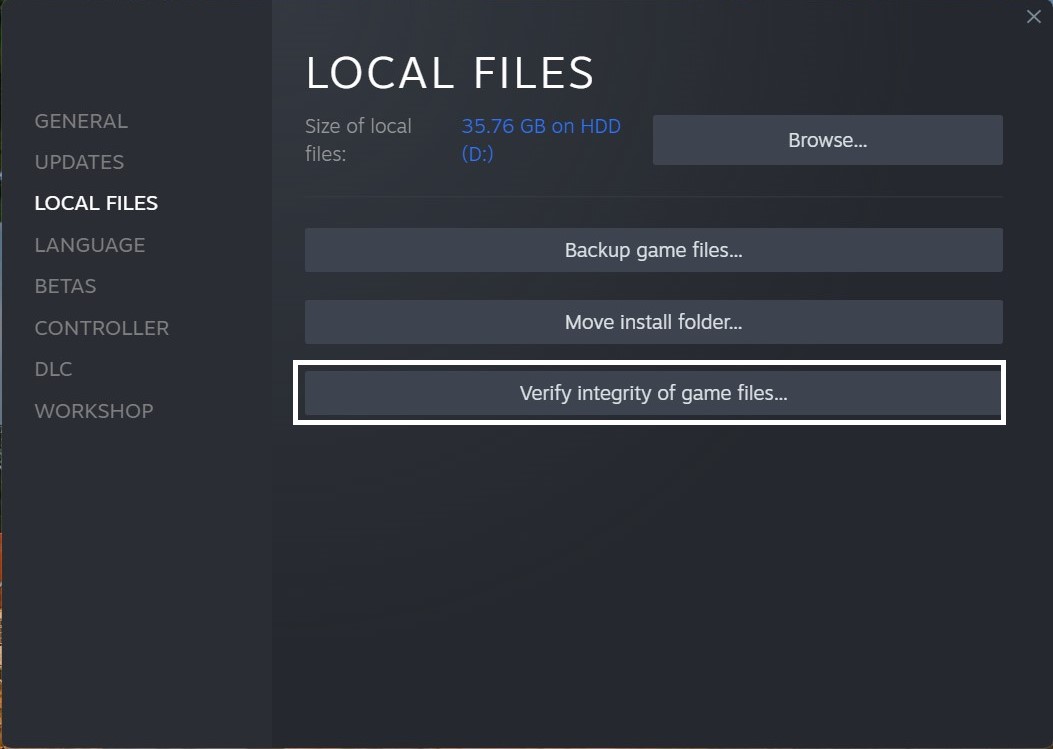
- Now the software is verifying the files, and this will take some time.
Sometimes the game file will get corrupted or get deleted that eventually causing a Crashing issue on steam.
Solution 5: Update Graphics Card Driver with Windows Update
Updating the graphic drivers will help you have a better and more stable graphical experience.
This will fix the “Battleye keeps Crashing on PC” and you will play without getting errors.
Here is how you can update drivers via optional updates:
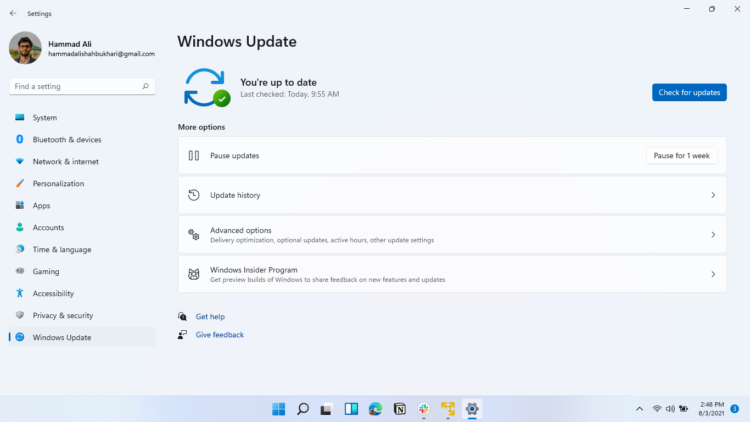
- Click on the Windows icon
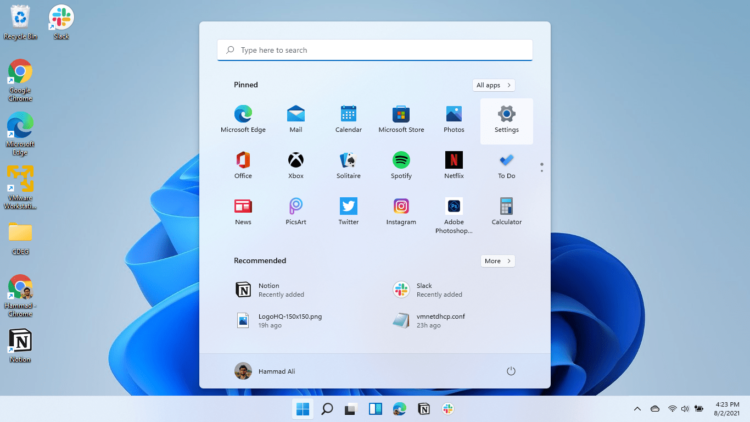
- Click on the Settings icon
- A new window will pop up
- Select Windows Update from the left menu
- The new window will pop up
- Now select Advanced options
- Click on Optional updates
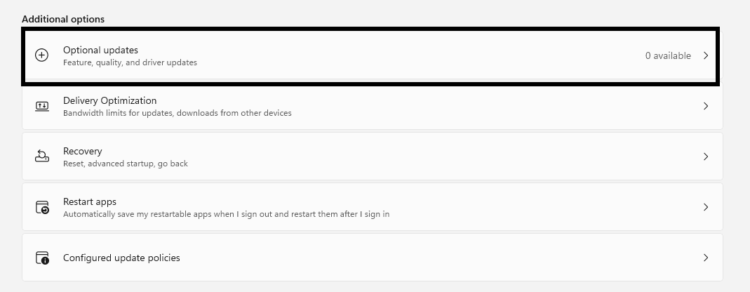
- A new window will open
- Click on the drop-down button for Driver updates
- Now, select your desired drivers
- Now press the Download & Install button
If you cannot update your drivers through Windows Update, then you can try updating the Graphics Drivers through Device Manager to fix the Battleye unable to update on your PC.
Solution 6: Update Graphics Card Driver via the Device manager
We can update outdated graphic drivers in multiple ways.
If you cannot update your graphic drivers by updating Windows, you can try updating through the Device Manager.
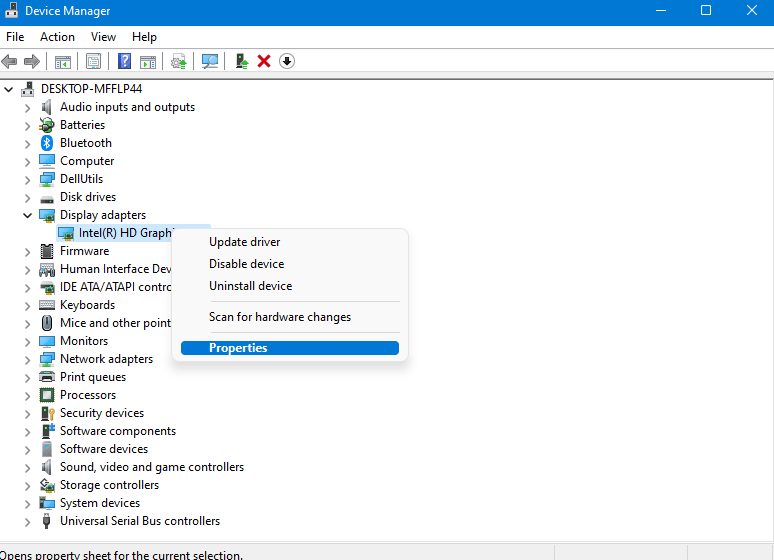
Here is how you can update drivers through Device Manager:
- Click on the Search icon
- Type Device Manager
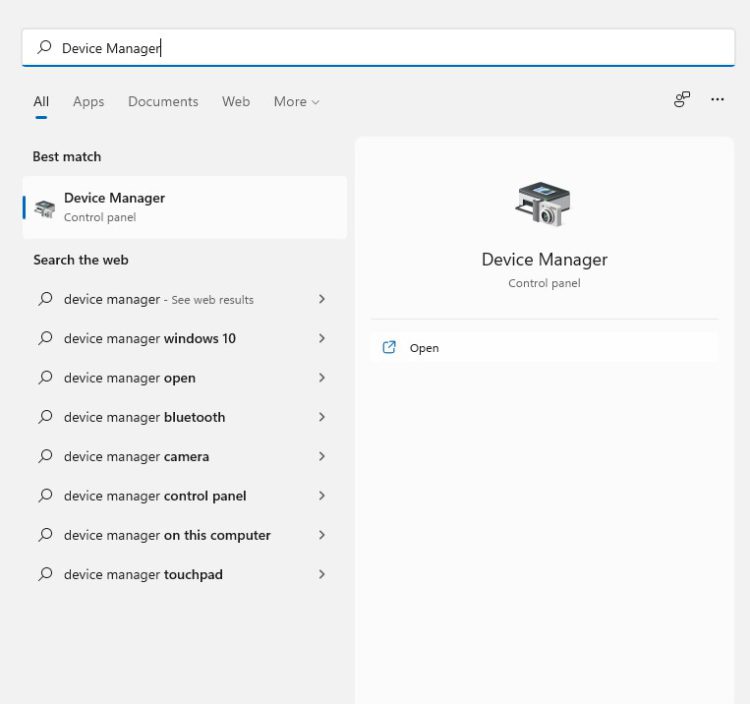
- Click to open Device Manager
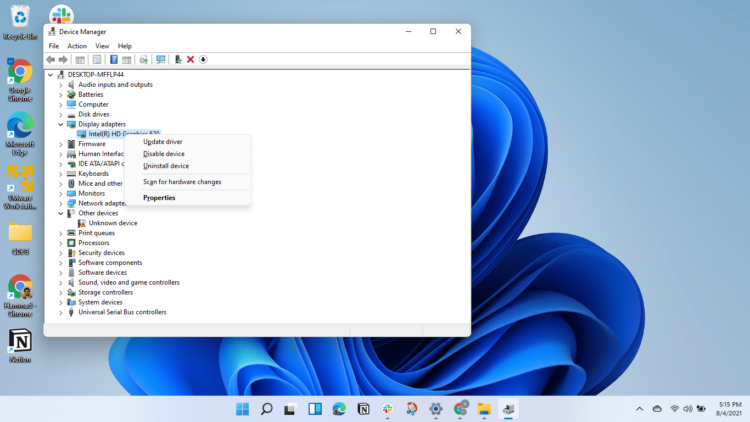
- Then select the Display adapters
- A further menu will open
- Right-click on the graphic card name
- Click on the Update driver
Rolling Back the Driver :
If you experiencing a Battleye unable to update after updating your graphic drivers, then you can roll back the driver’s recent update to avoid the error on Destiny 2.
Here is how you can roll back drivers:
- Click on the Search icon
- Type Device Manager
- Click to open Device Manager
- Then select the Display adapters
- A further menu will open
- Right-click on the graphic card name
- Click on the Properties
- A graphic card properties Windows will open
- Navigate to the Driver Tab
- There is an option for “Roll Back Drivers”. Click on it
- If the option of “Roll Back Drivers” is greyed out, this means that the driver did not update recently.
Solution 7: Check for Driver’s Updates of GPU/Video Card of different company
One of the highlighted issues is outdated GPU drivers leading to crashing.
When our video card has outdated drivers, it’s unable for GPU to align with the modern gaming experience and starts causing Battleye unable to update the issue on Destiny 2.
So, we recommend updating the video card drivers.
Here are the direct links to the main GPU Making Companies:
If the above solution didn’t work out for you, then try the next solution.
Solution 8: Disable Antivirus Software
In some cases, the third-party antivirus software installed on a computer may prevent the game Destiny 2 from running properly.
So, you need to disable the antivirus for a few minutes to check if the antivirus is causing it.
In order, to disable the antivirus follow the step below :

- Select the arrow button on the taskbar a Small menu will open.
- Then click left on the Avast antivirus icon.
- The setting menu will open and select ” Avast shield control “
- In a further menu, you will select the “ 10 minutes option“
- Now restart the game.
If the issue persists then proceed to the next solution.
Solution 9: Switch To Better Antivirus
If the above solution shows that your antivirus is causing the Battleye unable to update error then it’s time to change the antivirus.
The CPU Guide brings you the best-discounted deals on Top Tier Antivirus.
I am listing down some Best Anti-Virus with Exclusive discounted offers for The CPU Guide readers.


![[Solved] Elden Ring Easy Anti Cheat Launch Error 30005](https://www.thecpuguide.com/wp-content/uploads/2021/08/Screenshot-2021-08-24-124811-e1629791340991.png)
Hope all the solutions help you solve the Battleye’s unable to update on Destiny 2.
If you have any queries or suggestions, feel free to share your experience with us in the comments section down below or you can reach us on our social handles.