
Do you fancy some RGB setup to look even more cool on your PC? Here is how you can change RGB lighting based on CPU temperature.
If you are into building rather than buying a gaming PC, you may have this passion for getting fancy yet unique with technical experience. To get that immersive gaming experience, one might want RGB LED effects to make their PC look cooler and cyberpunk-ish.
But what if we tell you there is a way to change the LED color scheme on your PC based on the temperature? Imagine your PC gets overheated due to overclocking the CPU, and the LEDs turn RED or to any other color to denote the change. Similarly, when the cooler fan speed increases to cool down the PC, the LED changes to blue. Sounds cool right?
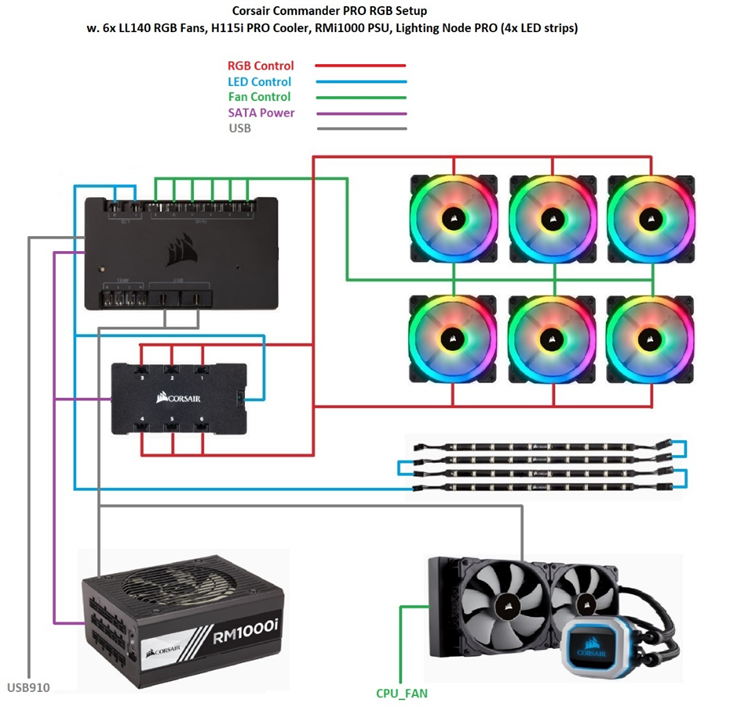
But controlling RGB lighting on any PC may sound unrealistic unless you have the Corsair Pro Commander. To help you out with the complete setup of Corsair Commander Pro on any gaming PC, we have set up this guide for you. We will also show you how to change RGB color lighting based on CPU temperature with Corsair Commander Pro.
What is Corsair Commander PRO?
The Corsair Commander PRO is a control unit that controls the RGB lighting and performs other hardware monitoring using the Corsair ICUE software. This small and compact unit fits right into your PC case. It turns your ordinary PC case into a smart case by offering RGB lighting control, fan speed control, and temperature monitoring of different components like the CPU.
What’s Included with Corsair Commander PRO?
Here is the list of items included with the Corsair Commander PRO, which would be sufficient to set up the unit in your computer system.
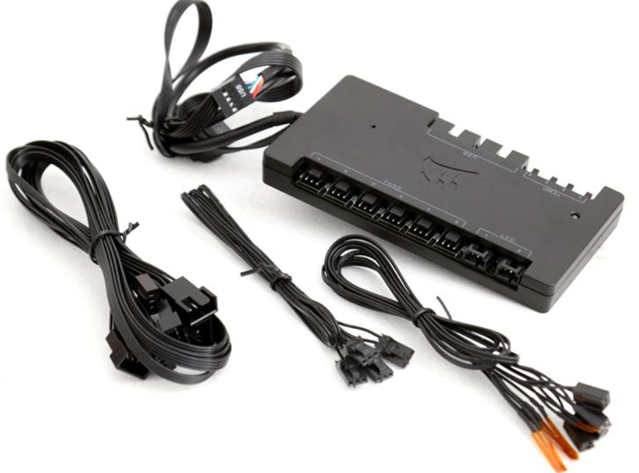
- Corsair Commander PRO control unit.
- USB cables to connect the Corsair Commander PRO with the motherboard.
- Temperature sensor cables.
- Extension kit for the fans or coolers.
How to Setup Corsair Commander PRO with PC
The Corsair Commander PRO unit is very compact and lightweight and can be installed anywhere in your PC’s case.
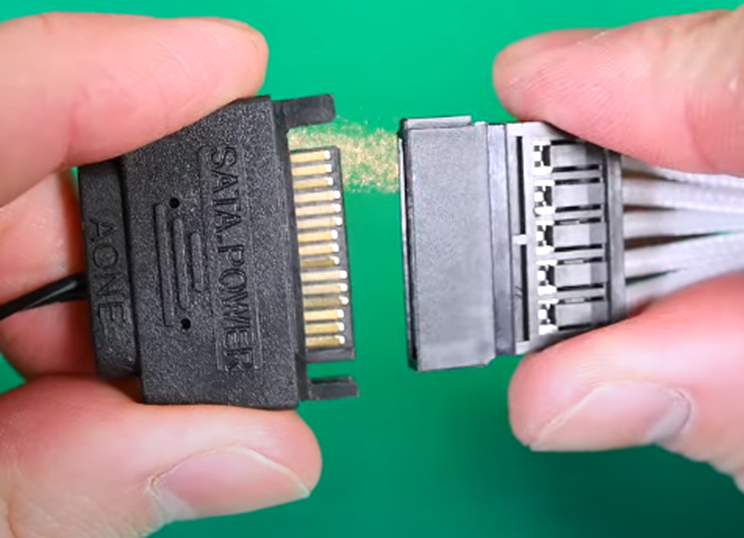
- Take the power cable from the Commander PRO and connect it to the PSU cable of your PC.
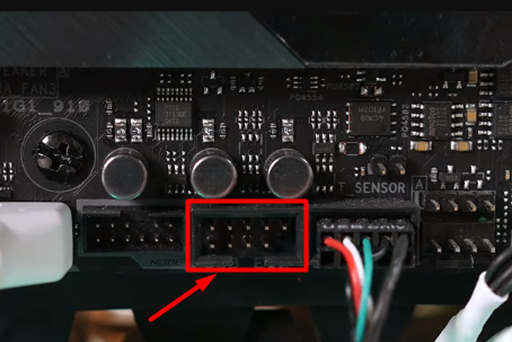
- Take the USB cable and plug its one end in the Corsair Commander PRO.
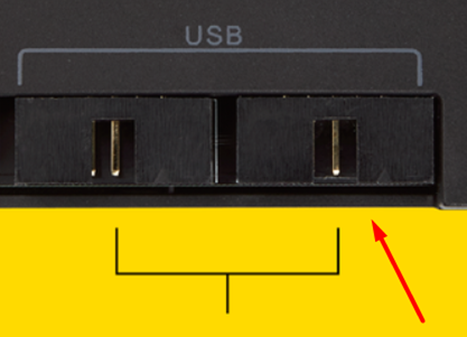
- Take the other end of the USB cable and plug it into your PC’s motherboard.
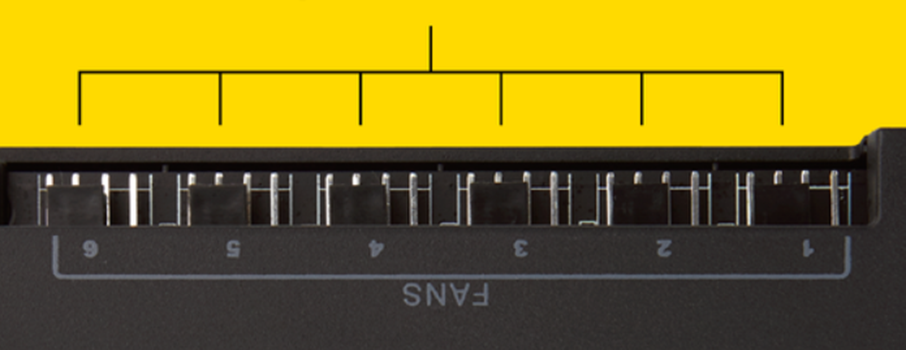
- Take the fan connector pins and insert them in the Corsair Commander Pro slots. You can connect up to 6 fans with Commander Pro. Numbering is crucial here as it indicates the location of fans in your PC case.
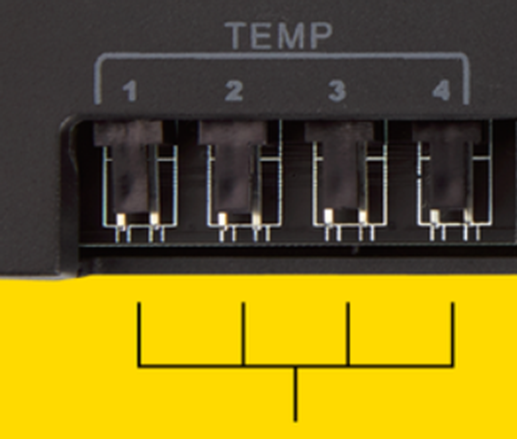
- Take the 2-pin temperature sensor cables and insert them into temp slots.
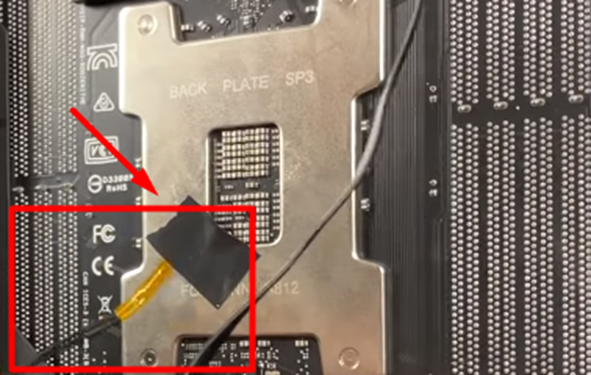
- Take the other end of the cables with the sensor attached to them and paste it with the PC section from where you want to monitor the temperature. So, for example, we connected the sensor behind the CPU, as you can see in the image below, and tapped it with the frame.
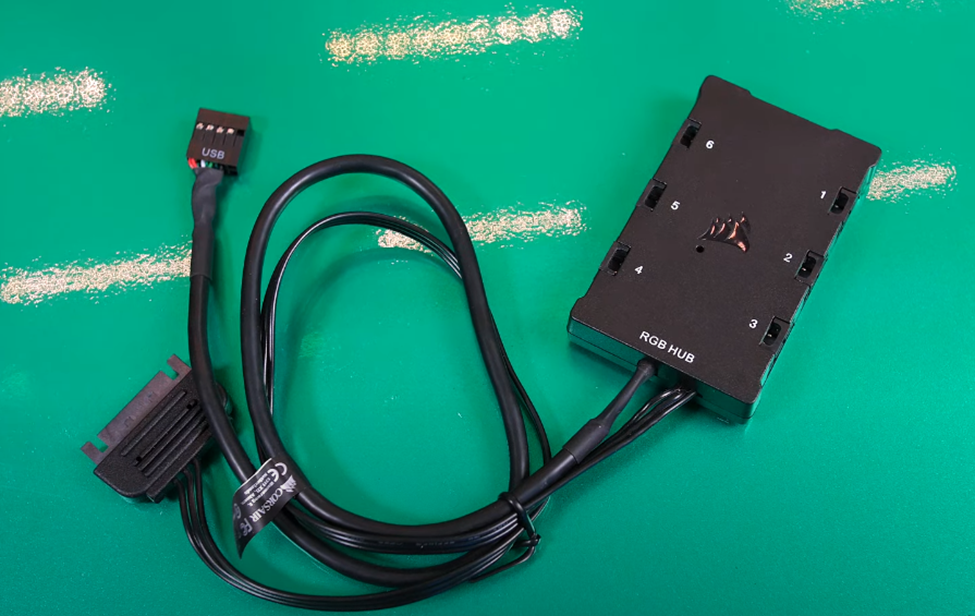
- Install the Corsair LED lights and plug in the LED slot of the Commander PRO. If you don’t have the Corsair RGB LEDs or Corsair case, you may just have to buy the Corsair RGB Hub, as shown below. Hence, you can connect the LEDs in the RGB Hub and then connect the RGB Hub to the Commander Pro unit.
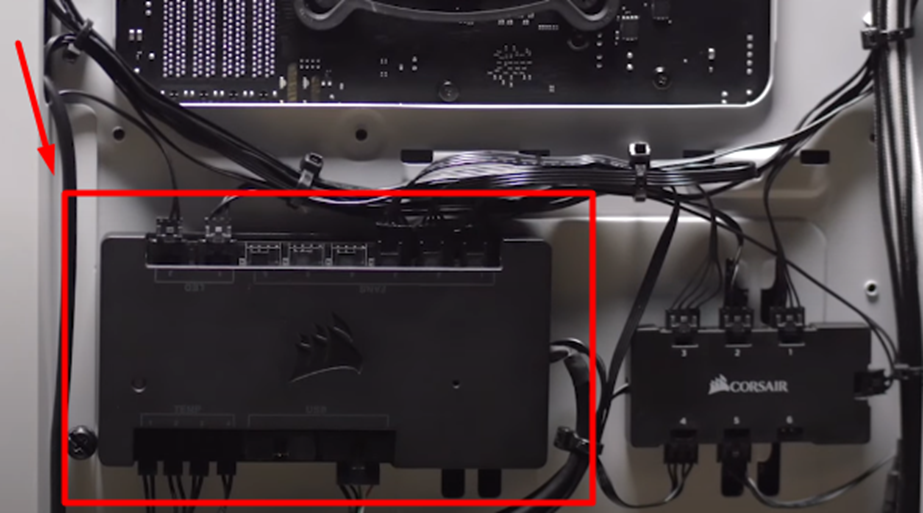
- Now that we have connected all the cables, placing them in the Commander Pro unit is time. As we mentioned, the unit is very light and compact, so you can use the double-sided tape to attach it anywhere inside your PC’s case.
Once you have connected everything, close your PC case and proceed towards changing the RGB temperature based on the CPU with the software.
Change RGB Lighting Color Based on CPU Temperature with Corsair iCue
- Download and install the Corsair iCue software for your PC.
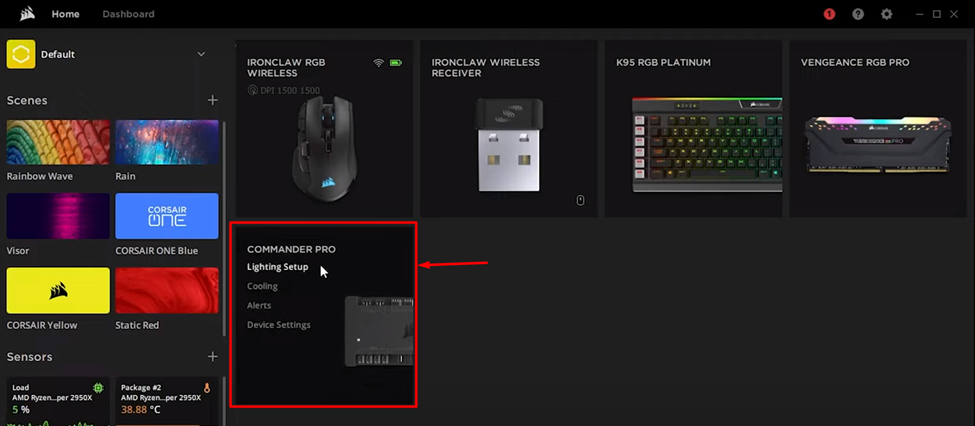
- Run the software and go to the home page. Hover the mouse over ‘Commander Pro’ and select ‘Lighting Setup.’
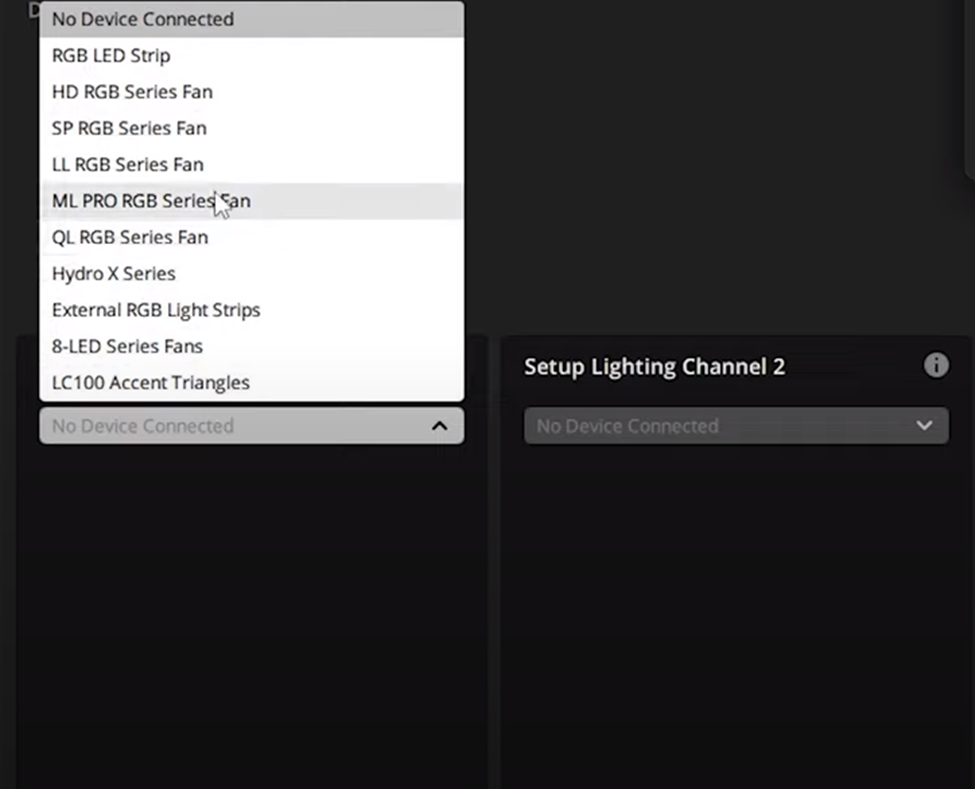
- Select the lighting output source in the ‘Setup Lighting Chanel’ section. For example, the External Lighting Strips.
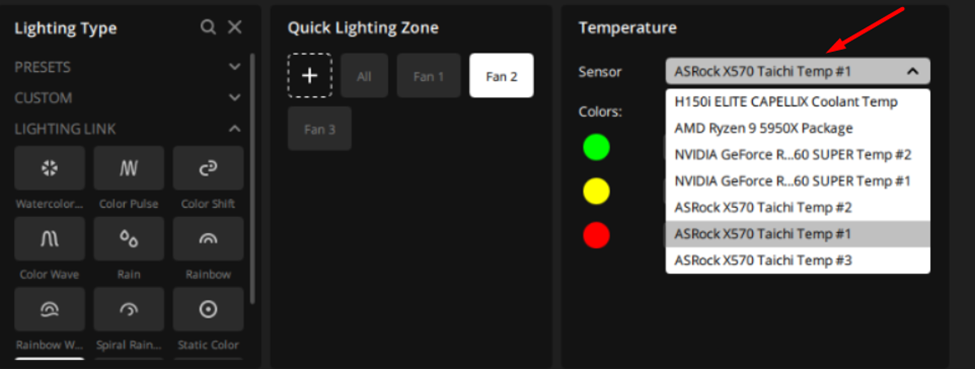
- You can go to the ‘Temperature’ tab and select your CPU from the Sensor menu.
- Return to your Home screen and repeat steps #2, #3, and #4 for the keyboard, mouse, or any other device that the Corsair iCue is detecting. It’s unnecessary, but only if you want the other RGB devices to change colors according to CPU temperature.
Final Words
Setting up Corsair Commander PRO for controlling the RGB lighting to change based on CPU temperature can put you through a wild ride. But it’s worth the effort since you can turn your PC case into a smart one for controlling and monitoring everything. Hopefully, this article has guided you well on setting up Corsair Commander PRO and changing the RGB color lighting based on GPU temperature.