Do you want to get that sci-fi feel with your gaming PC? Here is how to change RGB Lighting based on CPU temperature with Aura Sync.
If you are into building rather than buying a gaming PC, you may have this passion for getting fancy yet unique with technical experience. To get that immersive gaming experience, one might want RGB LED effects to make their PC look cooler and cyberpunk-ish.
But what if we tell you there is a way to change the LED color scheme on your PC based on the temperature? Imagine your PC gets overheated due to overclocking the CPU, and the LEDs turn RED or to any other color to denote the change. Similarly, when the cooler fan speed increases to cool down the PC, the LED changes to blue. Sounds cool, right?
So, if you have an Asus gaming PC or Aura Sync-compatible PC, you’re in luck. Since all you need is software, you can set up the RGB lighting in several ways. In this article, we will guide you on changing RGB lighting based on CPU temperature with Asus Aura Sync.
What is Asus Aura Sync?
Asus Aura Sync is an RGB control center for changing and tweaking any RGB effect on your PC. This includes the motherboard, RAM slots, keyboard, mouse, case lights, and GPU controls.
Aur Sync is built with the Armoury Crate software, which means you can change fan control and monitor your computer system from the same platform if you have an Asus ROG-based device.
Does Asus Aura Sync Work with Any PC for Controlling RGB LEDs?
You’re good to go if you have an Asus ROG product like a laptop, motherboard, or PC. Aura Sync has been working for its compatible devices since 2016. The new-age Asus gaming console ROG Ally can change RGB lighting based on CPU temperature as well as the Asus Aura Sync since it’s a Windows-based device.
As for the non-Asus ROG products, if your PC or its components have the “Aura Sync compatible” logo on the packaging or the product’s page, only then the Asus Aura Sync will be compatible with controlling the RGB lighting.
Things to Check Before Installing Armoury Crate
If you have an Asus ROG product or the Aura Sync verified product, you must check the following things, especially if you are building a new gaming PC.
- Check the number of 3-pin- and 4-pin addressable headers on your PC’s motherboard.
- RGB components with built-in lighting, like the RGB RAMS and GPU, may not require ARGB headers since they have dedicated slots to power them.
- If you want to attach additional RGB components or LEDs, insert them in your motherboard’s 3-pin addressable or 4-pin addressable headers.
Changing RGB Lighting Based on CPU Temperature with Aura Sync
- Download and install the Armoury Crate software if it’s not pre-installed on your system.
- Once you have installed the application, grant the permissions and run it. At first glance, the dashboard may look like this.
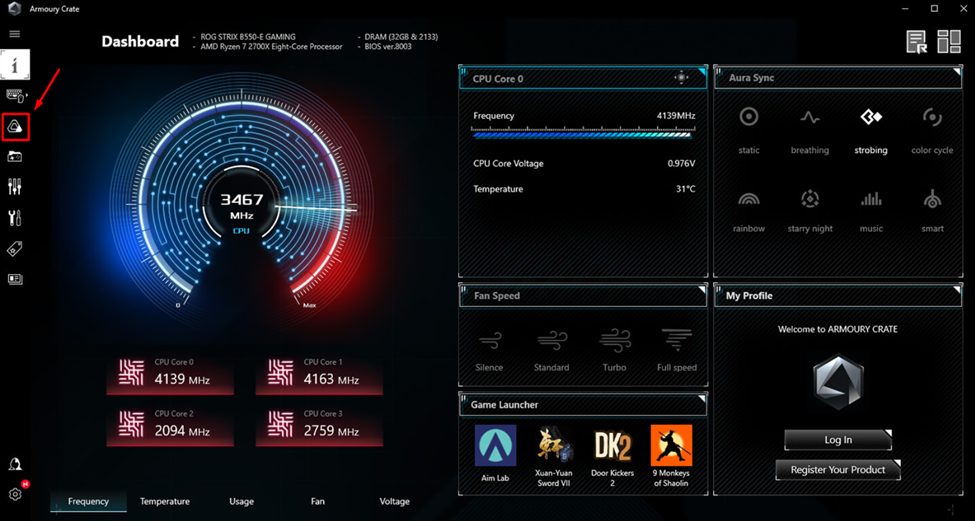
- Click on the Aura Sync option from the left side panel.
- In the Aura Sync tab, go to the ‘Auto effects’ section.
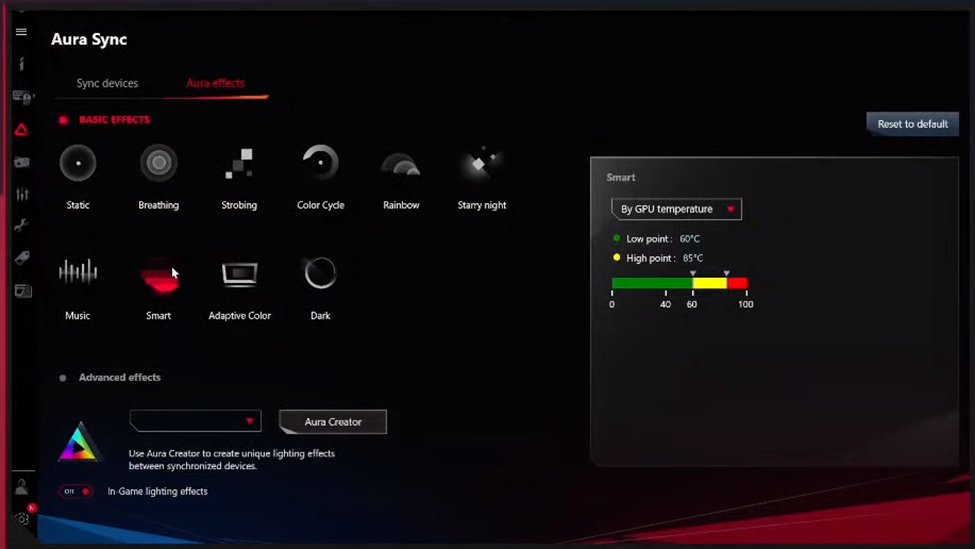
- Select ‘Smart’ mode, and the settings to set the temperature will appear on the right side.
- In the right-side menu, choose the Style as ‘By CPU Temperature’ and set the colored bar to change the temperature ranges.
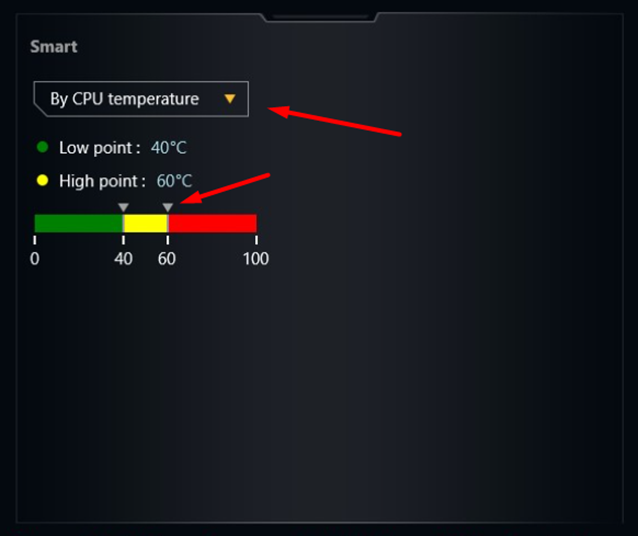
- You can set the low and high points for changing colors in a certain temperature range by moving the pointers on the colored pallet.
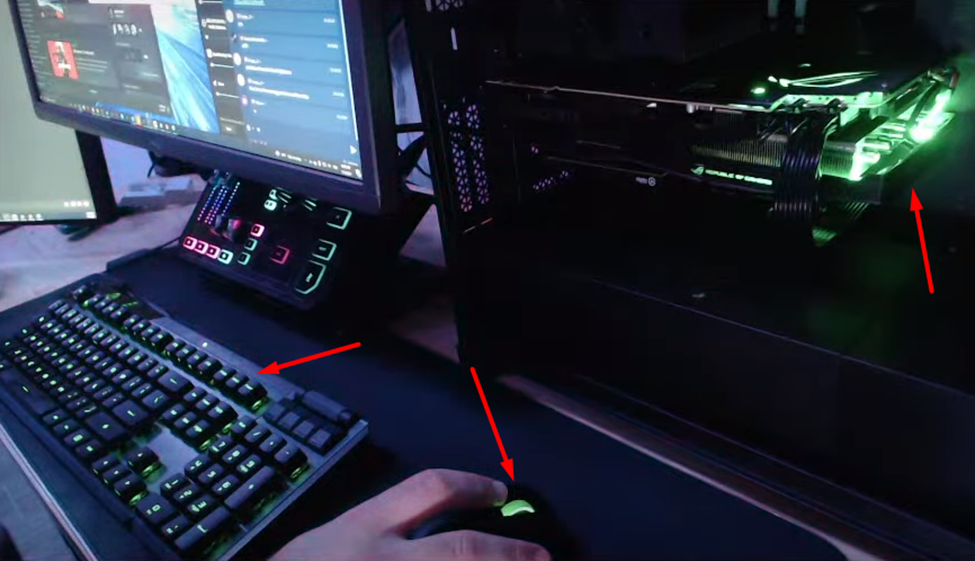
- Once you have set the temperature ranges, the changes will be automatically applied, and you can close the software to save them. As you can see in the image below, everything has turned green since the temperature is in the 40 Celsius range.
Final Words
The Asus Republic of Gamers gives numerous options and features to elevate your gaming experience with RGB effects and cool tech-themed add-ons. The products verified with Asus Aura Sync leave out the compatibility issues and let you control your device. Hopefully, this article has helped you to turn your gaming station into a spaceship. If you have any questions, let us know in the comments.