Many of the Vegas Pro users are facing issues while rendering the video. Most people suffer from the blurry videos they get after rendering.
Here, one user is sharing his experience on Reddit.
Don’t worry about it!
The CPU Guide brings you the best tutorial on the Best Sony Vegas Pro Rendering Settings.
Read More: Sony Vegas Pro Keeps Crashing On Windows 11/10? 7 Quick Fixes!
Tutorial: How to Render in Vegas Pro
So, in this tutorial, I will tell you the best rendering setting in Vegas pro, which will provide you with ultra-clear and full HD videos.
This tutorial will help YouTubers and streamers mainly if you belong to another platform, then little settings change will work for you.
And the upcoming settings are applicable to all Sony Vegas Pro variants.
Video Rendering Settings For PC/Windows 11/10
Video Project settings
- So firstly done with the editing of your video project
- Now right-click on the video. The small menu will appear select “Properties“
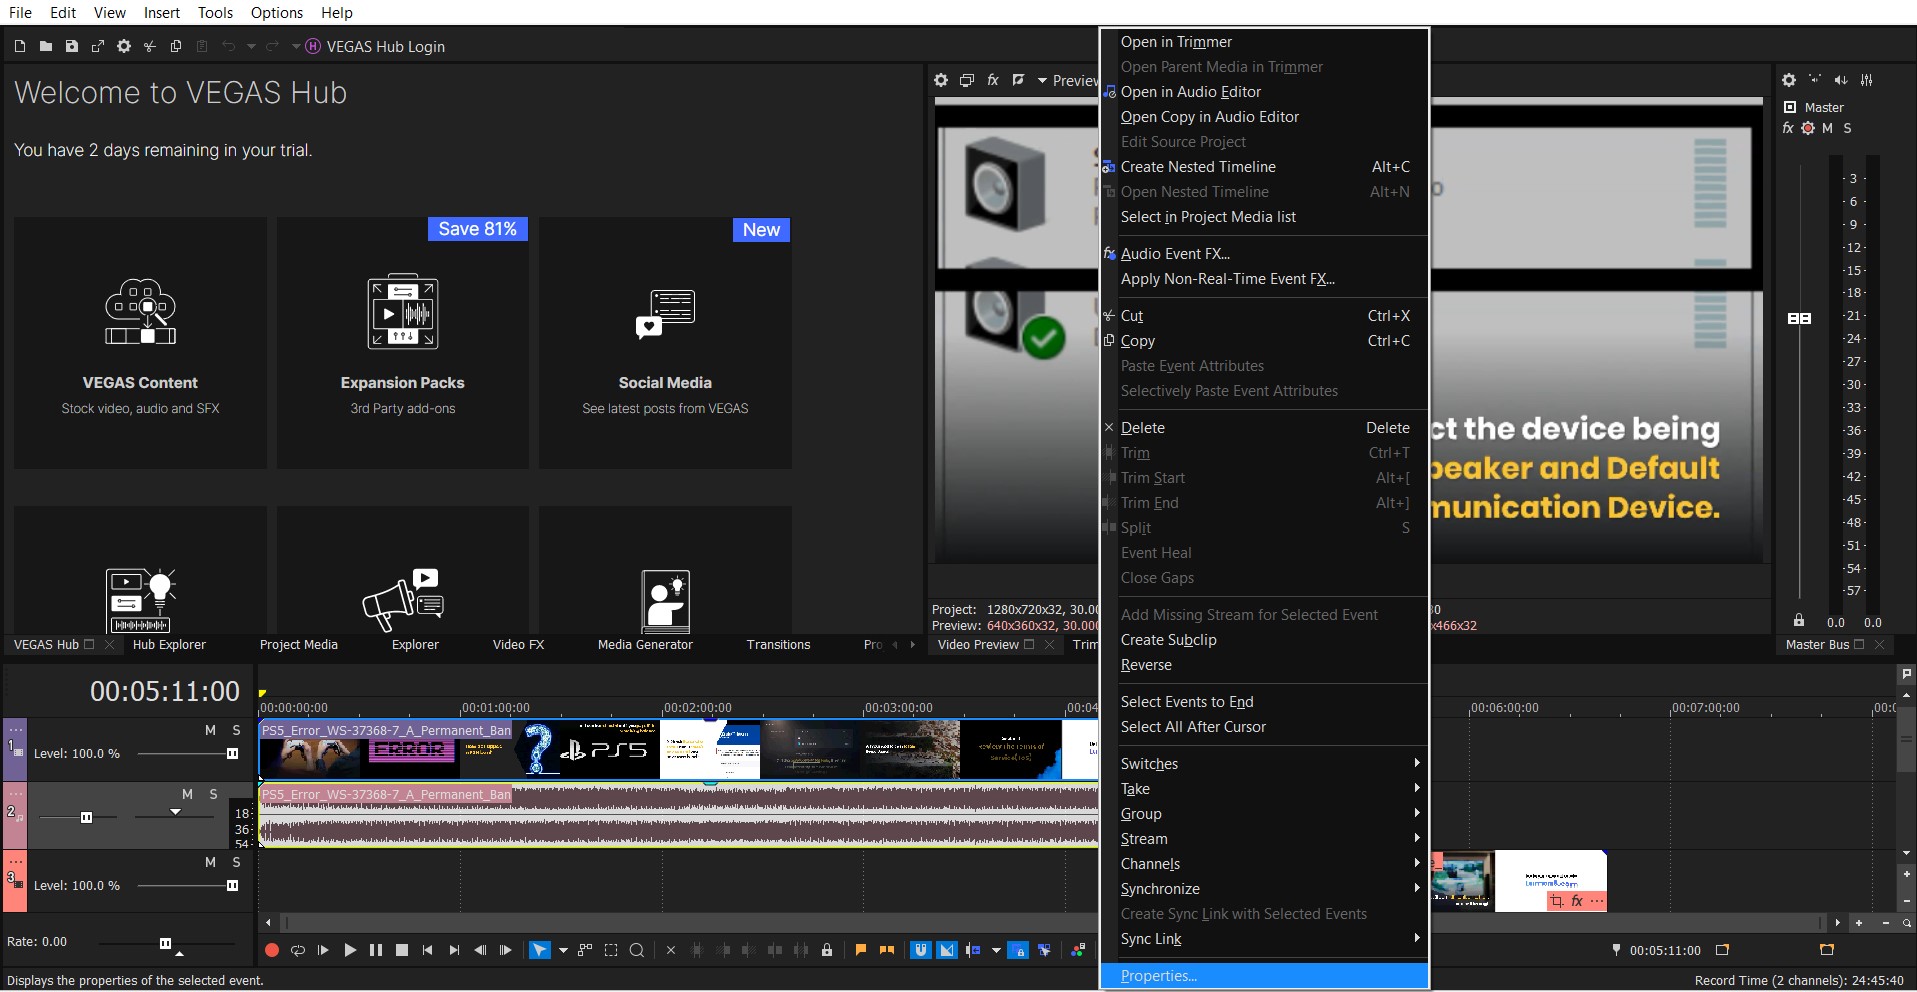
- Now select the Disable the Resample (To Avoid Blending frames together)
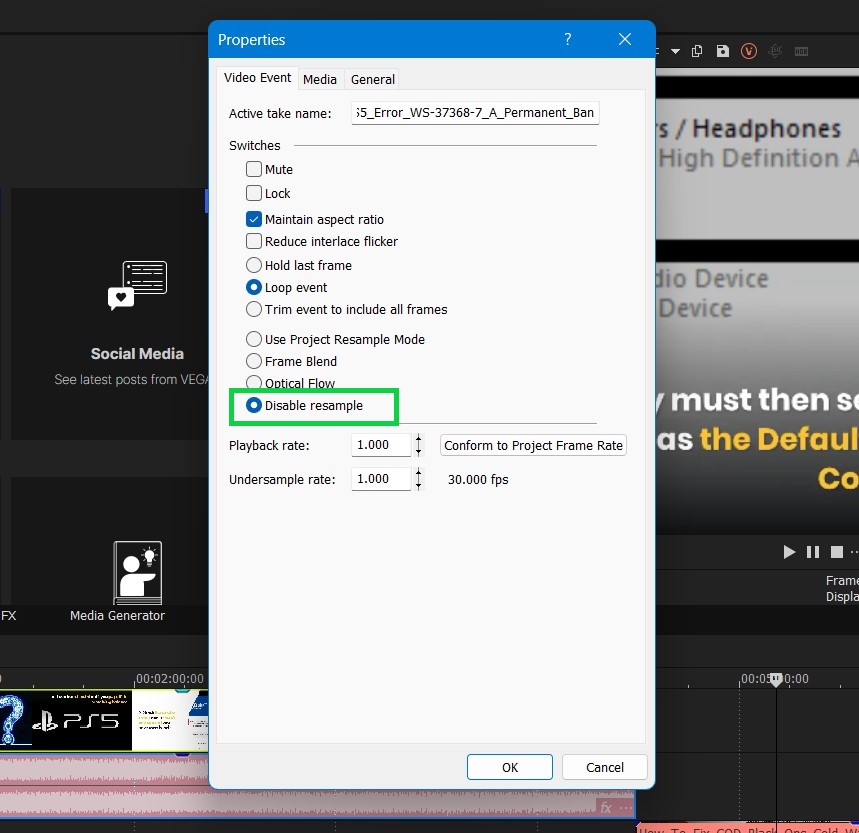
- Select the Video part you want to render and select the “Project Video properties“
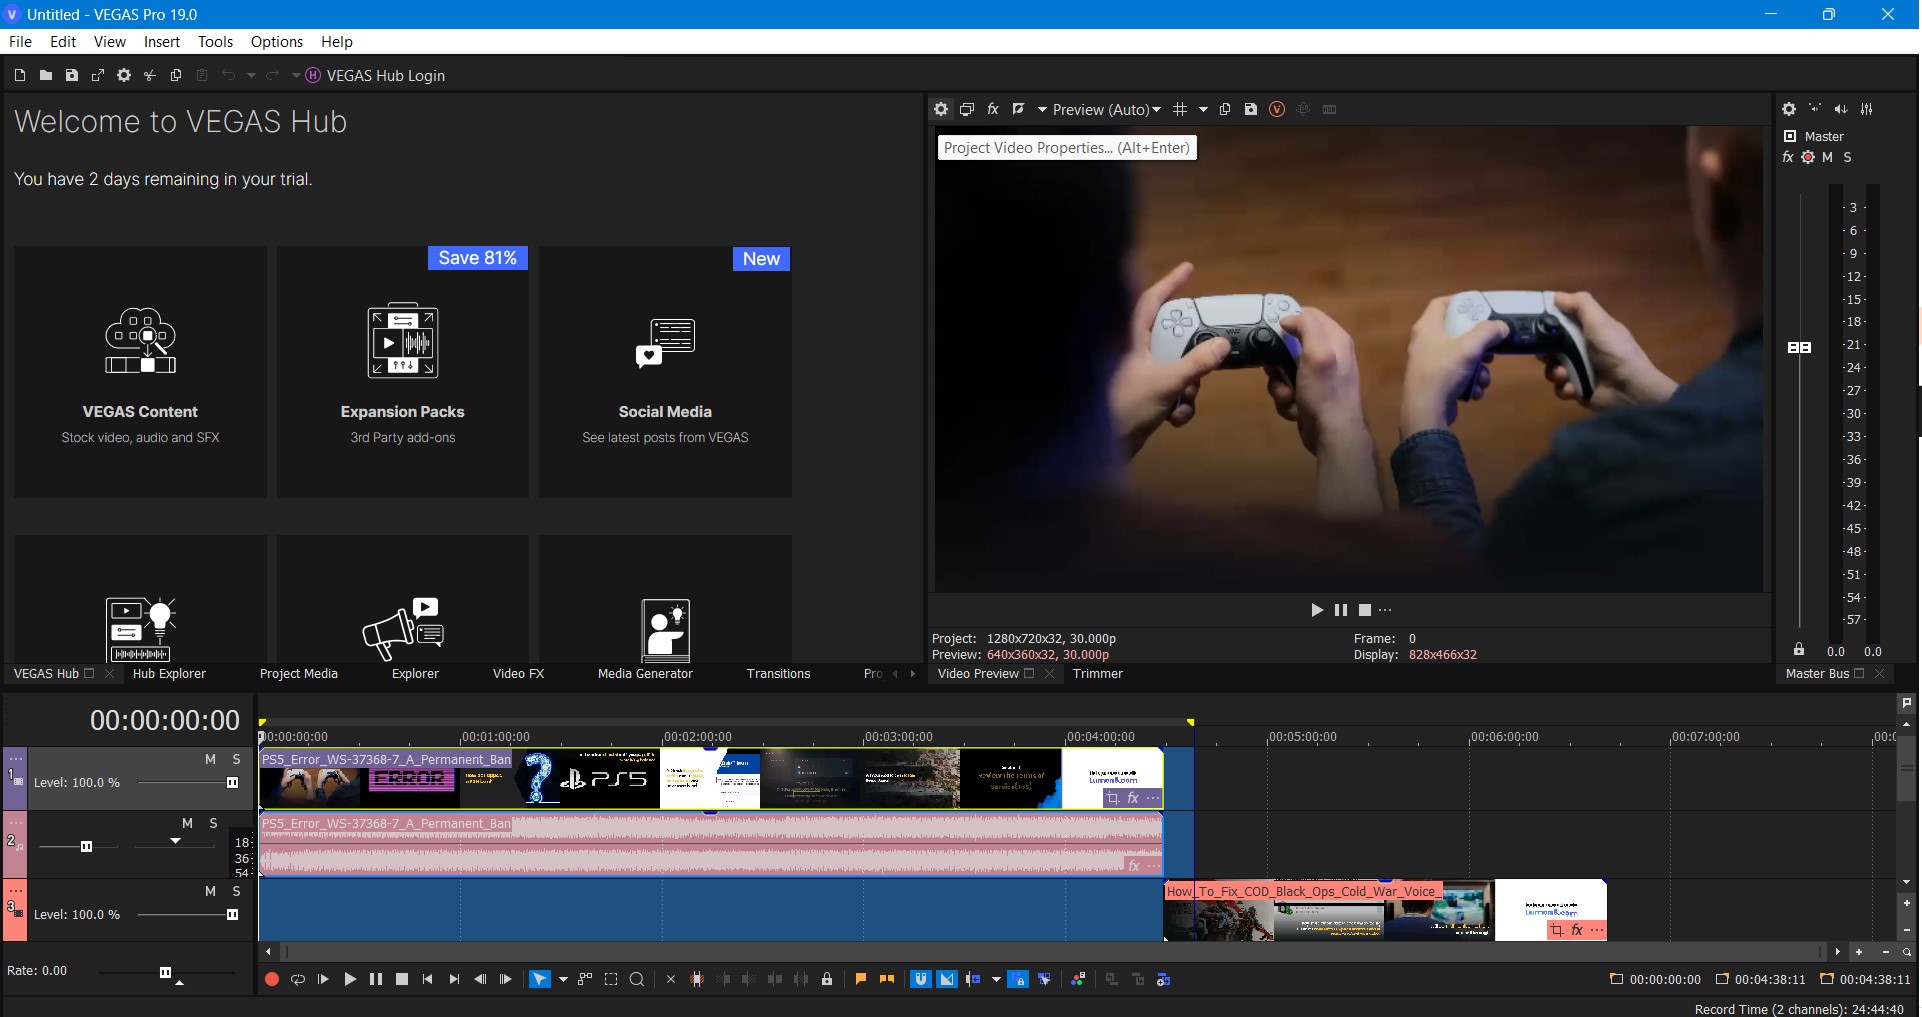
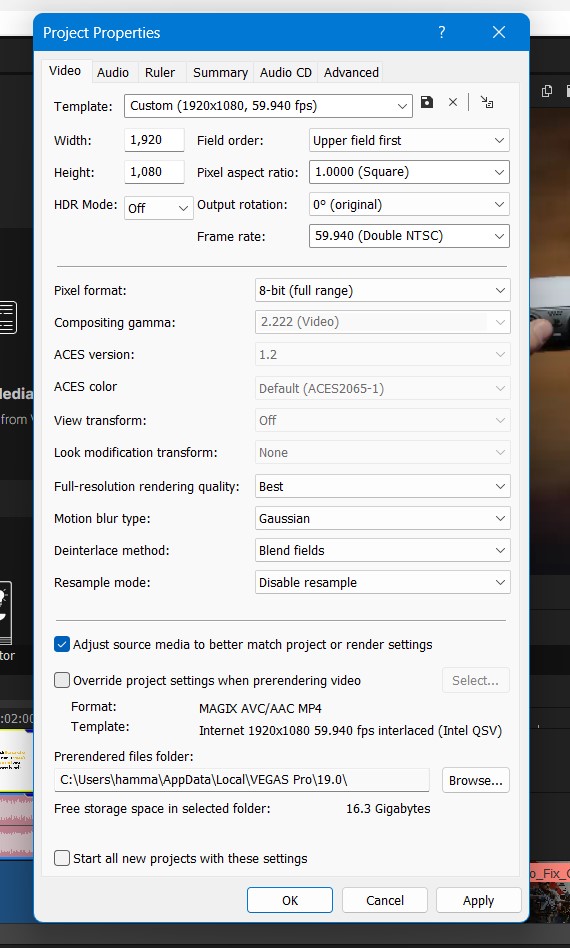
- Project Properties will open
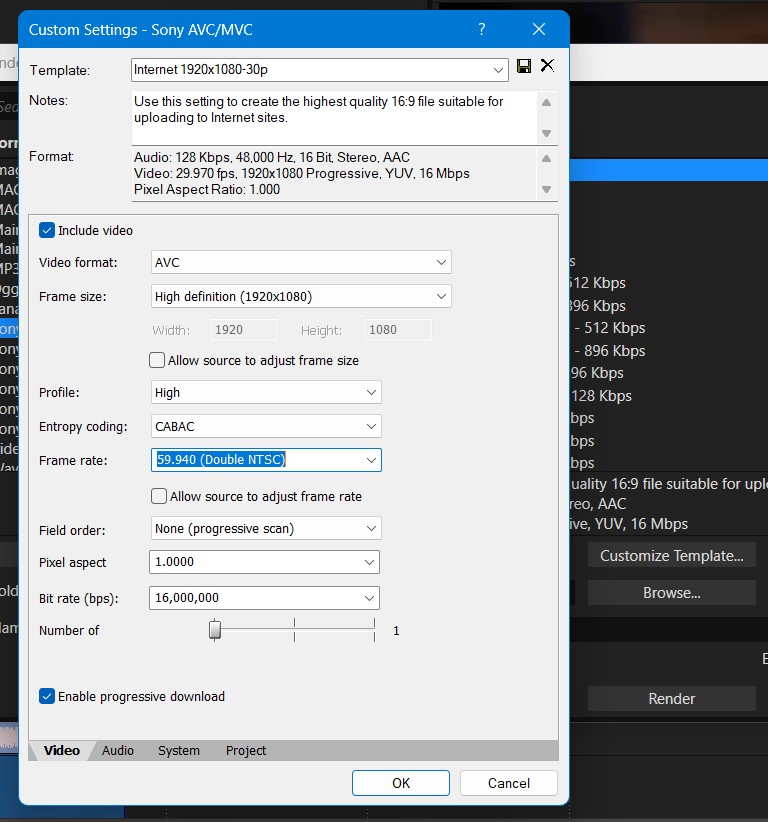
- For Full HD video, select temple 1920×1080 with 59.940 FPS (60 FPS)
- Set Width: 1920, Height: 1080, Frame rate: 59.940 FPS
- The Pixel Aspect ratio will stay the same
- Full-resolution Rendering quality set as BEST
- Resample mode: Disable
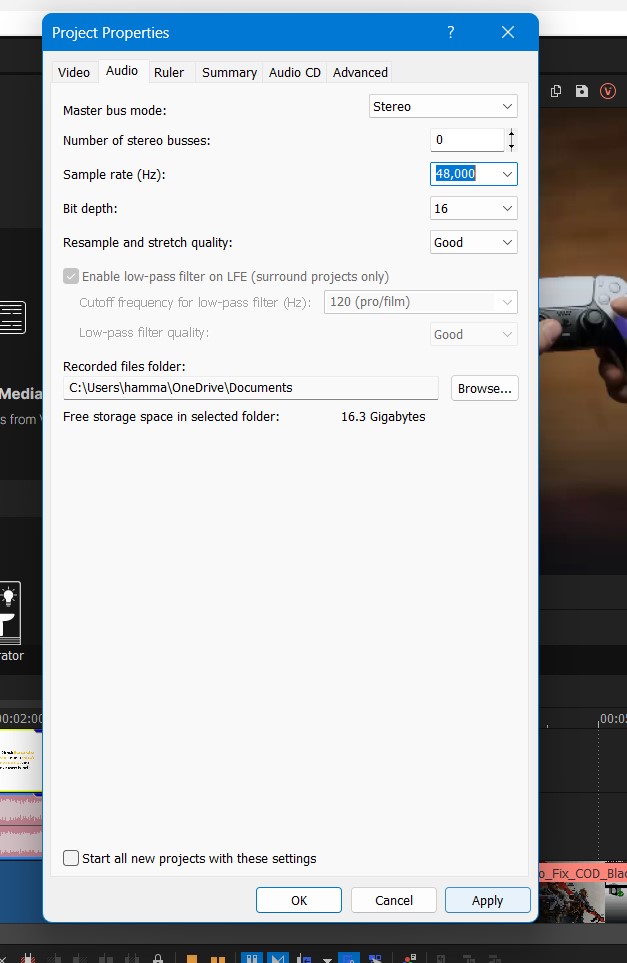
- Audio Tab
- Master bus mode set as Stereo
- Sample Rate (Hz) set as 48000
- After that select Apply and OK to save the Video project settings
Render Time
Now, after completing the above steps now it’s time to render the video. Follow the steps down below:
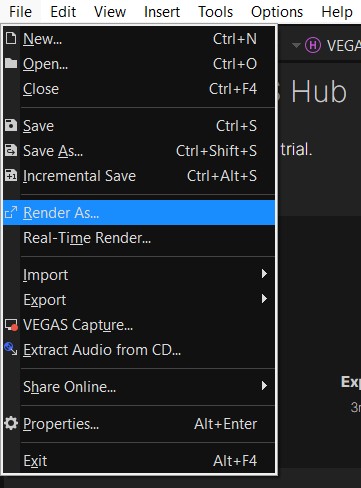
- On the top left corner, select the “File” button
- A small menu will appear to select the “Render As” option
- Render As window will open
- Select “Sony AVC/MVC” & and in Templet select “Internet 1920 x 1080“

- Hit the Customize template button and Set FPS and Resolution just like in Video project settings.
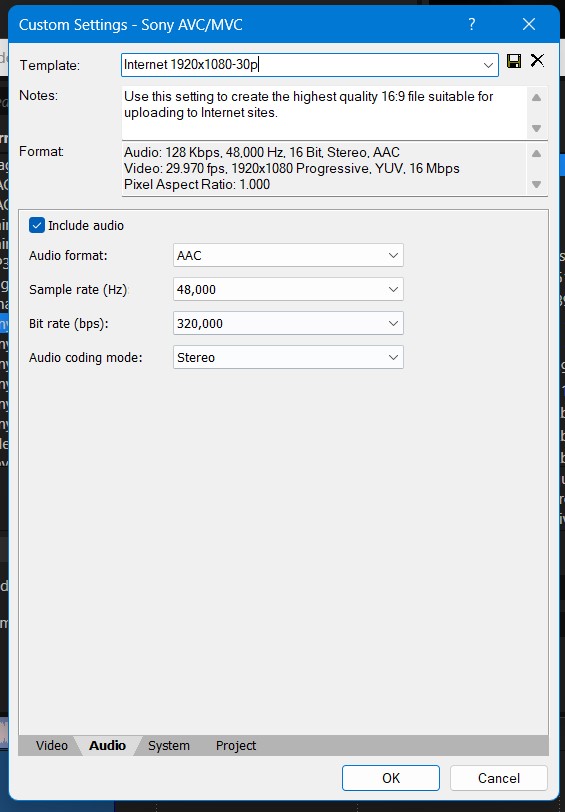
- Now click the Audio Tab located down below
- Set the Bit rate: 320000
- Now click Ok
- You back in the main window
- Now Click on the Render
Now the rendering of your video will start and now you have to wait to get a super clear and amazing video for you.
If you want to render the videos for mobile phones like iPhones or Android Devices.
Read More: Sony Vegas Pro No Waves Audio Issue On Windows 11/10? 5 Easy Fixes!
Video Rendering Setting For iOS & Android
- So firstly done with the editing of your video project.
- Now right-click on the video. The small menu will appear select “Properties”
- Now select the Disable the Resample (To Avoid Blending frames together)
- Select the Video part you want to render and select the “Project Video properties”
- Project Properties will open
- For Full HD video, select template, 1280×1080 with 30000 FPS (30 FPS) or you can change it according to your phone model
- Set Width: 1920, Height: 1080, Frame rate: 30000 FPS
- The Pixel Aspect ratio will stay the same
- Full-resolution Rendering quality set as BEST
- Resample mode: Disable
- Audio Tab
- Master bus mode set as stereo
- Sample Rate (Hz) set as 48000
- After that, select Apply and OK to save the Video project settings
Render Time
Now, after completing the above steps now it’s time to render the video. Follow the steps down below:
- On the top left corner, select the “File” button
- A small menu will appear to select the “Render As” option
- Render As window will open
- Select “Sony AVC/MVC” & and in Templet select “Internet 1280 x 720“
- Hit the Customize template button and Set FPS and Resolution just like in Video project settings.
- Now click the audio Tab located down below
- Set the Bit rate: 320000
- Now click Ok
- You back in the main window
- Now Click on the Render
Now the rendering of your video will start and now you have to wait to get a super clear and amazing video for your iPhone and Android mobiles
Hope all the above solutions help you understand the Best Sony Vegas Pro Render Settings.
If you have any queries or suggestions, share your experience with us in the comments section down below or you can reach us on our social handles.