The Last of Us Part 1 is a highly acclaimed video game that takes players on an emotional and thrilling journey through a post-apocalyptic world. The game was released on PS5 before recently getting released on PC which received backlash over its poor optimization. However, running this game on a low-end PC can be a challenge due to its high system requirements although here is the best PC build for TLOU you can use
Gamers who attempt to run “The Last of Us Part 1” on a low-end PC may encounter performance issues such as freezing, or even crashes. In this scenario, it may be necessary to take some steps to optimize the game’s settings or hardware to improve its performance.
Now follow the upcoming solution to run The Last Of Us PC smoothly on your Low-End PC.
Solution 1: Run the Application as Administrator on a PC
Running the program as an administrator will help you eradicate The Last of Part 1 unable to run issue as it might lack the privileges required to run the Application.
To solve the issue of the game crashing, running the program as an administrator could be a helpful solution as it may not have the necessary privileges to run the application. By granting administrative access to the program, you can ensure that it has all the necessary permissions to operate and potentially resolve any errors.
Here is how you can run the application as an administrator:
- Go to the file/ folder.
- Then go to the Game Launcher/Steam client.
- Right-click on the Launcher icon
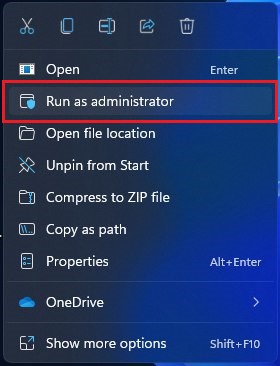
- A menu will open
- Select “Run as administrator“
Now the game will start running smoothly without giving you any errors.
The above solution is a temporary fix which helps you run the program or access folder. If you want to run the program permanently on administrator, then follow the next solution to solve The Last of Part 1 unable to run on low end PC Issue.
Read More: The Last of Us Part 1 Won’t Launch or Not Loading on a PC
Solution 2: Run the Program as an Administrator (Permanently)
When running a program or application on a Windows computer, there may be times when you need to give the program administrative privileges to access certain features or settings.
However, simply right-clicking on the program and selecting “Run as administrator” may not always be enough, as you may need to grant these privileges permanently to avoid constantly having to repeat the process.
In this case, you will need to take some additional steps to ensure that the program always runs with administrative privileges, even if you forget to explicitly select this option. In this solution, we will walk you through the process of running a program as an administrator permanently, so that you can gain the access you need without any extra hassle.
- Go to the folder/Application
- Right-click on it
- A menu will open
- Select Properties
- A new window will open
- Navigate to the “Compatibility Tab“
- Under the Settings heading
- Find “Run this Program as an administrator“
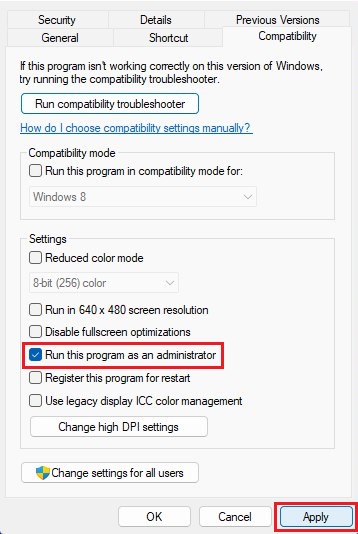
- Check the box for this option
- Click “Apply“
Now your program successfully Runs as an Administrator on Windows (Permanently) and you can easily open the program without repeating the steps again and again.
Controller Not Working with TLOU Part 1 on PC? Take a look at this
If you still facing errors then proceed to the next solution.
Solution 3: Close Unwanted Programs on PC
If there are too many programs running in the background, using too much internet/RAM/Disk can cause The Last of Part 1 Low-End PC on Windows 11.
Closing unwanted programs will help you eliminate the crashing issue on your PC.
So, let’s close unwanted programs:
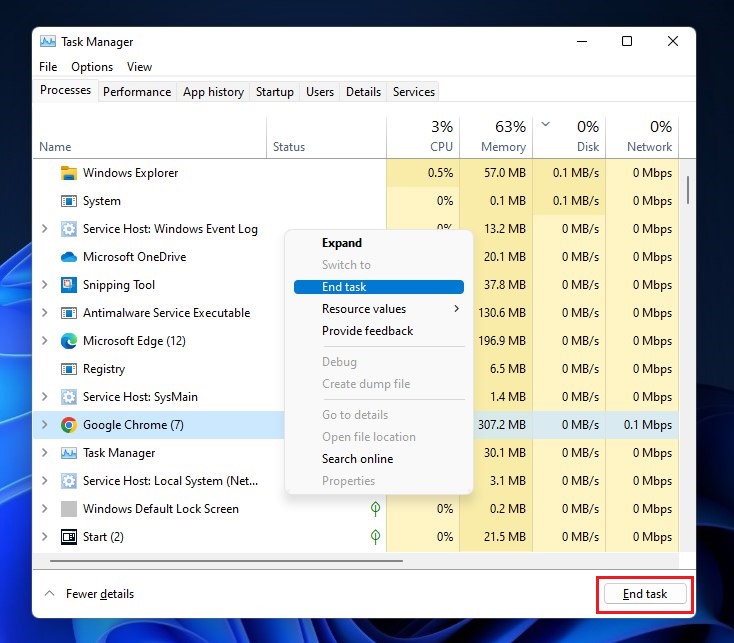
- Press Ctrl + Shift + ESC keys to open Task Manager
- Now check which program is using more Network
- Right-click on that program and select End task
- And check if the crash is solved or not.
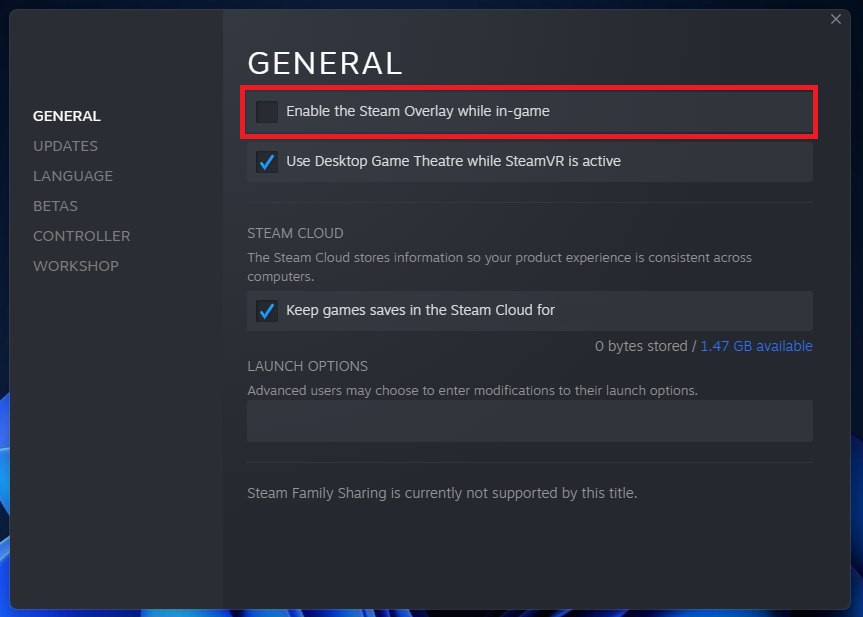
Solution 4: Disable The Steam Overlay PC
Some players have reported that disabling the Steam overlay on their Windows computers has improved their ability to play The Last of Part 1 on PC.
Here are steps to Disable the Steam Overlays:
- Open the Steam client
- Go to the Library
- Right-click on The Last of Part 1 and select the properties
- Select the General section
- Now just uncheck the Enable Steam Overlay
Read More: The Last of Us Part 1 Loading Shaders Takes Longer Than Expected Issue
Solution 5: Disable Antivirus Software
In some cases, the third-party antivirus software installed on a computer may prevent The Last of Part 1 from running properly.
So, you need to disable the antivirus for a few minutes to check if the antivirus is causing issues on The Last of Part 1.
In order, to disable the antivirus follow the step below :
- Select the arrow button on the taskbar a Small menu will open.
- Then click left on the Avast antivirus icon.
- The setting menu will open and select “Avast shield control“
- In a further menu, you will select the “10 minutes option“
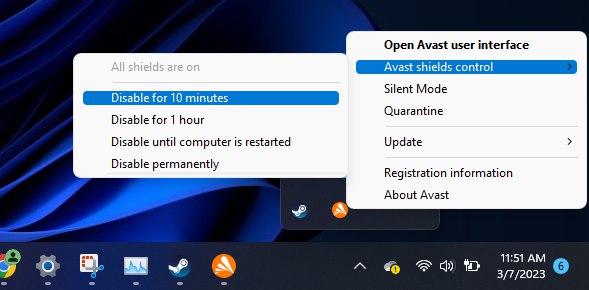
- Now restart the game.
If the issue persists then proceed to the next solution.
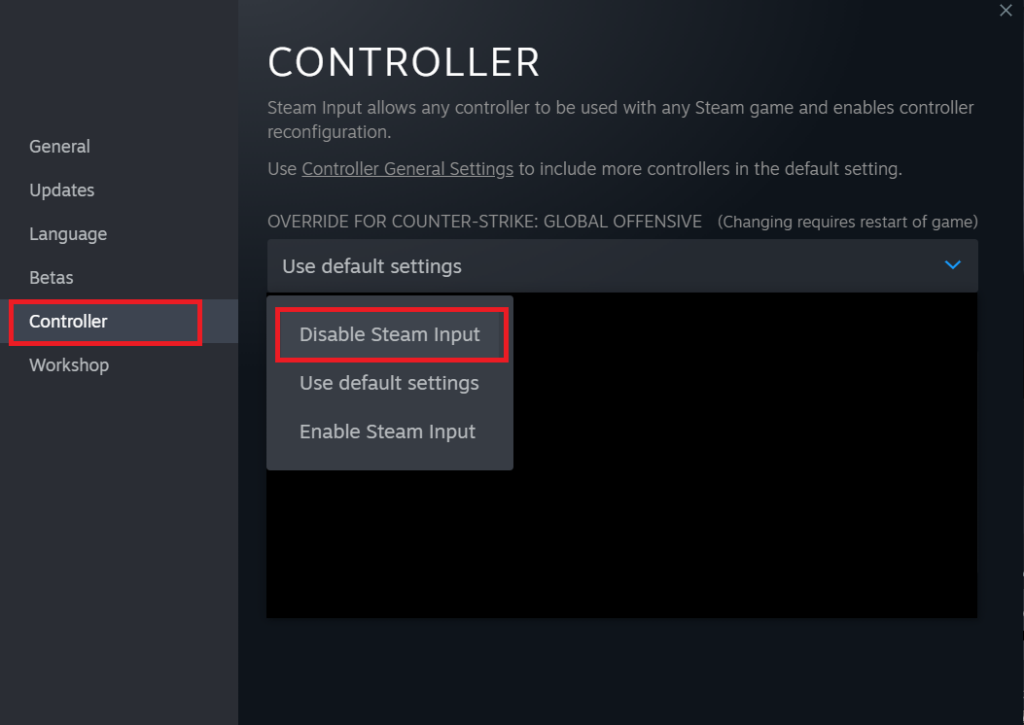
Solution 6: Disable Steam Input
Using native profiles set up by developers is recommended for The Last of Us Part 1 on PC due to its support for various controllers. This is preferable over using Steam Input.
To disable Steam Input for The Last of Us Part 1, start by ensuring the game is not running.
- Then, open Steam and navigate to your Library.
- Right-click on the game and select Properties.
- In the Properties window, choose the Controller option on the left-hand side.
- Next, click on the dropdown icon located next to OVERRIDE FOR The Last of Us Part 1 and select “Disable Steam Input” from the list.
Solution 7: Run the game in Windowed Mode
To potentially resolve frequent crashing in a game, you can change the Display Mode to Windowed from Full Screen by following these steps:
- Click on the Windows icon to open the Start Menu.
- Type %LOCALAPPDATA% in the search bar and press Enter to open the folder.
- Look for the ‘Prospect’ folder and open it.
- Navigate to the Saved > Config > WindowsNoEditor directory.
- Find the file named ‘GameUserSettings’ and open it using a text editor.
- Look for the line that says ‘FullscreenMode=1’ and change it to ‘FullscreenMode=0’.
- Save the changes and close the file.
- Launch the game again and check if the issue has been resolved.
Note that these steps may not work for all games, and other solutions may be necessary to fix this issue.
Solution 8: Update Graphics Card Driver Via Windows Update
Updating your graphics card driver is an important step in ensuring your computer is running smoothly and efficiently. With the latest driver updates, you can improve your system’s performance, fix any bugs, and enjoy new features. In this solution, we will be showing you how to update your graphics card driver using Windows Update, a simple method for keeping your drivers up to date. So, let’s get started!
Here is how you can update drivers via optional updates on Windows 11:
- Click on the Windows icon
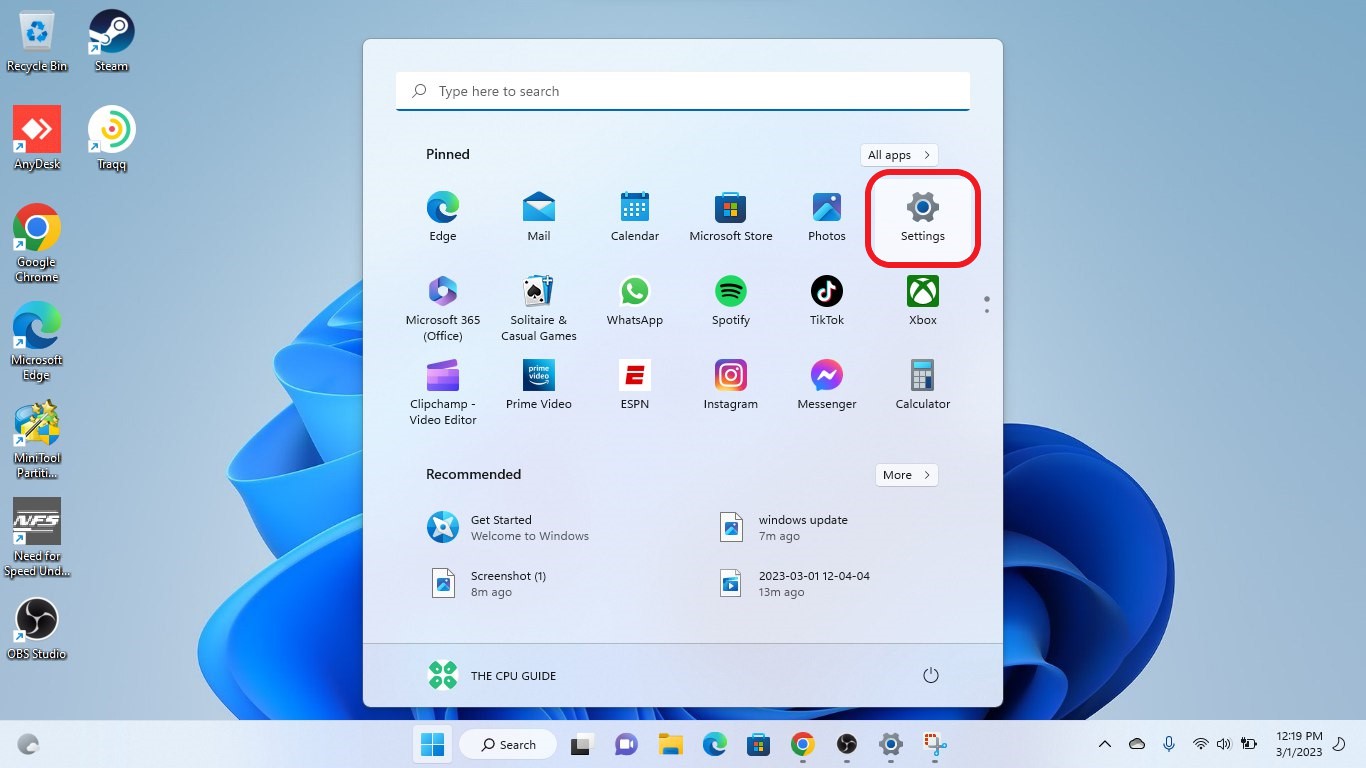
- Click on the Settings icon
- A new window will pop up
- Select Windows Update from the left menu
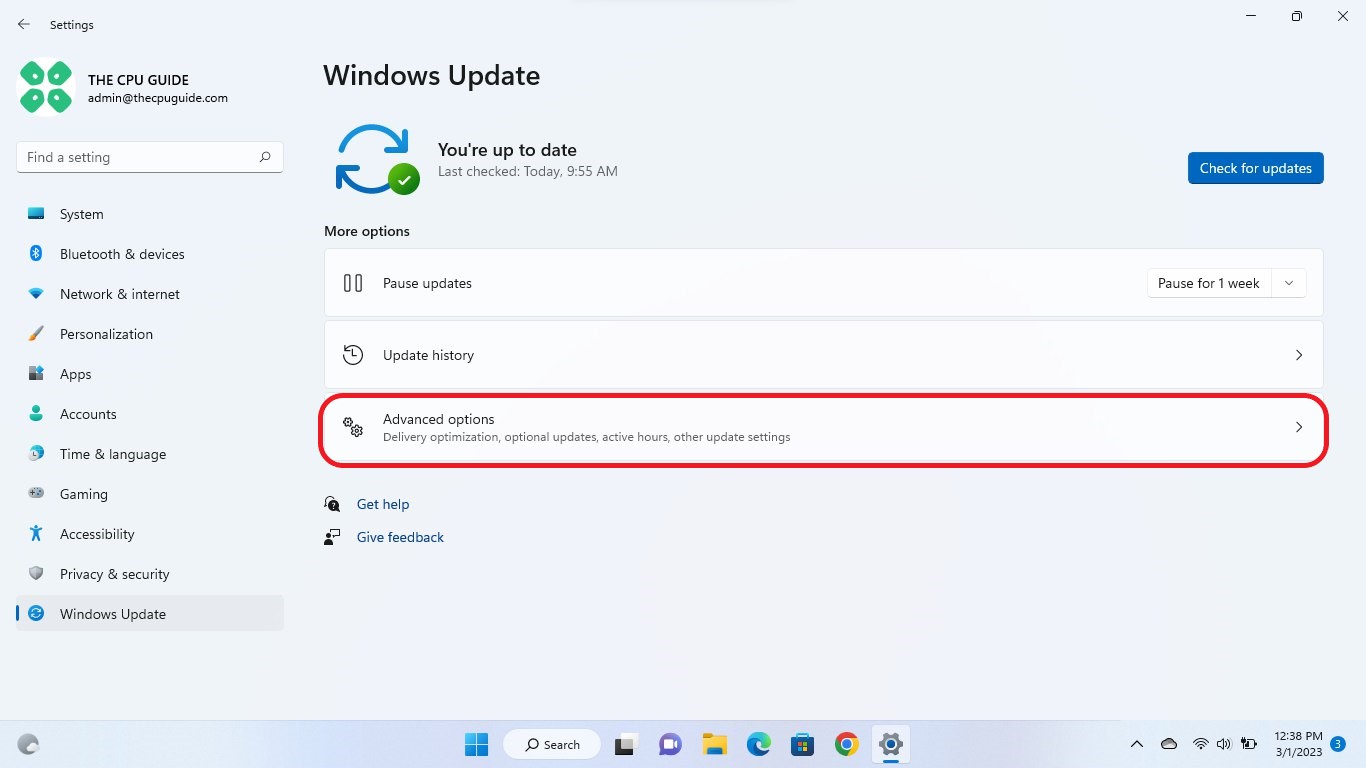
- The new window will pop up
- Now select Advanced options
- Click on Optional updates
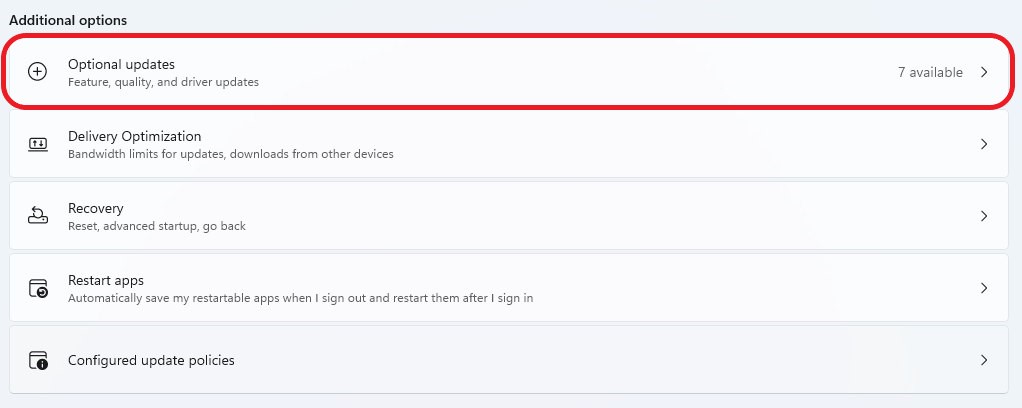
- A new window will open
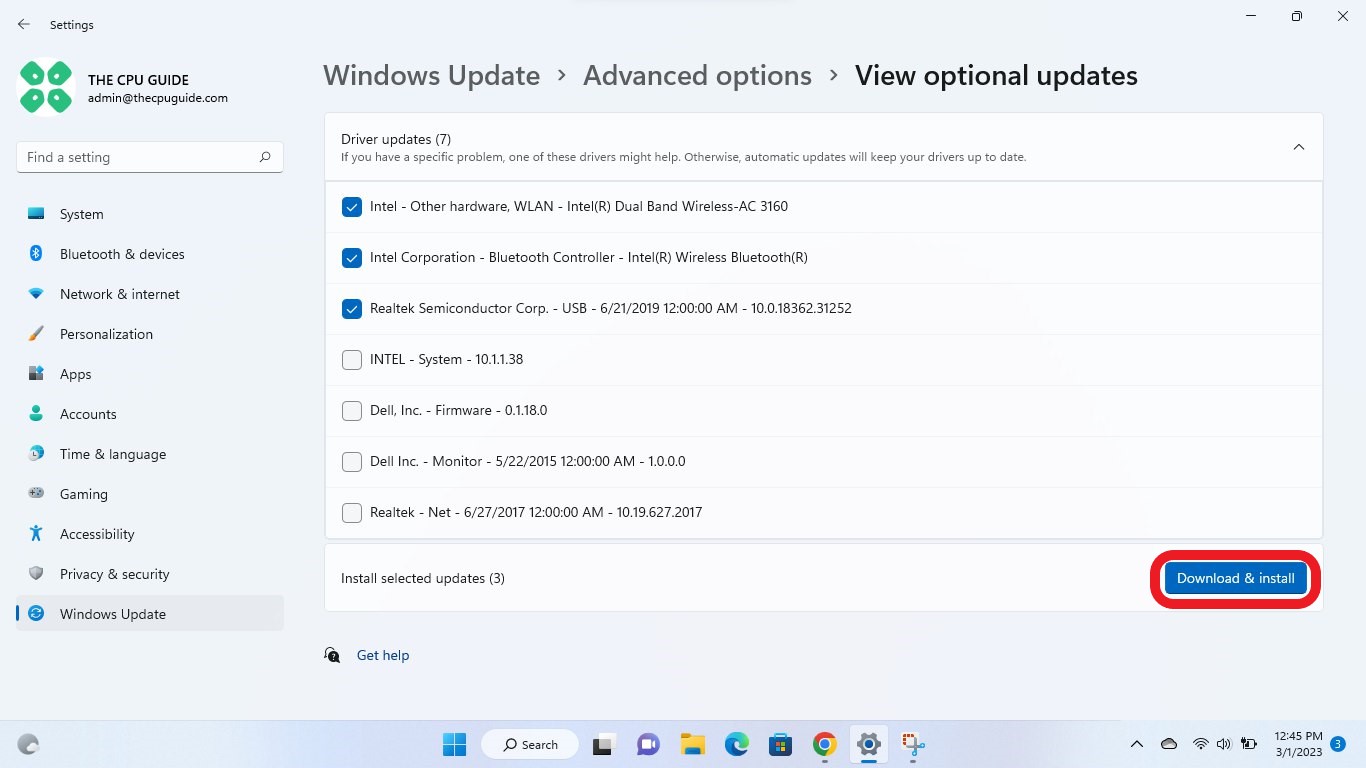
- Click on the drop-down button for Driver updates
- Now, select your desired drivers
- Now press the Download & Install button
If you cannot update your drivers through Windows Update, then you can try updating the Graphics Drivers through Device Manager to Run the game smoothly.
Solution 9: Update Graphic Drivers Via Device Manager
Updating your graphics card driver is essential for ensuring optimal performance and compatibility with the latest software and games. Updating your graphics card driver can be done via the Device Manager in Windows and is a straightforward process that can be completed in just a few steps.
Here is how you can update drivers through Device Manager:
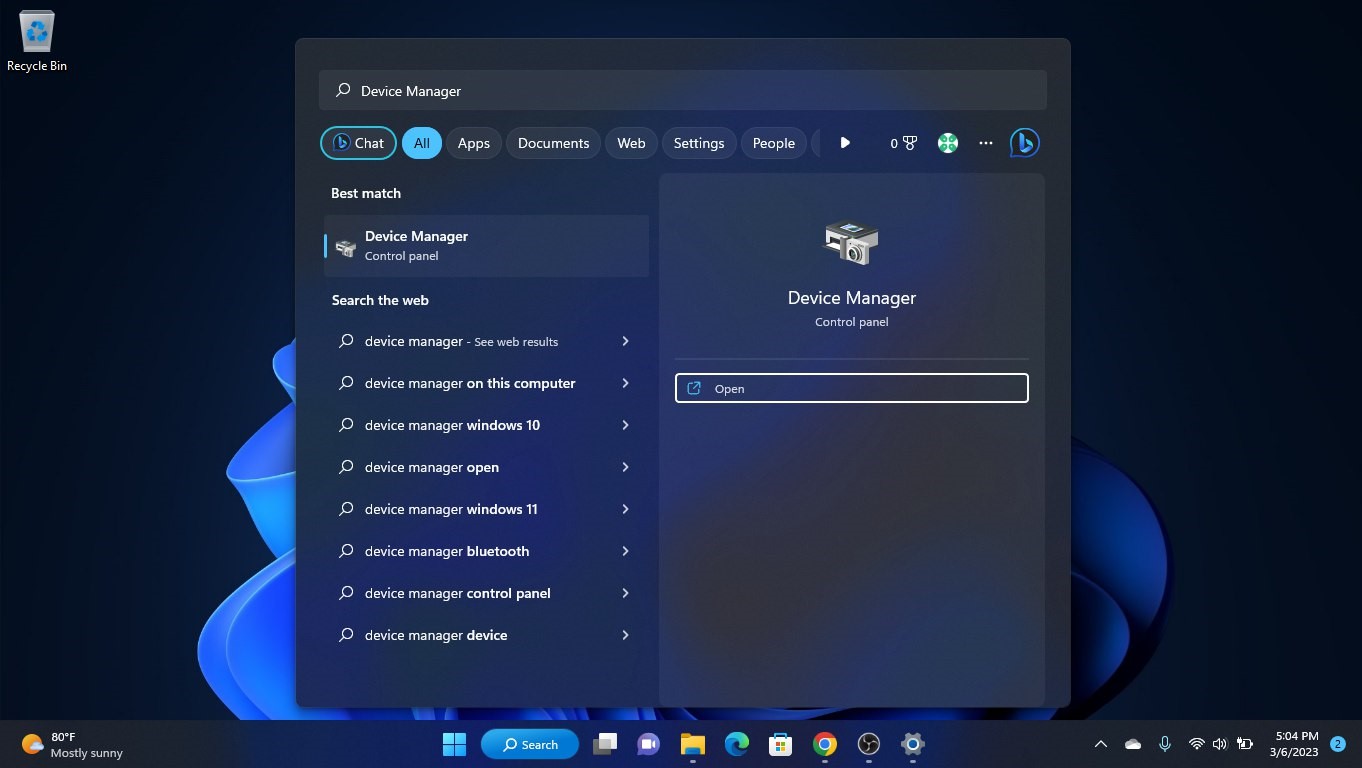
- Click on the Search icon
- Type Device Manager
- Click to open Device Manager
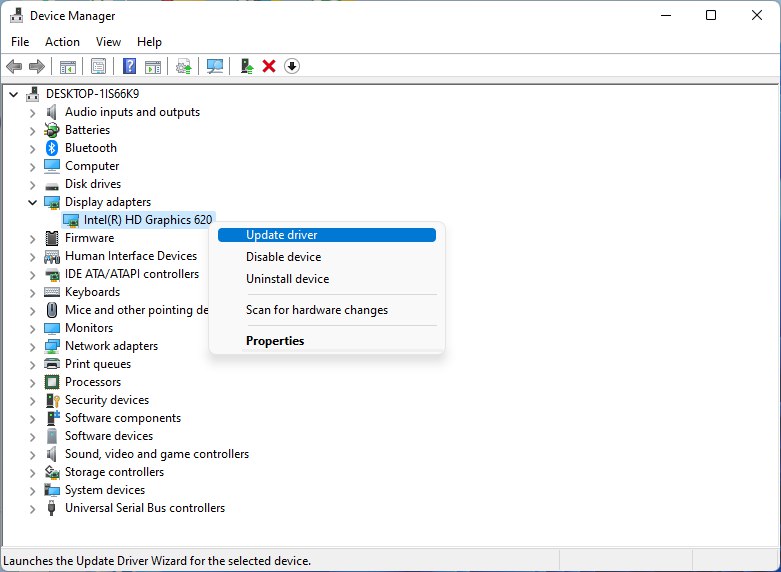
- Then select the Display adapters
- A further menu will open
- Right-click on the graphic card name
- Click on the Update driver
Solution 10: Check for Driver’s Updates of GPU/Video Cards of Different Company
Unable to run The Last of Us Part 1 issue can be due to outdated GPU drivers. When the video card drivers are not up to date, the GPU cannot keep up with modern gaming and may cause crashes. To resolve this, we suggest updating the video card drivers. Direct links to the main GPU manufacturers can be found below.


If you still have any queries or suggestions, share your experience with us in the comments section below.