The Last of Us Part 1 is a popular post-apocalyptic action-adventure game developed by Naughty Dog. The game was released on PS5 before recently getting released on PC which received backlash over its poor optimization.
While the game has received high praise for its captivating storyline, graphics, and gameplay, some PC players have reported experiencing visual glitches and graphics bugs.
These issues can range from texture problems to flickering screens, and distorted graphics, making it difficult to enjoy the game regardless of the PC build you are using for TLOU.
In this response, we will explore some of the possible causes and solutions for these visual glitches and graphics bugs in The Last of Us Part 1 on PC.
There are several potential causes for the visual glitches and graphics bugs that some PC players may experience while playing The Last of Us Part 1.
Here are a few possible reasons:
- Outdated graphics card drivers: If your graphics card drivers are outdated, it can result in compatibility issues with the game and cause visual glitches and graphics bugs.
- Overclocking: Overclocking your GPU or CPU can cause instability and result in visual glitches and graphics bugs while playing the game.
- Hardware limitations: The game’s graphics and gameplay are demanding, and if your PC’s hardware doesn’t meet the minimum requirements, it can lead to issues such as low frame rates, visual glitches, and graphics bugs.
- Corrupted game files: If some of the game files are corrupted or missing, it can result in visual glitches and graphics bugs.
- Other software conflicts: Running other programs or software while playing the game can also cause conflicts and result in screen flickering.
Solution 1: Restart the PC
When you experience Graphics Bugs in your game, it’s recommended to start by restarting the computer before attempting any other fixes. This is because restarting the computer can resolve any temporary errors caused by outdated cookies and cache or conflicts with other software on your system. Simply restarting the PC

Read More: The Last of Us Part 1 Won’t Launch or Not Loading on a PC
Solution 2: Close Unwanted Programs on PC
If there are too many programs running in the background, using too much internet/RAM/Disk can cause The Last of Us Part 1 Graphical issue on Windows 11.
Closing unwanted programs will help you eliminate the crashing issue on your PC.
So, let’s close unwanted programs:
- Press Ctrl + Shift + ESC keys to open Task Manager
- Now check which program is using more Network
- Right-click on that program and select End task
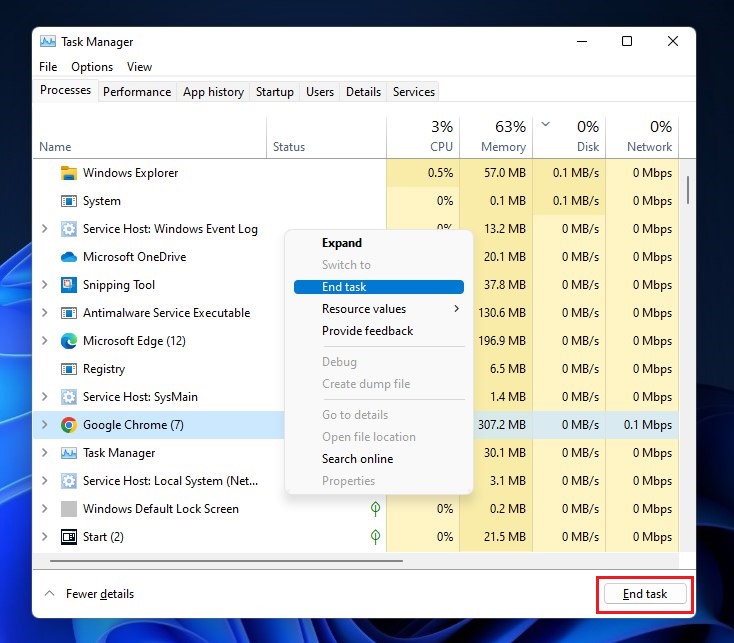
- And check if the crash is solved or not.
Controller Not Working with TLOU Part 1 on PC? Take a look at this
Solution 3: Update Graphics Card Driver Via Windows Update
Updating your graphics card driver is an important step in ensuring your computer is running smoothly and efficiently. With the latest driver updates, you can improve your system’s performance, fix any bugs, and enjoy new features. In this solution, we will be showing you how to update your graphics card driver using Windows Update, a simple method for keeping your drivers up to date. So, let’s get started!
Here is how you can update drivers via optional updates on Windows 11:
- Click on the Windows icon
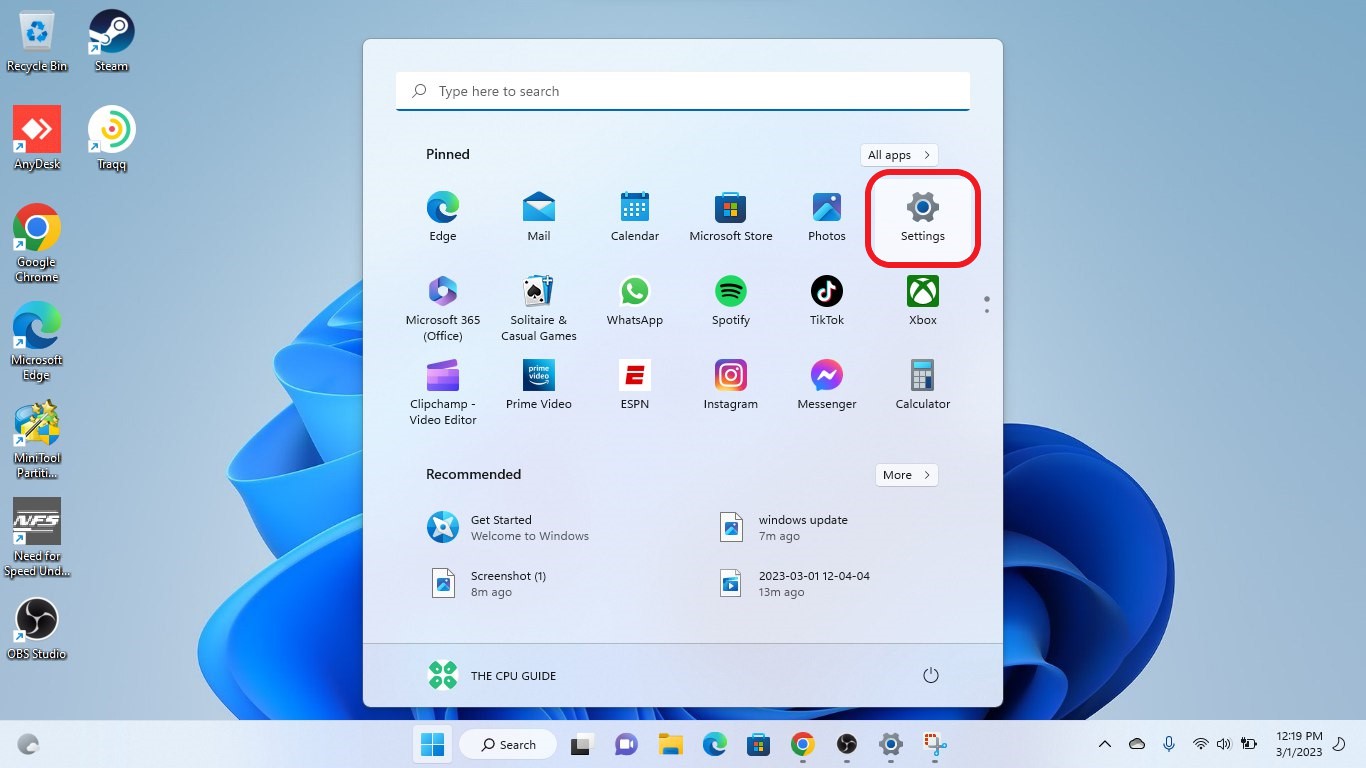
- Click on the Settings icon
- A new window will pop up
- Select Windows Update from the left menu
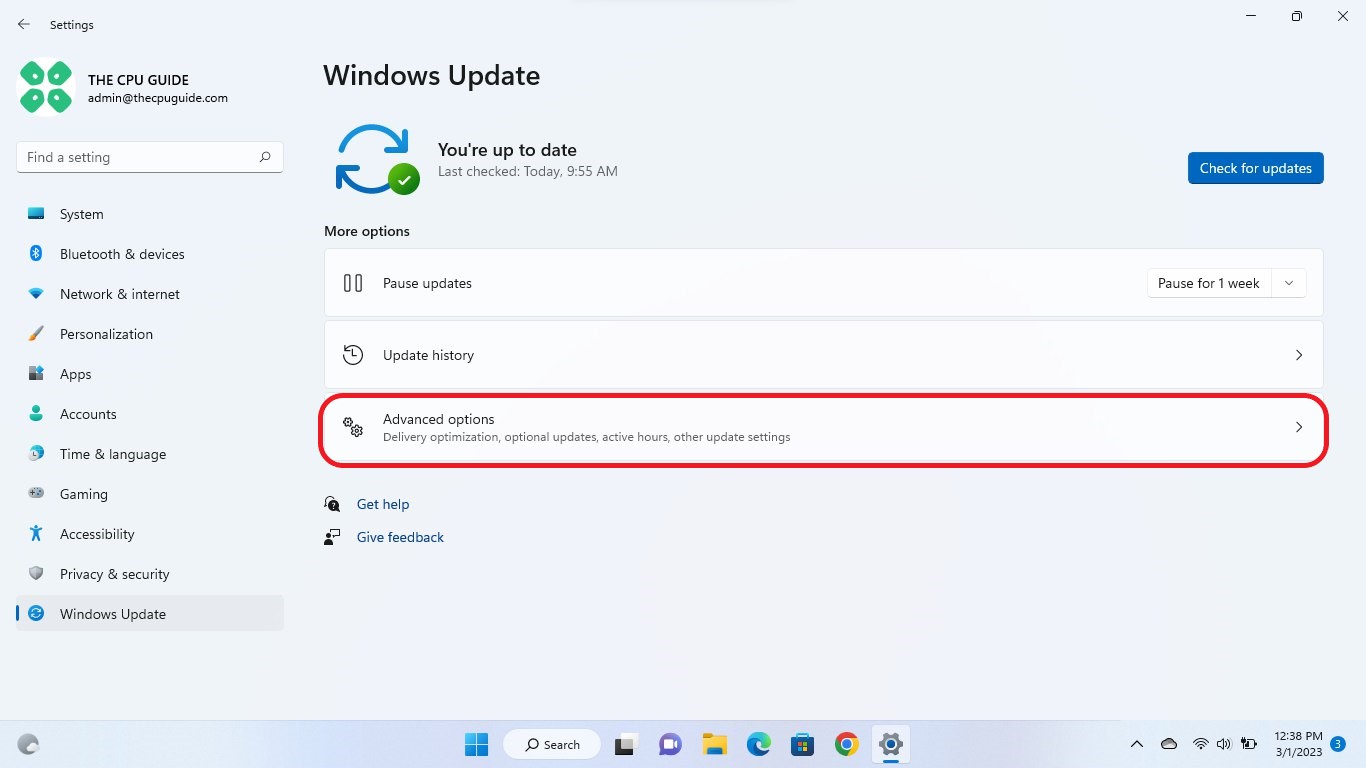
- The new window will pop up
- Now select Advanced options
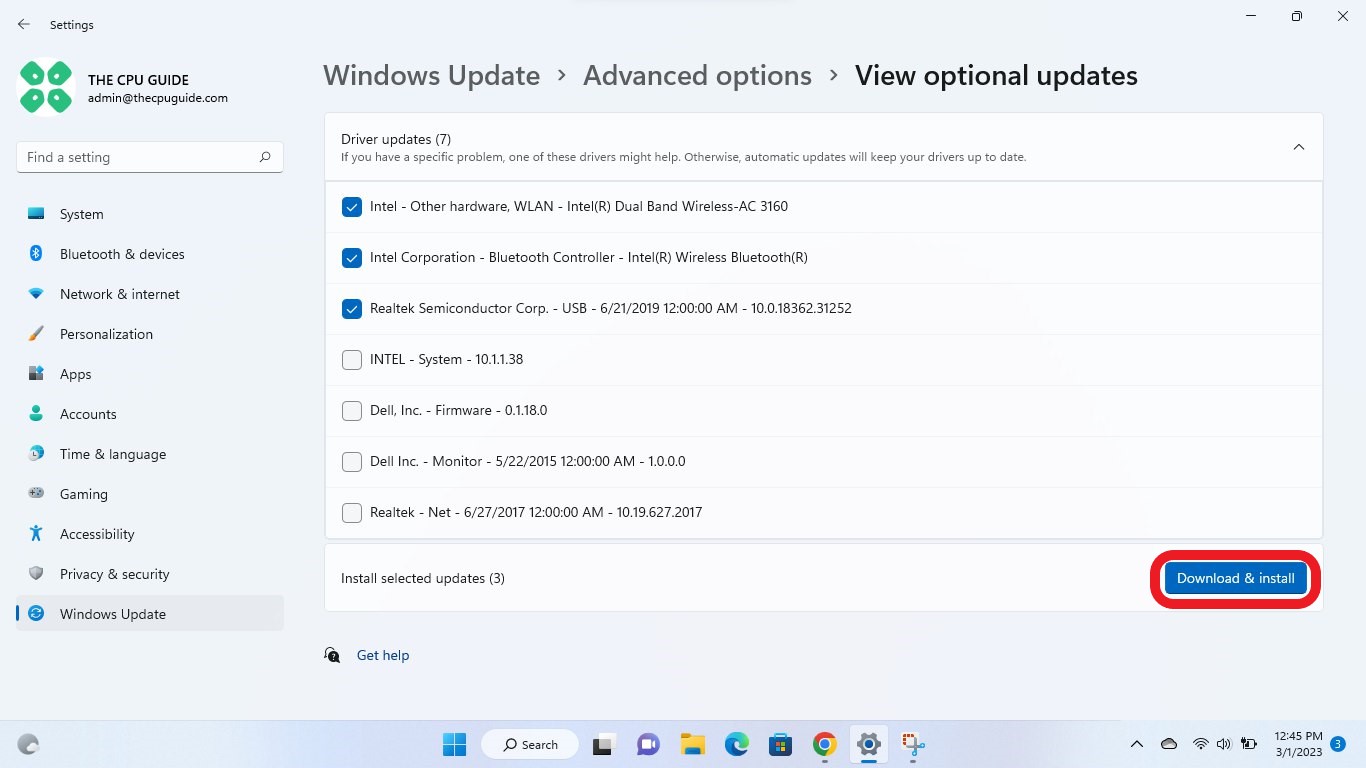
- Click on Optional updates
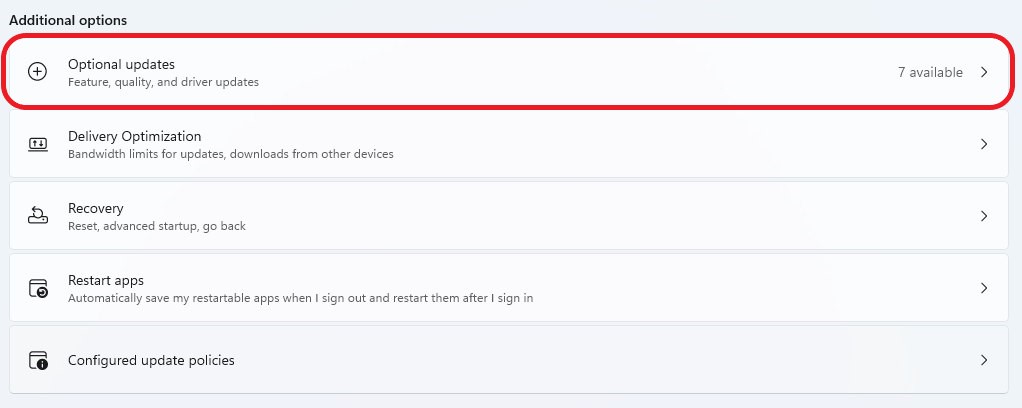
- A new window will open
- Click on the drop-down button for Driver updates
- Now, select your desired drivers
- Now press the Download & Install button
If you cannot update your drivers through Windows Update, then you can try updating the Graphics Drivers through Device Manager to fix The Last of Us Part 1 error.
Read More: The Last of Us Part 1 Steam Content File Locked Error [Fixed]
Solution 4: Update Graphic Drivers Via Device Manager
Updating your graphics card driver is essential for ensuring optimal performance and compatibility with the latest software and games. Updating your graphics card driver can be done via the Device Manager in Windows and is a straightforward process that can be completed in just a few steps.
Here is how you can update drivers through Device Manager:
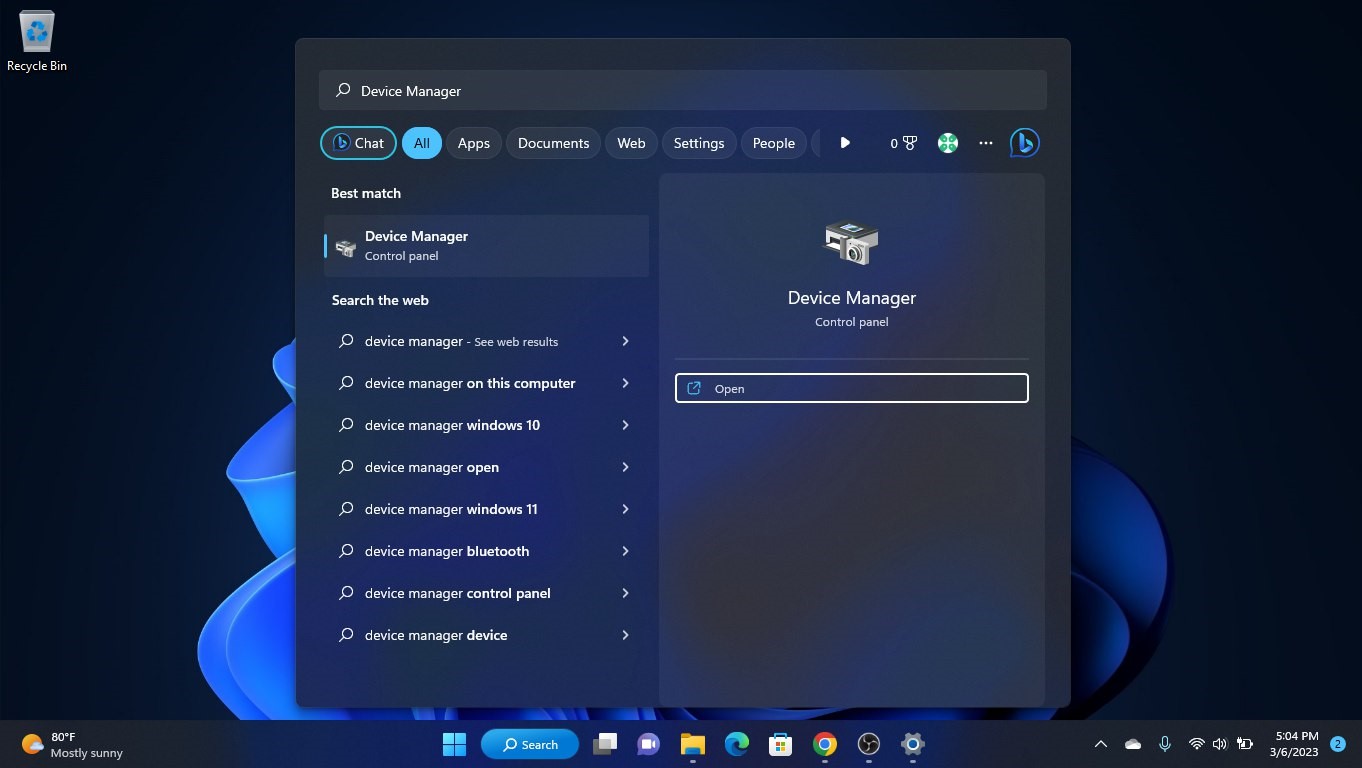
- Click on the Search icon
- Type Device Manager
- Click to open Device Manager
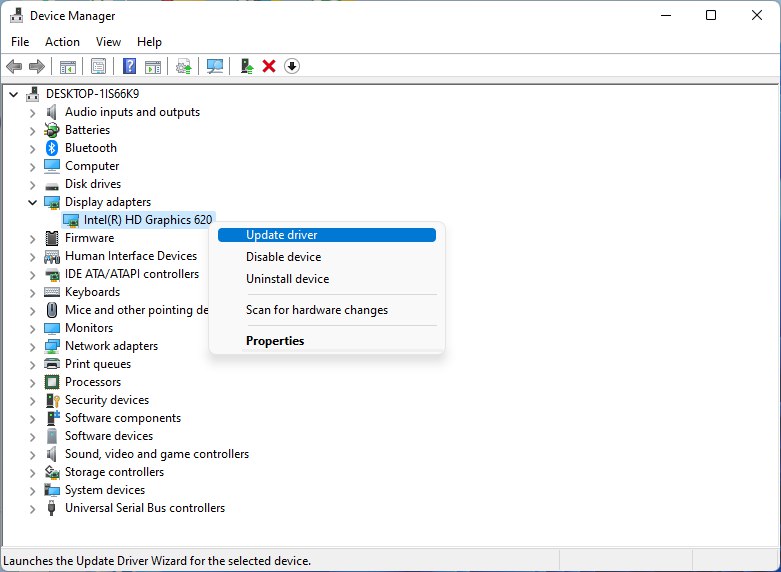
- Then select the Display adapters
- A further menu will open
- Right-click on the graphic card name
- Click on the Update driver
Solution 5: Check for Driver Updates of GPU/Video Cards of Different Company
An issue that can cause crashes and Graphics Bugs in The Last of Us Part 1 is outdated GPU drivers. When the video card drivers are not up to date, the GPU cannot keep up with modern gaming.
To resolve this, we suggest updating the video card drivers. Direct links to the main GPU manufacturers can be found below.
If the above solution didn’t work out for you, then try the next solution.
Solution 6: Disable DLSS in The Last of Us Part 1
Some players claim that turning off the DLSS feature in the game can help alleviate graphical problems.
So here is how you can disable DLSS Nvidia in The Last Of US Part 1:
- While playing the game press the ESC button on the option menu
- Select the “Options”
- An options menu will open now select the “Display” option
- Find Resolution Scaling Heading
- Under this heading go Scaling option
- Now click on the drop-down menu and select the “Default” option
- The Nvidia DLSS option is successfully disabled in your game.
Now play the game and check Visual Glitches & Graphics Bugs persist or not.
Solution 7: Verify the Game Files On Steam
Sometimes the game file will get corrupted or get deleted, which eventually causes a crashing issue on The Last of Us Part 1 on PC.
Verify the Game File in Steam
Follow the steps to verify the game file on steam software:
- Launch the Steam Software
- Now login in the steam
- Navigate to the library
- Select the game and right-click on the game
- Now select properties
- Now click on the “Local file” Option
- A further menu will open
- Click on the “Verify Integrity of the Game Cache“
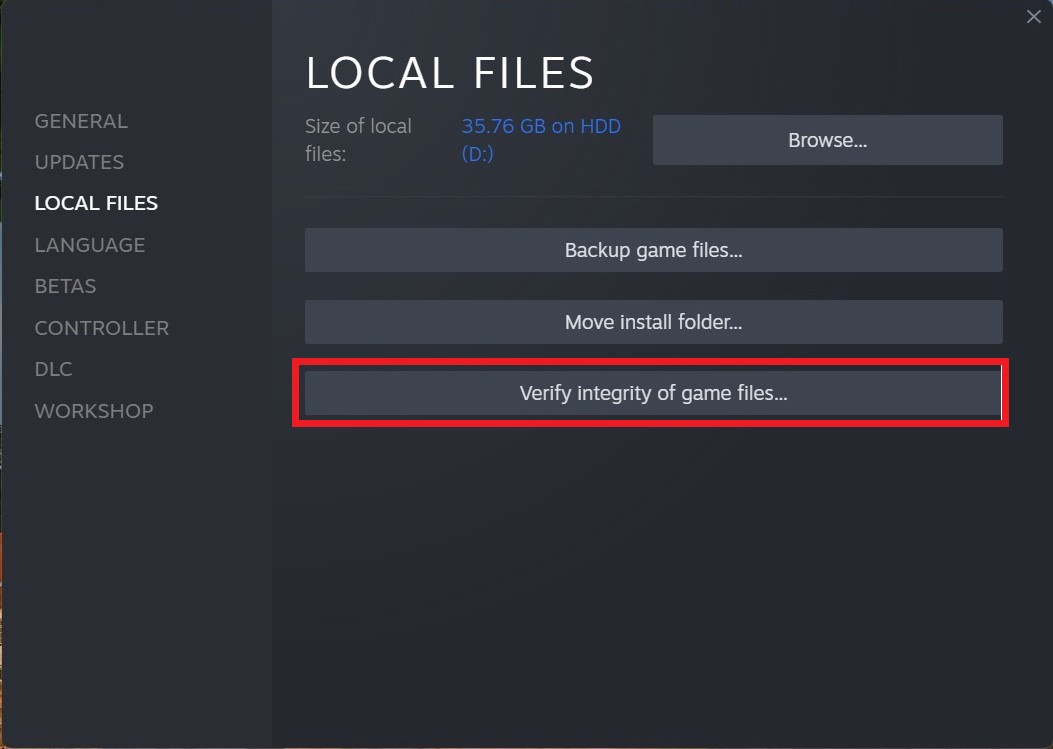
- Now the software is verifying the files, and this will take some time.
If you still have any queries or suggestions, share your experience with us in the comments section below.