Are you having a messy Mac desktop full of screenshots like the one I had in the picture below?
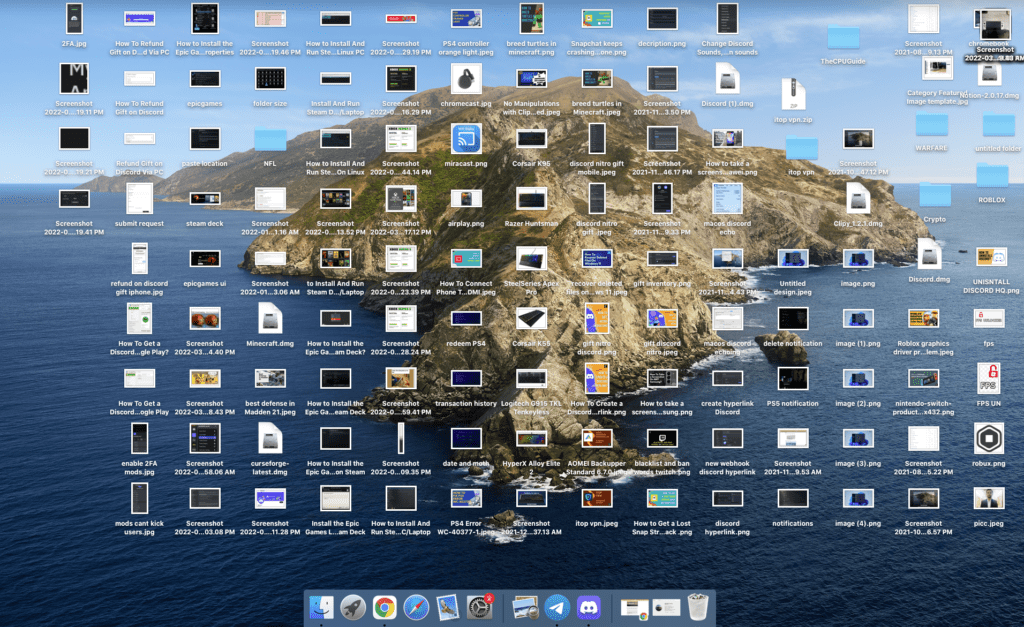
As we all know that the screenshots taken on Mac are saved right onto your desktop.
Although it was easy for me to access them but with time my desktop got too messy.
So, if you are also in the same situation then,
You really don’t need to worry!
Because we will tell you in details steps on How To Change Where Screenshots Are Saved On a Mac.
But for that,
you need to continue reading.
How To Take a Screenshot On Mac of Entire Screen?
The Shift + Command + 3 takes a screenshot of the entire Mac screen whether you are using multiple monitors or a single one.
Moreover, if you have enabled the floating thumbnail option then you will see a floating thumbnail in your screenshot.
How To Change Where Screenshots Are Saved On a Mac Mojave or Later?
So, If you have macOS Mojave, Catalina, Big Sur, or Monterey installed it is very easy to change where screenshots are saved on Mac.
Just follow the easy steps given below:
- Press Shift + Command + 5 on your Keyboard.
- By clicking on Options you will see a number of save to options such as:
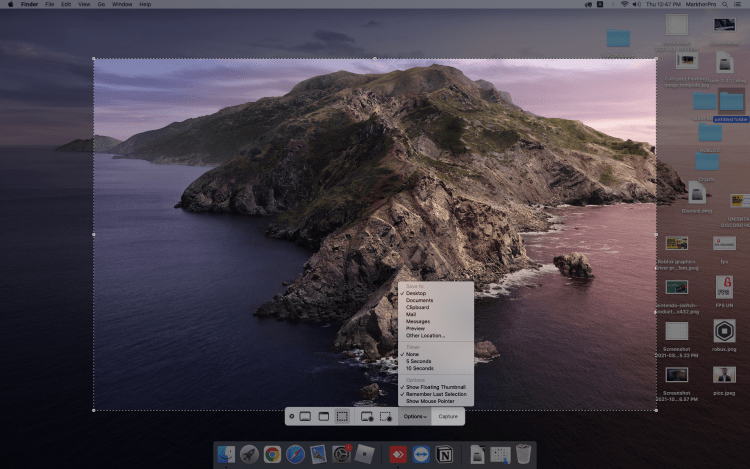
- Desktop: All the screenshots are saved here by default.
- Clipboard: This allows you to paste the shot into a different app immediately.
- Messages: This option opens a new message with the screenshot attached.
- Mail: It allows you to create a new email in the Mail app with the screenshot attached.
- Preview: This opens the screenshot in Preview, where you can edit it before saving it.
- Other Location: This will allow you to create a folder in your specified location where you can save your screenshots.
- And you will be able to Change Where Screenshots Are Saved On a Mac.
If you are the one having an older version of macOS
then you need to continue reading.
How To Change Where Screenshots Are Saved On a Mac On Pre-Mojave Versions?
You can easily change where screenshots are saved on Mac in the previous macOS version.
But for that you need to follow the steps:
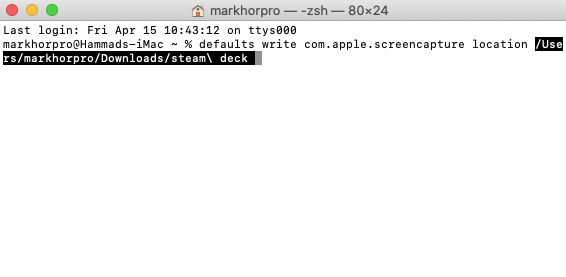
- Open a Finder window and press Shift + Command + N to create a new folder where you want your screenshots to be saved.
- Launch the Terminal app
- Type the following command and press the spacebar after the word location and don’t press Enter:
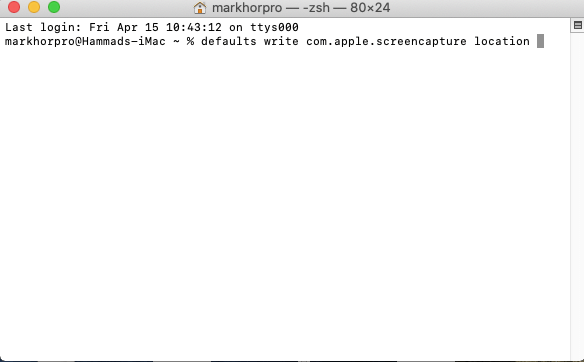
- defaults write com.apple.screencapture location
- Now drag the folder you just created into the Terminal window.
- The folder’s path should appear after the command you typed in and press Enter.
- Then type the following command:
- killall SystemUIServer
- Press Enter and you will be able to Change Where Screenshots Are Saved On a Mac On Pre-Mojave Versions
Hope all the above steps helped you with How To Change Where Screenshots Are Saved On a Mac.
If still, you have a query feel free to share your experiences and question in the comments section down below.