Enabling or disabling the auto-save screenshot feature in Snipping Tool on Windows 11 is only a matter of seconds with this step-by-step method.
The Snipping Tool application is one of the easy ways to take screenshots in Windows 11. With the new 2022 Windows 11 update, you don’t have to save the screenshots each time manually. They are captured using the Snipping Tool. Once you capture them, these snips will automatically copy to the clipboard so you can use them quickly in real-time.
The screenshot auto-save feature could be helpful for some users, while for others, it may affect their workflow process. Luckily, there is a quick fix for that. You can easily enable or disable the auto-save screenshot feature of Snipping Tool in Windows 11 by opening Snipping Tool and navigating to Settings > Automatically save screenshots by toggling the button ON/OFF.
To explain things more thoroughly, we will take a comprehensive approach to how to enable or disable the auto-save screenshot feature on Snipping Tool by following an easy method. We will also guide you on how to find the automatically saved screenshots once they are captured with Snipping Tool.
Enabling or Disabling Auto-Save Feature in Snipping Tool
To enable or disable the auto-save feature of the snipping tool in Windows 11, follow this step-by-step method to achieve the task in a matter of seconds.
- Open the Start Menu, search for Snipping Tool, and press the ‘Enter’ key to run it.
- Click the ‘three dots’ in the upper right corner of the screen.
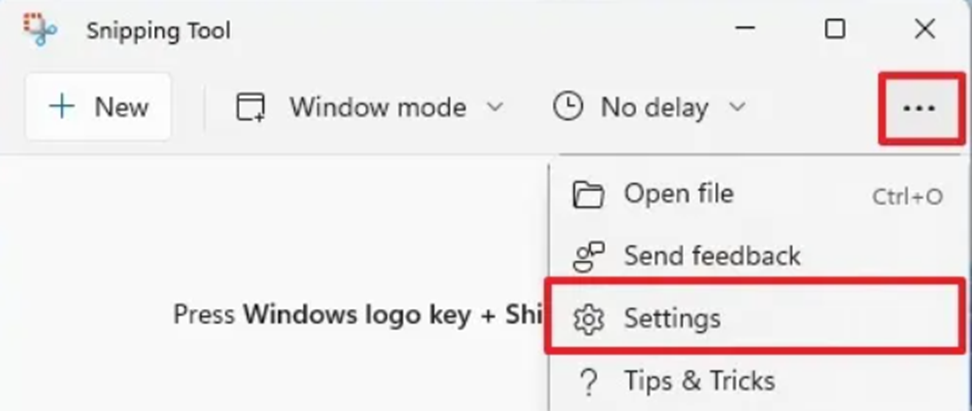
3. Go to ‘Settings’ and find the Automatically Save screenshots under the Snipping tab.
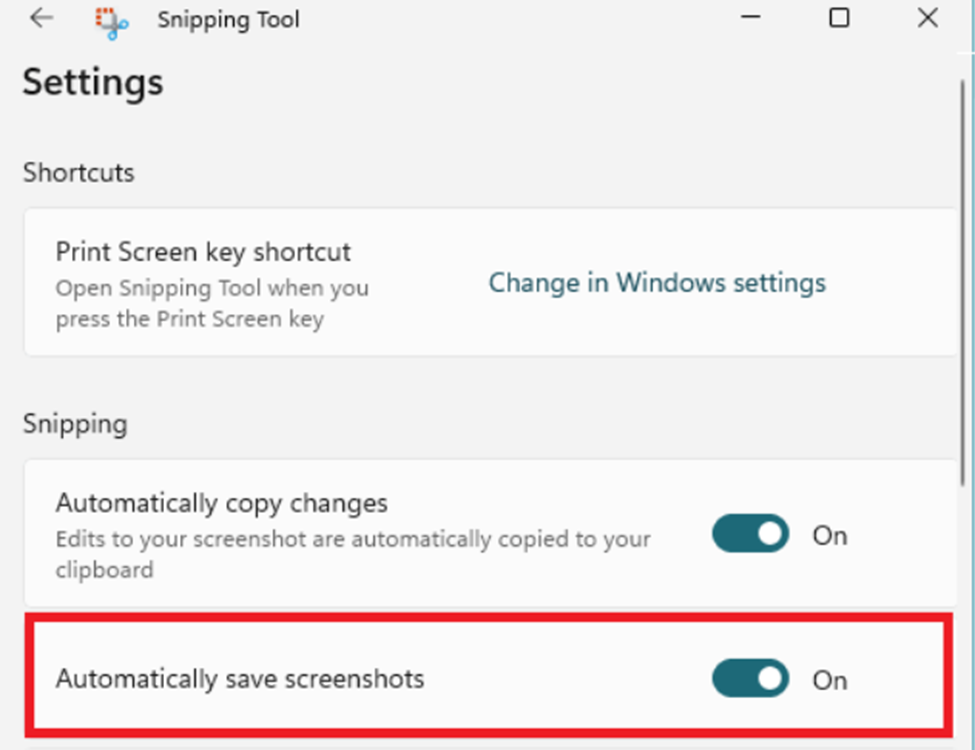
4. Click the toggle button next to ‘Automatically save screenshots’ to enable or disable the autosave feature.
And that’s about it, and you can simply switch ON/OFF the toggle button to enable or disable the screenshot autosave feature.
Also Read: 5 EASY Ways to find your Windows Version & Details
Where to Find the Auto-Saved Screenshot in Windows 11?
With the Windows 11 22H2 insider build 25211, the upgraded version of the Snipping Tool application will temporarily cache the screenshot on the current path: %LocalAppData%\Packages\Microsoft.ScreenSketch_8wekyb3d8bbw\TempState
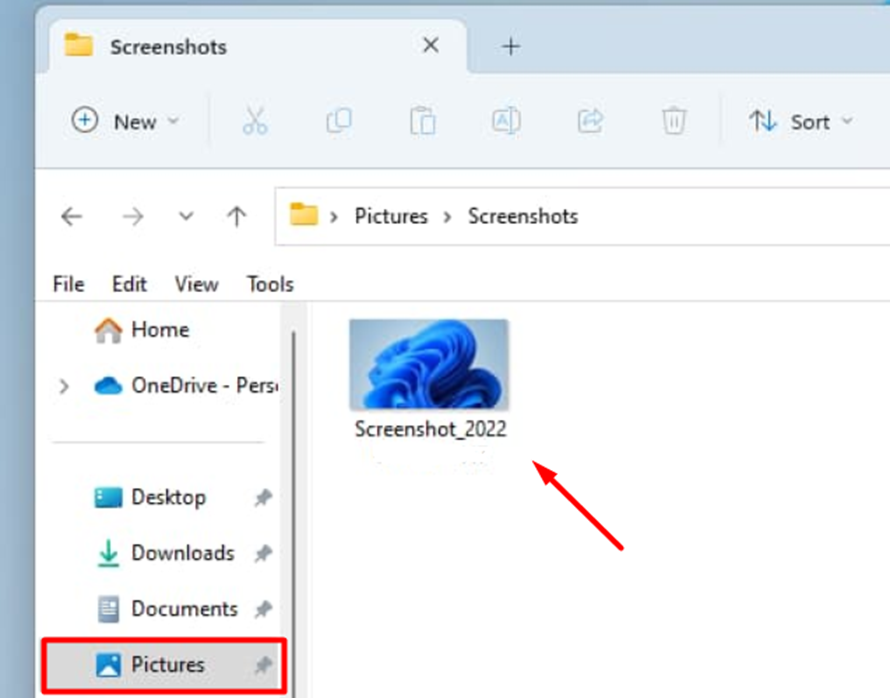
In case the copy-paste is not working on Windows 11, you can go to the Pictures > Screenshots folder where all the snips will be saved, and you can copy them like an image to open or edit in any application like MS Paint.
Final Words
Whether you want to download images from Instagram or capture a moment while gaming, Snipping Tool can be the fastest and most easily accessible option for those who have upgraded to Windows 11. With automation, options are always flexible, making things more personalized for their users. In this guide, we stated how you could enable or disable the autosave feature of the snipping tool by following an easy method. Hopefully, our guidelines were comprehensive enough to guide you through the process.