
Modern Standby is the upgraded version of the Sleep mode in Windows with its benefits and issues, so here is how you can enable or disable it.
The Modern Standby feature, also technically known as the S0 Lower Power Idle mode, is the newer version of power saving mode for portable computers, tablets, and laptops. This feature was introduced back in 2020 that enables Windows users to experience a mobile-like feel to maintain battery levels without affecting performance.
Suppose you lock your phone, but the background processes like network connection or playback music keep running in the background. Similarly, in the Modern Standby state, your portable laptop won’t experience any slow startup issues and will support a faster transition between on/off state. However, it comes with flaws that can cause hardware damage under a long-term sleep state, and some users may wish to disable it.
Therefore, we have written a comprehensive guide on how to enable or disable Modern Standby in Windows 10 and Windows 11 by following three easy methods. We will also guide you on how to check your computer’s current sleep state.
How to Check Your Computer’s Sleep State?
Whether you want to enable or disable the Modern Standby, first, by following these steps, you must check your computer’s sleep state to see if your device supports the feature.
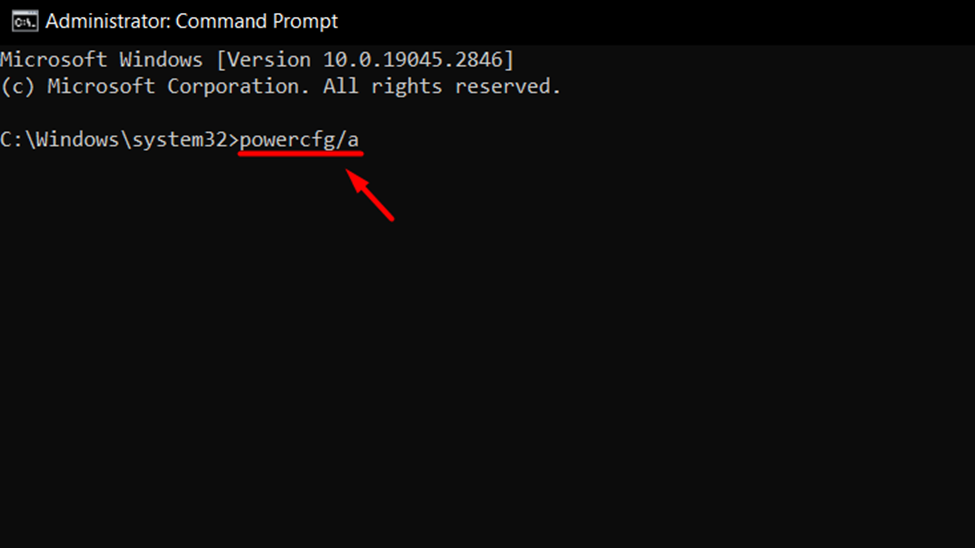
- Go to Start Menu and type CMD to find the Command Prompt.

2. Right-click on it and select ‘Run as Administrator.’
3. Type powercfg/a and press the ‘Enter’ key.
4. You will see different messages stating power states, which denote the following processes.
Check Standby (S0 Lower Power Idle) Network Connected/Disconnected as it means the Modern Standby is enabled.
Now check the Standby (S3) to see if it says, ‘This standby state is disabled when S0 low power idle is supported’ which denotes that you can switch the Modern Standby into S3 more power-saving mode (also known as Legacy Standby).
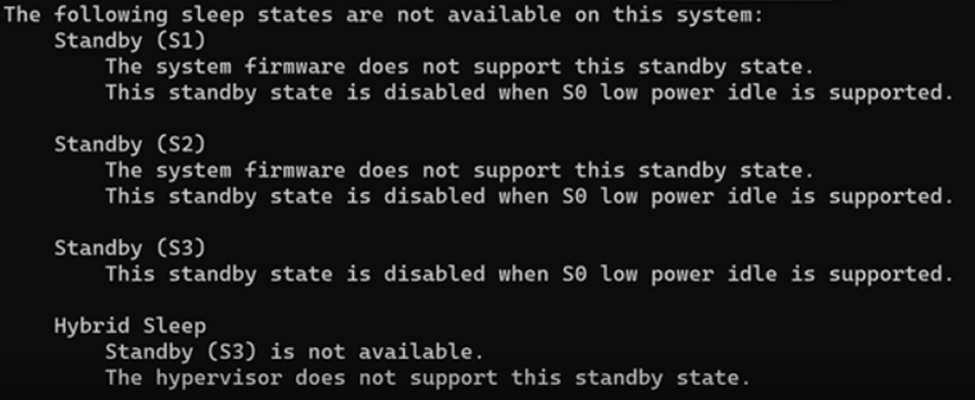
If the message on S3 says, ‘the system’s firmware doesn’t support the S3 sleep state’, then you’ll have to check the BIOS settings to see if there is an option to enable the S3 state in the system. Once S3 is enabled, you can disable S0 by editing the registry.
Also Read: How to Open BIOS Settings On Windows 11?
Disabling Modern Standby in Windows 10 and 11
Once you have checked the Sleep state of your computer system, you can follow these three step-by-step methods to enable or disable the Modern Standby in Windows 10 and 11.
Method #1: Enable/Disable Modern Standby via Windows Registry
This is a straightforward method to manually enable or disable Modern Standby from the Registry by following these steps.
- Press the Win+R key to open the Run dialogue. Type regedit and press ‘Enter’ to run it.
- Paste the following path in the navigation bar to open the specific folder HKEY_LOCAL_MACHINE\SYSTEM\CurrentControlSet\Control\Power
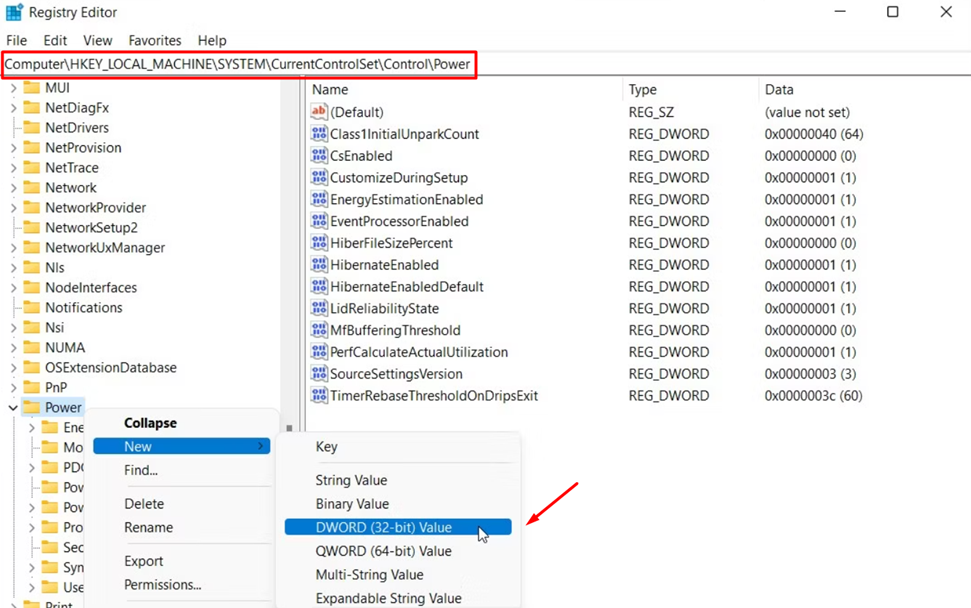
3. Right-click the ‘Power’ folder and select New > DWORD (32-bit) Value from the pop-up menu.
4. Right-click on this new value to rename it as PlatformAoAcOverride.
5. Again, right-click on the PlatformAoAcOverride and select ‘Modify.’
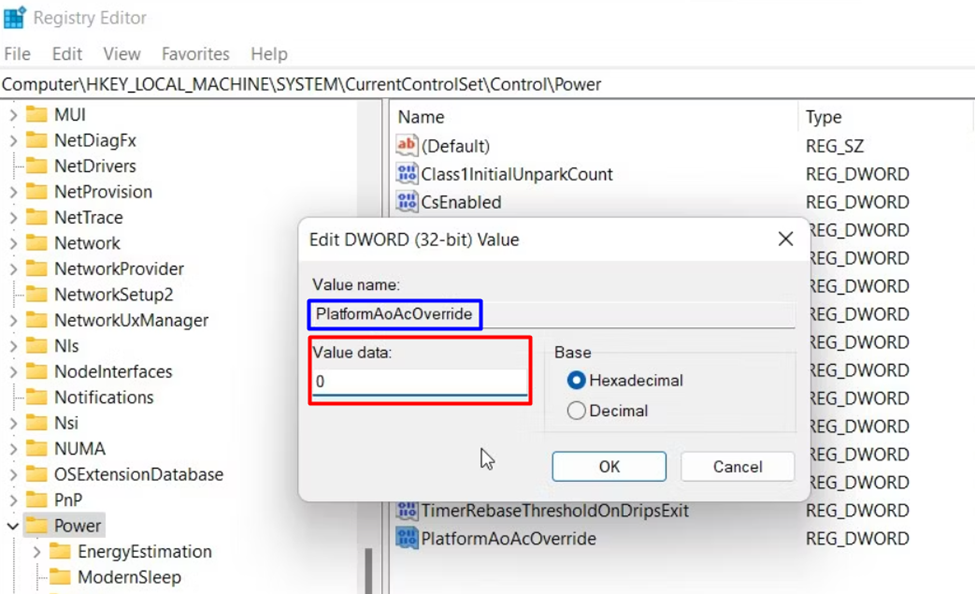
6. Set the value ‘1’ to enable it and ‘0’ to disable it.
7. Exit the Windows Registry to Reboot your computer system, and you’re all done.
Also Read: How to Bypass Windows 11 TPM 2.0 Check and Secure Boot?
Method #2: Enable/Disable Modern Standby via Registry Script
Another direct yet easy method to enable or disable the Modern Standby for your computer system is with the help of Registry Script, which can be performed by following these steps.
- Open the Run dialogue by pressing Win+R.
- Type ‘Notepad’ and press Enter key to open a new TXT Notepad file.
- Paste the following command in the Notepad by typing
Windows Registry Editor Version 5.00
[HKEY_LOCAL_MACHINE\SYSTEM\CurrentControlSet\Control\Power]
“PlatformAoAcOverride”=dword:00000000

4. Choose File > Save As > Save as type and select All files.
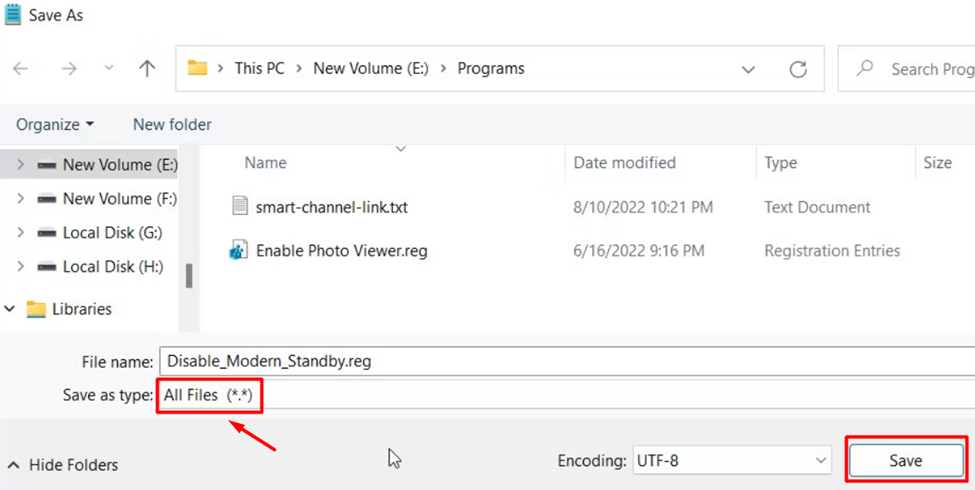
5. Rename the file as ‘Disable_Modern_Standby.reg’ to disable and ‘Enable_Modern_Standby.reg’ to enable the Modern Standby and click ‘Save’ to create the file.
6. Restart your computer system to apply the changes
Before enabling or disabling the file via registry script, run the files after saving them and then restart your computer system to apply changes.
Also Read: Windows 11 – How to Fix Random Black Screen
Method #3: Enable/Disable Modern Standby via Command Prompt
Once you have checked the Sleep state of your computer system, the simplest method to enable or disable Modern Standby is using the Command Prompt by following these steps.
- Go to Start Menu and type Command Prompt.
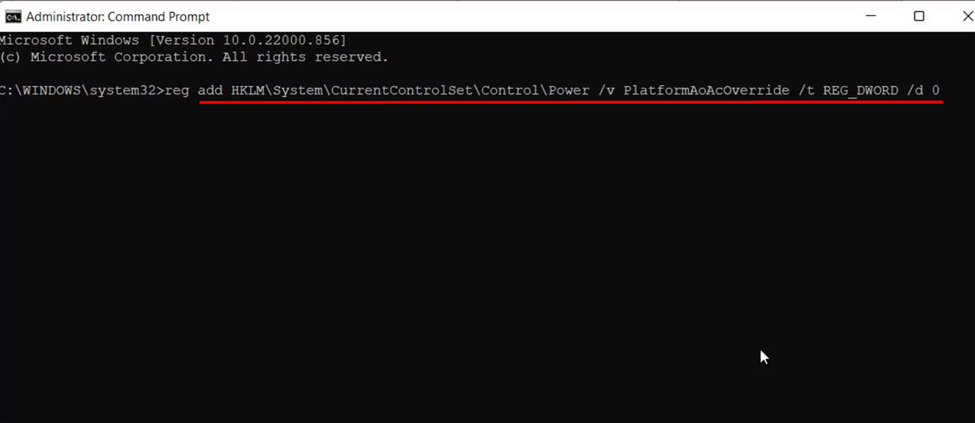
- Right-click on Command Prompt and select ‘Run as Administrator.’
3. To disable Modern Standby, paste the following command reg add HKLM\System\CurrentControlSet\Control\Power /v PlatformAoAcOverride /t REG_DWORD /d 0
To enable Modern Standby, paste the following command reg delete “HKLM\System\CurrentControlSet\Control\Power” /v PlatformAoAcOverride /f
4. After entering the command, press Enter key and reboot your computer system to apply changes.
Also Read: Windows 11 Startup Repair (4 Easy Ways)
Final Words
With all the new advantages to make portable laptops more energy efficient, Modern Standby is not the right fit for many Windows users. Instead of sleep mode, setting your system on hibernate is much better to avoid any hardware damage resulting in poor battery health or hardware heating issues. Moreover, if you have upgraded to Windows 11, consider optimizing the power usage of your PC to enhance battery life.