Installing Chrome on a Steam Deck is a simple process that allows users to access the full range of web-based content on their Steam Deck device.
By installing Chrome, users can browse the web, and access their favorite websites just like your phone.
And that’s why we will guide you through 2 easy steps of installing Google Chrome on your Steam Deck device
Also Read: 6 Methods for Extending the Life of Your Steam Deck’s Battery
Step 1: Installing Chrome on Steam Deck
Before we move on to the main steps make sure you have the following:
- A stable internet connection to download and use Chrome
- A keyboard or mouse(optional) as setting up the process will become more quickly when you will connect a keyboard to steam deck.
So, let’s follow the steps to install Google Chrome Steam Deck:
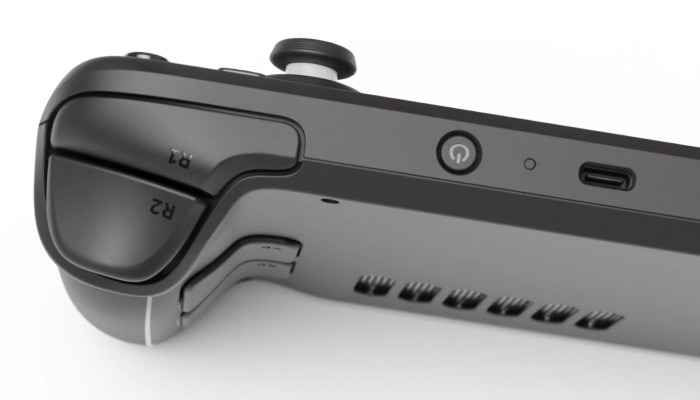
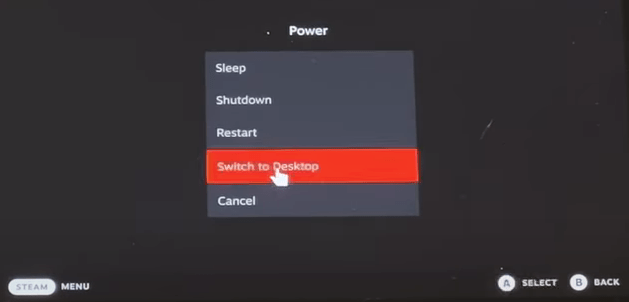
- Hold the Steam Deck power button to bring up the power menu.
- Then select Switch to Desktop to switch over to the Linux desktop.
- Make sure the desktop version of Steam is running.
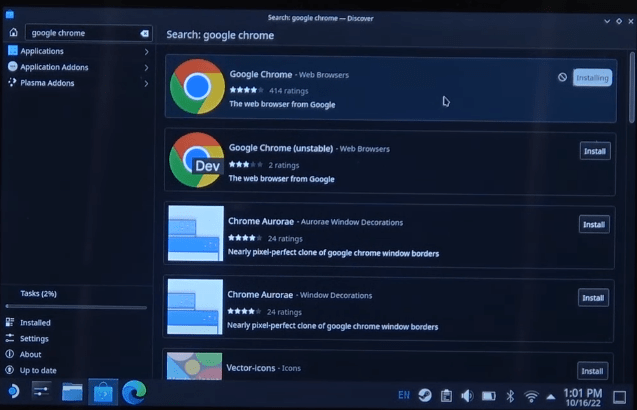
- Tap on the Discover app on the bottom left just like a shopping bag
- Now search for Google Chrome and install it on your Steam Deck(If the keyboard doesn’t pop up, click the Steam Button + X-button)
- After the installation is complete you can launch Chrome in desktop mode.
Also Read: How to Customize Controls on the Steam Deck
Step 2: Add Chrome To Steam Library
So, if you want to use Google Chrome in gaming mode then you need to add Chrome to steam
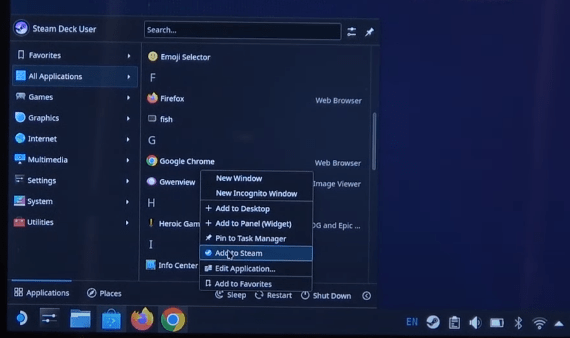
- In desktop, mode click on your Application launcher
- In all applications look for Chrome to add it to steam
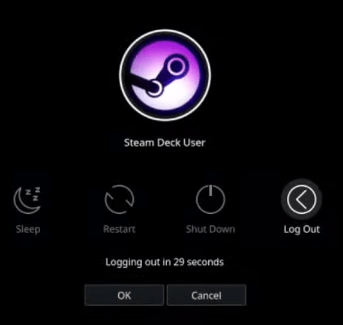
- Now logout from Desktop mode and return to Game mode
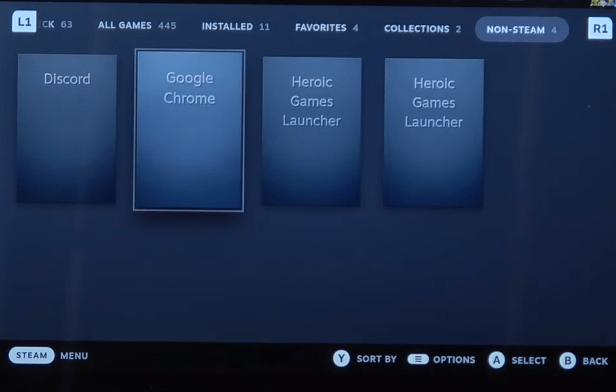
- Go to the library and go to the Non-Steam tab where you can find Google Chrome and launch it
- You can also make changes to the system controls of Steam Deck too.
We hope you found this guide helpful and do let us know how was your experience with Chrome on Steam Deck in the comments section below