
Looking to improve your Steam Deck gaming experience?
Changing your DNS settings can help with faster game load times and smoother online gameplay.
In this article, we’ll guide you through the simple steps to change your DNS settings on your Steam Deck. Get ready to optimize your gaming performance
Also Read: How To Connect AirPods To Your Steam Deck? Easy Steps
Changing DNS Settings on Desktop
Before moving on to the main steps make sure your Steam Deck is connected to the internet
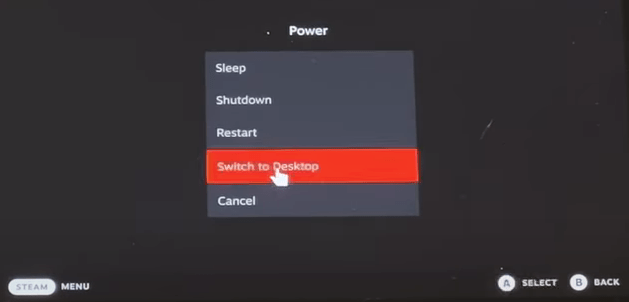
- Hold the Steam Deck power button to bring up the power menu.

- Then select Switch to Desktop to switch over to the Linux desktop.
- Make sure the desktop version of Steam is running.
- Now click on the Wi-Fi icon located at the bottom right and then click Configure Network Connection
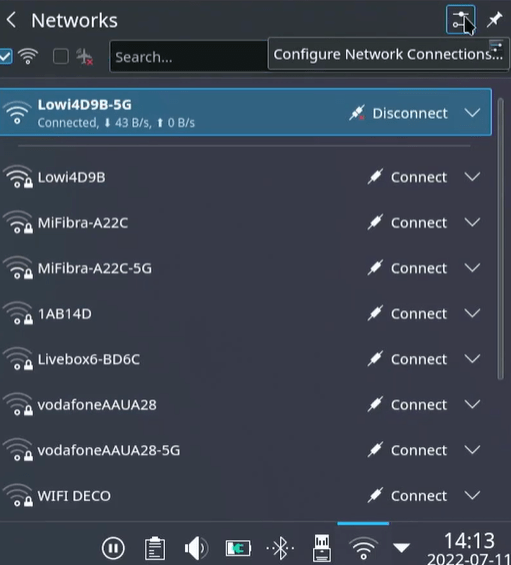
- Click on your current connection and then select IPv4
- Change the Method from Automatic to Manual
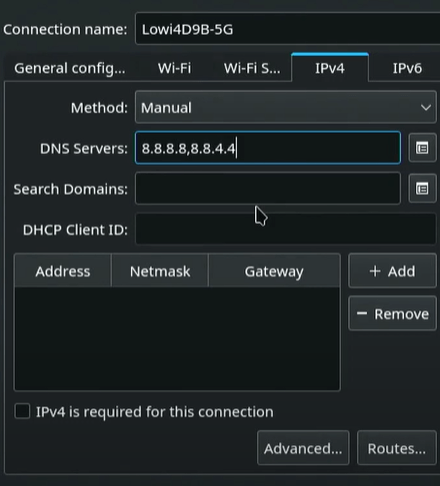
- In the DNS Servers, we are going to enter the DNS separated by commas to match the Google DNS.
- 8.8.8.8
- 8.8.4.4
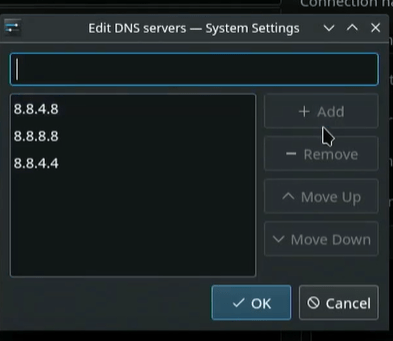
- To add, remove or modify the DNS manually you need to click on the Edit icon as shown in the picture below
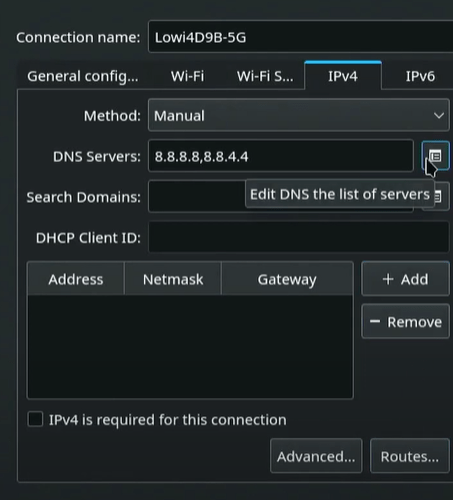
- And manage them from the window that appears
- You can do the same steps with IPv6 if you want to change its DNS settings
We hope that by following these easy steps, you were able to customize your network settings to meet your needs.
Happy gaming!
FAQs
Why change the DNS settings on Steam Deck?
Changing the DNS settings on Steam Deck can improve your internet connection speed and reduce lag while gaming
Can I use any DNS server or do I need to use specific ones?
You can use any public DNS server, such as Google DNS (8.8.8.8 and 8.8.4.4) or OpenDNS (208.67.222.222 and 208.67.220.220)
Is changing the DNS settings on Steam Deck safe?
Yes, changing the DNS settings is a safe and common practice that can improve your internet connection