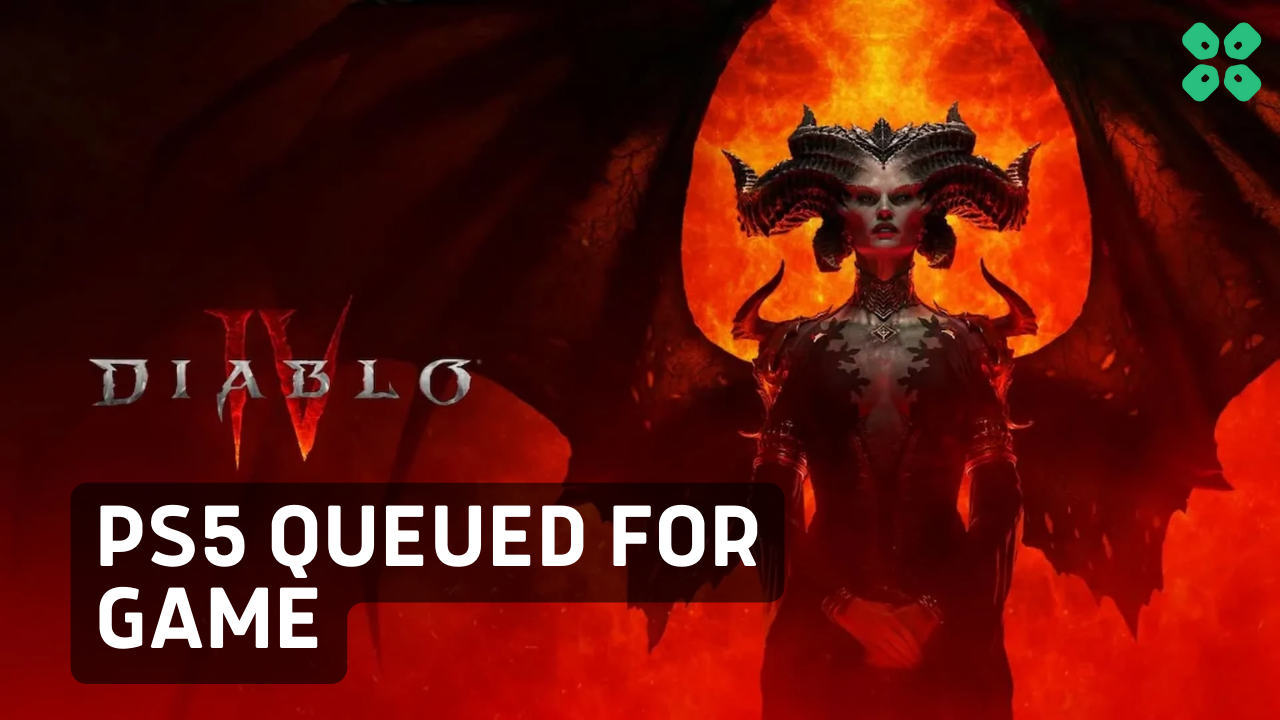
You might be excited to complete the Tarnished Letter quest on Diablo IV, but couldn’t access the required area after you restarted your PS5 as the server would have put you in the queue again and you might be getting dialog screen saying:
“~ 1 Minute Queue” then to “< 1 Minute Queue” to the endless “Pending Start” on your display.
Well, you are not alone, and the servers are basically loaded and your game might be crashing too, but there is nothing wrong with your PS5 or the download itself.
Here is what can help:
Solution 1: Just Waiting Might Fix Diablo 4 PS5 Queued for Game Error
If you encounter the message “Queued for Game – Start Game Pending” when launching Diablo 4 on your PlayStation 5, it typically indicates that you’ll need to wait for your turn.
This message appears when you’re attempting to join a highly populated server that has reached its maximum capacity. In other words, the server is full, and you’ll have to patiently wait in line to enter the game.
In case you don’t want to wait then trying one of the 2 solutions may help but less probable.
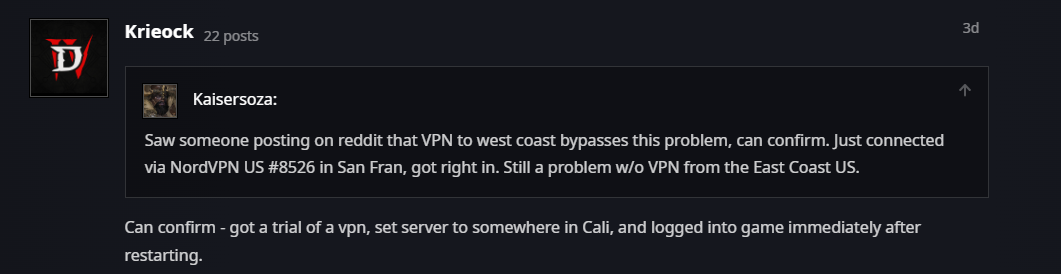
Solution 2: Try Using a VPN
Many users were able to solve Diablo 4 PS5 Queued for Game Error by using a VPN as per the Blizzard forum
If you don’t have a VPN then here are some of our favorite VPNs that are offering exclusive offers too:
1. Nord VPN
Get access to VPN, malware protection, password manager, and encrypted cloud storage – all combined in a single tool.
All-around digital security with 63% OFF.

2. CyberGhost VPN
Military-grade AES 256-bit encryption and a No-Logs policy ensure your privacy and security. You can connect to any of 9144+ VPN servers with a single click.
Save up to 82% with this link and up to 45-day money-back guarantee

3. Express VPN
ExpressVPN is the top choice for gamers and streamers, offering advanced technology that minimizes lag, lowers ping, and enhances connectivity.
3 Months Free with 49% discount.

So, all you need to do is:
- Go to Settings from the PS5 homepage

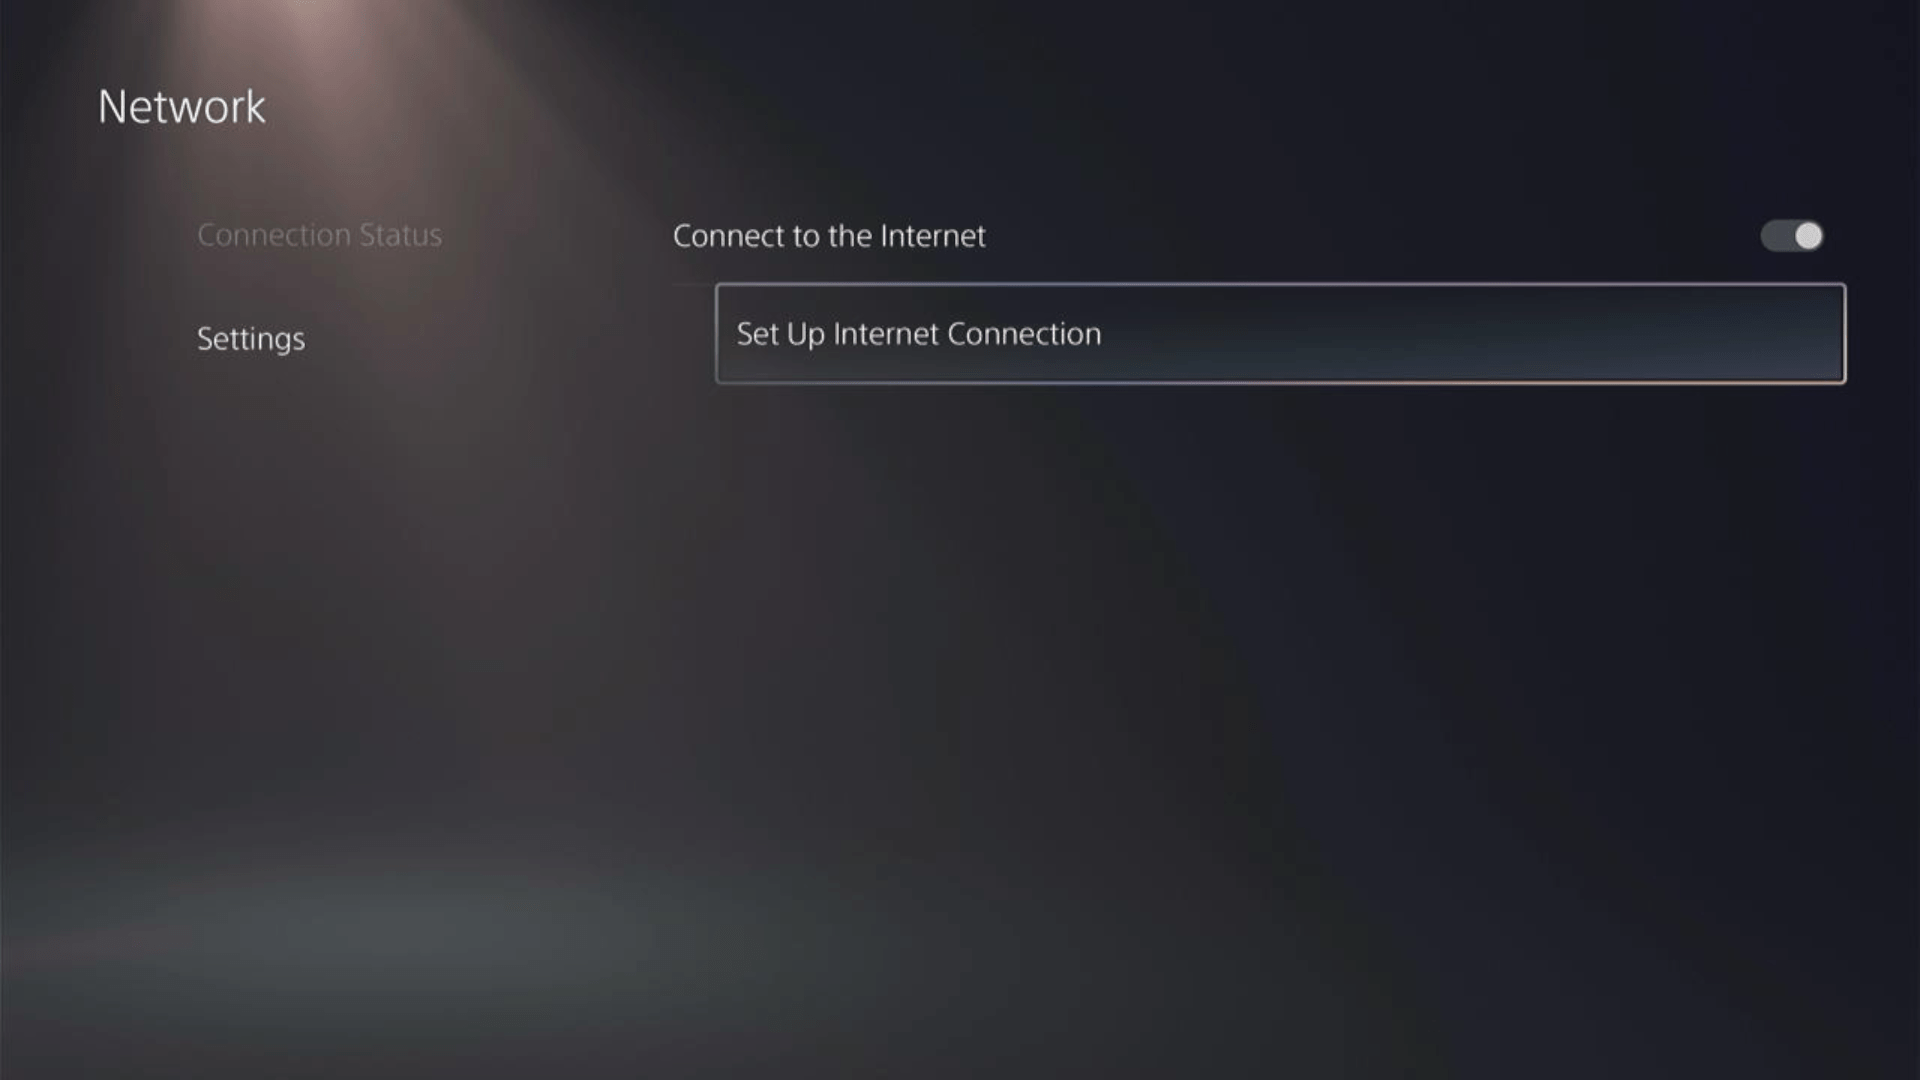
- Scroll down to Network and click on it to access Network Settings
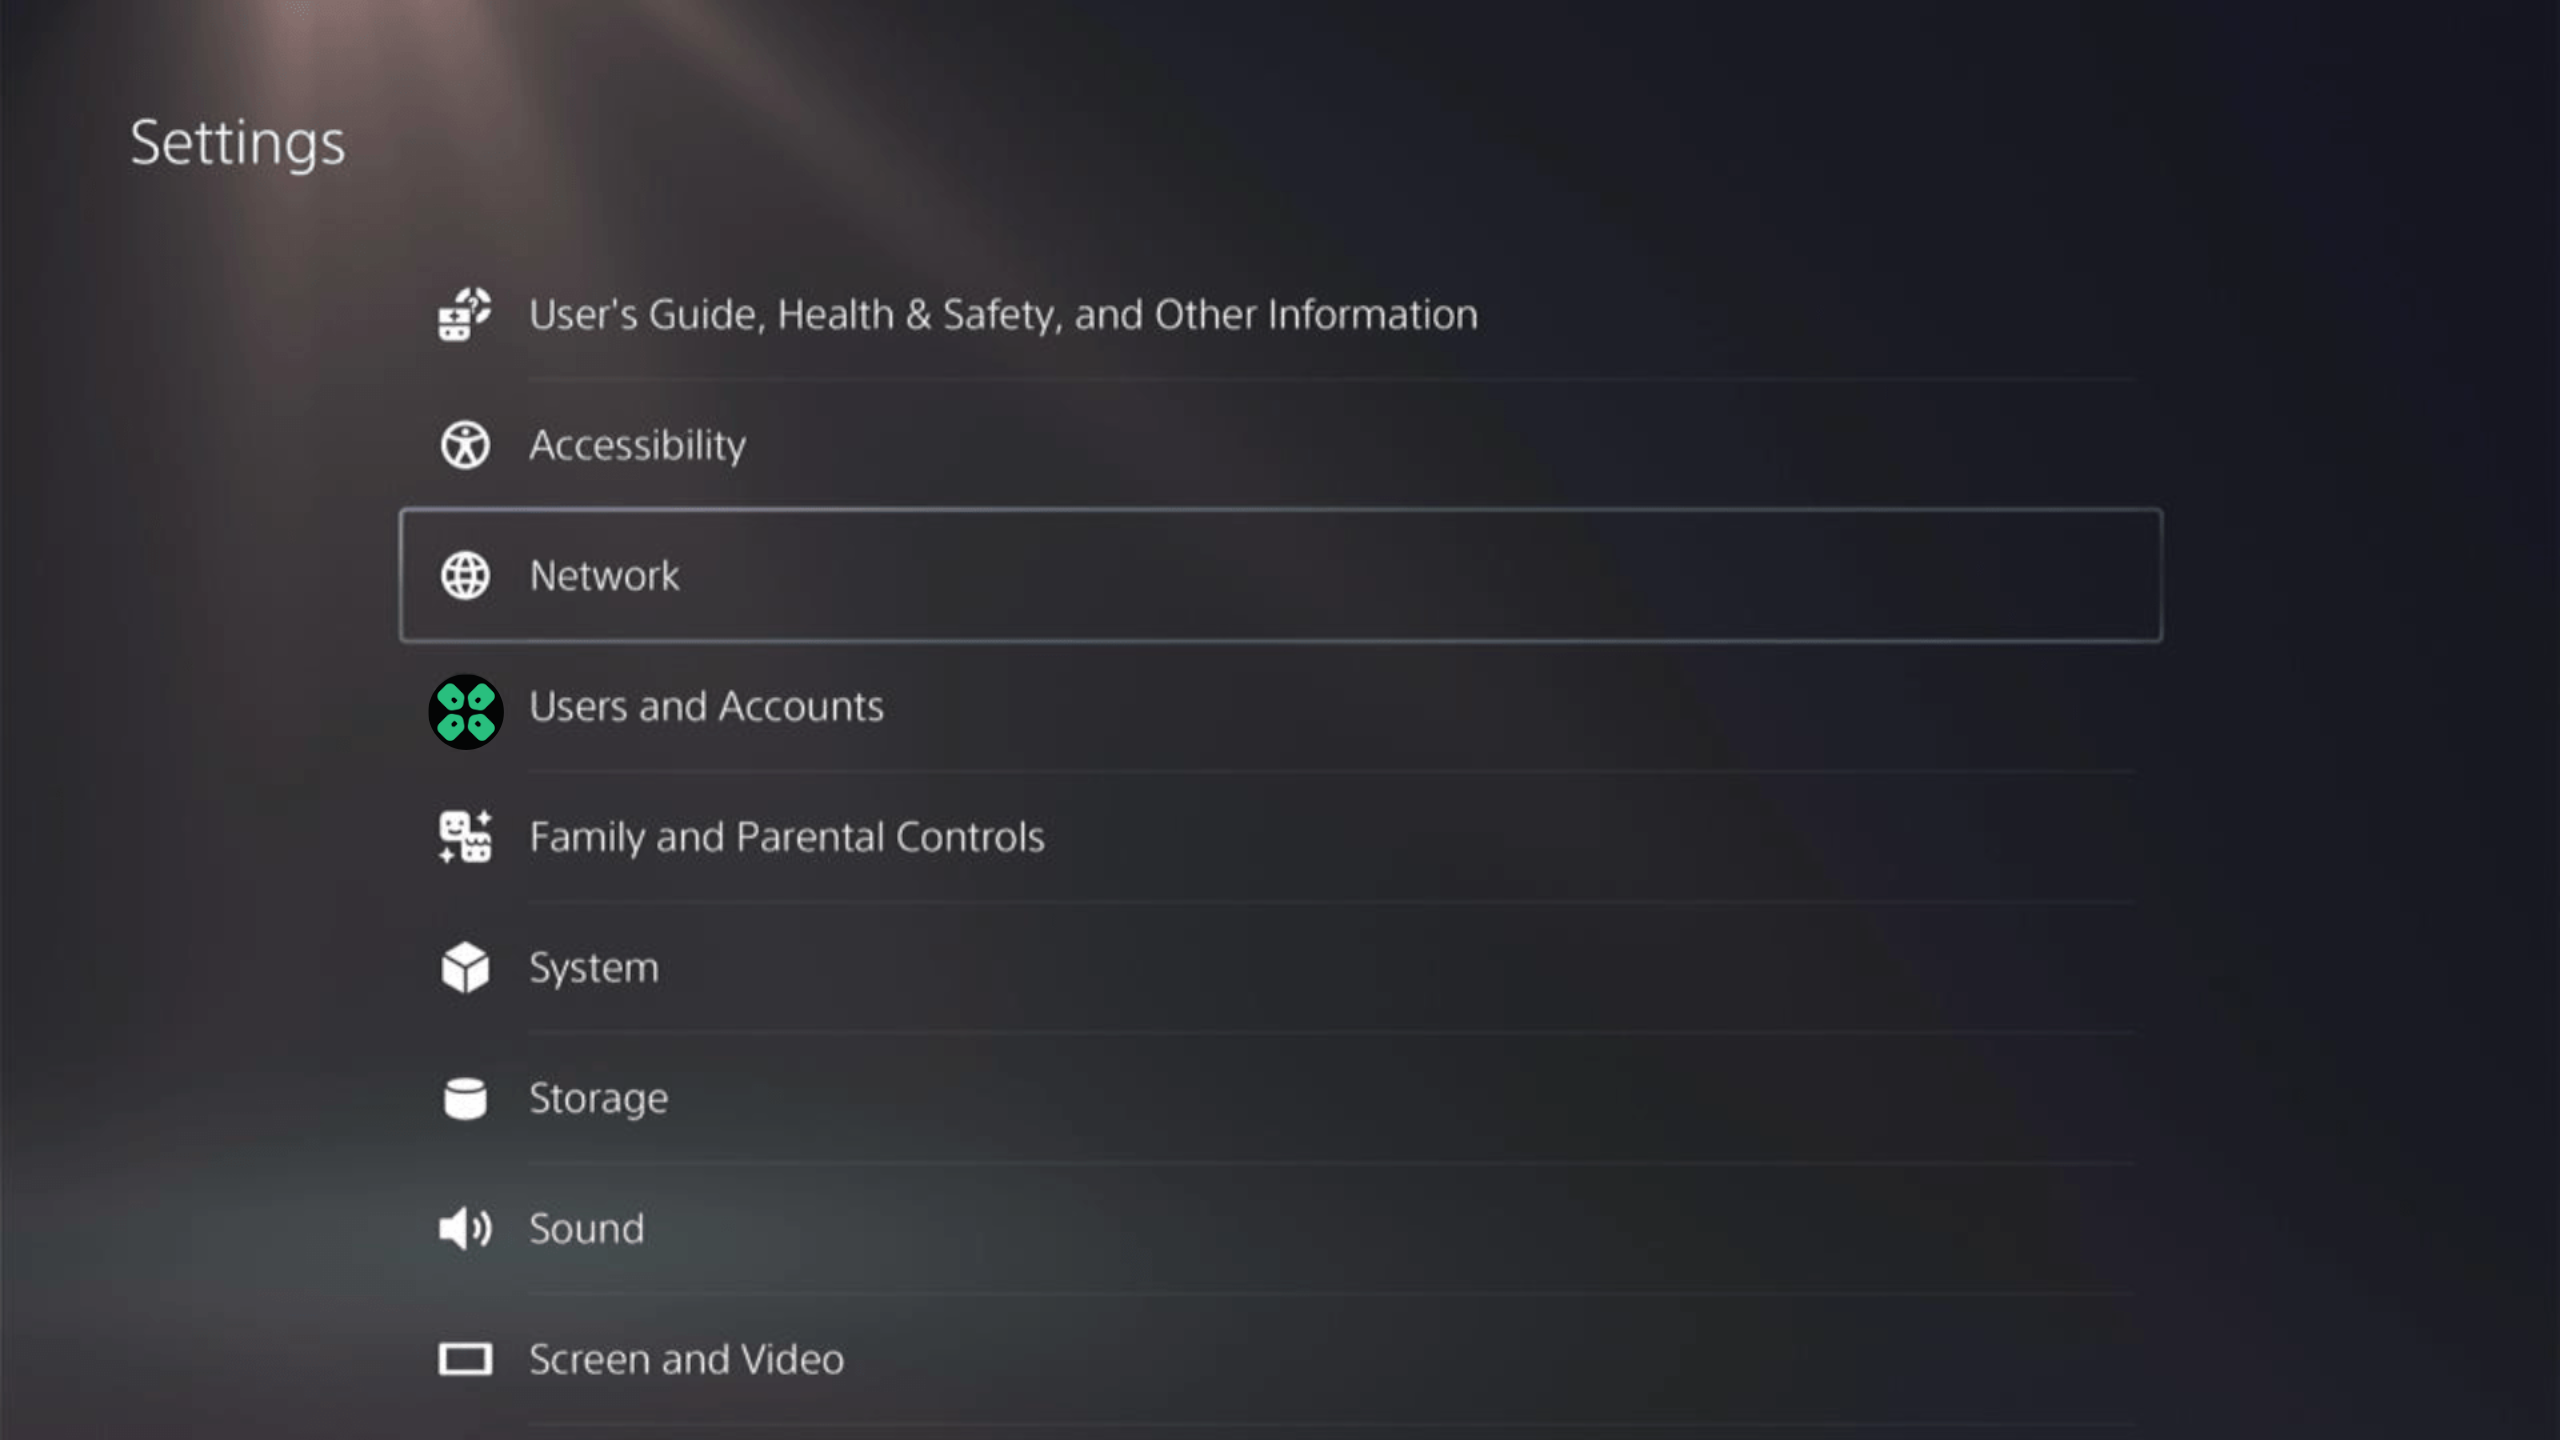
- Choose Settings from the left sidebar and scroll down to Set up Internet Connection from the expanded menu
- Choose either LAN or Wi-Fi, whichever you use > Custom
- Go to ‘IP Address” and set it to “Auto”
- Then to ‘DCHP Host’ and set it to ‘Do Not Specify’
- Go to ‘DNS’ and set it to ‘Manual’ then enter the Smart DNS address that you got from your provider
- Change ‘MUT Settings’ to ‘Auto’
- And ‘Proxy Server to ‘Do Not Use’
- Go to ‘Test Internet Connection’ to confirm that this has all worked smoothly
Solution 2: Set the Wi-Fi Frequency Band to 5GHz on PS5
You need to check if your Router has 5GHz band support, then you need to access network settings to do that:
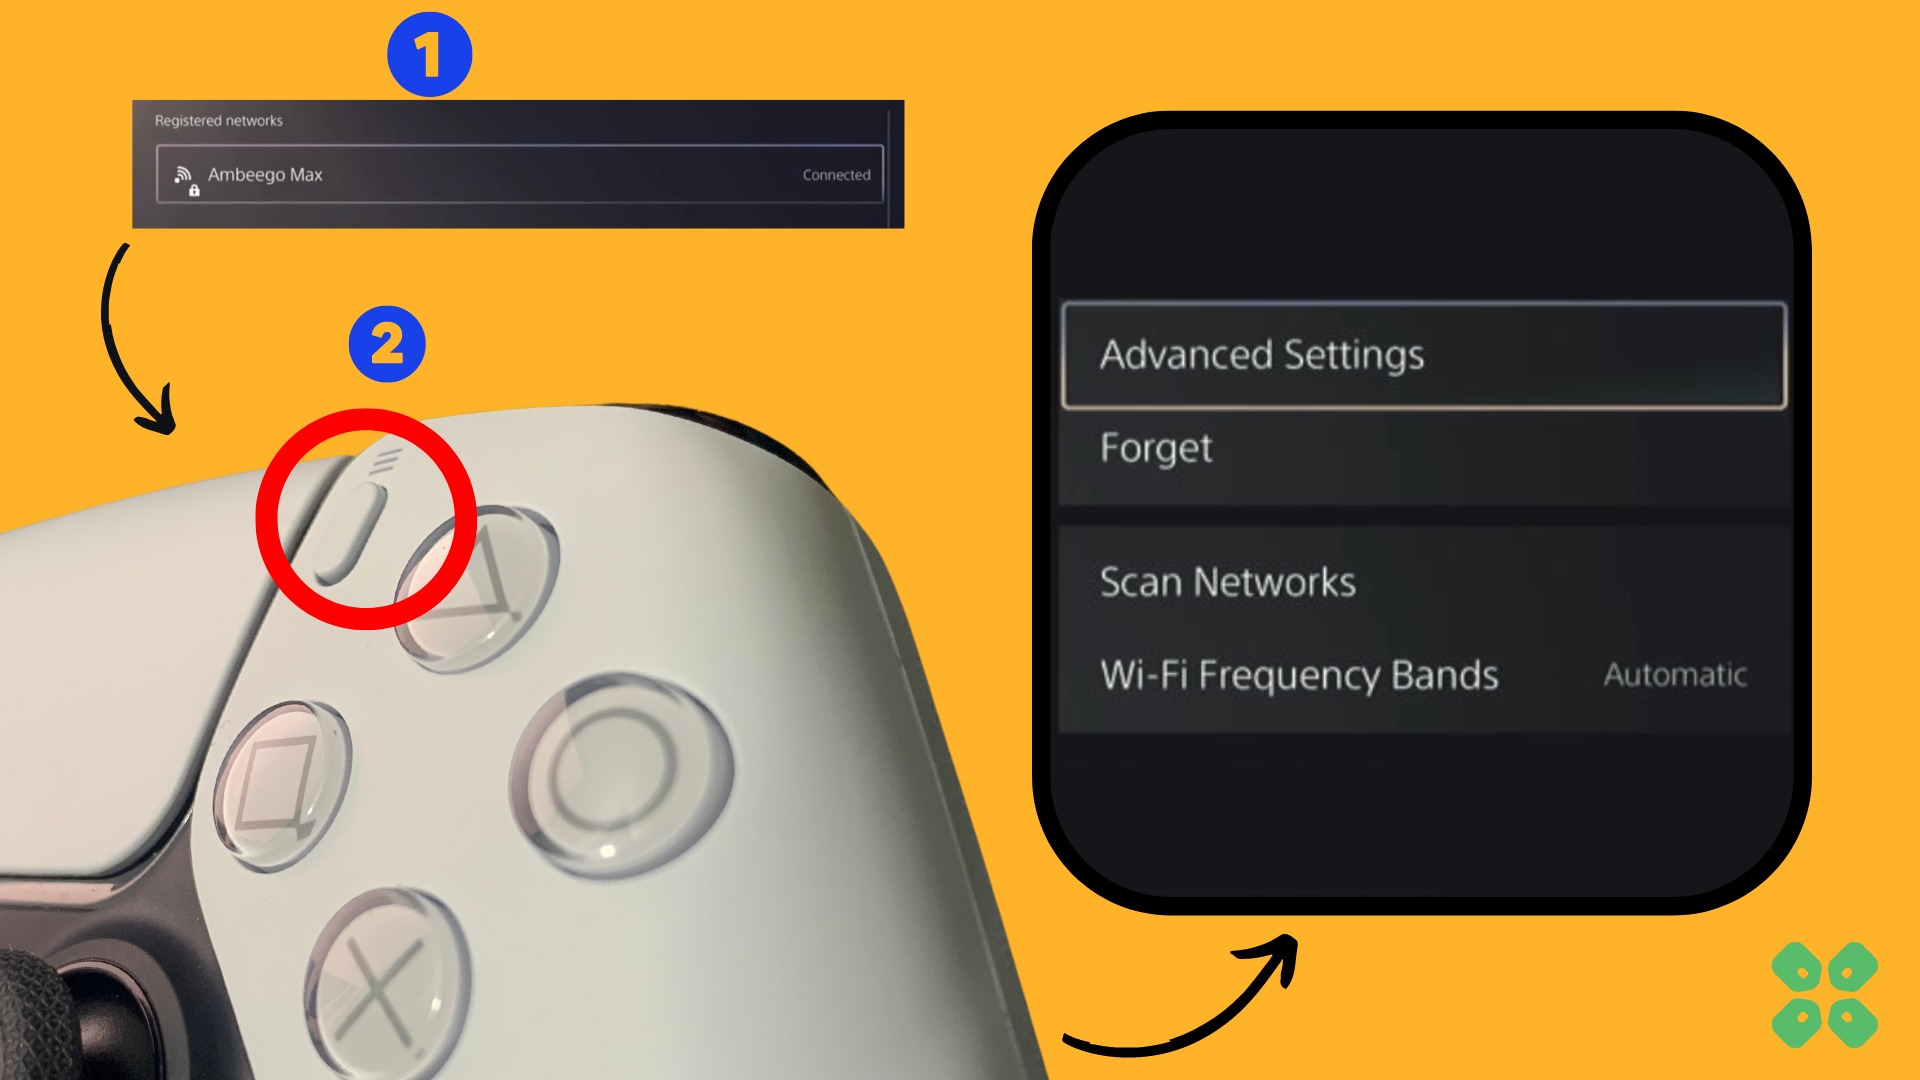
- Go to Settings from the PS5 homepage
- Scroll down to Network and click on it to access Network Settings
- Choose Settings from the left sidebar and scroll down to Set up Internet Connection from the expanded menu
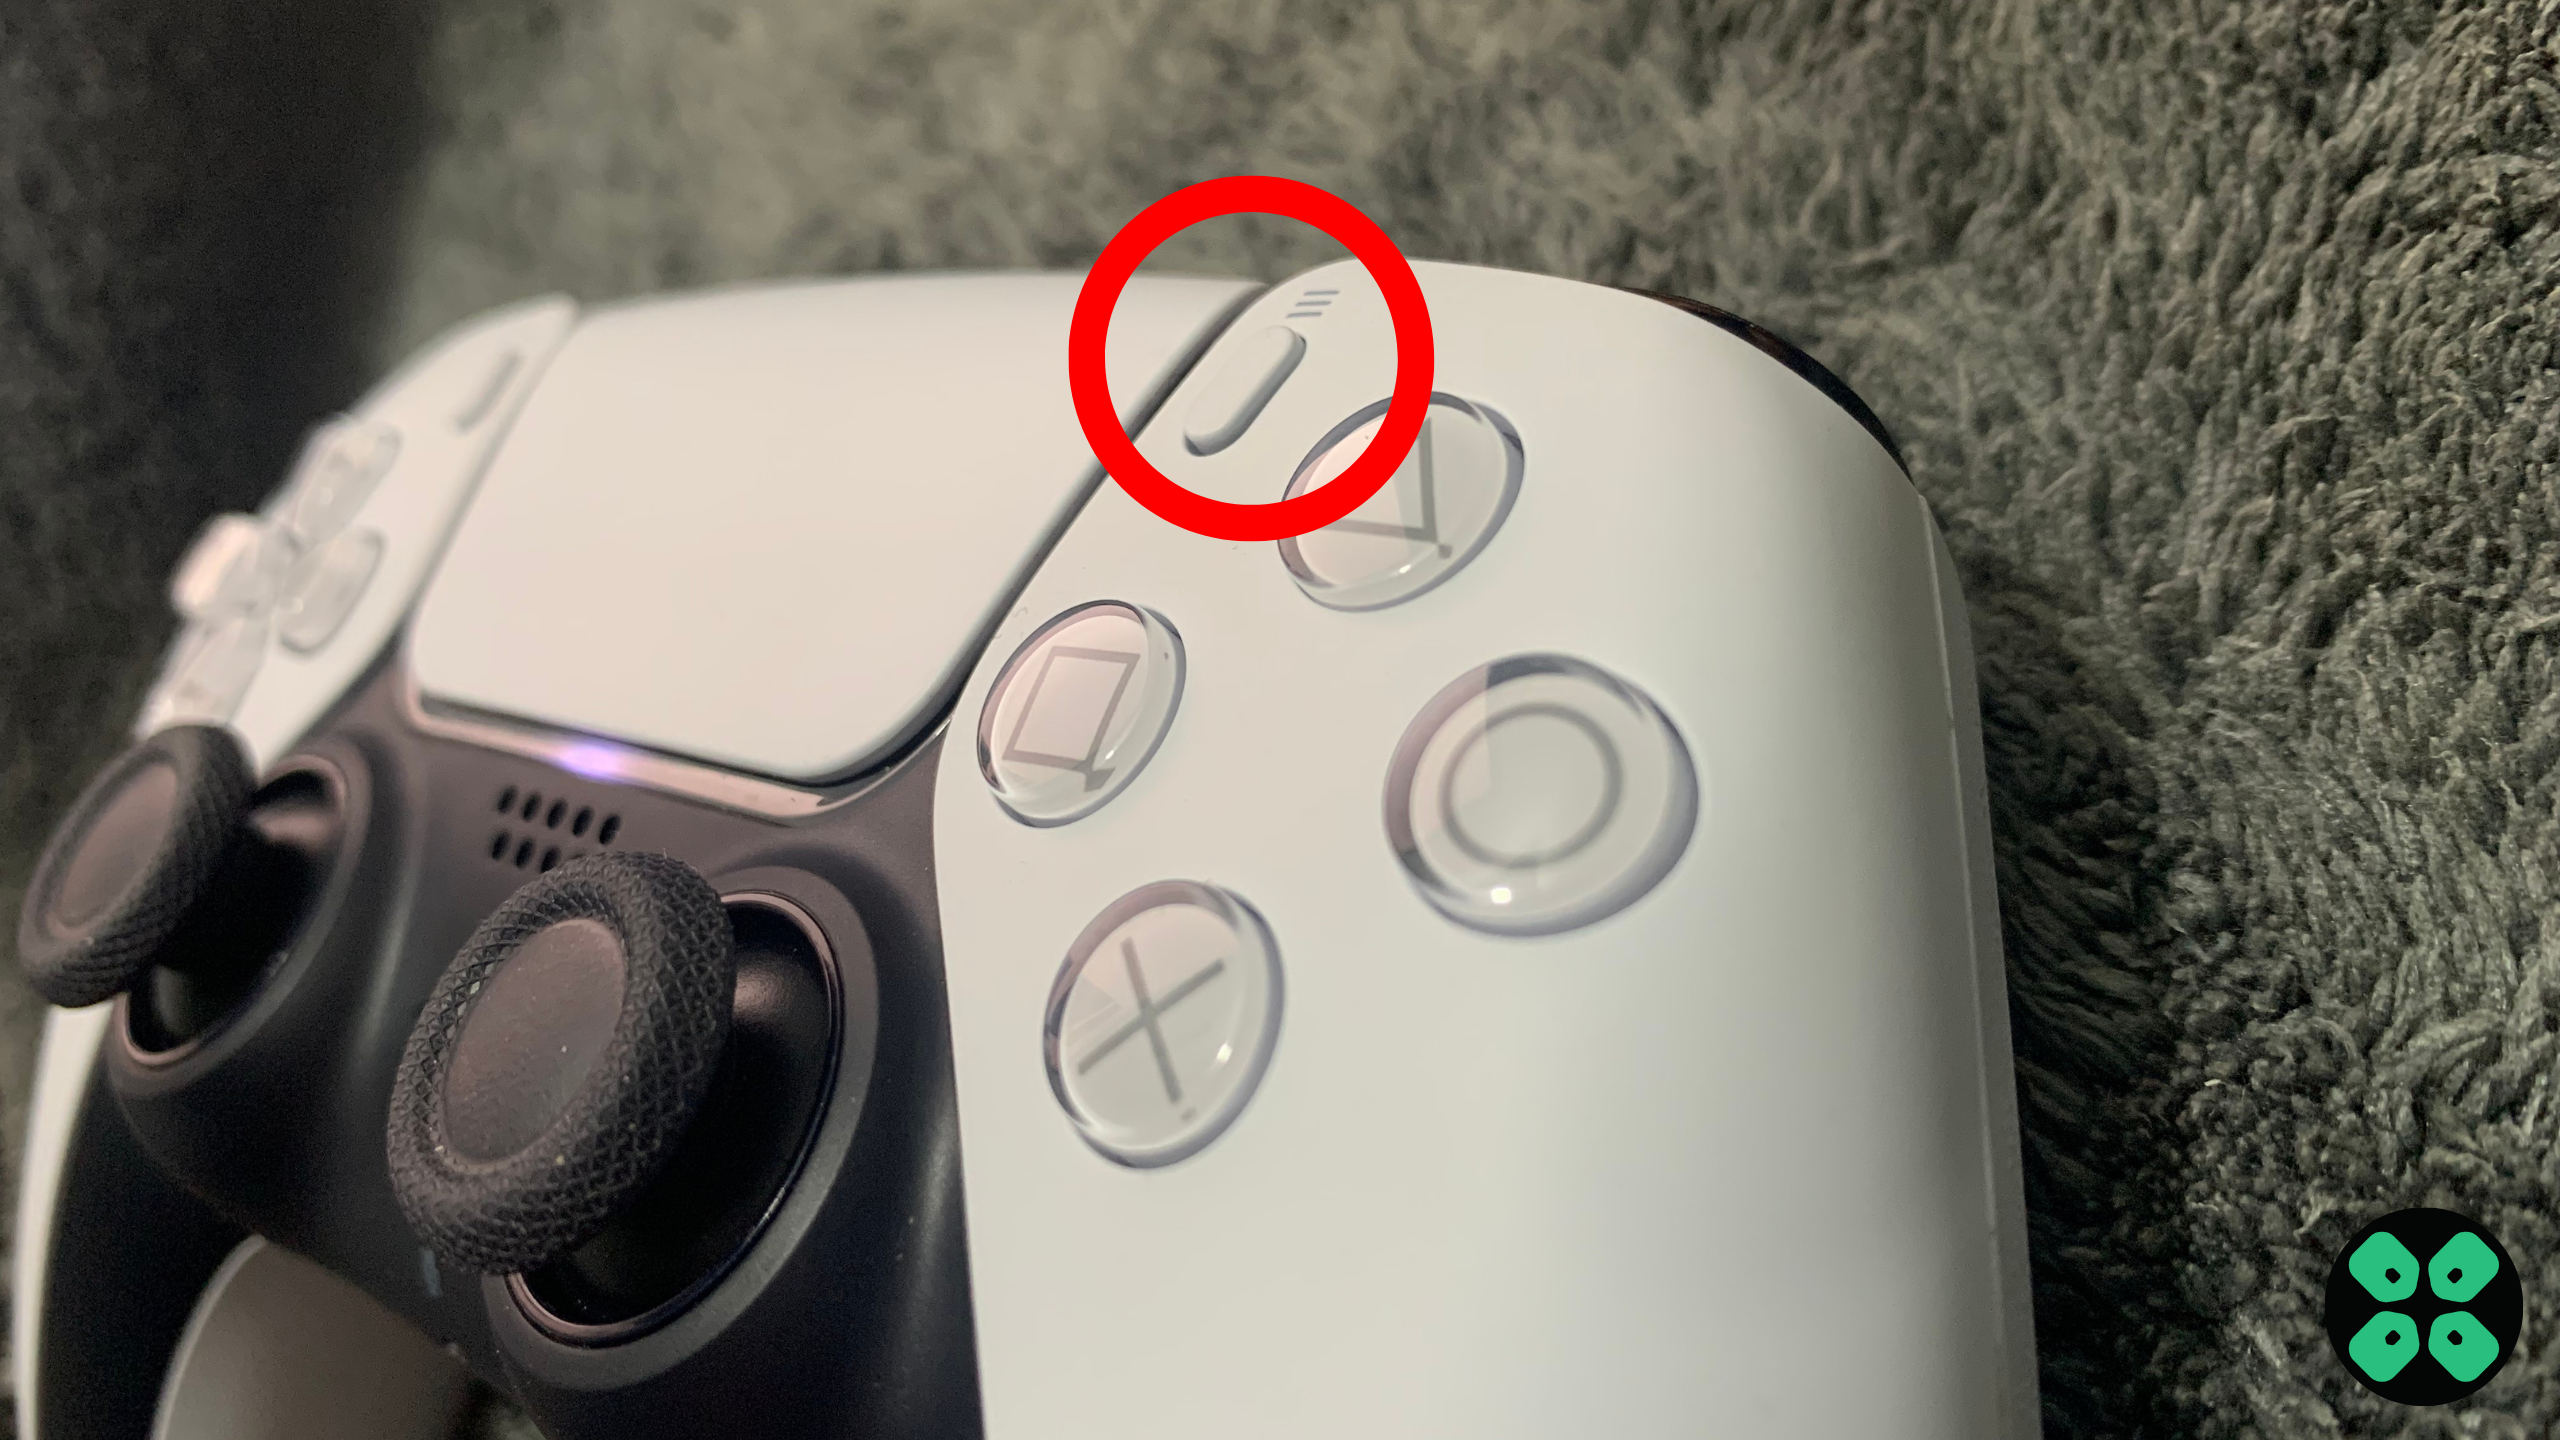
- You should see the WiFi you are connected to and pressing the options key as shown in the image would open a menu with the WiFi.
- Choose Wi-Fi Frequency Bands and set it to 5 GHz.
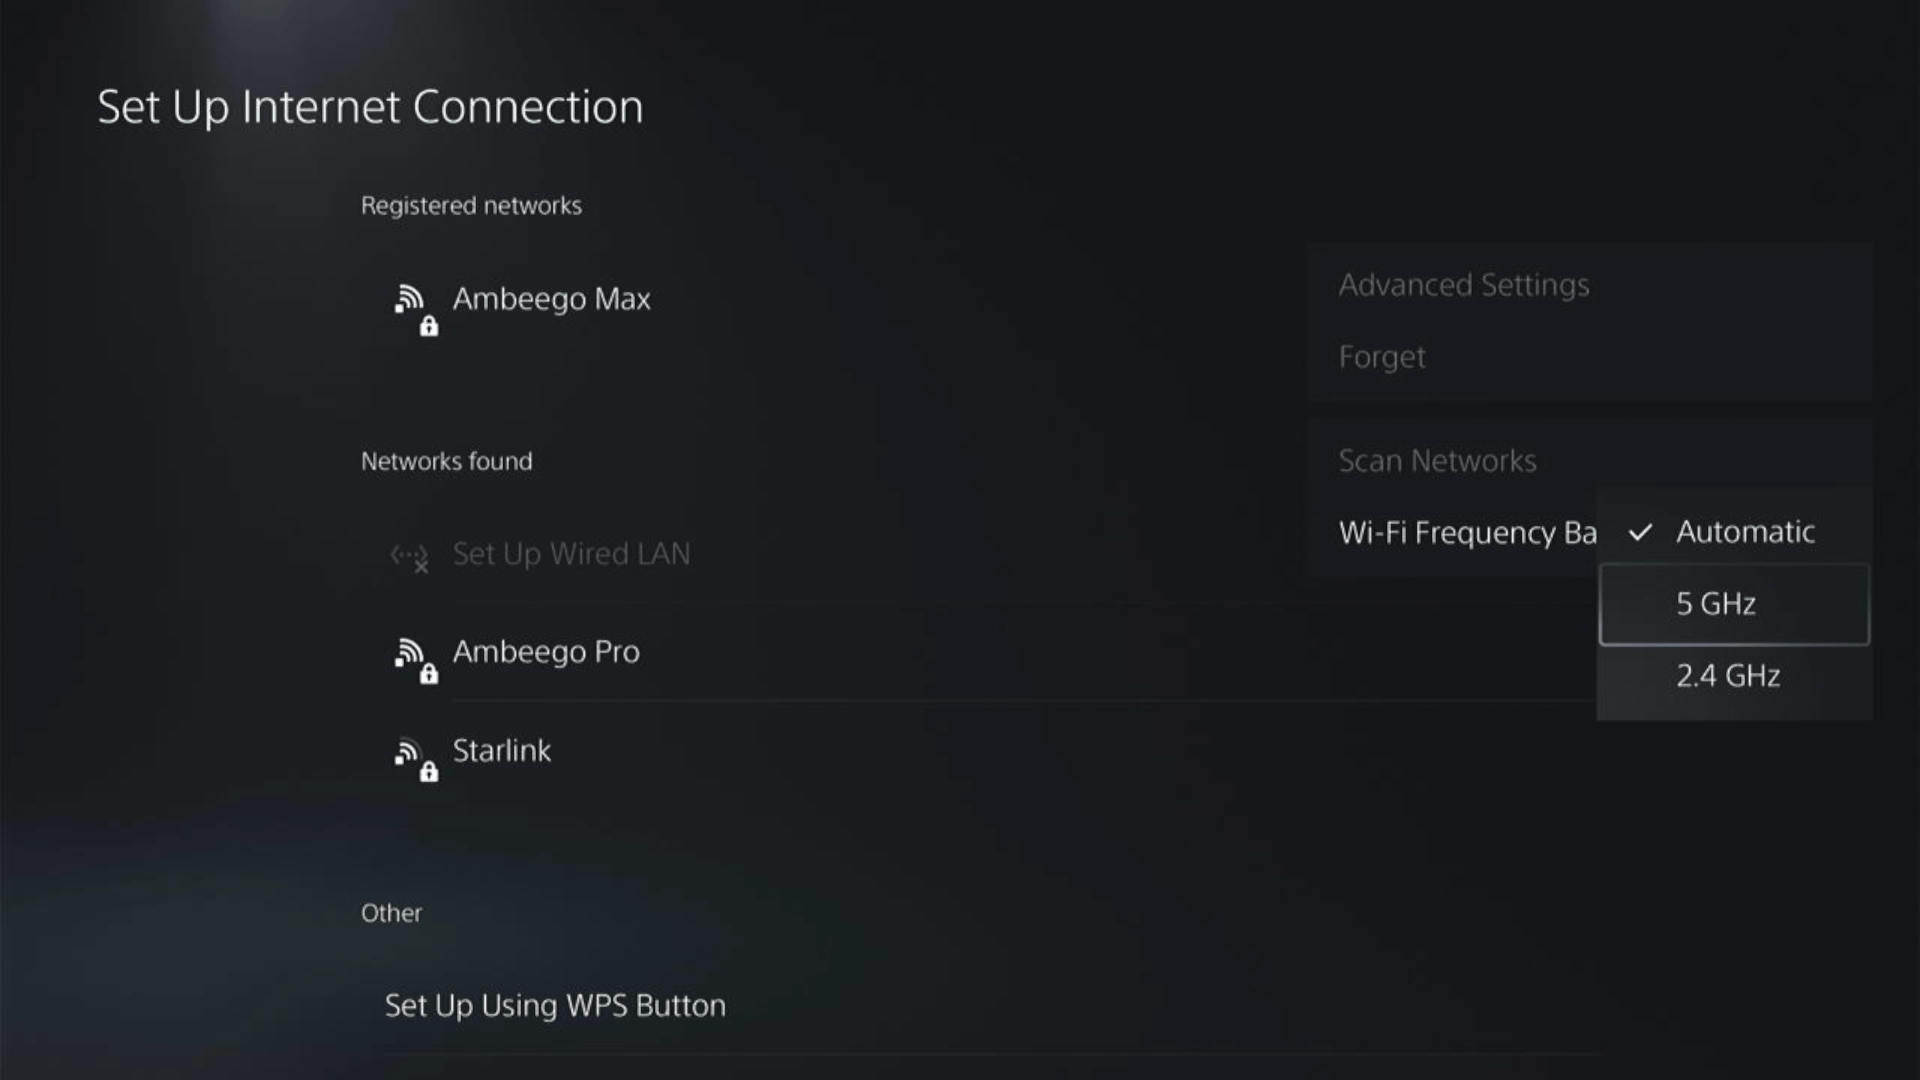
If you are unable to see the 5GHz option, then your Wi-Fi router doesn’t have 5GHz support, or try to connect with the 5GHz option your router generates if it has one.
Here’s also a helpful video for changing your WiFi band on PS5.
Solution 3: Change Your DNS Settings On PS5
There are some faulty DNS servers that may cause Diablo 4 issues
So, let’s change the DNS Settings:
- Go to Settings from the PS5 homepage
- Scroll down to Network and click on it to access Network Settings
- Choose Settings from the left sidebar and scroll down to Set up Internet Connection from the expanded menu
- Now, press the options button on the Connected Network to access Advanced settings as shown in the image.
- Scroll down in the Advanced Settings menu to access DNS Settings. Click on it and the small menu, select Manual.
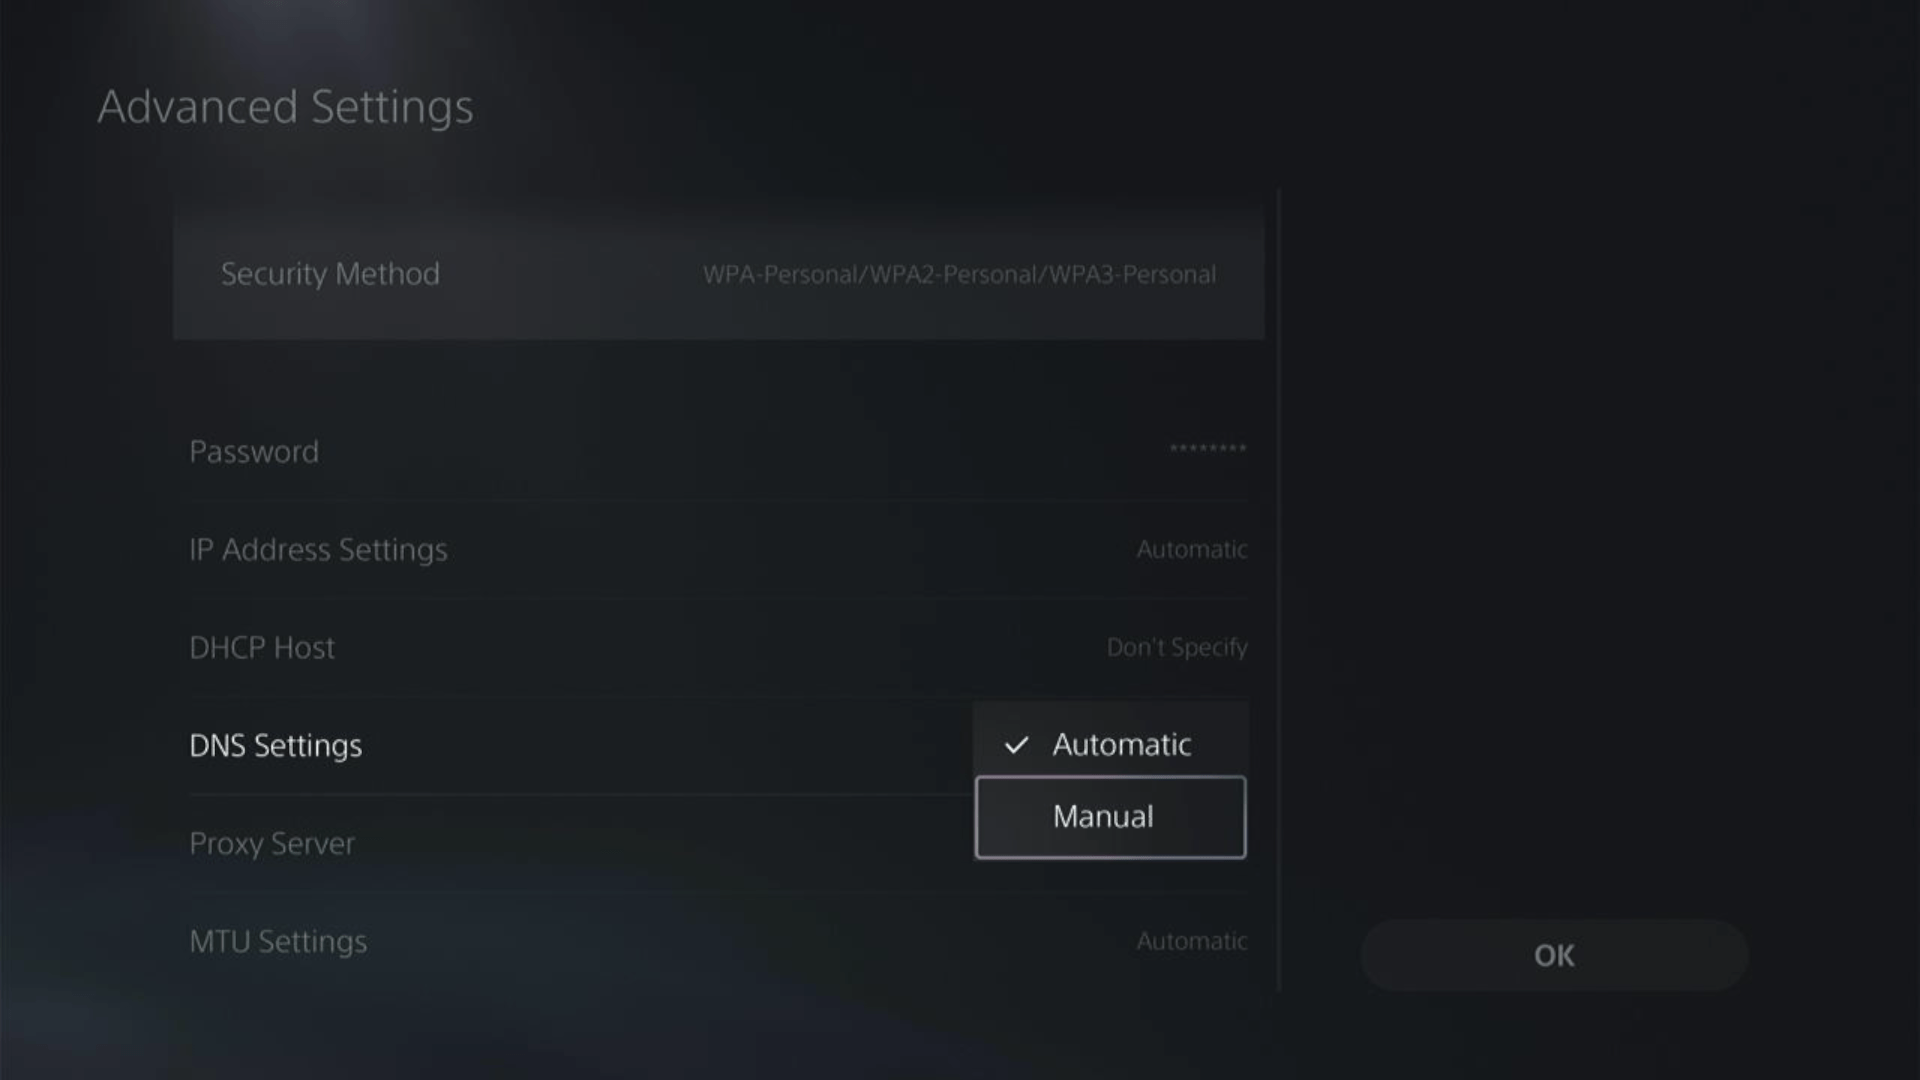
- More Settings would appear:
- For Primary settings enter 8.8.8.8
- For Secondary 8.8.4.4 to match the Google DNS.
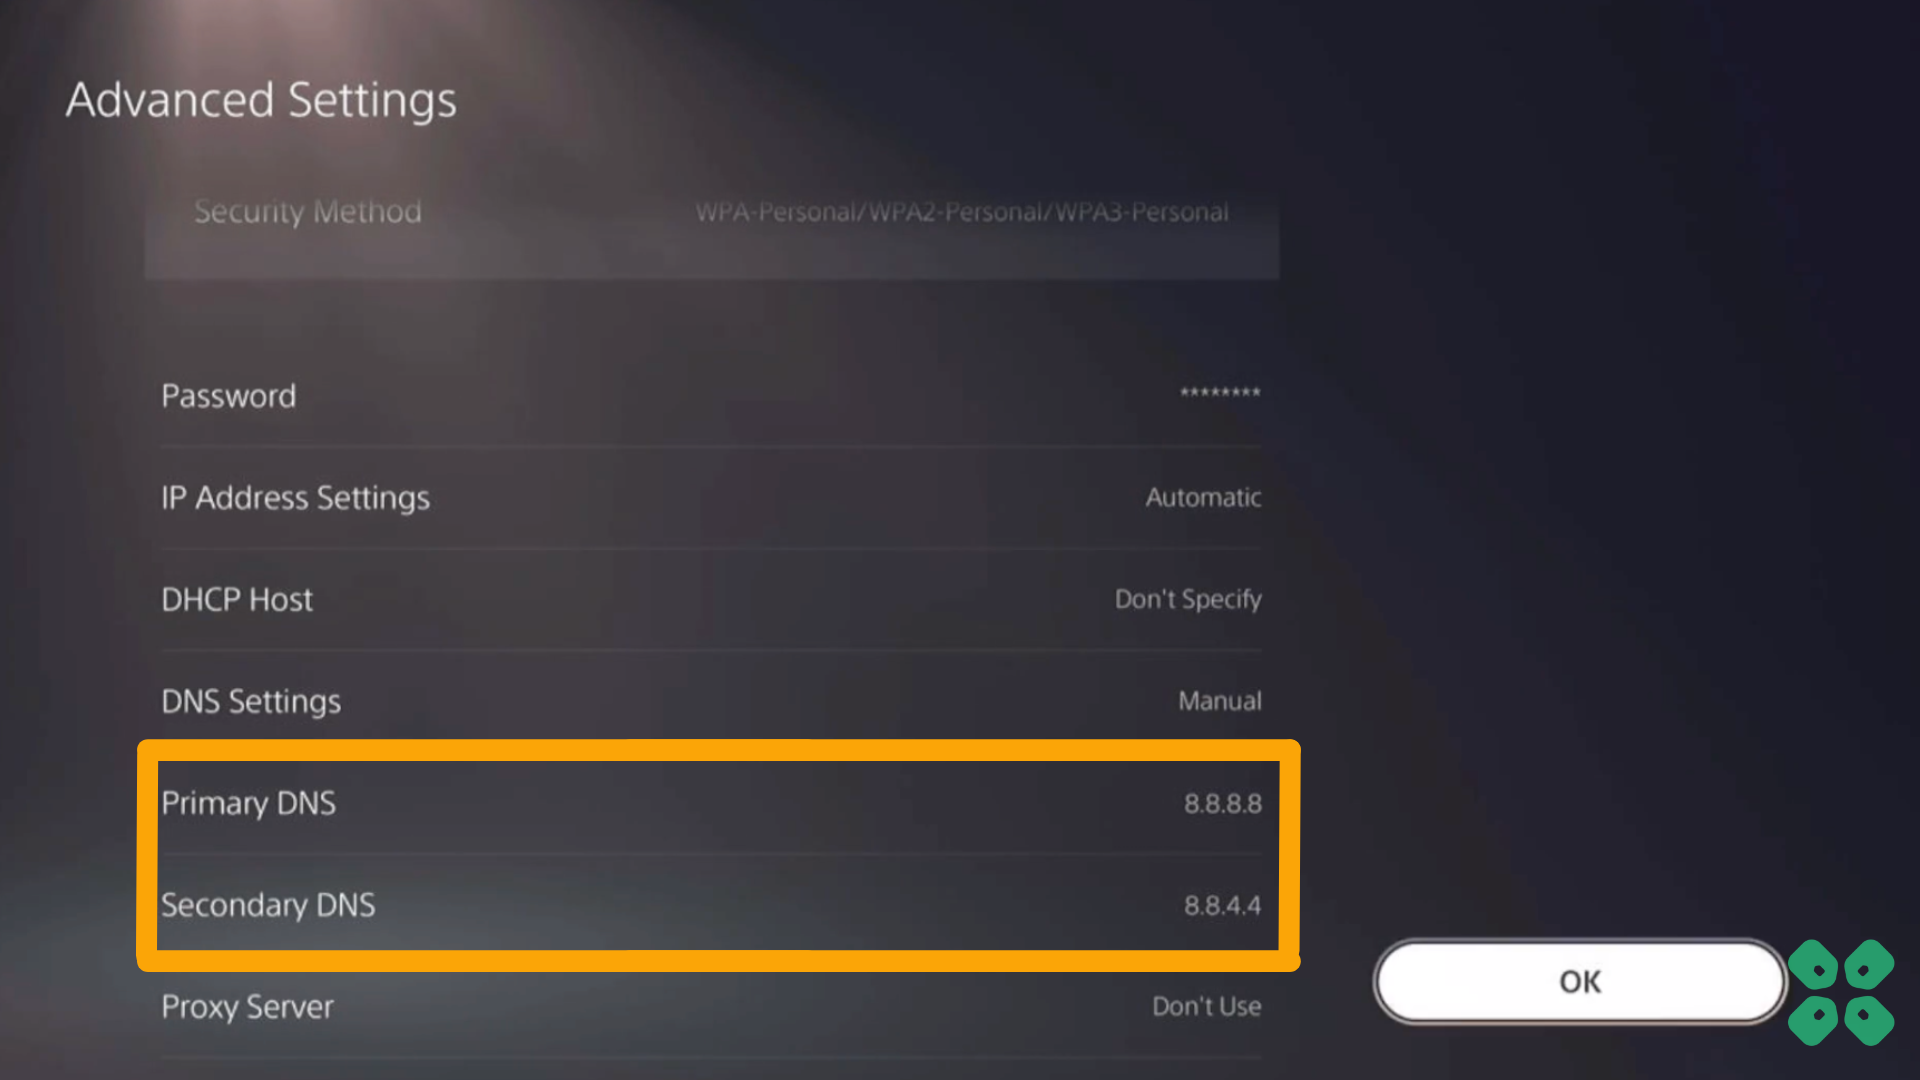
- Then click OK to save the changes.
- And Reboot your PS5 to check if the error is gone.
So, that’s it and if you got any questions just let us know in the comments section below.