Hi everyone!
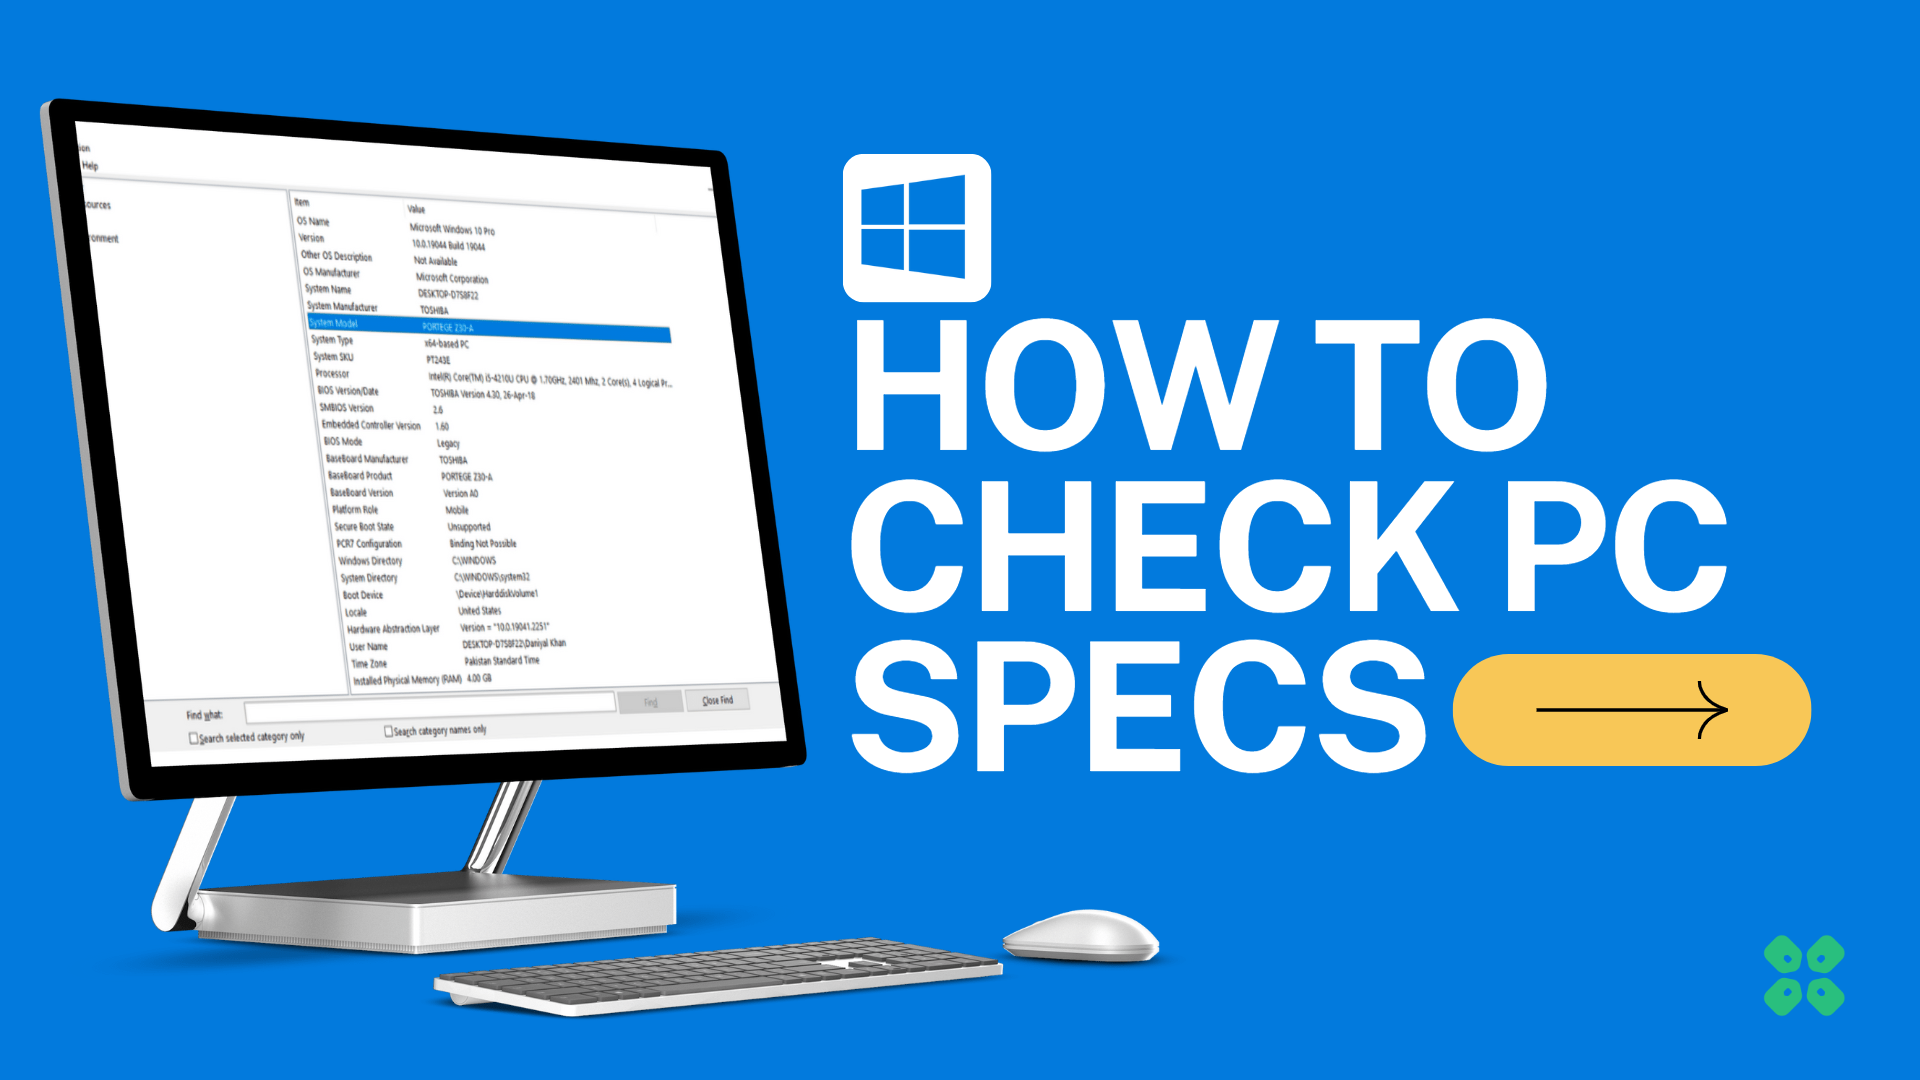
Today we’ll be checking our PC specs in Windows 10. Knowing the specifications of your computer can be helpful for a variety of reasons. Maybe you’re trying to troubleshoot a problem, upgrade your hardware, or just want to know more about your device. Regardless of the reason, it’s easy to check the specs of your PC in Windows 10.
We’ll be discussing some of the easiest methods here, let’s just get straight into it!
1. Using the System Information utility
Here’s how we can check our System specs in the System Information Utility using the steps below:
- Click Start Menu.
- Search System Information and click the icon to open the application.
- Click on System Summary.
- The System Information window will open, showing you a summary of your PC’s hardware and software.
- Check and confirm the model number of your PC in the System Model field.
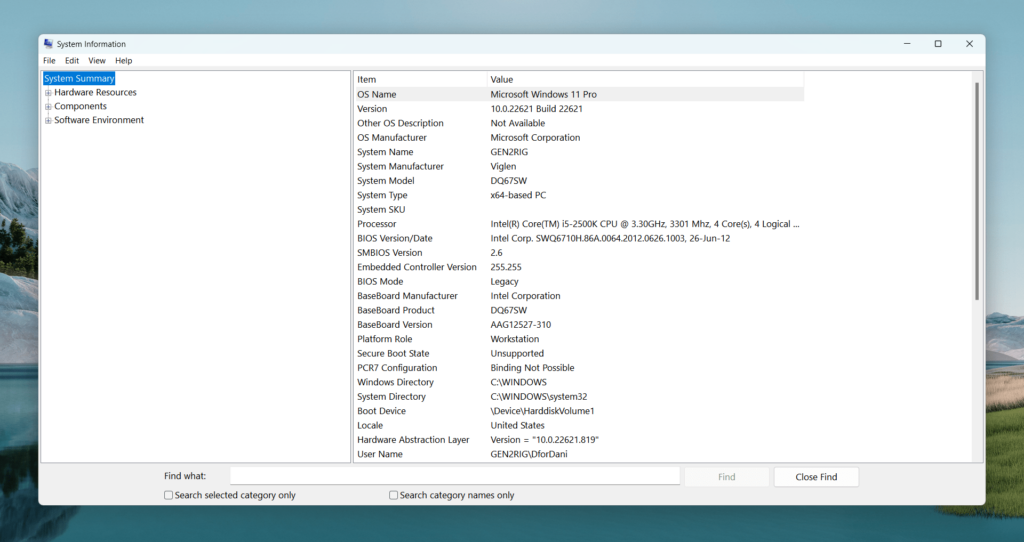
To view specific details about your hardware, you can expand the various categories listed on the left side of the window. For example, you can click Components and then Processor to view information about your CPU, or click Components and then Memory to view information about your RAM.
Read More: Which RAM is Compatible with my PC?
2. Using System App
Alternatively, we can use the System app in the Windows Settings to view your PC’s specs.
To do this:
- Press the Windows + I keys at the same time to open the Windows Settings app.
- Click System.
- Click About on the left side of the window.
This will show you a summary of your PC’s specs, including the version of Windows you’re running, the processor, the amount of RAM, and the system type (32-bit or 64-bit).
Read More: How to Check CPU and RAM usage on a Windows PC
3. Using CPU-Z
You can also use third-party software to view your PC’s specs, such as CPU-Z. These programs provide a more detailed breakdown of your hardware and can be downloaded for free from the internet.
Here’s how:
- Download CPUZ.
- Install the software.
- Launch the software.
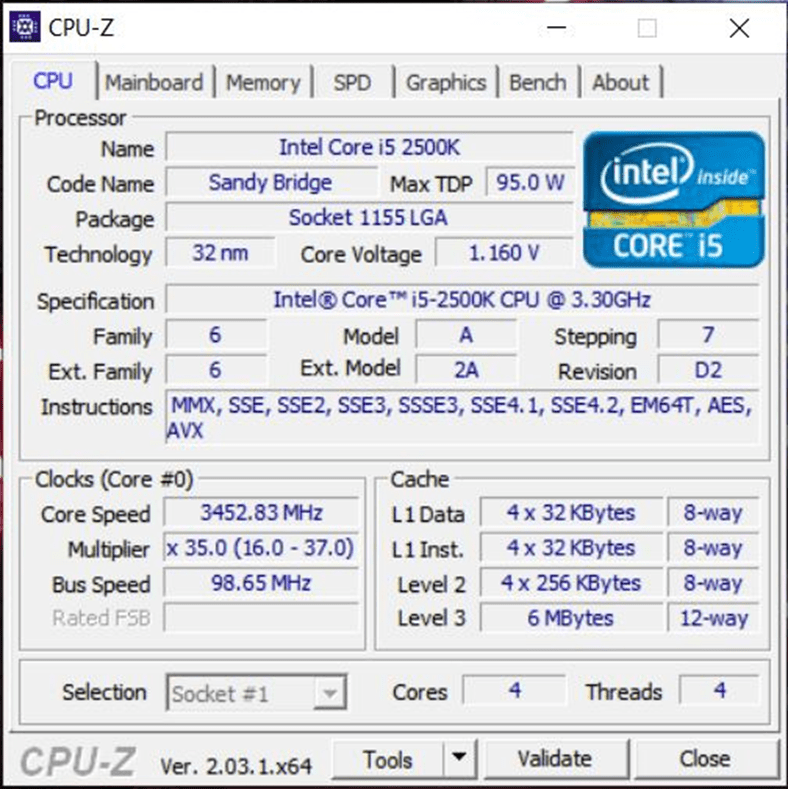
It shows you the Model and generation of your CPU and its details like core and thread count and core clock speed.
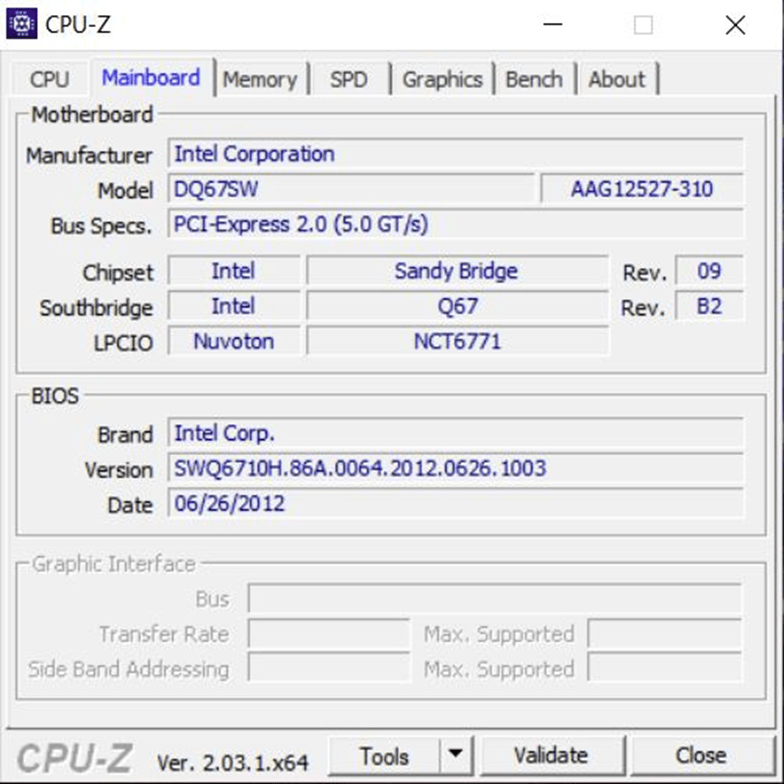
This shows the Brand of the motherboard and the technologies it supports.
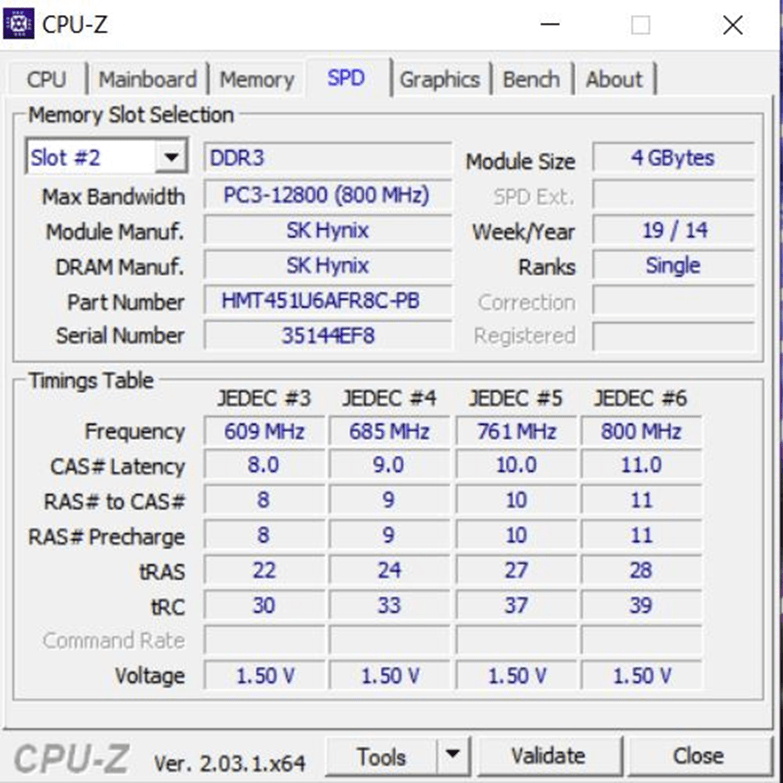
This shows details about each of the RAM modules installed on your computer.
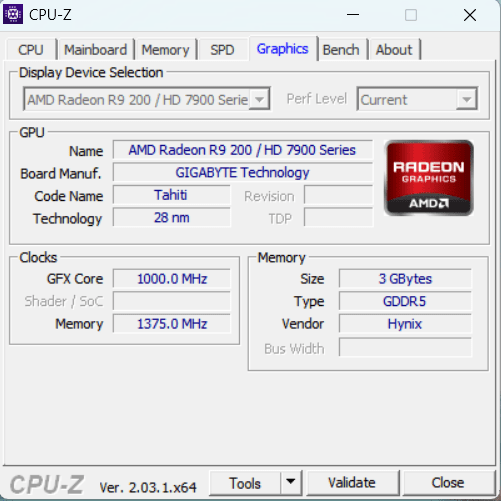
This shows details about the installed Graphics card (GPU) on your computer.
It’s crucial to maintain track of the processor operating inside your PC, whether you’ve chosen one of AMD’s newest eight-core Ryzen chipsets or given your old Pentium chip a new lease on life with a splotch of fresh thermal paste.
CPU-Z is a quick way to look at your computer’s specifications and other important details, such as CPU core clocks and speeds, motherboard BIOS versions, and the PCI-E bus generation.
Endnote
Whether you’ve upgraded your PC to a new one or put in new hardware bits to your existing system, you can use these instructions with ease to check and verify your system specifications. You can find more ways to do so in this other article for a more in-depth guide. Overall, checking the specs of your PC in Windows 10 is a quick and easy process that can provide valuable information about your device.